
Snagret Hole
| Snagret Hole | |
|---|---|

| |
| Location | Awakening Wood |
| Sublevels | 7 |
| Treasures | 15 |
| Hazards | |
|
The following article or section contains guides. |
The Snagret Hole (ヘビガラスの穴?, lit.: "Snagret Hole") is a cave in Pikmin 2, and is typically the last cave in the Awakening Wood to be accessed. It is the hardest cave found in the area, featuring several Burrowing Snagrets, and the boss at the end is the Pileated Snagret. In the US version, this cave has ![]() × 1215 worth of treasure. In the European version, there are
× 1215 worth of treasure. In the European version, there are ![]() × 1245 worth of treasure.
× 1245 worth of treasure.
How to reachEdit

To reach the Snagret Hole, you should start near the location of the Geographic Projection. Proceeding past the treasure's location will lead to water containing two Yellow Wollywogs and two bridges. Blue Pikmin are required to reach the first bridge, and White Pikmin are needed to unfurl the second, owing to the poison emitters underneath it. A Burrowing Snagret can be found guarding a bramble gate under a tree's roots. Destroying the bramble gate allows access to the Snagret Hole.
There is no fire in the Snagret Hole, but there are Candypop Buds. Only bring Red Pikmin if you intend to use them in the Candypop Buds, or as extra firepower. A large squad of Blue Pikmin is recommended due to the large amount of water in sublevel 6, where the 20 Pikmin-heavy Salivatrix resides.
Notes
Ship's dialogs
“Intriguing! My acoustic sensors are picking up a high-pitched wail.
It seems to emanate from the area near this gigantic stump.
This large root must penetrate deep beneath the planet's surface. Fascinating...”Sublevel 1Edit

- Theme: Garden (note)
- Music: Snagret Hole
- Treasures:
 Crystallized Telekinesis (inside Orange Bulborb)
 Leviathan Feather
- Enemies:
 Male Sheargrub × 4
 Orange Bulborb × 1
- Obstacles:
- None
- Vegetation:
- None
- Others:
- None
The first sublevel of the Snagret Hole isn't that difficult, but you should be alert. Take some Pikmin and go to the main circular area. Go in and defeat the Male Sheargrubs. After that, take a small squad of Purple Pikmin and defeat the Orange Bulborb that holds the Crystallized Telekinesis. A good idea is to punch it with a leader and run away so that it will go back to sleep while facing the other way.
After the treasure is retrieved, go up the rising trail into the wooden bird house. The hole to the next sublevel is there, but make sure to first get the Leviathan Feather, which should be next to it. After that is carried the pod, jump in the hole.
The wall with the root opposite to the ramp that goes up has a gap in it. If a Pikmin is thrown at the top of that root, they can fall out of bounds and die.[1]
| Technical sublevel information | |||||
|---|---|---|---|---|---|
| Internal cave name | forest_4 | ||||
| "Main" object maximum (?) | 5 | ||||
| "Treasure" object maximum (?) | 1 | ||||
| "Gate" object maximum (?) | 0 | ||||
| Dead end unit probability (?) | 0 | ||||
| Number of rooms (?) | 1 | ||||
| Corridor-to-room ratio (?) | 0 | ||||
| Escape geyser (?) | No | ||||
| Clogged hole (?) | No | ||||
| Cave units file (?) | 1_units_torigoya_kusachi.txt | ||||
| Lighting file (?) | normal_light_lv0.ini | ||||
| Background (?) | None | ||||
| Cave units (?) | |||||
 |
|||||
| Corridor connected to bird house | |||||
| Detailed object list | ||||
|---|---|---|---|---|
| The game spawns these "main" objects: | ||||
| ID | Object | Amount | Fall method | Spawn location |
| 1 | 1 | None | "Special" enemy spots | |
| - | Carried inside entry with ID 1 | |||
| 2 | 2 | None | "Easy" enemy spots | |
| Alongside it spawns 2 "main" objects. Chances: | ||||
| ID | Object | Chance | Fall method | Spawn location |
| 2 | 100% | None | "Easy" enemy spots | |
| Then it spawns these "treasure" objects: | ||||
| ID | Object | Amount | Fall method | Spawn location |
| 3 | 1 | None | Treasure spots | |
- For details on how objects are spawned, and how some may fail to spawn, see here.
Sublevel 2Edit
- Theme: Garden
- Music: Grass
- Treasures:
- Enemies:
 Cloaking Burrow-nit × 2
 Creeping Chrysanthemum × 2
- Male Sheargrub × 5
 Mitite (group of 10) × indefinite amount (from eggs)
 Shearwig × 3
- Obstacles:
- None
- Vegetation:
 Clover × 8
 Dandelion × 2
 Figwort (small red) × 8
 Ivory Candypop Bud × 1 (if max Pikmin requirement is met)
 Margaret × 6
- Others:
 Egg × indefinite amount
The second sublevel of the Snagret Hole is a large grassy plain, and it has two rather large treasures as well. There are Creeping Chrysanthemums, Cloaking Burrow-nits, Male Sheargrubs, and Shearwigs. It also has an Ivory Candypop Bud that will only appear if you have less than 20 White Pikmin in total.
Keep the Pikmin close and it should be a breeze. Take the Pikmin and scout out the area. Defeat enemies that get in the leader's way. You may need to overcome bodies of water. Pikmin can be thrown on the side of the rock barrier and lead around by moving the group, or can be waded across the lake.
Find the two treasures, which are both in alcoves; the Combustion Berry, and the Taste Sensation are these treasures. There may be eggs in alcoves if nectar is needed. After patrolling the sublevel, you can move on.
| Technical sublevel information | |||||
|---|---|---|---|---|---|
| Internal cave name | forest_4 | ||||
| "Main" object maximum (?) | 12 | ||||
| "Treasure" object maximum (?) | 2 | ||||
| "Gate" object maximum (?) | 0 | ||||
| Dead end unit probability (?) | 100 | ||||
| Number of rooms (?) | 3 | ||||
| Corridor-to-room ratio (?) | 0 | ||||
| Escape geyser (?) | No | ||||
| Clogged hole (?) | 0 | ||||
| Cave units file (?) | 3_ABE_5X5a_ike_big_kusachi.txt | ||||
| Lighting file (?) | kusachi_light_lv0.ini | ||||
| Background (?) | hiroba ( | ||||
| Cave units (?) | |||||
 |
 |
 |
 |
 |
|
| Dead end with item | Three-way crossing | Four-way crossing | Turning corridor | Corridor | Long corridor |
 |
 |
 |
|||
| Room with round corridors | Room with an upside-down bucket | Room with small pond | |||
| Detailed object list | ||||
|---|---|---|---|---|
| The game spawns these "main" objects: | ||||
| ID | Object | Amount | Fall method | Spawn location |
| 1 | 2 | None | "Hard" enemy spots | |
| 2 | 2 | None | "Hard" enemy spots | |
| 3 | 5 | None | "Easy" enemy spots | |
| 4 | 3 | None | Cave unit seams | |
| Then it spawns these "decoration" objects: | ||||
| ID | Object | Amount | Fall method | Spawn location |
| 5 | 2 | None | Plant spots | |
| 6 | 6 | None | Plant spots | |
| 7 | 8 | None | Plant spots | |
| 8 | 8 | None | Plant spots | |
| Then it spawns these "treasure" objects: | ||||
| ID | Object | Amount | Fall method | Spawn location |
| 9 | 1 | None | Treasure spots | |
| 10 | 1 | None | Treasure spots | |
| Then it spawns these "dead end" objects: | ||||
| ID | Object | Amount | Fall method | Spawn location |
| 11 | 1 | None | Dead ends | |
| Then it spawns "dead end" objects in as many dead ends as it can. Chances: | ||||
| ID | Object | Chance | Fall method | Spawn location |
| 12 | 100% | None | Dead ends | |
- For details on how objects are spawned, and how some may fail to spawn, see here.
Sublevel 3Edit

- Theme: Soil
- Music: Boss (only when combating a Snagret); Snagret Hole (otherwise)
- Treasures:
 Meat Satchel (inside Burrowing Snagret)
- Enemies:
 Burrowing Snagret × 2
- Mitite (group of 10) × indefinite amount (from eggs)
 Swooping Snitchbug × 1
- Obstacles:
- None
- Vegetation:
- Figwort (large red) × 4
- Figwort (small red) × 6
- Ivory Candypop Bud × 1
 Violet Candypop Bud × 1
- Others:
- See also: Burrowing Snagret strategy.
The third sublevel of the Snagret Hole will reveal very easily why the cave was given its name, for there are two Burrowing Snagrets found here. One of them has the treasure, the Meat Satchel. Use the Treasure Gauge to find which one, and then defeat it. Pay attention to where it appears, because the foliage may make it slightly hard to see it when it comes out. You may want to fight the other one as well, for both of them protect alcoves blocked by gates, which may have useful resources for you. A Swooping Snitchbug is also here, and it may be distracting; defeat it if necessary.
After the area is secured from all enemy threats, go and destroy all six of the gates. One has the hole to the next area, one has an Ivory Candypop Bud, and another one has a Violet Candypop Bud, and the others may have eggs to flower the Pikmin if they lost their flowers from being shaken off. After replenishing the Pikmin, proceed to the next area.
| Technical sublevel information | |||||
|---|---|---|---|---|---|
| Internal cave name | forest_4 | ||||
| "Main" object maximum (?) | 3 | ||||
| "Treasure" object maximum (?) | 0 | ||||
| "Gate" object maximum (?) | 6 | ||||
| Dead end unit probability (?) | 0 | ||||
| Number of rooms (?) | 1 | ||||
| Corridor-to-room ratio (?) | 0 | ||||
| Escape geyser (?) | No | ||||
| Clogged hole (?) | No | ||||
| Cave units file (?) | 1_ABE_mid1_boss_tsuchi.txt | ||||
| Lighting file (?) | normal_light_lv2.ini | ||||
| Background (?) | None | ||||
| Cave units (?) | |||||
 |
 |
 |
 |
 |
|
| Dead end with item | Three-way crossing | Four-way crossing | Turning corridor | Corridor | Long corridor |
 |
|||||
| Room with 6 exits | |||||
| Detailed object list | ||||
|---|---|---|---|---|
| The game spawns these "main" objects: | ||||
| ID | Object | Amount | Fall method | Spawn location |
| 1 | 1 | None | "Special" enemy spots | |
| - | Carried inside entry with ID 1 | |||
| 2 | 1 | None | "Special" enemy spots | |
| 3 | 1 | None | "Hard" enemy spots | |
| Then it spawns these "decoration" objects: | ||||
| ID | Object | Amount | Fall method | Spawn location |
| 4 | 6 | None | Plant spots | |
| 5 | 4 | None | Plant spots | |
| Then it spawns these "dead end" objects: | ||||
| ID | Object | Amount | Fall method | Spawn location |
| 7 | 1 | None | Dead ends | |
| 8 | 1 | None | Dead ends | |
| Then it spawns "dead end" objects in as many dead ends as it can. Chances: | ||||
| ID | Object | Chance | Fall method | Spawn location |
| 9 | 100% | None | Dead ends | |
| Then it spawns 6 "gate" objects. Chances: | ||||
| ID | Object | Chance | Fall method | Spawn location |
| 6 | Gate (2500 HP) | 100% | None | Gate spots |
- For details on how objects are spawned, and how some may fail to spawn, see here.
Sublevel 4Edit
- Theme: Metal
- Music: Metal 1
- Treasures:
 Crystallized Telepathy
 Cupid's Grenade
 Heavy-duty Magnetizer (inside Armored Cannon Beetle Larva)
- Enemies:
 Armored Cannon Beetle Larva (surface) × 2
 Dwarf Orange Bulborb × 5
- Mitite (group of 10) × 0 - 3 (from eggs)
 Watery Blowhog × 2
- Obstacles:
 Electrical wire × 3
- Vegetation:
- Others:
- Egg × 3
This next sublevel is rather complex, for it is mixed with all sorts of challenges and obstacles for the Pikmin. This is a metallic area, so make sure Pikmin aren't thrown off the edge by leaders or enemies. There are three treasures, and you need to be careful not to let the Pikmin wander into danger when the treasure is collected.
First off, deal with any electrical wires with Yellow Pikmin, so they don't get in the way in the future. Then take in a squad of Purple Pikmin and have them defeat all the enemies. There are Watery Blowhogs, Dwarf Orange Bulborbs and Armored Cannon Beetle Larvae that will pose a threat, however, the Armored Cannon Beetles can be used for your benefit if you lead them to aim their rocks at other enemies. Watch out for any boulders that the Beetles launch, and make sure that when the large enemies buck your Pikmin off, that they aren't facing the void, or your Pikmin could get thrown to their deaths.
Be warned, there is one Armored Cannon Beetle Larva that falls from the sky, and could give the leader and the Pikmin an ambush. If there is trouble attempting to find it, use the Treasure Gauge, for it must be defeated in order to get the Heavy-duty Magnetizer. After the area is secured, find the Cupid's Grenade and the Crystallized Telepathy. A few eggs may appear on this sublevel, but after using those if necessary, move on.
| Technical sublevel information | |||||
|---|---|---|---|---|---|
| Internal cave name | forest_4 | ||||
| "Main" object maximum (?) | 12 | ||||
| "Treasure" object maximum (?) | 2 | ||||
| "Gate" object maximum (?) | 0 | ||||
| Dead end unit probability (?) | 50 | ||||
| Number of rooms (?) | 3 | ||||
| Corridor-to-room ratio (?) | 0.05 | ||||
| Escape geyser (?) | No | ||||
| Clogged hole (?) | No | ||||
| Cave units file (?) | 3_ABE_mid2_hit446_hit344.txt | ||||
| Lighting file (?) | metal_light_lv3.ini | ||||
| Background (?) | test ( | ||||
| Cave units (?) | |||||
 |
 |
 |
 |
 |
|
| Dead end with item | Three-way crossing | Four-way crossing | Turning corridor | Corridor | Long corridor |
 |
 |
 |
|||
| T-shaped room | Roughly plus-shaped room | Room with hatch | |||
| Detailed object list | ||||
|---|---|---|---|---|
| The game spawns these "main" objects: | ||||
| ID | Object | Amount | Fall method | Spawn location |
| 1 | 1 | None | "Hard" enemy spots | |
| 2 | 1 | Falls from the sky | "Hard" enemy spots | |
| - | Carried inside entry with ID 2 | |||
| 3 | 1 | None | "Hard" enemy spots | |
| 4 | 1 | None | "Hard" enemy spots | |
| 5 | 2 | None | "Easy" enemy spots | |
| 6 | 3 | None | Cave unit seams | |
| Alongside it spawns 3 "main" objects. Chances: | ||||
| ID | Object | Chance | Fall method | Spawn location |
| 5 | 100% | None | "Easy" enemy spots | |
| Then it spawns these "decoration" objects: | ||||
| ID | Object | Amount | Fall method | Spawn location |
| 7 | 5 | None | Plant spots | |
| 8 | 5 | None | Plant spots | |
| Then it spawns these "treasure" objects: | ||||
| ID | Object | Amount | Fall method | Spawn location |
| 9 | 1 | None | Treasure spots | |
| 10 | 1 | None | Treasure spots | |
| Then it spawns these "dead end" objects: | ||||
| ID | Object | Amount | Fall method | Spawn location |
| 11 | 3 | Falls from the sky | Dead ends | |
- For details on how objects are spawned, and how some may fail to spawn, see here.
Sublevel 5Edit
- Theme: Metal
- Music: Metal 3 (alternate)
- Treasures:
 Crystallized Clairvoyance (inside Dwarf Orange Bulborb)
 Emperor Whistle (inside Antenna Beetle)
- Enemies:
 Antenna Beetle × 1
- Dwarf Orange Bulborb × 7
- Mitite (group of 10) × indefinite amount (from eggs)
- Obstacles:
- None
- Vegetation:
- Others:
- Egg × indefinite amount
Another metallic sublevel, but less dangerous; the only thing close to dangerous around here is the Antenna Beetle, but it shouldn't be that hard to fight. Take a squad of Purple Pikmin, and go after the quirky creature, making sure that if Dwarf Orange Bulborbs fall from the sky that you deal with them. Once you've pinpointed the Antenna Beetle, pound it with your bulky purples, and it should be gone quickly. It should drop the Emperor Whistle.
Now that the Treasure Gauge is operating correctly, use it to find the last treasure on this sublevel which is actually held by one of the Dwarf Orange Bulborbs that fall from the sky (unless it is already found and killed), which should be the Crystallized Clairvoyance. There are quite a few eggs, but you can move on after finding them.
Interestingly, the version of Metal 3 that plays on this sublevel is different from the usual version, with a slightly different melody and different atonal group.
| Technical sublevel information | |||||
|---|---|---|---|---|---|
| Internal cave name | forest_4 | ||||
| "Main" object maximum (?) | 6 | ||||
| "Treasure" object maximum (?) | 0 | ||||
| "Gate" object maximum (?) | 0 | ||||
| Dead end unit probability (?) | 50 | ||||
| Number of rooms (?) | 3 | ||||
| Corridor-to-room ratio (?) | 0 | ||||
| Escape geyser (?) | No | ||||
| Clogged hole (?) | No | ||||
| Cave units file (?) | 3_ABE_cent_4x4_mid1_metal.txt | ||||
| Lighting file (?) | metal_light_lv4.ini | ||||
| Background (?) | test ( | ||||
| Cave units (?) | |||||
 |
|
|
|
|
|
| Dead end | Dead end with item | Three-way crossing | Four-way crossing | Turning corridor | Corridor |
 |
 |
 |
|||
| Circular room with 4 exits | Room with large blue circle | Long room with 6 exits | |||
| Detailed object list | ||||
|---|---|---|---|---|
| The game spawns these "main" objects: | ||||
| ID | Object | Amount | Fall method | Spawn location |
| 1 | 1 | None | "Hard" enemy spots | |
| - | Carried inside entry with ID 1 | |||
| 2 | 1 | Falls when Pikmin are nearby | "Hard" enemy spots | |
| - | Carried inside entry with ID 2 | |||
| 3 | 4 | Falls from the sky | "Hard" enemy spots | |
| Then it spawns these "decoration" objects: | ||||
| ID | Object | Amount | Fall method | Spawn location |
| 4 | 5 | None | Plant spots | |
| 5 | 5 | None | Plant spots | |
| Then it spawns these "dead end" objects: | ||||
| ID | Object | Amount | Fall method | Spawn location |
| 7 | 2 | Falls from the sky | Dead ends | |
| Then it spawns "dead end" objects in as many dead ends as it can. Chances: | ||||
| ID | Object | Chance | Fall method | Spawn location |
| 6 | 100% | None | Dead ends | |
- For details on how objects are spawned, and how some may fail to spawn, see here.
Sublevel 6Edit
- Theme: Concrete
- Music: Boss (only when combating a Snagret); Snagret Hole (otherwise)
- Treasures:
 Salivatrix (US/Europe) /
  Coiny The Refined (Japan)
 Science Project
 Stupendous Lens (US) /
  Mysterious Remains (Europe) /
  Ultimate Spinner (Japan) (inside Dwarf Orange Bulborb in all regions)
 Triple Sugar Threat (inside Burrowing Snagret)
- Enemies:
- Antenna Beetle × 1
- Burrowing Snagret × 2
- Dwarf Orange Bulborb × 1
- Obstacles:
 Poison emitter × 5
- Vegetation:
- Clover × 5 or more
- Ivory Candypop Bud × 1
 Lapis Lazuli Candypop Bud × 3
 Queen Candypop Bud × 1
- Others:
- See also: Burrowing Snagret strategy.
The cave shows the meaning behind its name once more, as you are now on another sublevel with two Burrowing Snagrets. This sixth sublevel is still not very hard if prepared. If there are very few Blue Pikmin, it is recommended to use the three Lapis Lazuli Candypop Buds along with a Queen Candypop Bud because quite a few might be needed.
Take some Blue Pikmin and Purple Pikmin, and scout out the area. Use White Pikmin to deactivate poisonous gas pipes that you will come across. Be warned, if a very enclosed space surrounded by many water puddles is found, get ready to fight the first Snagret. It is near water, so a lot of caution is required when fighting it. Use the same Snagret fighting strategies when fighting it; just don't let any Pikmin drown. This particular Snagret, when defeated, will always hold the Triple Sugar Threat, the other one has no treasure at all.
When treasures are being transported, make sure to use Blue Pikmin when necessary; this is why bringing a large amount of Blue Pikmin is recommended. If the little strips of land are seen, you may be able to guide non-Blue Pikmin around these lakes, and into the next area. The other Snagret is easier to beat because it is in a wider area, but be careful, an Antenna Beetle will usually lurk around this area. Once the other Snagret is gone it will be easier to find the other treasures.
Take out the Antenna Beetle so the Treasure Gauge is usable, and search for a Dwarf Orange Bulborb that drops from the sky out of nowhere. Then defeat it to get the Stupendous Lens/Mysterious Remains/Ultimate Spinner. Take large squads of Pikmin, and find the bramble gate that the Salivatrix is hidden behind. After that, find the Science Project, a small but important treasure that is actually a four-leaf clover. There is no nectar or other useful items to be found here, so progress down the hole to the last sublevel.
To note is that it is possible for the Dwarf Orange Bulborb to spawn out of bounds, due to the way random cave sublevel generation shuffles around object positions when spawning them. This will result in the creature dying right away, and for its treasure to respawn nearby inside the cave. This respawn can be seen when the player approaches the spot the enemy was meant to appear in.
| Technical sublevel information | |||||
|---|---|---|---|---|---|
| Internal cave name | forest_4 | ||||
| "Main" object maximum (?) | 9 | ||||
| "Treasure" object maximum (?) | 2 | ||||
| "Gate" object maximum (?) | 3 | ||||
| Dead end unit probability (?) | 100 | ||||
| Number of rooms (?) | 4 | ||||
| Corridor-to-room ratio (?) | 0 | ||||
| Escape geyser (?) | No | ||||
| Clogged hole (?) | No | ||||
| Cave units file (?) | 3_ABE_b_f_g_conc.txt | ||||
| Lighting file (?) | normal_light_lv4.ini | ||||
| Background (?) | None | ||||
| Cave units (?) | |||||
 |
 |
 |
 |
 |
|
| Dead end with item | Three-way crossing | Four-way crossing | Turning corridor | Corridor | Long corridor |
 |
 |
 |
|||
| Room with 4 exits | Room with 4 exits and a stone ledge | Room with 4 exits and 2 walls | |||
| Detailed object list | ||||
|---|---|---|---|---|
| The game spawns these "main" objects: | ||||
| ID | Object | Amount | Fall method | Spawn location |
| 1 | 1 | None | "Special" enemy spots | |
| - | Carried inside entry with ID 1 | |||
| 2 | 1 | Falls from the sky | "Easy" enemy spots | |
| - | Carried inside entry with ID 2 | |||
| 3 | 1 | None | "Special" enemy spots | |
| 4 | 1 | None | "Hard" enemy spots | |
| 5 | 5 | None | Cave unit seams | |
| Then it spawns these "decoration" objects: | ||||
| ID | Object | Amount | Fall method | Spawn location |
| 7 | 5 | None | Plant spots | |
| Then it spawns these "treasure" objects: | ||||
| ID | Object | Amount | Fall method | Spawn location |
| 8 | 1 | None | Treasure spots | |
| 9 | 1 | None | Treasure spots | |
| Then it spawns these "dead end" objects: | ||||
| ID | Object | Amount | Fall method | Spawn location |
| 11 | 1 | None | Dead ends | |
| 12 | 1 | None | Dead ends | |
| 13 | 3 | None | Dead ends | |
| Then it spawns "dead end" objects in as many dead ends as it can. Chances: | ||||
| ID | Object | Chance | Fall method | Spawn location |
| 14 | 100% | None | Dead ends | |
| Then it spawns 3 "gate" objects. Chances: | ||||
| ID | Object | Chance | Fall method | Spawn location |
| 10 | Gate (2500 HP) | 100% | None | Gate spots |
- For details on how objects are spawned, and how some may fail to spawn, see here.
Sublevel 7Edit

- Theme: Concrete
- Music: Boss (only when combating)
- Treasures:
 Justice Alloy (inside Pileated Snagret)
- Enemies:
- Mitite (group of 10) × indefinite amount (from eggs)
 Pileated Snagret × 1
- Obstacles:
- None
- Vegetation:
- Others:
- See also: Pileated Snagret strategy.
The Pileated Snagret is found on this floor, and it is best to be ready, for it is a dangerous boss. This bigger, more powerful, and tougher version of the Burrowing Snagret can eat Pikmin at a greater range, and they'll be harder to save without keeping the Snagret distracted with damage, so it would be at your best interest to use an ultra-spicy spray while fighting it.
The leaders will spawn along the outer edge of a large raised plateau, but don't move forward just yet. Take Purple Pikmin and/or Yellow Pikmin if you wish, and when the Snagret comes out, start attacking it, making sure the Pikmin land close and on its head to cause damage. If a high amount of damage is dealt, the Snagret won't have a chance to retaliate, and will burrow back into the ground.
Follow the strategy, and when the boss is defeated, it will leave the Justice Alloy. With it, the Metal Suit Z is unlocked, which increases the health of the leaders' spacesuits.
If the Pikmin have been deflowered from being shaken off by the boss, or if you've lost a lot of Pikmin, destroy some of the Bramble Gates that seal off two Queen Candypop Buds and several eggs. After the Pikmin army's recovery is complete, exit the cave with the geyser.
| Technical sublevel information | |||||
|---|---|---|---|---|---|
| Internal cave name | forest_4 | ||||
| "Main" object maximum (?) | 1 | ||||
| "Treasure" object maximum (?) | 0 | ||||
| "Gate" object maximum (?) | 5 | ||||
| Dead end unit probability (?) | 0 | ||||
| Number of rooms (?) | 1 | ||||
| Corridor-to-room ratio (?) | 0 | ||||
| Escape geyser (?) | Yes | ||||
| Clogged hole (?) | No | ||||
| Cave units file (?) | 1_ABE_manp_boss_conc.txt | ||||
| Lighting file (?) | normal_light_lv4.ini | ||||
| Background (?) | None | ||||
| Cave units (?) | |||||
| |
|
|
|
|
|
| Dead end with item | Three-way crossing | Four-way crossing | Turning corridor | Corridor | Long corridor |
 |
|||||
| Pileated Snagret arena | |||||
| Detailed object list | ||||
|---|---|---|---|---|
| The game spawns these "main" objects: | ||||
| ID | Object | Amount | Fall method | Spawn location |
| 1 | 1 | None | "Special" enemy spots | |
| - | Carried inside entry with ID 1 | |||
| Then it spawns these "dead end" objects: | ||||
| ID | Object | Amount | Fall method | Spawn location |
| 3 | 2 | None | Dead ends | |
| Then it spawns "dead end" objects in as many dead ends as it can. Chances: | ||||
| ID | Object | Chance | Fall method | Spawn location |
| 4 | 100% | None | Dead ends | |
| Then it spawns 5 "gate" objects. Chances: | ||||
| ID | Object | Chance | Fall method | Spawn location |
| 2 | Gate (2500 HP) | 100% | None | Gate spots |
- For details on how objects are spawned, and how some may fail to spawn, see here.
GalleryEdit
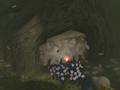
The entrance to the cave, sealed off.
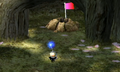
The cave entrance.


TriviaEdit

- If one looks in the cracks between the birdhouse in the first sublevel, they can see the open field layout from the second sublevel. This is better seen by hacking the camera.
- The location of this cave is right next to where three Burrowing Snagrets are fought in The Forest of Hope in the original Pikmin.
- It is entirely possible to reach this cave without going to the Perplexing Pool or getting Blue Pikmin. After eliminating the Wollywogs in the pond leading to the cave as well as any shear grubs on the middle island, one could, with enough skill, throw a Red Pikmin to the far shore, build the bridge, then have White Pikmin build the other. This could be considered a type of challenge or a speedrunning tactic for some, as you can also enter the cave in this way without Yellow Pikmin. In addition, a carrying path oversight allows a leader to reach the cave's ledge from the landing site with minimal effort.
Names in other languagesEdit
| Language | Name | Meaning |
|---|---|---|
| ダチョウの巣窟? Hebigarasu no Ana |
Snagret Hole | |
(traditional) |
蛇鱗鴉洞穴 | |
| Gîte Snabrek | Snagret's Home | |
| Schnappers Nest | Snagret's Nest | |
| Covo Letale | Lethal Den | |
| Nido del Tagarote | Snagret Nest |
See alsoEdit
ReferencesEdit
- ^ YouTube video of Pikmin being thrown at the gap in the wall, published on October 7th, 2019, retrieved on October 7th, 2019
| Caves in Pikmin 2 | |
|---|---|
| Valley of Repose | Emergence Cave • Subterranean Complex • Frontier Cavern |
| Awakening Wood | Hole of Beasts • White Flower Garden • Bulblax Kingdom • Snagret Hole |
| Perplexing Pool | Citadel of Spiders • Glutton's Kitchen • Shower Room • Submerged Castle |
| Wistful Wild | Cavern of Chaos • Hole of Heroes • Dream Den |