
White Flower Garden
| White Flower Garden | |
|---|---|

| |
| Location | Awakening Wood |
| Sublevels | 5 |
| Treasures | 7 |
| Hazards | |
|
The following article or section contains guides. |
The White Flower Garden (白い花園?, lit.: "White Flower Garden") is a cave in Pikmin 2, and is typically the first or second accessed in the Awakening Wood. It is where White Pikmin, the third type of Pikmin in the game, are discovered. It has 5 sublevels and the last contains the cave's boss, the Burrowing Snagret. In the US version, this cave has ![]() × 580 worth of treasure. In the European version, there are
× 580 worth of treasure. In the European version, there are ![]() × 670 worth of treasure.
× 670 worth of treasure.
How to reachEdit

This cave can be reached the same way that the Hole of Beasts was reached. However, before reaching the Creeping Chrysanthemum, turning right will reveal a bag that requires the equivalent of 200 Pikmin to crush, so at least 11 Purple Pikmin are needed. Proceeding past it and the nearby Cloaking Burrow-Nit will lead to the cave. Defeating the Cloaking Burrow-Nit first is recommended, as the cave discovery cutscene can allow the Burrow-Nit a free shot at your squad if left unchecked.
Like the caves before it, your squad is likely limited. Bring as many Purple Pikmin as you can, and fill the rest of your squad with Red Pikmin.
Notes
Ship's dialogs
“Astounding! My metal detectors are reacting violently. What could be down below?
If you find trouble below, press START/PAUSE to contact me and press R on the radar screen.
The exploration pod will drop its loot to make room to carry you, Louie, and the Pikmin to safety.”Sublevel 1Edit

- Theme: Metal
- Music: Metal 1
- Treasures:
 Alien Billboard (US/Japan) /
  Nutrient Silo (Europe)
- Enemies:
 Female Sheargrub × 6
 Male Sheargrub × 4
- Obstacles:
- None
- Vegetation:
- None
- Others:
- None
The first sublevel is simple, and only contains one treasure. The cave theme is metallic, with a sandy floor for the most part. You will encounter some Sheargrubs when you approach the opening at the far end of the first plateau. You will encounter some more on the second plateau. The Alien Billboard (or Nutrient Silo) will be in one of the three branching corridors, and the exit hole in another corridor.
| Technical sublevel information | |||||
|---|---|---|---|---|---|
| Internal cave name | forest_2 | ||||
| "Main" object maximum (?) | 10 | ||||
| "Treasure" object maximum (?) | 1 | ||||
| "Gate" object maximum (?) | 0 | ||||
| Dead end unit probability (?) | 0 | ||||
| Number of rooms (?) | 2 | ||||
| Corridor-to-room ratio (?) | 0 | ||||
| Escape geyser (?) | No | ||||
| Clogged hole (?) | No | ||||
| Cave units file (?) | 2_ABE_nor1_cen2_metal.txt | ||||
| Lighting file (?) | metal_light_lv0.ini | ||||
| Background (?) | test ( | ||||
| Cave units (?) | |||||
 |
 |
 |
 |
 |
|
| Dead end with item | Three-way crossing | Four-way crossing | Turning corridor | Corridor | Long corridor |
 |
 |
||||
| Circular room with 1 exit | Circular room with 4 exits | ||||
| Detailed object list | ||||
|---|---|---|---|---|
| The game spawns these "main" objects: | ||||
| ID | Object | Amount | Fall method | Spawn location |
| 1 | 4 | None | "Hard" enemy spots | |
| 2 | 2 | None | "Easy" enemy spots | |
| 3 | 2 | None | "Easy" enemy spots | |
| 4 | 2 | None | "Easy" enemy spots | |
| Then it spawns these "treasure" objects: | ||||
| ID | Object | Amount | Fall method | Spawn location |
| 5 | 1 | None | Treasure spots | |
- For details on how objects are spawned, and how some may fail to spawn, see here.
Sublevel 2Edit

- Theme: Metal
- Music: Metal 2
- Treasures:
- Enemies:
 Fiery Blowhog × 2
- Obstacles:
- None
- Vegetation:
- None
- Others:
- None
The second sublevel features a donut-shaped plateau that has two triangular corridors branching inward and three corridors branching outwards. The Petrified Heart and Drought Ender will either be in one of the central corridors, or in one of the outer corridors. The exit hole is located either in one of the outer corridors, or the center of the room by the center corridors. You should scout the area with an army of Red Pikmin, as there are two Fiery Blowhogs patrolling the sublevel.
| Technical sublevel information | |||||
|---|---|---|---|---|---|
| Internal cave name | forest_2 | ||||
| "Main" object maximum (?) | 2 | ||||
| "Treasure" object maximum (?) | 2 | ||||
| "Gate" object maximum (?) | 0 | ||||
| Dead end unit probability (?) | 0 | ||||
| Number of rooms (?) | 1 | ||||
| Corridor-to-room ratio (?) | 0 | ||||
| Escape geyser (?) | No | ||||
| Clogged hole (?) | No | ||||
| Cave units file (?) | 1_ABE_ari_metal.txt | ||||
| Lighting file (?) | metal_light_lv1.ini | ||||
| Background (?) | test ( | ||||
| Cave units (?) | |||||
 |
|
|
|
|
|
| Dead end | Dead end with item | Three-way crossing | Four-way crossing | Turning corridor | Corridor |
 |
|||||
| Long corridor | Donut-shaped room | ||||
| Detailed object list | ||||
|---|---|---|---|---|
| The game spawns these "main" objects: | ||||
| ID | Object | Amount | Fall method | Spawn location |
| 1 | 2 | None | "Hard" enemy spots | |
| Then it spawns these "treasure" objects: | ||||
| ID | Object | Amount | Fall method | Spawn location |
| 2 | 1 | None | Treasure spots | |
| 3 | 1 | None | Treasure spots | |
- For details on how objects are spawned, and how some may fail to spawn, see here.
Sublevel 3Edit

- Theme: Metal
- Music: Relax
- Treasures:
 Superstick Textile (fully buried)
- Enemies:
- Obstacles:
- None
- Vegetation:
 Clover × 2
 Figwort (large brown) × 2
- Figwort (small brown) × 6
 Glowstem (green) × 1
 Ivory Candypop Bud × 3 (if max Pikmin requirement is met)
- Others:
- None
This sublevel is where White Pikmin are discovered. Heading down the long pathway, you will come across three Ivory Candypop Buds. (As a side note, they will not appear if your total White Pikmin count is 20 or more.) Throw 5 Pikmin into the Ivory Candypop Buds, and each will be transformed into a White Pikmin, which are immune to poison and have the ability to excavate treasures buried completely underground. This new ability is used almost immediately, as heading down the corridor with the new White Pikmin will cause them to start digging up a hidden underground treasure, the Superstick Textile.
This sublevel has no enemies except for Honeywisps, and it is recommended to defeat them as they will drop nectar for your new White Pikmin. They can be found from one of two corners on a wall with a branching narrow corridor. Once you're done with the sublevel, head to the hole for the next one.
| Technical sublevel information | |||||
|---|---|---|---|---|---|
| Internal cave name | forest_2 | ||||
| "Main" object maximum (?) | 6 | ||||
| "Treasure" object maximum (?) | 1 | ||||
| "Gate" object maximum (?) | 0 | ||||
| Dead end unit probability (?) | 0 | ||||
| Number of rooms (?) | 1 | ||||
| Corridor-to-room ratio (?) | 0 | ||||
| Escape geyser (?) | No | ||||
| Clogged hole (?) | No | ||||
| Cave units file (?) | 1_units_white_metal.txt | ||||
| Lighting file (?) | forest_2_siro_light.ini | ||||
| Background (?) | None | ||||
| Cave units (?) | |||||
 |
|||||
| White Pikmin room | |||||
| Detailed object list | ||||
|---|---|---|---|---|
| The game spawns these "main" objects: | ||||
| ID | Object | Amount | Fall method | Spawn location |
| 1 | 3 | None | "Hard" enemy spots | |
| 2 | 2 | None | "Special" enemy spots | |
| 3 | 1 | None | "Easy" enemy spots | |
| Then it spawns these "decoration" objects: | ||||
| ID | Object | Amount | Fall method | Spawn location |
| 4 | 6 | None | Plant spots | |
| 5 | 2 | None | Plant spots | |
| 6 | 2 | None | Plant spots | |
| Then it spawns these "treasure" objects: | ||||
| ID | Object | Amount | Fall method | Spawn location |
| 7 | 1 | None | Treasure spots | |
- For details on how objects are spawned, and how some may fail to spawn, see here.
Sublevel 4Edit

- Theme: Soil
- Music: Soil 3
- Treasures:
 Survival Ointment (US) /
  Container of Sea Bounty (Europe) /
  Paper Slider (Japan)
 Toxic Toadstool (partially buried)
- Enemies:
- None
- Obstacles:
 Poison emitter × 5
- Vegetation:
- None
- Others:
- None
The fourth sublevel doesn't have any enemies, but it does have two treasures and a lot of poisonous gas pipes. There are two strategies you can use here.
- Use the White Pikmin obtained on the previous sublevel to shut off all the poison pipes, then have the other Pikmin collect the treasures.
- Use the White Pikmin to obtain both of the treasures, while ignoring the poison pipes.
If one of the treasures is up on a swirled plateau, throw the Pikmin up onto the lower section of the plateau. Then head into the alcove under the plateau and whistle to the Pikmin, guiding them to the treasure via ![]() /
/ ![]() .
.
The Toxic Toadstool will be partially buried.
| Technical sublevel information | |||||
|---|---|---|---|---|---|
| Internal cave name | forest_2 | ||||
| "Main" object maximum (?) | 5 | ||||
| "Treasure" object maximum (?) | 2 | ||||
| "Gate" object maximum (?) | 0 | ||||
| Dead end unit probability (?) | 0 | ||||
| Number of rooms (?) | 3 | ||||
| Corridor-to-room ratio (?) | 0.1 | ||||
| Escape geyser (?) | No | ||||
| Clogged hole (?) | No | ||||
| Cave units file (?) | 3_ABE_sak1_sak2_hit1_tsuchi.txt | ||||
| Lighting file (?) | normal_light_lv3.ini | ||||
| Background (?) | None | ||||
| Cave units (?) | |||||
 |
 |
 |
 |
 |
|
| Dead end with item | Three-way crossing | Four-way crossing | Turning corridor | Corridor | Long corridor |
 |
 |
 |
|||
| Room with trunk in center | Room with large trunk | Room with 5 exits | |||
| Detailed object list | ||||
|---|---|---|---|---|
| The game spawns 5 "main" objects. Chances: | ||||
| ID | Object | Chance | Fall method | Spawn location |
| 1 | 100% | None | Cave unit seams | |
| Then it spawns these "treasure" objects: | ||||
| ID | Object | Amount | Fall method | Spawn location |
| 2 | 1 | None | Treasure spots | |
| 3 | 1 | None | Treasure spots | |
- For details on how objects are spawned, and how some may fail to spawn, see here.
Sublevel 5Edit

- Theme: Soil
- Music: Boss (only when combating)
- Treasures:
 Five-man Napsack (inside Burrowing Snagret)
- Enemies:
 Burrowing Snagret × 1
 Mitite (group of 10) × 0 - 3 (from eggs)
- Obstacles:
- None
- Vegetation:
 Fiddlehead × 5
- Figwort (large brown) × 3
- Figwort (small brown) × 7
- Others:
 Egg × 3
- See also: Burrowing Snagret strategy.
Upon entering the cave, have one leader go ahead and break the eggs on the side of the arena, and have the other leader collect a squad of Purple Pikmin. If you have less than 20 Purple Pikmin, then use Red Pikmin instead.
You should use an ultra-spicy spray in this battle, and if you have any, ultra-bitter spray is also advised. If you have ultra-spicy spray, spray your Pikmin before the Burrowing Snagret starts emerging from the ground. If you have an ultra-bitter spray, then spray the Snagret when it firsts emerges. After this, throw a steady stream of Pikmin onto the Snagret's head.
Once the Burrowing Snagret has been defeated, it will leave behind the Five-man Napsack. After collecting this, you can hold ![]() /
/ ![]() to have the controlled leader take a nap. After obtaining the Five-man Napsack, go across the arena to the exit geyser.
to have the controlled leader take a nap. After obtaining the Five-man Napsack, go across the arena to the exit geyser.
| Technical sublevel information | |||||
|---|---|---|---|---|---|
| Internal cave name | forest_2 | ||||
| "Main" object maximum (?) | 4 | ||||
| "Treasure" object maximum (?) | 0 | ||||
| "Gate" object maximum (?) | 0 | ||||
| Dead end unit probability (?) | 0 | ||||
| Number of rooms (?) | 1 | ||||
| Corridor-to-room ratio (?) | 0 | ||||
| Escape geyser (?) | Yes | ||||
| Clogged hole (?) | No | ||||
| Cave units file (?) | 1_units_snake_tsuchi.txt | ||||
| Lighting file (?) | normal_light_lv2.ini | ||||
| Background (?) | None | ||||
| Cave units (?) | |||||
 |
|||||
| Burrowing Snagret arena | |||||
| Detailed object list | ||||
|---|---|---|---|---|
| The game spawns these "main" objects: | ||||
| ID | Object | Amount | Fall method | Spawn location |
| 1 | 1 | None | "Hard" enemy spots | |
| - | Carried inside entry with ID 1 | |||
| 2 | 3 | None | "Easy" enemy spots | |
| Then it spawns these "decoration" objects: | ||||
| ID | Object | Amount | Fall method | Spawn location |
| 3 | 3 | None | Plant spots | |
| 4 | 7 | None | Plant spots | |
| 5 | 5 | None | Plant spots | |
- For details on how objects are spawned, and how some may fail to spawn, see here.
NamingEdit
The English name "White Flower Garden" is a direct translation of the Japanese name for the cave, 白い花園?. Although in English, it is ambiguous whether it is the garden or the flowers that are white, the Japanese name makes it clear that it means "flower garden that is white", and not "garden of white flowers". This makes sense, considering that the flowers in question are the flowers atop a White Pikmin's head, which are actually colored magenta.
In earlier versions of the game, the cave was to be called "Garden of White Flowers"[1], which appears to be a mistranslation from the Japanese title.
Names in other languagesEdit
| Language | Name | Meaning |
|---|---|---|
| 白い花園? Shiroi Hanazono |
White flower garden | |
(traditional) |
白色花園 | |
| Jardin Blanc | White garden | |
| Weißer Garten | White garden | |
| Parco di Fiori Bianchi | White flower park | |
| Jardín de Blancaflor | White flower garden |
GalleryEdit
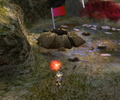
The cave entrance.
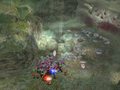
The entrance to the cave while foggy.


See alsoEdit
ReferencesEdit
- ^ Pikmin 2/Early English Script on The Cutting Room Floor
| Caves in Pikmin 2 | |
|---|---|
| Valley of Repose | Emergence Cave • Subterranean Complex • Frontier Cavern |
| Awakening Wood | Hole of Beasts • White Flower Garden • Bulblax Kingdom • Snagret Hole |
| Perplexing Pool | Citadel of Spiders • Glutton's Kitchen • Shower Room • Submerged Castle |
| Wistful Wild | Cavern of Chaos • Hole of Heroes • Dream Den |