The printable version is no longer supported and may have rendering errors. Please update your browser bookmarks and please use the default browser print function instead.
|
The following article or section contains guides.
The strategies shown are just suggestions.
|
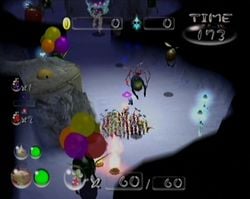
Abduction Den is the twenty-fourth level in Pikmin 2's Challenge Mode. There are quite a few enemies that take Pikmin and leaders in their grasp, hence the name.
Sublevel 1
- Theme: Snow
- Music: Emergence Cave 2
- Time: 180 (360 seconds)
- Starting Pikmin:
- Treasures:
- Enemies:
- Obstacles:
- Vegetation:
- Others:
It would be wise to lure the Greater Spotted Jellyfloat away from the rest to get the key it holds. If one is here for the pink flowers, then nothing else should be done. If a high score is wanted, taking out the Careening Dirigibugs with an ultra-bitter spray is advisable.
One strategy is as follows: The player should take both leaders with no Pikmin, and go over to the Greater Spotted Jellyfloat. One leader should be angled so that the Jellyfloat sucks him up into its body; the other leader should then petrify the creature with the ultra-bitter spray. Then, using the leader that is inside the Jellyfloat, the player should rapidly press the same buttons they would use if they were taken by a Bumbling Snitchbug. The Jellyfloat will break, the leader will escape, and the key will clatter onto the floor. After taking the key, one can collect any other treasures at will, and finally escape.
Generate sample map →
| Technical sublevel information
|
| Internal cave name
|
ch_NARI_09suikomi
|
| "Main" object maximum (?)
|
14
|
| "Treasure" object maximum (?)
|
3
|
| "Gate" object maximum (?)
|
0
|
| Dead end unit probability (?)
|
0
|
| Number of rooms (?)
|
3
|
| Corridor-to-room ratio (?)
|
0
|
| Escape geyser (?)
|
Yes
|
| Clogged hole (?)
|
No
|
| Cave units file (?)
|
3_MAT_hit34_sak2_uzu1_snow.txt
|
| Lighting file (?)
|
tutorial_1_light.ini
|
| Background (?)
|
None
|
| Cave units (?)
|
|
|
|
|
|
|
| Dead end |
Three-way crossing |
Four-way crossing |
Turning corridor |
Corridor |
Long corridor
|
|
|
|
|
| Room with large trunk |
Room with 4 exits |
Room with spiraling trunk
|
- For details on how objects are spawned, and how some may fail to spawn, see here.
Names in other languages
| Language
|
Name
|
Meaning
|
 Japanese Japanese |
さらいの洞窟? |
Kidnapper's Cave
|
 French (NoA) French (NoA) |
Antre du rapt |
Abduction den
|
 French (NoE) French (NoE) |
Antre du Rapt |
Abduction Den
|
 German German |
Höhle der Entführung |
Kidnapping Cave
|
 Italian Italian |
Covo di sequestro |
Abduction Lair
|
 Spanish (NoA) Spanish (NoA) |
Antro de la Abducción |
Abduction Den
|
See also

 Red Pikmin × 30 (flower)
 Yellow Pikmin × 30 (flower)
 Combustion Berry × 1
 Mirth Sphere × 3 (inside Bumbling Snitchbugs)
 Omniscient Sphere × 6 (4 inside Careening Dirigibugs, 2 inside Fiery Dweevils)
 Paradoxical Enigma × 1 (partially buried)
 Rubber Ugly × 1
 The Key × 1 (inside Greater Spotted Jellyfloat)
 Unknown Merit × 1 (inside Swooping Snitchbug)
 Bumbling Snitchbug × 3
 Careening Dirigibug × 4
 Fiery Dweevil × 2
 Greater Spotted Jellyfloat × 1
 Swooping Snitchbug × 1
 Fire geyser × 3
 Common Glowcap × 7


