
Echo Cavern
| Echo Cavern Sector 3 – Area B | |
|---|---|

| |
| Treasures | 3 |
| Pikmin available | Red Pikmin, Rock Pikmin |
| Requirements | Complete Crystal Tunnels via normal exit |
| Next area | Springpetal Cave |
| Music | Sparkling Labyrinth area Sparkling Labyrinth area - back side |
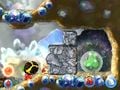
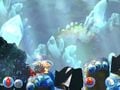
Echo Cavern (いわに ひびく おと?, lit.: "Sound echoing in the rocks") is the second main area in the Sparkling Labyrinth. It takes place inside a cave with lots of gems, but also several cobblestone blocks. These blocks can be destroyed with the usage of bomb rocks, that get introduced into the game in this area.
DescriptionEdit
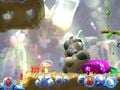
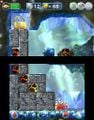
At the start, the player can call some Red Pikmin, that are needed to destroy the dirt blocks below Olimar's feet. After that, a little cutscene plays, introducing a bomb rock, which will be a major element of the area. Some steps after this, the player has to grab one of those rocks in order to destroy cobblestone blocks, and get access to the first treasure, the Cheer-o-Sphere. Then, Olimar has to take another bomb rock to destroy a wall of cobblestone blocks, that are blocking the way to the rest of the area. After encountering some Male Sheargrubs and a Crammed Wraith, Olimar can go through a doorway and find a Seedbagger. Some time after this, the player has to throw their Pikmin to the second treasure, the Numerical Monument, in order to retrieve it. Next to the treasure, there is a wall of cobblestone blocks to destroy. After a little walk, Olimar has to throw a bomb rock to a pile of cobblestone blocks in order to recover the Gigaton Bag. After that, the player needs some Rock Pikmin in order to get access to a bomb rock, thus making progress in the area, and reaching the end of it.
CutscenesEdit
| Cutscene | Screenshot | Trigger | Description |
|---|---|---|---|
| Bomb rock introduction | 
|
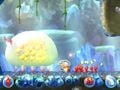
The player moves a bit ahead after falling down the first opening covered by dirt blocks. | Two Red Pikmin notice a bomb rock up ahead. They run towards it, and stand there in surprise. One of them eventually picks it up, and struggles to carry it. The weight proves to be too much, though, and the Pikmin accidentally drops it. This starts the countdown process, making the rock blink. The Pikmin recognize what this means and run to Olimar's side. Moments later, the bomb explodes, causing no harm. |
| Rocky Rock Pikmin | 
|
In the section with crystals and ceiling blocks, the player advances forward while in the lower route. | Four Rock Pikmin roll sideways from behind a stone. Their limbs are tucked in, so they look like normal round rocks. They eventually jump up from the ground and spring their limbs out, revealing they are just normal Rock Pikmin. |
Pikmin locationsEdit
|
The following article or section is in need of assistance from someone who plays Hey! Pikmin. |
| Spot | Location | Pikmin | Requirements | Notes |
|---|---|---|---|---|
ObjectsEdit
TreasuresEdit
EnemiesEdit
 Male Sheargrub × 5
 Crammed Wraith × 3
 Seedbagger × 1
 Crystalline Crushblat × 2
ObstaclesEdit
 Bouncy Mushroom × 2
 Buried Sparklium Seeds × 1
 Cobblestone block × 38
 Dirt block × 2
 Large crystal × 16
OthersEdit
 Yellow Sparklium Seed × 72 (10 of them are buried)
 Red Sparklium Seed × 3 (coming from a Seedbagger)
 Heart (small) × 2
GuideEdit
|
The following article or section contains guides. |
|
The following article or section is in need of assistance from someone who plays Hey! Pikmin. |
GalleryEdit
Location of the Cheer-o-Sphere.
The sleeping Crammed Wraith.
The Seedbagger.

Location of the Numerical Monument.
Location of the Gigaton Bag.
The room with blocks that fall from the ceiling, with the blocks already dropped.


Names in other languagesEdit
| Language | Name | Meaning |
|---|---|---|
| いわに ひびく おと? Iwa ni hibiku oto |
Sound echoing in the rocks | |
| Bombronnen | Bombwells | |
| Grotte explosive | Explosive cave | |
| Schall und Rauch | Sound and Smoke | |
| Caverna dell'eco | Echo cavern | |
| Caverna explosiva | Explosive cavern | |
| Caverna Explosiva | Explosive Cavern |
See alsoEdit
| Sector 3: Sparkling Labyrinth | |
|---|---|
| Normal areas | 3-A: Crystal Tunnels • 3-B: Echo Cavern • 3-C: Springpetal Cave • 3-D: The Burning Sky • 3-E: Subterranean Tyrant |
| Extra areas | 3-X: The Hollow Sky • Secret Spot 9 • Secret Spot 10 • Secret Spot 11 • Secret Spot 12 • Sparklium Springs |