Health
- "HP" redirects here. For the game with the acronym "HP", see Hey! Pikmin.
Health (also known as Hit Points or Health Points, and usually shortened to HP) is a common mechanic in games, used to represent how close a living entity is to dying. In general terms, the higher something's health is, the more damage it can sustain before dying. When its health reaches zero, it dies.
In the Pikmin games, health is stored as a number, but is shown to the player with a colored wheel as opposed to a number in text. It is mostly used to keep track of how close an enemy is to dying, although it can serve other purposes, such as pointing down how close a Volatile Dweevil is to exploding. It should be noted that some objects will not have their health shown to the player whatsoever, although things like gates will become visibly more damaged as they are attacked.
On Pikipedia, an object's health points can be found on the corresponding subject's page, on a section with the statistics, or under a section titled "Technical information". In the case of Pikmin 2 enemies, you may also use the Piklopedia page. The health values were gathered either by checking the memory with an emulator and/or memory reader, by reading the in-game files directly, or via in-game observations and calculations. For comparison, you may learn how strong Pikmin attacks are by checking the infobox at the top of a Pikmin type's article.
Leaders
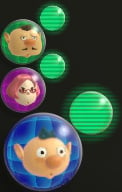
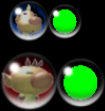
The health of leaders is represented on the bottom-left corner of the screen. It differs slightly from normal health wheels in that it lacks a black circle behind the main pie chart, and it beeps whenever it's below 50%. Whenever a leader gets hit with a light attack, they will be knocked back slightly, their suit will emit sparks, and their health will drop a bit, depending on the attack. If a leader's hit by a strong attack, they'll be thrown to the ground, be unable to move for a second or two, and their health will drop considerably, again, depending on the attack.
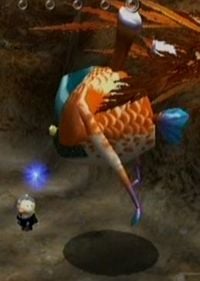
In Pikmin, if Captain Olimar loses all his health, a cutscene will play with him falling down, in black and white, then he'll appear next to the ship, go in, and take off, leaving all Pikmin on the field behind. This automatically ends the day. It's possible to heal to full health by investigating the S.S. Dolphin, which is done by pressing ![]() /
/ ![]() near the colored lights emitted by the ship.
near the colored lights emitted by the ship.
In Pikmin 2 and Pikmin 3, if a leader loses all their health, they will be transported back to the landing area, and the other leaders will continue on their own. If every leader loses all their health, the day ends, as it does when Olimar falls in Pikmin. The same rule applies to caves in Pikmin 2, but the cave is immediately left, all salvaged treasures are lost, all Pikmin in the cave are left behind, and hence, count as deaths, and the day is instantly over afterwards. If only one leader is knocked out inside a cave, he will be lying prostrate in front of the ship even after leaving the cave. This cannot be changed unless the day ends or is reset. The only way to heal the health of a leader that is not knocked out is to enter or leave a cave. In Challenge Mode and Mission Mode, if any leader is defeated, the challenge/mission is over. In 2-Player Battle and Bingo Battle, if a player's leader dies, the other player wins.
There are two minor glitches in Pikmin 2 related to a leader losing all of his health: one glitch has the fallen leader able to be hurt, while another one allows the leader to remain on the ground instead of being beamed up by the Research Pod.
Pikmin
It is currently unknown if Pikmin have health points. When hurt in combat in the first two games, they can lose their flower or bud. Once they're a leaf Pikmin, they will not suffer adverse effects from being hurt, aside from the knockback and temporary incapacitation that occurs regardless of the Pikmin's maturity. Normally, enemies have attacks that kill Pikmin right away, which makes it even harder to figure out if they do have health points or not.
There are some attacks that alternately hurt or kill Pikmin, such as a Gatling Groink's shots. It is unknown what decides whether a Pikmin should live or die in these cases. In regards to Pikmin infighting, such as that caused by the Puffstool or competitive 2-player modes, Pikmin can sustain multiple attacks from an opposing Pikmin before dying.
Enemies
As an enemy gets hit by Pikmin attacks (or leader punches, explosions, etc.), its health drops. Generally, enemies show no signs of weakeness when they are low on health. Once an enemy is dead, it will either leave its dead body, which can be carried to an Onion, or it'll drop some spoils. Any damage caused to an enemy will not carry over onto the next day, with the exception of bosses in Pikmin 3.
Some enemies have non-standard behavior regarding their health level:
- Hairy Bulborbs lose their hair when they reach half their health points.
- Iridescent Flint and Glint Beetles, and Doodlebugs cannot normally be hurt, but the spoils they drop depend on the number of times the insect's been hit. They can be damaged if petrified, though.
- Shearwigs in the first two games will start flying when their health drops to half, and return to land upon regenerating.
- Ravenous Whiskerpillars do not actually die while not petrified, as they do not leave a spirit and can be seen squirming when Pikmin carry their "corpse".
- The Waterwraith's fight enters a second stage once its rollers are destroyed.
- The Emperor Bulblax in Pikmin uses a new attack when it loses half its health points: jumping high into the air, and in Pikmin 2, when it reaches a quarter of its health, it will roar loudly, which can unearth Mitites, scare Pikmin, and alert other Emperor Bulblaxes.
- The Titan Dweevil only has health points for the creature itself once it loses all the treasures it's carrying. Until then, each treasure has its own health points (without a health wheel), and once it reaches 0, it is detached from the Titan Dweevil.
- Most of the main bosses in Pikmin 3 will have different attack and movement patterns depending on their health.
In Pikmin 3, the game contains data for every enemy's maximum health, but in the files that define what enemies go where in an area, it is possible for the developers to write down a specific amount of health for that specific instance of the enemy to have. This means that while most instances of an enemy have the "default" maximum health, some might have a more specific number. An example would be the Toady Bloyster on the Shaded Garden, that only has one third the normal amount. This can also apply to other properties, like sight radius.
Regeneration
Some of the enemies in the Pikmin games have the ability to slowly regenerate their health after being hurt. There are two types of regeneration: passive, and active. Enemies have either passive or active regeneration, except for the Shearwig in Pikmin 2, which has both.
Passive regeneration
Passive regeneration is when an enemy's health is always recovering, regardless of what the creature is doing. In most cases, the regeneration mechanic is simply to encourage the player to kill an enemy when it's attacked, and to not retreat, or else its health might be recovered on the next battle, and all the hard work will be lost. In others, it's to encourage the player to use a large number of Pikmin to attack, as a smaller number might have a hard time countering the regeneration.
Only one enemy passively regenerates in Pikmin 3: the Flighty Joustmite. In Pikmin 2, the Shearwig has passive and active regeneration, but only passive in Pikmin. The following enemies have passive regeneration:
- Pikmin
| Enemy | HP per second | Seconds to fully regenerate from 0 | |
|---|---|---|---|
| HP | Max health % | ||
| Unknown | Unknown | Unknown | |
| Unknown | Unknown | Unknown | |
| Unknown | Unknown | Unknown | |
| Unknown | Unknown | Unknown | |
| Unknown | Unknown | Unknown | |
| Unknown | Unknown | Unknown | |
| Unknown | Unknown | Unknown | |
| Unknown | Unknown | Unknown | |
| Unknown | Unknown | Unknown | |
| Unknown | Unknown | Unknown | |
| Unknown | Unknown | Unknown | |
| Unknown | Unknown | Unknown | |
- Pikmin 2
| Enemy | Health per second | Seconds to fully regenerate from 0 | |
|---|---|---|---|
| HP | Max health % | ||
| 1.5 | 0.3% | 333.33 | |
| 2.55 | 0.3% | 333.33 | |
| 6 | 0.3% | 333.33 | |
| 0.39 | 0.03% | 3333.33 | |
| 0.9 | 0.3% | 333.33 | |
| 7.5 | 0.3% | 333.33 | |
| 2.55 | 0.3% | 333.33 | |
| 0.45 | 0.03% | 3333.33 | |
| 1.5 | 0.03% | 3333.33 | |
| 1 | 0.03% | 3333.33 | |
| 4.2 | 0.3% | 333.33 | |
| 0.36 | 0.03% | 3333.33 | |
| 0.21 | 0.03% | 3333.33 | |
| 0.3 | 0.03% | 3333.33 | |
| 0.36 | 0.03% | 3333.33 | |
| 2.55 | 0.3% | 333.33 | |
| 4.5 | 0.15% | 666.66 | |
| 30 | 0.3% | 333.33 | |
| 4.5 | 0.3% | 333.33 | |
| 9 | 0.3% | 333.33 | |
| 0.6 | 0.3% | 333.33 | |
| 3.6 | 0.3% | 333.33 | |
| 1.5 | 0.03% | 3333.33 | |
| 2.4 | 0.3% | 333.33 | |
| 5.4 | 0.3% | 333.33 | |
- Pikmin 3
| Enemy | Health per second | Seconds to fully regenerate from 0 | |
|---|---|---|---|
| HP | Max health % | ||
| 5 | 0.8% | 120 | |
Active regeneration
Active regeneration is when the creature only regenerates when it is performing a certain action or in a certain state. As such, this type of regeneration encourages the player to attack the enemy in a certain way. The following enemies can regenerate with certain actions:
- Shearwigs in Pikmin 2 quickly regenerate while flying. They begin flying after being hurt, and go back to the ground when they're probably healed. In Pikmin, they always regenerate at the same rate, whether they are flying or not, making it passive healing instead.
- Breadbugs and Giant Breadbugs in Pikmin 2 instantly regenerate all of their health when they bring an item into their nest.
- Shearwigs, Male Sheargrubs, and Female Sheargrubs in Pikmin 3 regenerate when they are underground. They can fully heal in 30 seconds.
- Sputtlefish regenerate health when they're not focusing on any prey. They can fully heal in 60 seconds.
- The Vehemoth Phosbat heals a small amount of health the first time it idles on the wall, after the main light is on.
Besides that, it could be said that the Plasm Wraith regenerates when it sucks up loose plasm.
Revival
In Pikmin 2 and Pikmin 3, a few enemies are known to revive after they've been killed. Once their health points reach 0, a moderately slow process of revival occurs, where the enemy's health is filled up. The creature remains "dead" throughout this process, but once its health is full, two minutes later, it will be brought back to life. When its health reaches 0 during battle, the enemy will not release a spirit like most enemies, further hinting that the creature is not completely defeated.
In Pikmin 2, this mechanic encourages the player to dispose of the creature, by bringing it to an Onion or the Research Pod, before it continues attacking their Pikmin. If the enemy is killed while petrified, it will not leave a corpse, and hence, cannot revive. Finally, the only other way to ensure an enemy does not revive is to have it fall off the floor of a cave, if possible. In Pikmin 3, the only way to defeat the Mysterious Life Form is when it transforms into the Plasm Wraith, at which point the player may proceed to truly defeat it.
The following enemies can revive after being defeated:
 Spotty Bulbear (in Pikmin 2 only)
 Gatling Groink
- [icon] Mysterious Life Form
Interestingly, all of the enemies that can revive can also freely roam the areas they are found in.
In Hey! Pikmin
|
The following article or section is in need of assistance from someone who plays Hey! Pikmin. |
In Hey! Pikmin, Captain Olimar's health is measured by levels in a Health Gauge that can be increased via upgrades. Every time Olimar is hurt, he loses one level of health, and becomes invincible for eight seconds. Some things are able to kill him in one hit though, like the Queen Shearwig's finishing strike, the snowballs in Over Wintry Mountains, or being crushed by a pushed block. Olimar can regain health by collecting hearts.
With one bar of health left, the Energy Gauge and Olimar's spacesuit start to glow red and an extra sound is heard. Olimar dies upon reaching zero health bars, and the player is presented with the choice to "Try the area again" or "Return to Area Select".
Gallery
Captain Olimar's health in Pikmin.
The icons used for Captain Olimar's and Louie's health in Pikmin 3.
Names in other languages
Energy Gauge
| Language | Name | Meaning |
|---|---|---|
| ライフゲージ? Raifugēji |
Life gauge | |
| Energiemeter | Energymeter | |
| Jauge d'énergie | Energy gauge | |
| Lebensbalken | Lifebar | |
| Livello energetico | Energetic level | |
| Medidor de energía | Energymeter |


