Hole of Beasts
| Hole of Beasts | |
|---|---|

| |
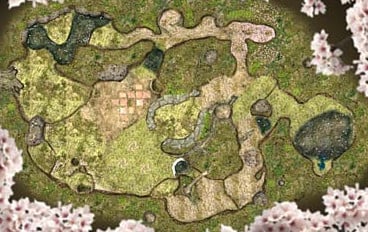
| Location | Awakening Wood |
| Sublevels | 5 |
| Treasures | 6 |
| Hazards | |
|
The following article or section contains guides. |
The Hole of Beasts (けだものの穴?, lit.: "Hole of Beasts") is one of the first caves that the player will likely go in first in the Awakening Wood, and is slightly harder and deeper than the Emergence Cave, but still very easy. This cave's potential hazard is the element of fire, and its boss is an Empress Bulblax: the only one in the game not to give birth to Bulborb Larvae. In this cave, there are 1,100 pokos worth of treasure.
How to reach
|
This article or section is in need of more images. Particularly: |

Near the landing site is a pair of Burgeoning Spiderworts bearing ultra-spicy berries. Beyond is a Cloaking Burrow-Nit and Creeping Chrysanthemum. Following the path both are on and turning right leads to the cave, located in the spot where the Extraordinary Bolt was found in Pikmin.
Like the Emergence Cave, very few Pikmin are likely available to you, and your squad is thus equally limited. Bringing all Purple Pikmin available to you, and filling the remainder of your squad with as many Red Pikmin as you are allowed is recommended.
Notes
Ship's dialogs
“Krrzt! Bzzrrt! Biological sensors are reacting violently. The readings are ominous.
A beast of unknown power lurks in these depths. A large Pikmin group would be reassuring.
My sound sensors are picking up hostile roars of many beasts. Expect dangerous encounters.
Sensors are also showing extreme heat pockets. You may need flame-resistant Pikmin...
But my sensors indicate no such data! Are my records incomplete?”Sublevel 1
- Theme: Soil
- Music: Soil 1
- Treasures:
- Enemies:
 Female Sheargrub × 6
 Male Sheargrub × 4
- Obstacles:
- None
- Plants and fungi:
- Others:
- None
| Technical sublevel information | |||||
|---|---|---|---|---|---|
| Internal cave name | forest_1 | ||||
| "Main" object maximum (?) | 10 | ||||
| "Treasure" object maximum (?) | 1 | ||||
| "Gate" object maximum (?) | 0 | ||||
| Dead end unit probability (?) | 50 | ||||
| Number of rooms (?) | 2 | ||||
| Corridor-to-room ratio (?) | 0 | ||||
| Escape geyser (?) | No | ||||
| Clogged hole (?) | No | ||||
| Cave units file (?) | 1_units_cent3_tsuchi.txt | ||||
| Lighting file (?) | normal_light_lv0.ini | ||||
| Background (?) | None | ||||
| Cave units (?) | |||||
 |
 |
 |
 |
 |
|
| Dead end with item | Three-way crossing | Four-way crossing | Turning corridor | Corridor | Long corridor |
 |
|||||
| Circular room with 4 exits | |||||
The first sublevel of the Hole of Beasts is relatively simple, with only a few Sheargrubs to worry about, all in the room after the landing site. There are roughly equal numbers of both genders; only the males need defeating. Once that has been done, it is time to retrieve the Stone of Glory, the sublevel's only treasure.
Sublevel 2
- Theme: Soil
- Music: Rest
- Treasures:
- None
- Enemies:
- None
- Obstacles:
- None
- Plants and fungi:
 Common Glowcap × 6
 Figwort (small) × 2
- Others:
 Egg × 2 (in dead ends)
 Violet Candypop Bud × 2 (if the player has less than 20 Purples)
| Technical sublevel information | |||||
|---|---|---|---|---|---|
| Internal cave name | forest_1 | ||||
| "Main" object maximum (?) | 2 | ||||
| "Treasure" object maximum (?) | 0 | ||||
| "Gate" object maximum (?) | 0 | ||||
| Dead end unit probability (?) | 100 | ||||
| Number of rooms (?) | 2 | ||||
| Corridor-to-room ratio (?) | 0 | ||||
| Escape geyser (?) | No | ||||
| Clogged hole (?) | No | ||||
| Cave units file (?) | 1_units_cent2_tsuchi.txt | ||||
| Lighting file (?) | muraon_light_lv2.ini | ||||
| Background (?) | None | ||||
| Cave units (?) | |||||
 |
|
|
|
|
|
| Dead end | Dead end with item | Three-way crossing | Four-way crossing | Turning corridor | Corridor |
 |
|||||
| Long corridor | Circular room with 4 exits | ||||
If 20 or more Purple Pikmin have been collected, the two Violet Candypop Buds here will not show up, leaving the sublevel nearly completely empty. This is possible only if the 10 Purples in Emergence Cave have been obtained twice or more. If that is the case, besides the two eggs that provide nectar and spray, there is nothing to do here.
Sublevel 3
- Theme: Soil
- Music: Fire
- Treasures:
- Enemies:
- None
- Obstacles:
 Fire geyser × 14
- Plants and fungi:
- Common Glowcap × 8
- Others:
- None
| Technical sublevel information | |||||
|---|---|---|---|---|---|
| Internal cave name | forest_1 | ||||
| "Main" object maximum (?) | 14 | ||||
| "Treasure" object maximum (?) | 2 | ||||
| "Gate" object maximum (?) | 0 | ||||
| Dead end unit probability (?) | 0 | ||||
| Number of rooms (?) | 3 | ||||
| Corridor-to-room ratio (?) | 0 | ||||
| Escape geyser (?) | No | ||||
| Clogged hole (?) | No | ||||
| Cave units file (?) | 2_ABE_norhiba_blkhiba_tsuchi.txt | ||||
| Lighting file (?) | normal_light_lv2.ini | ||||
| Background (?) | None | ||||
| Cave units (?) | |||||
|
|
|
|
|
|
| Dead end | Three-way crossing | Four-way crossing | Turning corridor | Corridor | Long corridor |
 |
 |
||||
| Circular room with 1 exit | Room with hole in wall | ||||
This sublevel has no enemies, but may be the first place where you are introduced to the game's most common hazard: fire. As long as you have at least 15 Red Pikmin, which should've been brought, this dungeon should pose no problems. If any Purple or other non-Red Pikmin catch on fire, just whistle them to save them.
Take only Red Pikmin through into the next room and swarm them to pick up the Strife Monolith, which is in the fireplace-like dark space, and the Cosmic Archive, located near the entrance to the next sublevel.
Sublevel 4
- Theme: Soil
- Music: Soil 2
- Treasures:
 Dream Architect (inside the Red Bulborb)
 Luck Wafer
- Enemies:
 Mitite × 10 (in dead ends)
 Red Bulborb × 1
- Obstacles:
- Fire geyser × 4
- Plants and fungi:
- Common Glowcap × 6
- Violet Candypop Bud × 1
- Others:
- Egg × 2 (in dead ends)
| Technical sublevel information | |||||
|---|---|---|---|---|---|
| Internal cave name | forest_1 | ||||
| "Main" object maximum (?) | 6 | ||||
| "Treasure" object maximum (?) | 1 | ||||
| "Gate" object maximum (?) | 0 | ||||
| Dead end unit probability (?) | 50 | ||||
| Number of rooms (?) | 2 | ||||
| Corridor-to-room ratio (?) | 0 | ||||
| Escape geyser (?) | No | ||||
| Clogged hole (?) | No | ||||
| Cave units file (?) | 2_ABE_mid1_nor3_tsuchi.txt | ||||
| Lighting file (?) | normal_light_lv3.ini | ||||
| Background (?) | None | ||||
| Cave units (?) | |||||
|
|
|
|
|
|
| Dead end with item | Three-way crossing | Four-way crossing | Turning corridor | Corridor | Long corridor |
 |
 |
||||
| Room with 6 exits | Room with long dead end | ||||
Find the Red Bulborb, where its location may vary, and pound it with Purple Pikmin to vanquish the beast and get the Dream Architect. Then take your Pikmin to the curved alcove to find the Luck Wafer, a very light, but valuable piece. Nearby is a Violet Candypop Bud; luckily, this one never disappears no matter how many Purples you possess.
In one of the alcoves not containing any of the eggs found here, there will be a swarm of Mitites that reveal themselves before scuttling around. Throw your Purple Pikmin to defeat them in order to get, in some cases, much-needed nectar. After your thorough scavenging is complete, proceed to the final sublevel of this cave.
Sublevel 5

- Theme: Soil
- Music: Boss (only when combating)
- Treasures:
 Prototype Detector (inside the Empress Bulblax)
- Enemies:
 Empress Bulblax × 1
- Obstacles:
- None
- Plants and fungi:
- Common Glowcap × 8
- Others:
- None
| Technical sublevel information | |||||
|---|---|---|---|---|---|
| Internal cave name | forest_1 | ||||
| "Main" object maximum (?) | 1 | ||||
| "Treasure" object maximum (?) | 0 | ||||
| "Gate" object maximum (?) | 0 | ||||
| Dead end unit probability (?) | 0 | ||||
| Number of rooms (?) | 1 | ||||
| Corridor-to-room ratio (?) | 0 | ||||
| Escape geyser (?) | Yes | ||||
| Clogged hole (?) | Yes | ||||
| Cave units file (?) | 1_units_boss_tsuchi.txt | ||||
| Lighting file (?) | qchap_light.ini | ||||
| Background (?) | None | ||||
| Cave units (?) | |||||
 |
|||||
| Empress Bulblax arena | |||||
- See also: Empress Bulblax strategy.
The last sublevel of the Hole of Beasts holds a very strange and large creature, an Empress Bulblax; as the name suggests, it is a female matriarch, making it seem simple why it is a boss. This one, though, out of the several you are yet to see, does not produce the small, aggravating vermin known as Bulborb Larvae. If you know what these are beforehand, you should be relieved that you will not find them in this sublevel.
Just follow the instructions on how to defeat it here, and the treasure is yours. Throw Pikmin onto its head to pummel the beast, and then call them to prevent them from being shaken off when necessary. The boss will roll around in attempt to squash your Pikmin, but luckily it can only roll horizontally.
However, do not attempt to pursue it with your army, as you and your Pikmin can not attack it if it is in movement. Also, attempting to throw Pikmin at it will result in them flying off it and landing right in the path of the Empress, enabling it to crush them. Also, any Pikmin thrown off will continue to attempt to attack the Empress and will more than likely be squashed.
Should you be standing in its track, you will still have time to swarm your Pikmin against a small, but noticeable indent in the wall to prevent you and the Pikmin from being smashed. When you defeat it, it will drop one of the most renowned treasures in the game, the Prototype Detector. This device allows you to unlock the Treasure Gauge, a very important machine that will track down any treasure in this world, making this very useful indeed. Once you complete this last sublevel, you may exit via the geyser.
Names in other languages
| Language | Name | Meaning |
|---|---|---|
| けだものの穴? Keda Mono no Ana |
Hole of Beasts | |
| Gîte des Bêtes | Gite of Beasts | |
| Höhle der Bestien | Cave of Beasts | |
| Covo di Bestie | Lair of Beasts | |
| Sima de las Bestias | Hole of the Beasts |
See also
|
This page is currently pending deletion. Reason: |
#REDIRECT Template:P2 caves