The Lonely Tower
|
The following article or section is in need of assistance from someone who plays Hey! Pikmin. |
| The Lonely Tower Sector 4 – Area A | |
|---|---|

| |
| Treasures | 3 |
| Pikmin available | Rock Pikmin, Blue Pikmin, Red Pikmin |
| Requirements | Complete Subterranean Tyrant |
| Next area | Steel Pipe Forest |
| Music | |
The Lonely Tower (孤独な塔?) is the first main area in the Ravaged Rustworks. Roughly the first half of the time spent here is with Olimar alone. By himself, he manages to find a treasure, but continues on for a bit longer without Pikmin. Dirt blocks begin to appear, and one of them even blocks the way to the exit, indicating that it's possible to take them down. A bit later, he encounters the first group of Pikmin, but cannot land next to them and instead zooms past the group as he continues to climb the tower. His journey continues alone, and it isn't until the very top of the area that he discovers a group of Red Pikmin he can call to his side. With these new Pikmin, he can now go back down the tower, taking down obstacles and enemies he couldn't before, and open the way to the exit.
Although the player is meant to go back down the tower and use Pikmin to remove the dirt block covering the exit of the tower, it's possible to climb the tower to the top, to where the Private Castle is, and use the jetpack to fly directly to the right, over the boundaries of the topmost room, and fall outside and to the right of the tower, right in front of the exit.
Description
The area takes place in a big location made of rusted pipes, metal plates, and other human-made materials. Not so long after the beginning of the level, the player can use a Flatterchuck in order to retrieve the first treasure, the Metal Bagel. After that, the player will begin a huge ascent without any Pikmin for quite some time, forcing Olimar to dodge enemies he'll encounter. At the top of the tower, the player can get some Red Pikmin, as well as the Private Castle. The few Pikmin Olimar has with him are necessary to destroy obstacles, such as dirt blocks, and to get more Pikmin. At some point in the tower, the player can destroy some dirt blocks and get access to a doorway, alongside some Rock Pikmin. On the other side, Olimar has to launch some Pikmin on a Flatterchuck in order to retrieve the last treasure of the level, the Un-Damaging Javelin. After that, the player can safely reach the end of the area, at the bottom of the tower, which is blocked off by a dirt block that can now be opened.
Cutscenes
| Cutscene | Screenshot | Trigger | Description |
|---|---|---|---|
| Clingy Pikmin | 
|
The player climbs up the tower till the first doorway, enters it, and advances a bit forward. | Four Blue Pikmin are holding on to a pipe. They look down while shaking, and eventually three of them slide down the pipe, spinning around it as they go down like a corkscrew, and land on a nearby platform. The fourth Pikmin refuses to go down, until one of the three Blue Pikmin jumps against the pipe, which makes the lone Pikmin lose its grip and fall. Since this Pikmin is on the other side of the pipe as the other three, it lands on the platform on the opposite end. |
| Obstructing Mockiwi | 
|
After getting the Red Pikmin at the top, the player goes down a level, breaks the dirt block on the left, and enters the doorway. | There is a Mockiwi sleeping in front of the doorway. Its bottom is covering half of the doorway. Two Red Pikmin exit from the opening behind its bottom, turn to the obstacle, and realize it's a Mockiwi. They then slowly make their way back inside the doorway. After some seconds, the creature wakes up on its own and walks away. The two Pikmin show up a bit later, notice that the Mockiwi left, and start cheering. |
| Flatterchuck | 
|
The player frees the Rock Pikmin and enters the doorway next to them. | Two Rock Pikmin exit the doorway, look around, and notice a Flatterchuck bouncing around, ready to land on them. Before it does though, they manage to escape back into the doorway. The creature jumps once more and goes off the stage. |
Pikmin locations
|
The following article or section is in need of assistance from someone who plays Hey! Pikmin. |
| Spot | Location | Pikmin | Requirements | Notes |
|---|---|---|---|---|
Objects
Treasures
Enemies
 Mockiwi × 4
 Flatterchuck × 7
 Shooting Spiner (Male) × 5
Obstacles
|
The following article or section is in need of assistance from someone who plays Hey! Pikmin. |
Others
|
The following article or section is in need of assistance from someone who plays Hey! Pikmin. |
 Sparklium Seed × 140
 Sparklium flower × 1
 Heart × 5
Guide
|
The following article or section contains guides. |
|
The following article or section is in need of assistance from someone who plays Hey! Pikmin. |
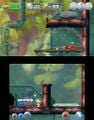
Gallery
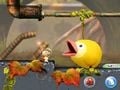
The first Mockiwi.
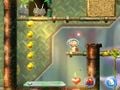
Location of the Metal Bagel.
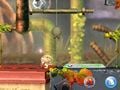
The first group of Pikmin.
Top of the tower, and the location of the Private Castle.
Location of the Un-Damaging Javelin.


Names in other languages
| Language | Name | Meaning |
|---|---|---|
| 孤独な塔? Kodokuna tou |
Lonely tower | |
| De eenzame toren | The lone tower | |
| Tour solitaire | Lone tower | |
| Einsame Turmbesteigung | Lone Towerclimb | |
| Torre solitaria | Lone tower | |
| Torre solitaria | Lone tower | |
| Torre Solitaria | Lone Tower |
| Sector 4: Ravaged Rustworks | |
|---|---|
| Normal areas | 4-A: The Lonely Tower • 4-B: Steel Pipe Forest • 4-C: Pollution Pool • 4-D: Space of Silence • 4-E: Flashes of Fear |
| Extra areas | 4-X: Drenchnozzle Den • Secret Spot 13 • Secret Spot 14 • Secret Spot 15 • Secret Spot 16 • Sparklium Springs |