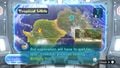
Tropical Wilds
| Tropical Wilds | |
|---|---|
| |
| Fruits | 18 |
| Pikmin discovered | Red Pikmin |
| Requirements | None |
| Music | Alph's Crash Site, Tropical Wilds |


The Tropical Wilds (始まりの森?, lit.: "Forest of Beginnings") is an area in Pikmin 3. It is set in a tropical jungle near a beach, with sandy paths and several tree stumps. Red Pikmin are discovered in this area, and it is where Alph and the S.S. Drake first land. The Sandbelching Meerslug is the boss of the area. The 18 fruits in the area give a total of 26.5 cups of juice (13.25 on Ultra-Spicy difficulty).
Plot
After the scene in the prologue with Captain Charlie, it is shown that Alph crashed in a small pond, the S.S. Drake flying unsteadily above him as he first regains consciousness. As Alph gets up to explore, he comes across some Red Pikmin trying to get what he hopes is fruit but is revealed to be the Red Onion out of a tree branch. After getting the Onion down, Alph takes the Red Pikmin and sets them to work building a bridge to get over to where his KopPad landed. After this, Alph tracks the signal of the S.S. Drake to a location not far from where he crashed. Taking his Red Pikmin and raising their numbers a bit, Alph sets them to work pushing a large box out of the path to reveal a data file. Alph installs a data file log into the KopPad before setting off again. He makes his way through a cavern, noting the size of the mushrooms and the dirt wall in the way, and on the other side discovers the S.S. Drake, which he is happy about. However, his companions, Brittany and Charlie, are nowhere to be found, so Alph resolves to find them the next day before hastily taking to the skies after the nocturnal predators begin to wake up.
Later, Alph, Brittany, and Charlie return here after Charlie shows them a data file from Olimar's log and subsequently acquire a strong signal emanating from the area, which the Koppaites believe could come from a Hocotatian transmitter. After landing, the three note that the signal is not far off, and they proceed to explore, collecting fruit as they go along. Using their wits and numbers, the Koppaites soon find a cliffside that leads to where the signal is emanating. When Alph, Brittany, and Charlie get to where the signal is, they find out that it was a flip phone emitting the signal all along, which they resolve to take back to the Drake so that they can find Olimar's signal easier. However, as they are about to dig it up, it sinks into the sand and the Sandbelching Meerslug bursts out of the ground. After fighting and defeating the third monstrous beast, the Koppaites are able to get what they name the Folded Data Glutton as well as a small watermelon they name the Crimson Banquet. After the Folded Data Glutton transmitter has been integrated with the Drake, it picks up a signal coming from the north, and the three explorers resolve to explore this area the next day.
Overview
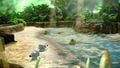
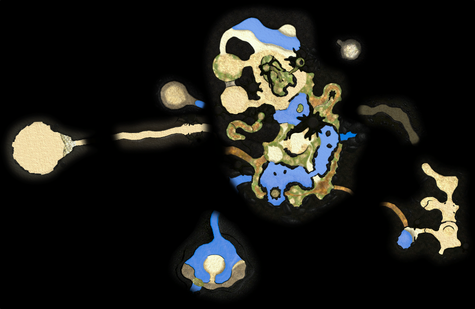
The Tropical Wilds is a fairly complex area. There are large bits of land, but also a few sub-areas, mostly strung together with corridors, tunnels, and caves. Only a few caves actually make up the destination sub-areas, which is the opposite of the Garden of Hope and the Distant Tundra. The main motif of the area is that of a tropical jungle, with a lot of greenery, sand, and water. Water is in fact one of the most abundant aspects of the area, making this area home to quite a few aquatic and beach-related enemies. There are several bridges needing to be built, and alternate paths needing to be taken in order to cross shores, due to all the water. While most of the sub-areas lead to dead ends, the main section of the area is quite open-ended, even if parts of it are closed off by water or walls. Some of these walls actually belong to platforms on higher terrain that can also be explored – this mostly consists of tree trunk tops.
Key sections
The main section of the area is an open-ended piece of land in a rough 8-shape, with the two halves split by a river. The landing site is at the southern half of this section. On the following list, all sections of text except for the first two refer to a different sub-area from the main one, meaning that the game performs a transition when going to and from those parts.
- Normal landing site
This is where the S.S. Drake lands during a normal exploration day. This half of the main area is mostly covered in water all around it, but there are some strips of land surrounding the perimeter of the area. These strips are also cut off by water, at parts. The actual landing site itself is in a circular base half enclosed by walls. From this part of the whole area, some tunnels and walls provide access to a multitude of different sub-areas. One of the most noteworthy locations here is the waterfall to the east.
- Northern half
The first half of the main part of the area is separated from the second by a river, although the two are connected by a swirling pathway on the east, next to the waterfall. A tunnel to the west of the landing site opens a path to a high ledge from which one can drop down to the northern half of the main area, however.
This whole section has a large protrusion in the middle, so the ground-level paths surround it. This protrusion can be accesssed with nearby seesaw blocks, and from it, there is access to a small cave with a Medusal Slurker. To the north is a beach, and to the west, two circular arenas where the Shaggy Long Legs is fought, separated by a short yet insurmountable wall.
- Alph's crash site
This is where the first day takes place, on the far southeast of the area. To the south is a small pond, where Alph first awakes. From here on out, the outdoors terrain is all sandy. The first part of this section is at a lower level than the second, and a bridge is needed to go forward. Beyond some more terrain is a small linear cave that leads into the main area. Near the pond, there's a ledge that leads to the main area right away, but to reach it, one leader must toss another; this corridor has the Metal Suit Z on it.
- Sandbelching Meerslug path
A simple linear corridor of sand that builds up to the arrival at the arena with the Sandbelching Meerslug.
- Sandbelching Meerslug arena
This arena is on the southwest, and is accessible through a path near the landing site, but to reach it, it is necessary to climb up to the walls that surround the southern half of the main area. The arena lies beyond a long corridor, and is actually a large circular sandpit.
- Calcified Crushblat arena
On the lake of the southern half, there is an underwater pathway leading to this remote island, on the western wall. An outer half-ring of land circles the island and contains Candypop Buds needed for the fight. On the island itself resides the Calcified Crushblat.
- Medusal Slurker's cave
A very small cave with a Medusal Slurker on the northeastern part of the map can be accessed from the structure taking up the center of the northern half of the main area.
- Flighty Joustmite cave
On the western wall of the river that splits the main area in two is an underwater passageway to a small cave with two Flighty Joustmites.
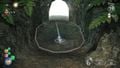
- First cave
The first cave entered in this area is a curved path that leads from Alph's crash site to the main landing site.
Objects
|
This article is a stub. You can help Pikipedia by expanding it. |
Fruits
 Pocked Airhead × 1
 Dapper Blob × 1
 Delectable Bouquet × 1
 Crimson Banquet × 1
 Velvety Dreamdrop × 2
 Lesser Mock Bottom × 1
 Dawn Pustules × 1
 Face Wrinkler × 1
 Scaly Custard × 1
 Stellar Extrusion × 1
 Cupid's Grenade × 1
 Juicy Gaggle × 1
 Mock Bottom × 1
 Zest Bomb × 1
 Disguised Delicacy × 1
 Slapstick Crescent × 1
 Searing Acidshock × 1
Enemies
- [icon] Dwarf Red Bulborb × 3
 Red Bulborb × 1
 Orange Bulborb × 1
 Whiptongue Bulborb × 1
 Fiery Blowhog × 2
 Wogpole × 2
 Yellow Wollywog × 2
 Calcified Crushblat × 1
 Puckering Blinnow × 7
 Pyroclasmic Slooch × 4
 Medusal Slurker × 1
 Female Sheargrub × 4
 Male Sheargrub × 5
 Swarming Sheargrub × 8
 Swooping Snitchbug × 1
 Skutterchuck × 2
 Flighty Joustmite × 2
 Armored Cannon Larva × 1
 Skitter Leaf × 2
 Yellow Spectralids × 2
 Hermit Crawmad × 1
 Peckish Aristocrab × 1
 Shaggy Long Legs – Mini-boss × 1
 Sandbelching Meerslug – Boss × 1
Obstacles
 Dirt wall × 3
 Reinforced wall × 3
 Electric gate × 1
 Dirt mound × 6
 Paper bag × 1
 Bridge (Brown)
  × 15 (piles of 3 and 12)
- Bridge (Brown) × 18 (piles of 8 and 10)
- Bridge (Red) × 56 (piles of 10 and 46, 34 buried)
Plants and fungi
 Pellet Posy
 Burgeoning Spiderwort × 1
 Flukeweed × 6
 Spotcap
 Kingcap × 2
 Lapis Lazuli Candypop Bud × 4
- [icon] Gray Candypop Bud × 4
Other
 Metal Suit Z × 1
- Red Onion × 1
Data files
- Main article: Data file.
- Pikmin Behavior / Pikminology
- Pikminology #1
- Pikminology #7; Pikmin 3 only
- Pikminology #10
- Pikminology #15
- Controls
- Plucking #2
- Dividing Labor #2 / Dividing Labour #2
- Escaping; Pikmin 3 only
- Indigenous Life
- Sandbelching Meerslug #1
- Sandbelching Meerslug #2
- Bulborb #1; Pikmin 3 Deluxe only
- Peckish Aristocrab
- Shaggy Long Legs
- Area Hints
- With one more person...
- The cliff-top mystery / The clifftop mystery
- Olimar's Log
- Journal Entry #4 / Olimar's diary #4
- Secret File
- Olimar's Log Vol. 2
Hidden murals
- Main article: Hidden mural.
|
Warning: the following text contains major spoilers about the hidden murals in the area.
|
|---|
|


Quotes
|
This article is a stub. You can help Pikipedia by expanding it. |
Changes in Pikmin 3 Deluxe
Like most areas, Tropical Wilds has received some notable changes in Pikmin 3 Deluxe:
- The pathway surrounding the landing site plateau is mostly grassy with some sandy paths, instead of completely sandy.
- The vines around the S.S. Drake are higher.
- The path southeast of the landing site across the lake is made of dirt instead of sand, and is thinner on the plateau.
- The cave connected to the landing site has brighter lighting, but appears darker on the radar.
- The ground color in Alph's crash site is whiter.
- The texture of the base of the pond Alph first lands in is simpler.
- There are added screws in the ground in several places: 2 on the stump in the lake, 1 on each side of the light brown bridge near the landing site (that stop working once the bridge is completed), and 1 on the ledge near the light brown bridge.
- Some data files have been added, removed, or moved elsewhere.
Guide
|
The following article or section contains guides. |
Basic guide
The first time this area is visited is on the day 1 tutorial. To complete the tutorial, first rescue the Onion, then use the 3 Pikmin you start with (plus the 1 Pikmin hidden at the back of the pot nearby) to carry the bridge fragments next to the Onion. After the bridge is built, collect pellets and defeat the Female Sheargrubs to grow 20 or 21 Pikmin, and use them to push the cardboard box. Go through the cave, and then day 1 will end.
Upon rescuing Charlie in the Distant Tundra, a signal will appear on the map screen to head to the Tropical Wilds. In this area, take your Pikmin out of the Onion, and walk up to the unfinished beige bridge. Throw a leader and some Pikmin across the gap. Use those Pikmin to carry the 8 fragments in front of you and destroy the dirt wall to the right. Once the dirt wall is destroyed, go past it and carry the 8 bridge fragments up there. Once the bridge is completed, get all 3 leaders to meet at the site of the second pile of fragments. Next to this plateau, there is a small circular island above the water, and past this island is a path forward. Throw 2 leaders and all your Pikmin onto this island. Switch to one of those leaders and throw the third leader and all the Pikmin across the gap to the other side. With the third leader, walk to the end of the path and turn left to pass through a loading zone.
Follow the sandy path to a large circular arena. There will be a buried flip phone in the middle. Throw some Pikmin at it to start the boss battle with the Sandbelching Meerslug. To defeat it, follow the strategies here. Defeating it will make it drop the Folded Data Glutton and the Crimson Banquet. To carry these items back, a few obstacles must be dealt with. Walk back along the path that led to the boss, and once you're back in the main area, push down a paper bag. Walk down the new ramp and defeat the Whiptongue Bulborb and destroy the dirt wall. It is also possible to get bomb rocks from the nearby dirt mound to destroy the reinforced wall, which can save time when carrying. Upon collecting the Folded Data Glutton, the story segment of the Tropical Wilds is complete.
Speed completion
|
This article is a stub. You can help Pikipedia by expanding it. |
In other game modes
These Mission Mode and Side Story stages take place within the Tropical Wilds:
- Mission Mode
- Side Stories
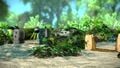
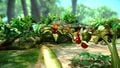
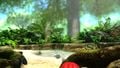
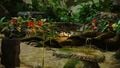
Gallery
|
This article or section is in need of more images. Particularly: |
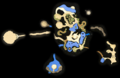
The full map of the Tropical Wilds.
Map from the Prima guide.
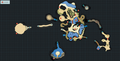
An aerial view of the northern section in Pikmin 3 Deluxe.
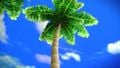
A palm tree found in the area.
Overview of the landing site.
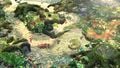
Overview of an area with a Burgeoning Spiderwort.
Some more areas.
The Tropical Wilds while its raining.
What Alph says to landing in the Tropical Wilds on day 2.
A view of the area where the Slapstick Crescent, Zest Bomb, and Face Wrinkler are located.
Entrance to the cave with Flighty Joustmites.

Spatial view of Tropical Wilds.


- See more: Tropical Wilds images category.
Trivia
- This location's continental shape is based on Antarctica.
- This area's name, like most Pikmin 3 areas, seems to be imitating the name of another area in the series – namely, the Wistful Wild.
- If the player tries to enter Tropical Wilds on day 2, they will be denied access and Alph will say "This is where I crash-landed. But exploration will have to wait for later. I need to prioritize finding Brittany first." If it is later than day 2 and the player has still not rescued Brittany, Alph will say "It doesn't seem like Brittany is in this area..."
Names in other languages
| Language | Name | Meaning |
|---|---|---|
| 始まりの森? Hajimari no Mori |
Forest of Beginnings | |
(traditional) |
起始森林 | Forest of Beginning |
(simplified) |
起始之森 | Forest of Beginning |
| Bosquet des sources | Forest of springs | |
| Wald des Anfangs | Forest of Beginning | |
| Selva sorgente | Spring forest | |
| 재회의 호화원 등 jaehoeui hohwawon deung |
||
| Bosque de la Vida | Forest of life |
See also
![[icon]](/index.php?title=Special:Upload&wpDestFile=Dwarf_Red_Bulborb_P3_icon.png)
![[icon]](/index.php?title=Special:Upload&wpDestFile=Gray_Candypop_Bud_icon.png)
| Pikmin 3 areas |
|---|
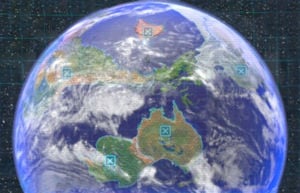 Click an area on the image Tropical Wilds • Garden of Hope • Distant Tundra • Twilight River • Formidable Oak |