Indigenous Life (Exploration Notes): Difference between revisions
Trig Jegman (talk | contribs) mNo edit summary |
mNo edit summary |
||
| Line 7: | Line 7: | ||
===Armored Mawdad #1=== | ===Armored Mawdad #1=== | ||
[[File:Mawdad1.jpeg|right]] | [[File:Mawdad1.jpeg|right]] | ||
*'''Text''': {{transcript|Its exoskeleton is made of crystal. Use Rock Pikmin to smash it. | *'''Text''': {{transcript|Its exoskeleton is made of crystal. Use Rock Pikmin to smash it.}} | ||
*'''Area''': [[Garden of Hope]] | *'''Area''': [[Garden of Hope]] | ||
*'''''Pikmin 3'' location''': In the [[Armored Mawdad]]'s arena, in a small alcove closed off by [[Spotcap]]s. The camera will change view if the player is getting close to it. | *'''''Pikmin 3'' location''': In the [[Armored Mawdad]]'s arena, in a small alcove closed off by [[Spotcap]]s. The camera will change view if the player is getting close to it. | ||
| Line 15: | Line 15: | ||
===Armored Mawdad #2=== | ===Armored Mawdad #2=== | ||
[[File:Mawdad2.jpeg|right]] | [[File:Mawdad2.jpeg|right]] | ||
*'''Text''': {{transcript|It's soft on the inside. | *'''Text''': {{transcript|It's soft on the inside.}} | ||
*'''Area''': [[Garden of Hope]] | *'''Area''': [[Garden of Hope]] | ||
*'''''Pikmin 3'' location''': In the Armored Mawdad's arena, hidden in a Spotcap on the outer rim of the arena, towards the northeast. | *'''''Pikmin 3'' location''': In the Armored Mawdad's arena, hidden in a Spotcap on the outer rim of the arena, towards the northeast. | ||
| Line 23: | Line 23: | ||
===Vehemoth Phosbat #1=== | ===Vehemoth Phosbat #1=== | ||
[[File:Phosbat1.jpeg|right]] | [[File:Phosbat1.jpeg|right]] | ||
*'''Text''': {{transcript|The Vehemoth Phosbat hates the light! | *'''Text''': {{transcript|The Vehemoth Phosbat hates the light!}} | ||
*'''Area''': [[Distant Tundra]] | *'''Area''': [[Distant Tundra]] | ||
*'''Location''': In the cave where the [[Vehemoth Phosbat]] is first encountered, on the ledge accessible by the [[Bloominous Stemple]]s. | *'''Location''': In the cave where the [[Vehemoth Phosbat]] is first encountered, on the ledge accessible by the [[Bloominous Stemple]]s. | ||
| Line 30: | Line 30: | ||
===Vehemoth Phosbat #2=== | ===Vehemoth Phosbat #2=== | ||
[[File:Phosbat2File.jpeg|right]] | [[File:Phosbat2File.jpeg|right]] | ||
*'''Text''': {{transcript|Take refuge in brightly lit areas! | *'''Text''': {{transcript|Take refuge in brightly lit areas!}} | ||
*'''Area''': [[Distant Tundra]] | *'''Area''': [[Distant Tundra]] | ||
*'''''Pikmin 3'' location''': In the corner of the Vehemoth Phosbat's arena, in the middle of three blue [[Glowcap]]s. | *'''''Pikmin 3'' location''': In the corner of the Vehemoth Phosbat's arena, in the middle of three blue [[Glowcap]]s. | ||
| Line 38: | Line 38: | ||
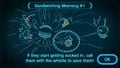
===Sandbelching Meerslug #1=== | ===Sandbelching Meerslug #1=== | ||
[[File:Meerslug1.jpeg|right]] | [[File:Meerslug1.jpeg|right]] | ||
*'''Text''': {{transcript|If they start getting sucked in, call them with the whistle to save them! | *'''Text''': {{transcript|If they start getting sucked in, call them with the whistle to save them!}} | ||
*'''Area''': [[Tropical Wilds]] | *'''Area''': [[Tropical Wilds]] | ||
*'''''Pikmin 3'' location''': In a [[dirt mound]] on a ledge in the [[Sandbelching Meerslug]]'s arena. The mound is located in the left side of the arena. | *'''''Pikmin 3'' location''': In a [[dirt mound]] on a ledge in the [[Sandbelching Meerslug]]'s arena. The mound is located in the left side of the arena. | ||
| Line 46: | Line 46: | ||
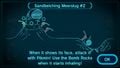
===Sandbelching Meerslug #2=== | ===Sandbelching Meerslug #2=== | ||
[[File:Meerslug2.jpeg|right]] | [[File:Meerslug2.jpeg|right]] | ||
*'''Text''': {{transcript|When it shows its face, attack it with Pikmin! Use the Bomb Rocks when it starts inhaling! | *'''Text''': {{transcript|When it shows its face, attack it with Pikmin! Use the Bomb Rocks when it starts inhaling!}} | ||
*'''Area''': [[Tropical Wilds]] | *'''Area''': [[Tropical Wilds]] | ||
*'''''Pikmin 3'' location''': In a dirt mound on a ledge in the Meerslug's arena. The mound is located on the right side of the arena. | *'''''Pikmin 3'' location''': In a dirt mound on a ledge in the Meerslug's arena. The mound is located on the right side of the arena. | ||
| Line 54: | Line 54: | ||
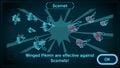
===Scornet=== | ===Scornet=== | ||
[[File:Maestro1.jpeg|right]] | [[File:Maestro1.jpeg|right]] | ||
*'''Text''': {{transcript|Winged Pikmin are effective against Scornets! | *'''Text''': {{transcript|Winged Pikmin are effective against Scornets!}} | ||
*'''Area''': [[Twilight River]] | *'''Area''': [[Twilight River]] | ||
*'''''Pikmin 3'' location''': Located behind a giant wood pillar in the second half of the area, which holds some [[fragments]]. This file is in the water. | *'''''Pikmin 3'' location''': Located behind a giant wood pillar in the second half of the area, which holds some [[fragments]]. This file is in the water. | ||
| Line 62: | Line 62: | ||
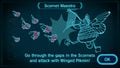
===Scornet Maestro=== | ===Scornet Maestro=== | ||
[[File:Maestro2.jpeg|right]] | [[File:Maestro2.jpeg|right]] | ||
*'''Text''': {{transcript|Go through the gaps in the Scornets, and attack with Winged Pikmin! | *'''Text''': {{transcript|Go through the gaps in the Scornets, and attack with Winged Pikmin!}} | ||
*'''Area''': [[Twilight River]] | *'''Area''': [[Twilight River]] | ||
*'''''Pikmin 3'' location''': In the [[Scornet Maestro]]'s arena, hidden in some Spotcaps on the outer rim of the area. | *'''''Pikmin 3'' location''': In the [[Scornet Maestro]]'s arena, hidden in some Spotcaps on the outer rim of the area. | ||
| Line 70: | Line 70: | ||
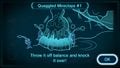
===Quaggled Mireclops #1=== | ===Quaggled Mireclops #1=== | ||
[[File:Mireclops1.jpeg|right]] | [[File:Mireclops1.jpeg|right]] | ||
*'''Text''': {{transcript|Throw it off balance and knock it over! | *'''Text''': {{transcript|Throw it off balance and knock it over!}} | ||
*'''Area''': [[Garden of Hope]] | *'''Area''': [[Garden of Hope]] | ||
*'''''Pikmin 3'' location''': In the [[Quaggled Mireclops]]' arena, located in one of the two Spotcaps on the left side of the arena. | *'''''Pikmin 3'' location''': In the [[Quaggled Mireclops]]' arena, located in one of the two Spotcaps on the left side of the arena. | ||
| Line 78: | Line 78: | ||
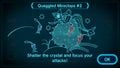
===Quaggled Mireclops #2=== | ===Quaggled Mireclops #2=== | ||
[[File:Mireclops2.jpeg|right]] | [[File:Mireclops2.jpeg|right]] | ||
*'''Text''': {{transcript|Shatter the crystal and focus your attacks! | *'''Text''': {{transcript|Shatter the crystal and focus your attacks!}} | ||
*'''Area''': [[Garden of Hope]] | *'''Area''': [[Garden of Hope]] | ||
*'''''Pikmin 3'' location''': In the Mireclop's arena, it is located in one of the two Spotcaps on the right side of the arena. | *'''''Pikmin 3'' location''': In the Mireclop's arena, it is located in one of the two Spotcaps on the right side of the arena. | ||
| Line 86: | Line 86: | ||
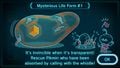
===Mysterious Life-Form #1=== | ===Mysterious Life-Form #1=== | ||
[[File:Wraith1.jpeg|right]] | [[File:Wraith1.jpeg|right]] | ||
*'''Text''': {{transcript|It's invincible when it's transparent! Rescue Pikmin who have been absorbed by calling with the whistle! | *'''Text''': {{transcript|It's invincible when it's transparent! Rescue Pikmin who have been absorbed by calling with the whistle!}} | ||
*'''Area''': [[Formidable Oak]] | *'''Area''': [[Formidable Oak]] | ||
*'''Location''': To the left of the area where the Bulborbs are found, on a small ledge. | *'''Location''': To the left of the area where the Bulborbs are found, on a small ledge. | ||
| Line 93: | Line 93: | ||
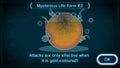
===Mysterious Life-Form #2=== | ===Mysterious Life-Form #2=== | ||
[[File:Wraith2.jpeg|right]] | [[File:Wraith2.jpeg|right]] | ||
*'''US text''': {{transcript|Attacks are only effective when it is gold colored! | *'''US text''': {{transcript|Attacks are only effective when it is gold colored!}} | ||
*'''Europe text''': {{transcript|Attacks are only effective when it is gold-coloured! | *'''Europe text''': {{transcript|Attacks are only effective when it is gold-coloured!}} | ||
*'''Area''': [[Formidable Oak]] | *'''Area''': [[Formidable Oak]] | ||
*'''''Pikmin 3'' location''': Past the area with the Bulborbs, closed off by a [[Crystal Wall]]. Once the wall is the destroyed, it can be found in the middle of two [[Candypop family|Candypop Buds]]. | *'''''Pikmin 3'' location''': Past the area with the Bulborbs, closed off by a [[Crystal Wall]]. Once the wall is the destroyed, it can be found in the middle of two [[Candypop family|Candypop Buds]]. | ||
| Line 101: | Line 101: | ||
===Plasm Wraith #1=== | ===Plasm Wraith #1=== | ||
[[File:Wraith3.jpeg|right]] | [[File:Wraith3.jpeg|right]] | ||
*'''US text''': {{transcript|Attack the fragments when it breaks apart! | *'''US text''': {{transcript|Attack the fragments when it breaks apart!}} | ||
*'''Europe text''': {{transcript|Attack the pieces when it breaks apart! | *'''Europe text''': {{transcript|Attack the pieces when it breaks apart!}} | ||
*'''Area''': [[Formidable Oak]] | *'''Area''': [[Formidable Oak]] | ||
*'''Location''': In a patch of clovers in the boss arena. This Data File only appears once the [[Plasm Wraith]] fight has begun. | *'''Location''': In a patch of clovers in the boss arena. This Data File only appears once the [[Plasm Wraith]] fight has begun. | ||
| Line 108: | Line 108: | ||
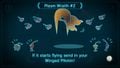
===Plasm Wraith #2=== | ===Plasm Wraith #2=== | ||
[[File:Wraith4.jpeg|right]] | [[File:Wraith4.jpeg|right]] | ||
*'''US text''': {{transcript|If it starts flying, send in your Winged Pikmin! | *'''US text''': {{transcript|If it starts flying, send in your Winged Pikmin!}} | ||
*'''Europe text''': {{transcript|If it starts flying send in your Winged Pikmin! | *'''Europe text''': {{transcript|If it starts flying send in your Winged Pikmin!}} | ||
*'''Area''': [[Formidable Oak]] | *'''Area''': [[Formidable Oak]] | ||
*'''Location''': Dropped when the Plasm Wraith has been sufficiently damaged. | *'''Location''': Dropped when the Plasm Wraith has been sufficiently damaged. | ||
| Line 116: | Line 116: | ||
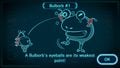
===Bulborb #1=== | ===Bulborb #1=== | ||
[[File:P3 Bulborb Indigenous Life Icon 1.jpg|right]] | [[File:P3 Bulborb Indigenous Life Icon 1.jpg|right]] | ||
*'''Text''': {{transcript|A Bulborb's eyeballs are its weakest point! | *'''Text''': {{transcript|A Bulborb's eyeballs are its weakest point!}} | ||
*'''''Pikmin 3'' area''': [[Garden of Hope]] | *'''''Pikmin 3'' area''': [[Garden of Hope]] | ||
*'''''Pikmin 3'' location''': Under the pile of Fragments in the small broken pot near some [[Skutterchuck]]s. | *'''''Pikmin 3'' location''': Under the pile of Fragments in the small broken pot near some [[Skutterchuck]]s. | ||
| Line 125: | Line 125: | ||
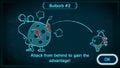
===Bulborb #2=== | ===Bulborb #2=== | ||
[[File:P3 Bulborb Indigenous Life Icon 2.jpg|right]] | [[File:P3 Bulborb Indigenous Life Icon 2.jpg|right]] | ||
*'''Text''': {{transcript|Attack from behind to gain the advantage! | *'''Text''': {{transcript|Attack from behind to gain the advantage!}} | ||
*'''Area''': [[Garden of Hope]] | *'''Area''': [[Garden of Hope]] | ||
*'''''Pikmin 3'' location''': In the water off the shore of the landing site, in a corner of some roots. | *'''''Pikmin 3'' location''': In the water off the shore of the landing site, in a corner of some roots. | ||
| Line 133: | Line 133: | ||
===Dwarf Bulborb=== | ===Dwarf Bulborb=== | ||
[[File:DwarfFile.jpeg|right]] | [[File:DwarfFile.jpeg|right]] | ||
*'''''Pikmin 3'' US text''': {{transcript|Aim for its back and for victory! | *'''''Pikmin 3'' US text''': {{transcript|Aim for its back and for victory!}} | ||
*'''''Pikmin 3'' Europe text''': {{transcript|Aim for its back to defeat it quickly! | *'''''Pikmin 3'' Europe text''': {{transcript|Aim for its back to defeat it quickly!}} | ||
*'''''Pikmin 3 Deluxe text''': {{transcript|Aim for its back and for victory! | *'''''Pikmin 3 Deluxe text''': {{transcript|Aim for its back and for victory!}} | ||
*'''''Pikmin 3'' area''': [[Twilight River]] | *'''''Pikmin 3'' area''': [[Twilight River]] | ||
*'''''Pikmin 3'' location''': Hidden in a Spotcap in the area where the [[Puffy Blowhog]] is found. | *'''''Pikmin 3'' location''': Hidden in a Spotcap in the area where the [[Puffy Blowhog]] is found. | ||
| Line 144: | Line 144: | ||
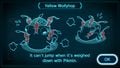
[[File:P3 Indigenous Life Yellow Wollywog Icon.jpg|right]] | [[File:P3 Indigenous Life Yellow Wollywog Icon.jpg|right]] | ||
"'''Yellow Wollyhop'''" in the European version. | "'''Yellow Wollyhop'''" in the European version. | ||
*'''Text''': {{transcript|It can't jump when it's weighed down with Pikmin. | *'''Text''': {{transcript|It can't jump when it's weighed down with Pikmin.}} | ||
*'''Area''': [[Garden of Hope]] | *'''Area''': [[Garden of Hope]] | ||
*'''''Pikmin 3'' location''': In the shallow water near where the [[Toady Bloyster]] is found, right next to the white and blue Fragments. | *'''''Pikmin 3'' location''': In the shallow water near where the [[Toady Bloyster]] is found, right next to the white and blue Fragments. | ||
| Line 151: | Line 151: | ||
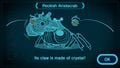
===Peckish Aristocrab=== | ===Peckish Aristocrab=== | ||
[[File:P3 Aristocrab Data File.jpg|right]] | [[File:P3 Aristocrab Data File.jpg|right]] | ||
*'''Text''': {{transcript|Its claw is made of crystal! | *'''Text''': {{transcript|Its claw is made of crystal!}} | ||
*'''Area''': [[Tropical Wilds]] | *'''Area''': [[Tropical Wilds]] | ||
*'''''Pikmin 3'' location''': On a small island with a [[Cupid's Grenade]], just near the landing site. A leader must be thrown to it, as it is elevated. | *'''''Pikmin 3'' location''': On a small island with a [[Cupid's Grenade]], just near the landing site. A leader must be thrown to it, as it is elevated. | ||
| Line 159: | Line 159: | ||
===Joustmite=== | ===Joustmite=== | ||
[[File:JoustmiteFile.jpeg|right]] | [[File:JoustmiteFile.jpeg|right]] | ||
*'''Text''': {{transcript|It has a weak point at the back of its shell! | *'''Text''': {{transcript|It has a weak point at the back of its shell!}} | ||
*'''Area''': [[Distant Tundra]] | *'''Area''': [[Distant Tundra]] | ||
*'''Location''': At the bottom of the pot holding some bridge shards, guarded by two [[Joustmite]]s. | *'''Location''': At the bottom of the pot holding some bridge shards, guarded by two [[Joustmite]]s. | ||
| Line 166: | Line 166: | ||
===Desiccated Skitter Leaf=== | ===Desiccated Skitter Leaf=== | ||
[[File:SkitterFile.jpeg|right]] | [[File:SkitterFile.jpeg|right]] | ||
*'''Text''': {{transcript|If it senses someone approaching, it will disguise itself as a leaf. | *'''Text''': {{transcript|If it senses someone approaching, it will disguise itself as a leaf.}} | ||
*'''''Pikmin 3'' area''': [[Twilight River]] | *'''''Pikmin 3'' area''': [[Twilight River]] | ||
*'''''Pikmin 3'' location''': On a ledge guarded by two [[Yellow Wollywog]]s. | *'''''Pikmin 3'' location''': On a ledge guarded by two [[Yellow Wollywog]]s. | ||
| Line 175: | Line 175: | ||
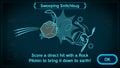
===Swooping Snitchbug=== | ===Swooping Snitchbug=== | ||
[[File:SnitchbugFile.jpeg|right]] | [[File:SnitchbugFile.jpeg|right]] | ||
*'''Text''': {{transcript|Score a direct hit with a Rock Pikmin to bring it down to earth! | *'''Text''': {{transcript|Score a direct hit with a Rock Pikmin to bring it down to earth!}} | ||
*'''Area''': [[Distant Tundra]] | *'''Area''': [[Distant Tundra]] | ||
*'''Location''': On the ledge where some [[Dawn Pustules]] and two [[Swooping Snitchbug]]s are found. A leader must be [[throw]]n up to the ledge to access this. | *'''Location''': On the ledge where some [[Dawn Pustules]] and two [[Swooping Snitchbug]]s are found. A leader must be [[throw]]n up to the ledge to access this. | ||
| Line 182: | Line 182: | ||
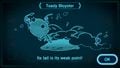
===Toady Bloyster=== | ===Toady Bloyster=== | ||
[[File:BloysterFile.jpeg|right]] | [[File:BloysterFile.jpeg|right]] | ||
*'''Text''': {{transcript|Its tail is its weak point! | *'''Text''': {{transcript|Its tail is its weak point!}} | ||
*'''Area''': [[Twilight River]] | *'''Area''': [[Twilight River]] | ||
*'''''Pikmin 3'' location''': Under the bridge shards past the group of [[Scornet]]s. | *'''''Pikmin 3'' location''': Under the bridge shards past the group of [[Scornet]]s. | ||
| Line 190: | Line 190: | ||
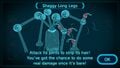
===Shaggy Long Legs=== | ===Shaggy Long Legs=== | ||
[[File:ShaggyFile.jpeg|right]] | [[File:ShaggyFile.jpeg|right]] | ||
*'''Text''': {{transcript|Attack its joints to strip its hair! You've got the chance to do some real damage once it's bare! | *'''Text''': {{transcript|Attack its joints to strip its hair! You've got the chance to do some real damage once it's bare!}} | ||
*'''Area''': [[Tropical Wilds]] | *'''Area''': [[Tropical Wilds]] | ||
*'''Location''': Past the [[electric gate]], laying right out in the open. The [[Shaggy Long Legs]] will spawn if it has not already. | *'''Location''': Past the [[electric gate]], laying right out in the open. The [[Shaggy Long Legs]] will spawn if it has not already. | ||
| Line 197: | Line 197: | ||
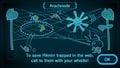
===Arachnode=== | ===Arachnode=== | ||
[[File:ArachnodeIcon.jpeg|right]] | [[File:ArachnodeIcon.jpeg|right]] | ||
*'''''Pikmin 3'' US text''': {{transcript|Call Pikmin trapped in the web with the whistle to save them! | *'''''Pikmin 3'' US text''': {{transcript|Call Pikmin trapped in the web with the whistle to save them!}} | ||
*'''''Pikmin 3'' Europe text''': {{transcript|To save Pikmin trapped in the web, call to them with your whistle! | *'''''Pikmin 3'' Europe text''': {{transcript|To save Pikmin trapped in the web, call to them with your whistle!}} | ||
*'''''Pikmin 3 Deluxe'' text''': {{transcript|Call Pikmin trapped in the web with the whistle to save them! | *'''''Pikmin 3 Deluxe'' text''': {{transcript|Call Pikmin trapped in the web with the whistle to save them!}} | ||
*'''Area''': [[Twilight River]] | *'''Area''': [[Twilight River]] | ||
*'''''Pikmin 3'' location''': On the small strip of land near where the [[Winged Pikmin]] are found. It is behind a pink 1 pellet and pink 5 pellet. | *'''''Pikmin 3'' location''': On the small strip of land near where the [[Winged Pikmin]] are found. It is behind a pink 1 pellet and pink 5 pellet. | ||
| Line 207: | Line 207: | ||
[[File:P3 Bug-Eyed Crawmad Indigenous Life Icon 1.jpg|right]] | [[File:P3 Bug-Eyed Crawmad Indigenous Life Icon 1.jpg|right]] | ||
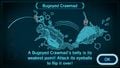
"'''Bugeyed Crawmad'''" in the European version. | "'''Bugeyed Crawmad'''" in the European version. | ||
*'''US text''': {{transcript|A Bug-Eyed Crawmad's belly is its weakest point! Attack its eyeballs to flip it over! | *'''US text''': {{transcript|A Bug-Eyed Crawmad's belly is its weakest point! Attack its eyeballs to flip it over!}} | ||
*'''Europe text''': {{transcript|A Bugeyed Crawmad's belly is its weakest point! Attack its eyeballs to flip it over! | *'''Europe text''': {{transcript|A Bugeyed Crawmad's belly is its weakest point! Attack its eyeballs to flip it over!}} | ||
*'''Area''': [[Garden of Hope]] | *'''Area''': [[Garden of Hope]] | ||
*'''''Pikmin 3'' location''': In one of the [[dirt mound]]s inside the arena in the cave. One has pellets, and the other has the data file. | *'''''Pikmin 3'' location''': In one of the [[dirt mound]]s inside the arena in the cave. One has pellets, and the other has the data file. | ||
| Line 215: | Line 215: | ||
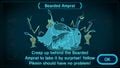
===Bearded Amprat=== | ===Bearded Amprat=== | ||
[[File:AmpratFile.jpeg|right]] | [[File:AmpratFile.jpeg|right]] | ||
*'''Text''': {{transcript|Creep up behind the Bearded Amprat to take it by surprise! Yellow Pikmin should have no problem! | *'''Text''': {{transcript|Creep up behind the Bearded Amprat to take it by surprise! Yellow Pikmin should have no problem!}} | ||
*'''Area''': [[Distant Tundra]] | *'''Area''': [[Distant Tundra]] | ||
*'''Location''': In an alcove leading up to a [[Zest Bomb]] encased in crystal, guarded by the [[Arctic Cannon Larva]]. | *'''Location''': In an alcove leading up to a [[Zest Bomb]] encased in crystal, guarded by the [[Arctic Cannon Larva]]. | ||
| Line 222: | Line 222: | ||
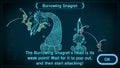
===Burrowing Snagret=== | ===Burrowing Snagret=== | ||
[[File:SnagretFile.jpeg|right]] | [[File:SnagretFile.jpeg|right]] | ||
*'''Text''': {{transcript|The Burrowing Snagret's head is its weak point! Wait for it to pop out, and then start attacking! | *'''Text''': {{transcript|The Burrowing Snagret's head is its weak point! Wait for it to pop out, and then start attacking!}} | ||
*'''Area''': [[Twilight River]] | *'''Area''': [[Twilight River]] | ||
*'''''Pikmin 3'' location''': Near where the [[Dusk Pustules]] are found, right next to a [[Water Dumple]]. | *'''''Pikmin 3'' location''': Near where the [[Dusk Pustules]] are found, right next to a [[Water Dumple]]. | ||
| Line 230: | Line 230: | ||
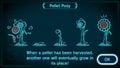
===Pellet Posy=== | ===Pellet Posy=== | ||
[[File:PelletFIle.jpeg|right]] | [[File:PelletFIle.jpeg|right]] | ||
*'''US text''': {{transcript|After a pellet has been harvested, another one will eventually grow in its place. | *'''US text''': {{transcript|After a pellet has been harvested, another one will eventually grow in its place.}} | ||
*'''Europe text''': {{transcript|When a pellet has been harvested, another one will eventually grow in its place! | *'''Europe text''': {{transcript|When a pellet has been harvested, another one will eventually grow in its place!}} | ||
*'''Area''': [[Distant Tundra]] | *'''Area''': [[Distant Tundra]] | ||
*'''Location''': In the landing site, it pops up when the pellet on the rightmost side of the small cliff is popped out of the [[Pellet Posy]]. | *'''Location''': In the landing site, it pops up when the pellet on the rightmost side of the small cliff is popped out of the [[Pellet Posy]]. | ||
| Line 238: | Line 238: | ||
[[File:CloverFile.jpeg|right]] | [[File:CloverFile.jpeg|right]] | ||
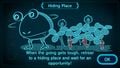
"'''Hiding Place'''" in the European version of ''Pikmin 3''. | "'''Hiding Place'''" in the European version of ''Pikmin 3''. | ||
*'''Text''': {{transcript|When the going gets tough, retreat to a hiding place and wait for an opportunity! | *'''Text''': {{transcript|When the going gets tough, retreat to a hiding place and wait for an opportunity!}} | ||
*'''Area''': [[Garden of Hope]] | *'''Area''': [[Garden of Hope]] | ||
*'''Location''': Past the small bridge near base, right in a patch of clovers near the Bulborb. | *'''Location''': Past the small bridge near base, right in a patch of clovers near the Bulborb. | ||
Revision as of 20:22, March 13, 2021
Indigenous Life is a category from the Exploration Notes menu in Pikmin 3. It holds 30 Data Files that share tips and information about the life forms found in areas of PNF-404. Most of these Data Files can be found around the area terrain, just about anywhere, hidden or not.
In this article, unless otherwise specified, the text provided is the same in both the US and European versions. Pikmin 3 Deluxe changes some of the Data Files.
Data files
Armored Mawdad #1

- Text: “Its exoskeleton is made of crystal. Use Rock Pikmin to smash it.”
- Area: Garden of Hope
- Pikmin 3 location: In the Armored Mawdad's arena, in a small alcove closed off by Spotcaps. The camera will change view if the player is getting close to it.
- Pikmin 3 Deluxe location: In the Armored Mawdad's arena to the southwest of the center, out in the open.
Armored Mawdad #2

- Text: “It's soft on the inside.”
- Area: Garden of Hope
- Pikmin 3 location: In the Armored Mawdad's arena, hidden in a Spotcap on the outer rim of the arena, towards the northeast.
- Pikmin 3 Deluxe location: In the Armored Mawdad's arena to the northeast of the center, out in the open.
Vehemoth Phosbat #1

- Text: “The Vehemoth Phosbat hates the light!”
- Area: Distant Tundra
- Location: In the cave where the Vehemoth Phosbat is first encountered, on the ledge accessible by the Bloominous Stemples.
Vehemoth Phosbat #2

- Text: “Take refuge in brightly lit areas!”
- Area: Distant Tundra
- Pikmin 3 location: In the corner of the Vehemoth Phosbat's arena, in the middle of three blue Glowcaps.
- Pikmin 3 Deluxe location: Under a pink Glowcap next to the first electrode, in the Vehemoth Phosbat's main arena.
Sandbelching Meerslug #1

- Text: “If they start getting sucked in, call them with the whistle to save them!”
- Area: Tropical Wilds
- Pikmin 3 location: In a dirt mound on a ledge in the Sandbelching Meerslug's arena. The mound is located in the left side of the arena.
- Pikmin 3 Deluxe location: In the Meerslug's arena, out in the open, towards the southeastern corner.
Sandbelching Meerslug #2

- Text: “When it shows its face, attack it with Pikmin! Use the Bomb Rocks when it starts inhaling!”
- Area: Tropical Wilds
- Pikmin 3 location: In a dirt mound on a ledge in the Meerslug's arena. The mound is located on the right side of the arena.
- Pikmin 3 Deluxe location: In the Meerslug's arena, out in the open, towards the northwestern corner.
Scornet

- Text: “Winged Pikmin are effective against Scornets!”
- Area: Twilight River
- Pikmin 3 location: Located behind a giant wood pillar in the second half of the area, which holds some fragments. This file is in the water.
- Pikmin 3 Deluxe location: Next to the swarm of Scornets on the southwesternmost nook of the area.
Scornet Maestro

- Text: “Go through the gaps in the Scornets, and attack with Winged Pikmin!”
- Area: Twilight River
- Pikmin 3 location: In the Scornet Maestro's arena, hidden in some Spotcaps on the outer rim of the area.
- Pikmin 3 Deluxe location: In the Scornet Maestro's arena, out in the open, near the center.
Quaggled Mireclops #1

- Text: “Throw it off balance and knock it over!”
- Area: Garden of Hope
- Pikmin 3 location: In the Quaggled Mireclops' arena, located in one of the two Spotcaps on the left side of the arena.
- Pikmin 3 Deluxe location: In the Quaggled Mireclops' arena, out in the open, to the southwest of the center.
Quaggled Mireclops #2

- Text: “Shatter the crystal and focus your attacks!”
- Area: Garden of Hope
- Pikmin 3 location: In the Mireclop's arena, it is located in one of the two Spotcaps on the right side of the arena.
- Pikmin 3 Deluxe location: In the Mireclop's arena, out in the open, to the northeast of the center.
Mysterious Life-Form #1

- Text: “It's invincible when it's transparent! Rescue Pikmin who have been absorbed by calling with the whistle!”
- Area: Formidable Oak
- Location: To the left of the area where the Bulborbs are found, on a small ledge.
Mysterious Life-Form #2

- US text: “Attacks are only effective when it is gold colored!”
- Europe text: “Attacks are only effective when it is gold-coloured!”
- Area: Formidable Oak
- Pikmin 3 location: Past the area with the Bulborbs, closed off by a Crystal Wall. Once the wall is the destroyed, it can be found in the middle of two Candypop Buds.
- Pikmin 3 Deluxe location: Past the room with the Yellow Spectralids.
Plasm Wraith #1

- US text: “Attack the fragments when it breaks apart!”
- Europe text: “Attack the pieces when it breaks apart!”
- Area: Formidable Oak
- Location: In a patch of clovers in the boss arena. This Data File only appears once the Plasm Wraith fight has begun.
Plasm Wraith #2

- US text: “If it starts flying, send in your Winged Pikmin!”
- Europe text: “If it starts flying send in your Winged Pikmin!”
- Area: Formidable Oak
- Location: Dropped when the Plasm Wraith has been sufficiently damaged.
Bulborb #1
- Text: “A Bulborb's eyeballs are its weakest point!”
- Pikmin 3 area: Garden of Hope
- Pikmin 3 location: Under the pile of Fragments in the small broken pot near some Skutterchucks.
- Pikmin 3 Deluxe area: Tropical Wilds
- Pikmin 3 Deluxe location: In the room where Alph's throwing tutorial takes place. Only appears after day 1.
Bulborb #2
- Text: “Attack from behind to gain the advantage!”
- Area: Garden of Hope
- Pikmin 3 location: In the water off the shore of the landing site, in a corner of some roots.
- Pikmin 3 Deluxe location: A bit to the right of the entrance of the first Bulborb's arena.
Dwarf Bulborb
- Pikmin 3 US text: “Aim for its back and for victory!”
- Pikmin 3 Europe text: “Aim for its back to defeat it quickly!”
- Pikmin 3 Deluxe text: “Aim for its back and for victory!”
- Pikmin 3 area: Twilight River
- Pikmin 3 location: Hidden in a Spotcap in the area where the Puffy Blowhog is found.
- Pikmin 3 Deluxe area: Garden of Hope
- Pikmin 3 Deluxe location: Halfway between the Onion and the nearby Dwarf Bulborb.
Yellow Wollywog
"Yellow Wollyhop" in the European version.
- Text: “It can't jump when it's weighed down with Pikmin.”
- Area: Garden of Hope
- Pikmin 3 location: In the shallow water near where the Toady Bloyster is found, right next to the white and blue Fragments.
- Pikmin 3 Deluxe location: Near the Yellow Wollywogs near the landing site.
Peckish Aristocrab

- Text: “Its claw is made of crystal!”
- Area: Tropical Wilds
- Pikmin 3 location: On a small island with a Cupid's Grenade, just near the landing site. A leader must be thrown to it, as it is elevated.
- Pikmin 3 Deluxe location: Near the Peckish Aristocrab, next to the exit of the small northeast cave.
Joustmite
- Text: “It has a weak point at the back of its shell!”
- Area: Distant Tundra
- Location: At the bottom of the pot holding some bridge shards, guarded by two Joustmites.
Desiccated Skitter Leaf

- Text: “If it senses someone approaching, it will disguise itself as a leaf.”
- Pikmin 3 area: Twilight River
- Pikmin 3 location: On a ledge guarded by two Yellow Wollywogs.
- Pikmin 3 Deluxe area: Distant Tundra
- Pikmin 3 Deluxe location: Before the crystals found after the cave with a bamboo gate, on the westernmost part of the area.
Swooping Snitchbug

- Text: “Score a direct hit with a Rock Pikmin to bring it down to earth!”
- Area: Distant Tundra
- Location: On the ledge where some Dawn Pustules and two Swooping Snitchbugs are found. A leader must be thrown up to the ledge to access this.
Toady Bloyster
- Text: “Its tail is its weak point!”
- Area: Twilight River
- Pikmin 3 location: Under the bridge shards past the group of Scornets.
- Pikmin 3 Deluxe location: Underwater next to the Bouncy Mushroom in the second main overworld section of the area.
Shaggy Long Legs

- Text: “Attack its joints to strip its hair! You've got the chance to do some real damage once it's bare!”
- Area: Tropical Wilds
- Location: Past the electric gate, laying right out in the open. The Shaggy Long Legs will spawn if it has not already.
Arachnode
- Pikmin 3 US text: “Call Pikmin trapped in the web with the whistle to save them!”
- Pikmin 3 Europe text: “To save Pikmin trapped in the web, call to them with your whistle!”
- Pikmin 3 Deluxe text: “Call Pikmin trapped in the web with the whistle to save them!”
- Area: Twilight River
- Pikmin 3 location: On the small strip of land near where the Winged Pikmin are found. It is behind a pink 1 pellet and pink 5 pellet.
- Pikmin 3 Deluxe location: Right next to the Arachnode holding the Winged Onion.
Bug-Eyed Crawmad
"Bugeyed Crawmad" in the European version.
- US text: “A Bug-Eyed Crawmad's belly is its weakest point! Attack its eyeballs to flip it over!”
- Europe text: “A Bugeyed Crawmad's belly is its weakest point! Attack its eyeballs to flip it over!”
- Area: Garden of Hope
- Pikmin 3 location: In one of the dirt mounds inside the arena in the cave. One has pellets, and the other has the data file.
- Pikmin 3 Deluxe location: Near the northwesternmost of the Bug-Eyed Crawmad's nests inside the arena in the cave.
Bearded Amprat

- Text: “Creep up behind the Bearded Amprat to take it by surprise! Yellow Pikmin should have no problem!”
- Area: Distant Tundra
- Location: In an alcove leading up to a Zest Bomb encased in crystal, guarded by the Arctic Cannon Larva.
Burrowing Snagret

- Text: “The Burrowing Snagret's head is its weak point! Wait for it to pop out, and then start attacking!”
- Area: Twilight River
- Pikmin 3 location: Near where the Dusk Pustules are found, right next to a Water Dumple.
- Pikmin 3 Deluxe location: Near the Burrowing Snagret.
Pellet Posy

- US text: “After a pellet has been harvested, another one will eventually grow in its place.”
- Europe text: “When a pellet has been harvested, another one will eventually grow in its place!”
- Area: Distant Tundra
- Location: In the landing site, it pops up when the pellet on the rightmost side of the small cliff is popped out of the Pellet Posy.
Hiding
"Hiding Place" in the European version of Pikmin 3.
- Text: “When the going gets tough, retreat to a hiding place and wait for an opportunity!”
- Area: Garden of Hope
- Location: Past the small bridge near base, right in a patch of clovers near the Bulborb.
Gallery
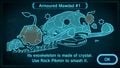
The Armored Mawdad's armor.
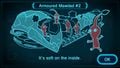
The Armored Mawdad's weakness.
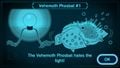
The Vehemoth Phosbat's weakness.
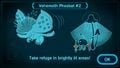
Hiding from the Vehemoth Phosbat.
Escaping the Sandbelching Meerslug.
Attacking the Sandbelching Meerslug.
Fighting Scornets.
Attacking the Scornet Maestro.
Downing the Quaggled Mireclops.
Attacking the Quaggled Mireclops.
Evading the Mysterious Life Form.
Attacking the Mysterious Life Form.

Defeating the Plasm Wraith.
Countering the Plasm Wraith's flying attack.
Stunning Bulborbs.
The weakness of Bulborbs.

Effectively taking out Dwarf Bulborbs.
Weighing down Yellow Wollywogs.
Weakening Peckish Aristocrabs.
- JoustmiteDataFile.jpg
The Joustmite's weakness.

The Desiccated Skitter Leaf's strength.
Downing a Swooping Snitchbug.
The Toady Bloyster's weakness.
Attacking a Shaggy Long Legs.
Escaping an Arachnode.
Attacking a Bug-Eyed Crawmad.
Attacking a Bearded Amprat.
Attacking a Burrowing Snagret.
The growth cycle of a Pellet Posy.
Evading enemies through hiding.


| Exploration Notes |
|---|
| Pikmin Behavior • Controls • Indigenous Life • Area Hints • Olimar's Log • Other • Olimar's Log Vol. 2 |