
Category:Screenshots
This category contains screenshots, both from the Pikmin games and other video games.
Media in category "Screenshots"
The following 200 files are in this category, out of 8,644 total.
(previous page) (next page) Anxious Sprout.png 653 × 1,083; 609 KB
 Anywhere Floater 1.jpg 489 × 391; 46 KB
 Anywhere Floater.png 103 × 91; 33 KB
 AnywhereFloater.png 247 × 151; 84 KB
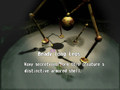
 Apotheosis of Balance discovery.jpg 400 × 240; 244 KB
 Apple Logic Pro X.jpg 1,000 × 608; 295 KB
 Apron Model 1.jpg 320 × 240; 58 KB
 Apron Model 2.jpg 320 × 240; 58 KB
 Apron Model Secret Spot.jpg 400 × 240; 168 KB
 ApronModel'sModel.png 750 × 650; 207 KB
 Aqua Milk 2.jpg 1,177 × 720; 120 KB
 Aquatic Mine 2.jpg 1,115 × 695; 120 KB
 Arachnode dormant P3.jpg 800 × 450; 286 KB
 Arachnode P3 Indigenous Life icon.jpg 67 × 73; 6 KB
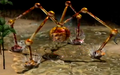
 Arachnode P3 side view.jpg 800 × 450; 273 KB
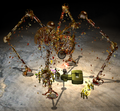
 Arachnode's web.jpg 1,033 × 581; 249 KB
 ArachnodeDataFile.jpg 800 × 450; 98 KB
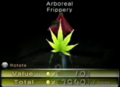
 Arboreal Frippery EU 2.jpg 1,114 × 720; 99 KB
 Arboreal Frippery EU.jpg 401 × 380; 28 KB
 Arboreal Frippery NA render.png 162 × 140; 7 KB
 Arboreal Frippery P2 analysis NA.png 626 × 456; 214 KB
 Arctic Baldy Long Legs.jpg 1,280 × 720; 56 KB
 Arctic Cannon Beetle backside.jpg 1,280 × 720; 323 KB
 Arctic Cannon Beetle corpse.jpg 1,280 × 720; 324 KB
 Arctic Cannon Beetle frontside.jpg 1,280 × 720; 307 KB
 Arctic Cannon Beetle snowball.jpg 1,280 × 720; 321 KB
 Arctic Cannon Beetle stalactite.jpg 1,280 × 720; 316 KB
 Arctic Cannon Larva P3 closeup.jpg 800 × 450; 253 KB
 Arctic Cannon Larva P3 encounter.png 551 × 328; 367 KB
 Arctic Cannon Larva P3 fight.jpg 351 × 262; 28 KB
 Arctic Cannon Larva P3 side view.jpg 800 × 450; 217 KB
 Arctic Shaggy Long Legs.jpg 1,280 × 720; 56 KB
 Arctic shoot.png 800 × 450; 522 KB
 Argyle Collector 1.jpg 320 × 240; 58 KB
 Argyle Collector 2.jpg 320 × 240; 56 KB
 Argyle Collector Secret Spot.jpg 320 × 240; 77 KB
 Arid Metropolis P3 Blue Onion.png 588 × 660; 755 KB
 Arid Metropolis P3 Bulborb.png 589 × 663; 706 KB
 Arid Metropolis P3 Nectar Eggs.png 588 × 662; 723 KB
 Arid Metropolis P3 Red Onion.png 588 × 661; 750 KB
 Arid Metropolis P3 screenshot.jpg 800 × 450; 132 KB
 Armored Cannon Beetle corpse.jpg 458 × 377; 110 KB
 Armored Cannon Beetle Enemy Reel Switch.png 1,920 × 1,080; 2.31 MB
 Armored Cannon Beetle Larva.png 308 × 302; 98 KB
 Armored Cannon Beetle P1 early.jpg 515 × 386; 39 KB
 Armored Cannon Beetle Pikmin 4.png 139 × 107; 24 KB
 Armored Cannon Beetle.jpg 439 × 263; 18 KB
 Armored Cannon Larva backside P3.jpg 1,280 × 720; 246 KB
 Armored Cannon Larva backside P4.jpg 993 × 720; 231 KB
 Armored Cannon Larva backside.png 321 × 264; 114 KB
 Armored Cannon Larva boulder.jpg 880 × 715; 210 KB
 Armored Cannon Larva burrowing P4.jpg 854 × 720; 191 KB
 Armored Cannon Larva burrowing.jpg 394 × 431; 78 KB
 Armored Cannon Larva corpse P4.jpg 933 × 720; 229 KB
 Armored Cannon Larva corpse.png 302 × 225; 108 KB
 Armored Cannon Larva frontside P4.jpg 847 × 720; 207 KB
 Armored Cannon Larva frontside.jpg 1,280 × 720; 200 KB
 Armored Cannon Larva ND screenshot.png 1,280 × 720; 1.39 MB
 Armored Cannon Larva P2 Piklopedia.png 480 × 290; 149 KB
 Armored Cannon Larva retreating P2.png 231 × 241; 79 KB
 Armored Cannon Larva throwing.jpg 694 × 720; 174 KB
 Armored Mawdad (no facial armor) P3 early.png 370 × 222; 94 KB
 Armored Mawdad arena P3.png 1,280 × 720; 1.33 MB
 Armored Mawdad Corpse.jpg 800 × 450; 129 KB
 Armored Mawdad E3 2012 attacked.png 1,443 × 660; 522 KB
 Armored Mawdad E3 2012 photo.png 1,280 × 720; 988 KB
 Armored Mawdad P3 defeated.jpg 1,576 × 951; 91 KB
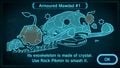 ArmoredMawdadDataFile1.jpg 800 × 450; 96 KB
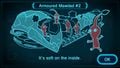 ArmoredMawdadDataFile2.jpg 800 × 450; 96 KB
 ArmourUpgrade.jpg 800 × 450; 120 KB
 Armurk ball.jpg 320 × 240; 52 KB
 Armurk ceiling.jpg 400 × 240; 58 KB
 Armurk Creature Log.png 1,031 × 456; 251 KB
 Armurk dead.jpg 320 × 240; 72 KB
 Armurk defeated.jpg 320 × 240; 54 KB
 Armurk falling.jpg 400 × 240; 62 KB
 Armurk moving.jpg 320 × 240; 54 KB
 Armurk raising.jpg 320 × 240; 55 KB
 Armurk retreat.jpg 320 × 240; 53 KB
 Armurk spitting.jpg 320 × 240; 53 KB
 Armurk stomping.jpg 320 × 240; 52 KB
 Armurk thrown.jpg 320 × 240; 59 KB
 Armurk turning.jpg 320 × 240; 54 KB
 Armurk wall.jpg 320 × 240; 57 KB
 ArrowRainOatchi.jpg 1,280 × 720; 222 KB
 Assembled Courage Series.jpg 1,280 × 720; 302 KB
 Asterix Olimar.jpg 1,280 × 720; 253 KB
 Asterix Pikmin.jpg 800 × 600; 362 KB
 Astringent Clump Brittany P3 EU.jpg 800 × 450; 101 KB
 Astringent Clump Distant Tundra.jpg 1,280 × 720; 486 KB
 Astringent Clump Garden of Hope.jpg 1,280 × 720; 492 KB
 Astringent Clump P3 analysis.png 1,103 × 1,080; 593 KB
 Astringent Clump.jpg 800 × 450; 217 KB
 Attacking Freezecake.jpg 1,280 × 720; 354 KB
 Attacking Shockcake.jpg 1,280 × 720; 341 KB
 Attention-Getting Logo JP.png 363 × 232; 89 KB
 Attention-Getting Logo.png 363 × 232; 78 KB
 Attitude Adjuster 2.jpg 320 × 240; 56 KB
 Attitude Adjuster log.jpg 320 × 240; 56 KB
 Attitude Adjuster.png 211 × 272; 25 KB
 Automatic Gear 2.jpg 835 × 964; 197 KB
 Autumn Harvest Series.jpg 1,280 × 720; 265 KB
 AW bag.png 665 × 530; 977 KB
 AW blues.png 665 × 530; 998 KB
 AW man made.png 665 × 530; 982 KB
 AW path.png 665 × 530; 884 KB
 AW plate.png 665 × 530; 959 KB
 AW snagret.png 665 × 530; 963 KB
 AW spiderwort caves.png 665 × 530; 948 KB
 AW start.png 665 × 530; 962 KB
 AW vases.png 665 × 530; 951 KB
 AW wollywog.png 665 × 530; 991 KB
 Awakening Wood Blue Pikmin.png 993 × 744; 1.28 MB
 Awakening Wood HD.jpg 2,218 × 3,380; 5.08 MB
 Awakening Wood preview.png 518 × 288; 314 KB
 AwakeningWood Branch Hole.png 542 × 415; 583 KB
 B Down.jpg 400 × 315; 44 KB
 Babi email.png 661 × 661; 67 KB
 Back-and-Forth Road 1.jpg 400 × 512; 119 KB
 Back-and-Forth Road 2.jpg 400 × 512; 128 KB
 Back-and-Forth Road 3.jpg 400 × 512; 116 KB
 Back-and-Forth Road 4.jpg 400 × 512; 122 KB
 Back-and-Forth Road 5.jpg 320 × 240; 57 KB
 Back-and-Forth Road 6.jpg 320 × 240; 53 KB
 Back-and-Forth Road 7.jpg 400 × 512; 135 KB
 Back-and-Forth Road 8.jpg 400 × 512; 116 KB
 Back-and-Forth Road 9.jpg 320 × 240; 61 KB
 Back-and-Forth Road horn cutscene.jpg 320 × 240; 54 KB
 Back-and-Forth Road Sheargrub cutscene.jpg 320 × 240; 45 KB
 Back-and-Forth Road Spectralid cutscene.jpg 320 × 240; 50 KB
 Backside of a Frosty Bulborb.jpg 1,280 × 720; 304 KB
 Badge placeholder.jpg 240 × 240; 22 KB
 BagP3.png 1,092 × 711; 830 KB
 Baldy Long Legs P4.jpg 1,280 × 720; 386 KB
 Ball.png 296 × 233; 112 KB
 Balloon bolbert.jpg 800 × 450; 239 KB
 Balloons.png 697 × 716; 550 KB
 Bamboo gate closed P3 screenshot.jpg 800 × 450; 250 KB
 Bamboo gate P3 screenshot.png 1,597 × 869; 1.87 MB
 Bamboo gate.jpg 1,033 × 581; 266 KB
 Barrel of Laughs 1.jpg 320 × 240; 59 KB
 Barrel of Laughs 2.jpg 320 × 240; 60 KB
 Barrel of Laughs Secret Spot.jpg 400 × 240; 171 KB
 Barriers of Flame 1.jpg 320 × 240; 56 KB
 Barriers of Flame 2.jpg 320 × 240; 57 KB
 Barriers of Flame 3.jpg 320 × 240; 55 KB
 Barriers of Flame 4.jpg 400 × 512; 115 KB
 Barriers of Flame 5.jpg 320 × 240; 55 KB
 Barriers of Flame 6.jpg 320 × 240; 57 KB
 Barriers of Flame 7.jpg 320 × 240; 43 KB
 Barriers of Flame dirt block cutscene.jpg 320 × 240; 47 KB
 Barriers of Flame grass cutscene.jpg 320 × 240; 46 KB
 Barriers of Flame wall cutscene.jpg 320 × 240; 55 KB
 Basket.png 450 × 421; 343 KB
 Battle enemies screen.jpg 1,280 × 720; 466 KB
 Battle Enemies! menu.jpg 1,280 × 720; 463 KB
 Battle Field.png 720 × 576; 536 KB
 Battle In A Box Leafling Card.png 592 × 368; 97 KB
 BattleEnemies.jpg 800 × 450; 126 KB
 BattleInABoxLeaflingIcon.png 142 × 142; 26 KB
 Baubles.png 334 × 182; 135 KB
 Bchara.png 208 × 256; 27 KB
 Beady Long Legs (enemy reel).png 640 × 480; 185 KB
 Beady Long Legs cave.png 416 × 260; 154 KB
 Beady Long Legs Crumble.png 616 × 569; 516 KB
 Beady Long Legs Damaged.png 576 × 575; 449 KB
 Beady Long Legs Destroy.png 572 × 603; 593 KB
 Beady Long Legs Enemy Reel Switch.png 1,920 × 1,080; 1.46 MB
 Beady Long Legs P1 early.png 640 × 480; 602 KB
 Bearded Amprat P3 belly.jpg 800 × 450; 239 KB
 Bearded Amprat P3 front.jpg 800 × 450; 289 KB
 Bearded Amprat P3 sniffing.jpg 800 × 450; 229 KB
 Bearded Amprat P3 stretches.jpg 800 × 450; 275 KB
 Bearded Amprat.PNG 678 × 501; 1.3 MB
 BeardedAmpratDataFile.jpg 800 × 450; 85 KB
 Beastly Cavern.png 860 × 752; 841 KB
 Beastly Caverns CT start point.jpg 800 × 450; 146 KB
 Beastly Caverns P3 exploration.jpg 800 × 450; 100 KB
 BeastlyCavernBattleEnemiesMap.jpg 694 × 591; 136 KB
 Bed of Fallen Leaves 1.jpg 320 × 240; 45 KB
 Bed of Fallen Leaves 2.jpg 400 × 512; 113 KB
 Bed of Fallen Leaves 3.jpg 320 × 240; 49 KB
 Bed of Fallen Leaves 4.jpg 320 × 240; 63 KB
 Bed of Fallen Leaves Sparrowhead cutscene.jpg 320 × 240; 41 KB
 Bed of Fallen Leaves twig cutscene.jpg 320 × 240; 42 KB
 Bedtime Series.jpg 1,280 × 720; 295 KB
 Bee Boss.jpg 800 × 450; 118 KB
 Beee.png 1,351 × 735; 1.16 MB
 Bell.png 88 × 78; 17 KB
 Below the Ice 1.jpg 400 × 512; 115 KB
 Below the Ice 2.jpg 320 × 240; 53 KB
 Below the Ice 3.jpg 320 × 240; 49 KB
 Below the Ice 4.jpg 320 × 240; 47 KB
 Below the Ice 5.jpg 320 × 240; 51 KB
 Below the Ice 6.jpg 320 × 240; 43 KB
 Below the Ice 7.jpg 320 × 240; 50 KB
 Below the Ice can cutscene.jpg 320 × 240; 43 KB
 Below the Ice sleeping cutscene.jpg 320 × 240; 47 KB
 Below the Ice tripping cutscene.jpg 320 × 240; 37 KB
 Beneficial Intelligence.png 284 × 165; 96 KB


_P3_early.png)


.png)


