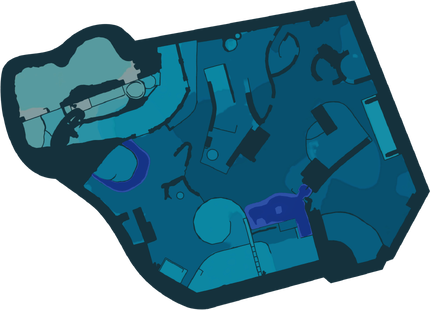
Crackling Cauldron
| Crackling Cauldron | |
|---|---|

| |
| Location | Sun-Speckled Terrace |
| Sublevels | 2 |
| Rescues | 1 |
| Treasures | 6 |
| Onions | 0 |
| Suggested Pikmin | |
|
The following article or section contains guides. |
The Crackling Cauldron is a cave in the Sun-Speckled Terrace in Pikmin 4. It has two sublevels where 20 Yellow Pikmin can be found. A majority of the enemies and obstacles here are fire related, so Red Pikmin are recommended. This cave has ![]() × 470 worth of treasure.
× 470 worth of treasure.
How to reach[edit]
From the second base, Rugged Scaffold, head past the 5-Pellet Posy and the Bulborb sleeping and turn the corner leading you past an electric gate and 2 Dwarf Bulborbs. Follow the path, which should take you past a pile of raw material, and turn right. Destroy the dirt wall in front of another sleeping Bulborb and straight ahead the cave entrance is located underneath a pile of dirt.
Notes[edit]
Olimar's Voyage Log[edit]
Sublevel 1[edit]

- Treasures:
 Deceptive Snack × 1
 Dusty Bed × 1
 Illumination Goo (buried) × 1
- Enemies:
 Shearwig × 4
 Fiery Blowhog × 3
- Obstacles:
 Electric gate × 1
 Paper bag × 1
- Wild Pikmin:
 Yellow Pikmin × 5
- Yellow Pikmin × 5 (Sprouts)
- Others:
 Candypop Bud (Yellow) × 1 (If 100 Pikmin are brought in)
 Egg × 2
 Raw material pile × 1 (15 pieces)
Note: It is assumed that you have collected 1 Flarlic and have entered the cave with 30 Red Pikmin.
The first section of this sublevel contains 2 eggs which can give some Nectar, Raw material or, not so often, Ultra-spicy spray. It also contains a Fiery Blowhog. Using Red Pikmin is recommended as they are immune to the flames they emit. Whistle back any Pikmin latched on before it bucks off any attackers as they may lose their flower/bud (if they have any). Once the Blowhog has been defeated, you can enter the next section which contains two already flying Shearwigs, as well as the Deceptive Snack and Illumination Goo treasures. There are also 5 Yellow Pikmin sprouts which are blocked by the 2 previously mentioned enemies. Throwing Red Pikmin at them will knock them out of the sky, giving an opening for an attack. You can pluck the 5 Yellow Pikmin sprouts and enter the next section which contains another Fiery Blowhog as well as two more Shearwigs (undeground this time). You can repeat the same attack strategy used previously and whistle the 5 wild Yellow Pikmin standing on a tin-like object adjacent to the Blowhog. These 10 Yellow Pikmin can be used to defeat the 2 Shearwigs and weigh down the Dusty Bed treasure which Red Pikmin are unable to reach and can push down the Paper bag. Once the paper bag is down, you can use the 10 Yellow Pikmin to carry back the Dusty Bed and can use your Red Pikmin and Oatchi to carry back the 2 Fiery Blowhog bodies, the 4 Shearwigs, and the Deceptive Snack and Illumination. Goo. If you have any remaining Pikmin, you can place them on the pile of raw materials. Once the Yellow Pikmin have returned the treasure, you can 'flower' them and put them to work on the electric gate in the first section. Once that's done, you can find the cave entrance to the next sublevel which is guarded by a third Fiery Blowhog which you can use Red Pikmin to defeat.
Sublevel 2[edit]

- Treasures:
 Cookie of Nibbled Circles × 1
 Daughter of the Earth (buried) × 1
 S.S. Chocolate × 1
- Enemies:
- Shearwig × 3
 Scorchcake × 1
 Iridescent Flint Beetle × 1 (contains raw material × 20)
- Obstacles:
- Electric gate × 1
 Dirt wall × 1
 Sizzling floor × 5
- Wild Pikmin:
- Yellow Pikmin × 10 (Sprouts)
- Others:
- Candypop Bud (Yellow) × 2 (If 100 Pikmin are brought in)
 Castaway × 1
- Egg × 2
- Raw material pile × 2 (15 and 20 pieces)
 Candypop Bud × 1 (Red; if 5 or less Red Pikmin)
The landing area for this sublevel contains two eggs which can be used to flower any non-flowered Pikmin (or to collect raw material/ultra spicy spray). Heading down the path leading to the electric gate, you can assign the 10 Yellow Pikmin to work on it and have your Red Pikmin attack the nearby Shearwig up the ramp and have 20 Red Pikmin collect the raw material and another on the Shearwig. Back at the base, whistle your Pikmin and take the other path blocked by the Sizzling floors which needs Red Pikmin to deal with. This leads to the next section which contains a few more sizzling floors surrounding the Daughter of the Earth treasure. Once your Red Pikmin have cleared the fire, you can send 12 to dig it up and head to the 5 Yellow Pikmin sprouts in the section. Once they've been plucked, head in to the adjacent section where you'll see a Scorchcake guarding a base location. This is a fire-based enemy so have Red Pikmin attack it, but stay near to whistle them off when it attempts to crush them. Once it's defeated, move your base here for the 12 Red Pikmin carrying the Daughter of the Earth to carry back quicker. Head towards the Dirt wall nearby and be prepared to attack an underground Shearwig. Once that's been dealt with, place a few Red Pikmin on the dirt wall and have the remaining attack the 2 sizzling floors at opposite ends of the section. You'll see near the dirt wall that there's two treasures on a ledge, which Yellow Pikmin are needed for. Both of these treasures weigh 3 Pikmin so you can bring down the first one with 3 out of your 5 Yellow Pikmin and whistle them once they have brought it down from the ledge. Then throw them on the other treasure and have Oatchi carry the first one back to the S.S. Beagle. Once the dirt wall has been destroyed, place most of your Pikmin on the pile of raw materials and have a few (2~3) Red Pikmin and Oatchi in your squad and head down the right path past the dirt wall. You'll encounter some more sizzling floors and a buried Shearwig, have your Red Pikmin defeat it and have Oatchi carry back the corpse whilst the Red Pikmin deal with the sizzling floors. Whilst you wait, head to the electric gate to whistle the Yellow Pikmin and it'll be demolished and use them to reach the Castaway lying on the high ledge. Have the Yellow Pikmin then carry the castaway back to the base. Once done you can head to the cave exit and leave with 6 new treasures, 20 more Yellow Pikmin and a Castaway.
Gallery[edit]
|
This article or section is in need of more images. |
Names in other languages[edit]
| Language | Name | Meaning |
|---|---|---|
| 焼きおこし工房? Yaki Okoshi Kōbō |
Baked Rice Cake Workshop | |
(traditional) |
烤米餅工房 Kǎo Mǐbǐng Gōngfáng |
Baked Rice Cake Workshop |
(simplified) |
烤米饼工房 Kǎo Mǐbǐng Gōngfáng |
Baked Rice Cake Workshop |
| Vuursteenfornuis | Flint furnace | |
| Chaudron crépitant | Crackling cauldron | |
| Feurige Fabrik | Fiery Factory | |
| Officina ardente | Burning workshop | |
| 불 피우는 공방 Bul Piuneun Gongbang |
Fire Burning Workshop | |
| Caldeira crepitante | Crackling boiler | |
| Fábrica ardiente | Burning factory |
See also[edit]
| Caves in Pikmin 4 | |
|---|---|
| Rescue Command Post | Burrow of Beginnings |
| Sun-Speckled Terrace | Last-Frost Cavern • Crackling Cauldron • Aquiferous Summit • Industrial Maze • Hectic Hollows |
| Blossoming Arcadia | Drafty Gallery • Secluded Courtyard • Sightless Passage • Kingdom of Beasts |
| Serene Shores | Seafloor Resort • Subzero Sauna • Below-Grade Discotheque • Engulfed Castle |
| Hero's Hideaway | Doppelgänger's Den • Frozen Inferno • Plunder Palace |
| Giant's Hearth | Ultimate Testing Range • Dream Home • Cradle of the Beast |
| Primordial Thicket | The Mud Pit • Subterranean Swarm • Cavern for a King |
| Dandori Challenges | Dandori Day Care • Hotshock Canyon • Rockaway Cellars • Test Tubs • Ice-Cross Course • Hefty Haulway • Aerial Incinerator • Strategic Freezeway • Planning Pools • Toggle Training • Cliff-Hanger's Hold • Oasis of Order • Trial of the Sage Leaf |
| Dandori Battles | Trial Run • Battle in a Box • Dandori Castle • Leafy Showdown • Hot Sandy Duel • Final Battle |