User:Twins1105/Sandbox: Difference between revisions
Tags: Mobile edit Advanced mobile edit |
(→Enemies in Pikmin Adventure Rewrite: JP name in first sentence to match with other enemy articles.) Tags: Mobile edit Advanced mobile edit |
||
| (29 intermediate revisions by the same user not shown) | |||
| Line 143: | Line 143: | ||
= '''Enemies in Pikmin Adventure Rewrite''' = | = '''Enemies in Pikmin Adventure Rewrite''' = | ||
The following W.I.P. | The following W.I.P. is a rewrite of the [[Pikmin Adventure enemies]] page. | ||
==Bulborb== | ==Bulborb== | ||
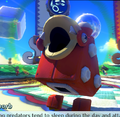
[[File:Bulborb NL.png|thumb|The Bulborb [[Pikmin Adventure prizes|statue]] as seen in the ''Nintendo Land'' Plaza.]] | [[File:Bulborb NL.png|thumb|The Bulborb [[Pikmin Adventure prizes|statue]] as seen in the ''Nintendo Land'' Plaza.]] | ||
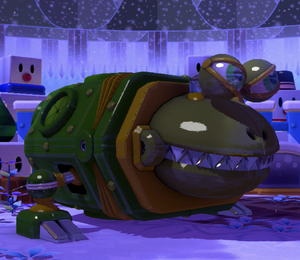
=== | The '''Bulborb''' ({{j|チャッピー|Chappī|Chappy}}) is the most common Bulborb variant found in ''Pikmin Adventure'', being found in almost every level. It bears a resemblance to the [[Bulborb]] from the [[Pikmin series|mainline ''Pikmin'' series]], featuring three large white spots on its sides, large stalkless eyes that turn red when attacking, screws connecting the mouth to the main body, a hole on its back to expel [[Pikmin Adventure prizes#Bulborb Dropping|Bulborb Droppings]], and lacks any legs connecting the body to the feet. The average Bulborb is slightly bigger than the player, but there are larger Bulborbs found in certain areas. | ||
Once the Bulborb | |||
===Behavior=== | |||
The Bulborb can be found either sleeping or being sent into the area by a gashapon capsule before it starts walking towards the player. It has three walking speeds, a slow walk, a slightly faster walk that is replaced by an attack once the Bulborb is close to the players, and a small hop that helps close the gap between thte Bulborb and the players. Once the Bulborb is close enough to a player, it will either charge a dash in a straight line or try to eat a player depending on how far they are to the Bulborb. If the Bublorb is able to catch a player, it will toss them up, eat them, and turn them into a Bulborb Dropping, making it impossible for them to be whistled at or attack enemies. In this state, the player must be broken out by Olimar or other Pikmin. If the Bulborb is defeated while a player is bring eaten, the player will be sent flying out of its mouth. | |||
===Strategy=== | ===Strategy=== | ||
The Bulborb is one of the easiest enemies to defeat in ''Pikmin Adventure''. It is easy to dodge its charge, but can take out a player if they aren't careful. | The Bulborb is one of the easiest enemies to defeat in ''Pikmin Adventure''. It is easy to dodge its charge, but can take out a player if they aren't careful. The only weak spot the Bulborb has is on its back. The Bulborb will try to shake off Pikmin that are on its weak spot, causing them to be knocked over for a little bit. There are ways to circumvent the Bulborb's movement and shaking, however, either by waiting for it to do its slow walk, move out of its sight while it is attacking, or wait for it to start panting. These are the ideal times to attack the Bulborb since it won't be able to shake off the Pikmin on its back until after it starts trying to move. | ||
The only weak spot the Bulborb has is on its back | |||
===Monita's notes=== | ===Monita's notes=== | ||
| Line 161: | Line 160: | ||
{{EU|y}}: {{transcript|These Grub-dog predators tend to sleep during the day and attack aggressively if woken. ◆ Bulborbs come in a variety of colours and are now on sale at our souvenir shop.}} | {{EU|y}}: {{transcript|These Grub-dog predators tend to sleep during the day and attack aggressively if woken. ◆ Bulborbs come in a variety of colours and are now on sale at our souvenir shop.}} | ||
===Gallery=== | |||
<gallery> | |||
PA Bulborb Statue Roar.png|The Bulborb statue roaring after being interacted with. | |||
PA Bulborb attacks.png|Two Bulborbs attacking with a bite and a charge. | |||
Pikmin Adventure Red Bulborb.png|A ''Pikmin Adventure'' render featuring the Bulborb. | |||
</gallery> | |||
===Names in other languages=== | ===Names in other languages=== | ||
| Line 195: | Line 201: | ||
{{clear}} | {{clear}} | ||
== Yellow Bulborb == | ==Yellow Bulborb== | ||
{{title|Yellow Bulborb}} | |||
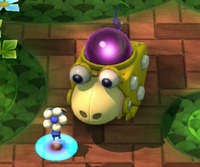
[[File:Yellow Bulborb NL.png|thumb|A Yellow Bulborb ready to attack the Blue Pikmin player.]] | [[File:Yellow Bulborb NL.png|thumb|A Yellow Bulborb ready to attack the Blue Pikmin player.]] | ||
The '''Yellow Bulborb''' is a common Bulborb variant found in ''Pikmin Adventure'', and acts as the first mini-boss in the attraction. It is almost identical to the Bulborb in appearance, but is colored yellow instead of red or green. Much like the Bulborb, the Yellow Bulborb is typically found slightly larger than players but larger ones are slightly more common to encounter than standard large Bulborbs. | |||
The Yellow Bulborb | |||
The Yellow Bulborb | ===Behavior=== | ||
The Yellow Bulborb, unlike other Bulborb variants, does not charge at far away players, instead it shoots a projectile to attack the player. On top of this, the Yellow Bulborb will hop around often to dodge attacks and get close to eat players. | |||
The Yellow Bulborb can spew orbs of water that ensnare players, rendering them helpless until they are freed, or a [[Pikmin Adventure prizes#Spike Ball|Spike Ball]], which will take out a player that gets hit by it. If a player is trapped in a water bubble, they have to be freed by having other Pikmin attack them, similar to the Bulborb Dropping. | |||
===Strategy=== | |||
Due to being a variant of the standard Bulborb, it has a very similar method to defeat it. It will not shake off Pikmin when it is panting or when it is shooting projectiles, being a good time to attack if the projectile misses all players. | |||
{{clear}} | {{clear}} | ||
==Green Bulborb== | ==Green Bulborb== | ||
{{title|Green Bulborb}} | |||
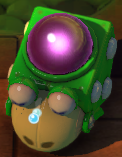
[[File:Green Bulborb PA.png|thumb|178px|A sleeping Green Bulborb.]] | [[File:Green Bulborb PA.png|thumb|178px|A sleeping Green Bulborb.]] | ||
The '''Green Bulborb''' is a semi-common | |||
The '''Green Bulborb''' is a semi-common Bulborb variant found in ''Pikmin Adventure''. It is nearly identical to the Bulborb in appearance, except it is green instead of red or yellow. It usually appears in groups, requiring players to either take on a small group of them, or in some cases, simply run away from them. | |||
===Behavior=== | |||
The Green Bulborb, unlike the other Bulborb variants, can only charge at the players on sight and has no other methods of attack, but it can follow the player when charging, unlike the other Bulborb variants. Once it finishes a charge, it will start panting for a short amount of time.. | |||
===Strategy=== | ===Strategy=== | ||
Because the Green Bulborb starts panting after charging, it is very easy to attack it when it isn't charging. When the Green Bulborb is charging however, it is advised to run away because the homing charge makies it difficult to attack without getting hit by it. If possible, one should try to lure charging the Green Bulborb into a [[pit]] or a small area to deal with them from a safe area. | |||
===Gallery=== | ===Gallery=== | ||
| Line 219: | Line 234: | ||
{{clear}} | {{clear}} | ||
== Bilious Bulborb == | ==Bilious Bulborb== | ||
[[File:Bilious Bulborb NL.png|thumb|The Bilious Bulborb [[Pikmin Adventure prizes|statue]] as seen in the ''Nintendo Land'' Plaza.]] | [[File:Bilious Bulborb NL.png|thumb|The Bilious Bulborb [[Pikmin Adventure prizes|statue]] as seen in the ''Nintendo Land'' Plaza.]] | ||
The '''Bilious Bulborb''' is the rarest variant | |||
The '''Bilious Bulborb''' ({{j|テンテンチャッピー|Tenten Chappī|Dotted Chappy}}) is the rarest standard Bulborb variant found in ''Pikmin Adventure'', and is the seventh mini-boss the player fights. Its thinner eyes and orange color scheme resembles that of the [[Orange Bulborb]]. It has smaller spots than other Bulborb variants, so it is suggested by Monita that it may not be a Bulborb subspecies. | |||
===Behavior=== | |||
The Bilious Bulborb shares most of the attacks that are used by the three standard Bulborb variants. It can shoot out Spike Balls and water like the Yellow Bulborb, except it shoots out 6 spike balls in different directions. It also charges in a straight line and pants afterwards like the Red and Green Bulborbs respectively. | |||
===Strategy=== | ===Strategy=== | ||
The best way to defeat the Bilious Bulborb is with multiple players. Have the Olimar player run around it so the other Mii Pikmin can get to the weak-points dotting its back. If the arena has rocks or bombs nearby, Olimar or the Pikmin can pick them up to throw them at the Bilious Bulborb. If the rocks hit the creature on a weak-point or directly on its face, it will be stunned for a few seconds. If the bombs land close enough to the Bilious Bulborb, it can deal massive damage to all the weak spots at once. If utilized properly, the rocks and bombs can turn the tide in a losing battle and defeat the Bilious Bulborb. | |||
===Monita's Notes=== | ===Monita's Notes=== | ||
| Line 263: | Line 282: | ||
==Creepy Beeb== | ==Creepy Beeb== | ||
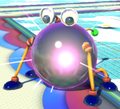
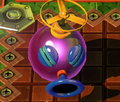
[[File:Creepy Beeb | [[File:PA Creepy Beeb Statue.png|thumb|The Creepy Beeb [[Pikmin Adventure prizes|statue]] as seen in the ''Nintendo Land'' Plaza.]] | ||
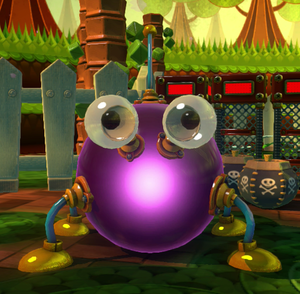
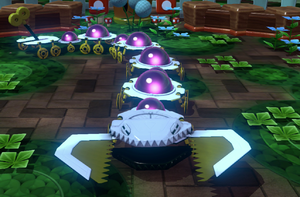
{{ | The '''Creepy Beeb''' ({{j|ザコワラジ|Zako Waraji|Small Fry Woodlouse}}; known as the '''Worker Baub''' in the European version of ''Pikmin Adventure'') is the most common enemy found in ''Pikmin Adventure''. The standard appearance features a purple orb with four flexible yellow legs with black feet, stalked googly eyes, and a yellow and green antenna coming out of the top of its head. There is also a variant that features blue legs and yellow feet like the [[King Beeb]], but also features a ring around the yellow tip of its antenna. | ||
===Behavior=== | |||
When it is not attacking players, the Creepy Beeb will try to move towards the player even if they are away from its spawning point. The Creepy Beeb attacks by rolling forward a short distance that can take out careless players. | |||
===Strategy=== | ===Strategy=== | ||
The Creepy Beeb | The Creepy Beeb is the easiest enemy to kill in '''Pikmin Adventure''', as it can die in one direct hit and get weighed down by a single Pikmin due to its entire body being a single weak-point. It only rolls forward a little bit, so avoiding its attack is very simple. Some Creepy Beebs take slightly more hits to kill, but are still very simple to get rid of as their attacks are the same as the small ones. | ||
===Monita's Notes=== | ===Monita's Notes=== | ||
| Line 279: | Line 298: | ||
<gallery> | <gallery> | ||
PA Creepy Beeb Statue Charge.png|The Creepy Beeb statue initiating a charge when interacted with. | PA Creepy Beeb Statue Charge.png|The Creepy Beeb statue initiating a charge when interacted with. | ||
Creepy Beeb 2.jpg|The Creepy Beeb statue after rolling. | Creepy Beeb 2.jpg|The Creepy Beeb statue after rolling. | ||
Creepy Beeb NL.png|Four Creepy Beebs. | |||
PA Creepy Beeb Weighed Down.png|Two Creepy Beebs being weighed down by some Pikmin. | |||
PA large Creepy Beebs.png|Four large Creepy Beebs resembling the [[King Beeb]], with a player weighing one down. | |||
</gallery> | </gallery> | ||
| Line 315: | Line 337: | ||
==Bombardier Beeb== | ==Bombardier Beeb== | ||
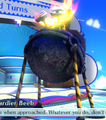
[[File:Bombardier Beeb | [[File:PA Bombardier Beeb Statue.png|thumb|The Bombardier Beeb [[Pikmin Adventure prizes|statue]] as seen in the ''Nintendo Land'' plaza.]] | ||
The '''Bombardier Beeb''' (known as the '''Bombardier Baub''' in the European version of ''Pikmin Adventure'') is one of the rarer enemies seen in ''[[Pikmin Adventure]]''. It is a variant of the Creepy Beeb that explodes after a few seconds of spotting a player. It has a number of common characteristics to the Creepy Beeb with the black feet and googly eyes, but it also has a few major differences as well including rivets on its sides and a | |||
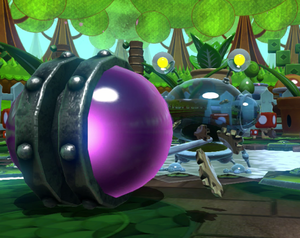
The '''Bombardier Beeb''' ({{j|サクレワラジ|Sakure Waraji|Bursting Woodlouse}}; known as the '''Bombardier Baub''' in the European version of ''Pikmin Adventure'') is one of the rarer enemies seen in ''[[Pikmin Adventure]]''. It is a variant of the Creepy Beeb that explodes after a few seconds of spotting a player. It has a number of common characteristics to the Creepy Beeb with the black feet and stalked googly eyes, but it also has a few major differences as well including rivets on its sides and a fuse in place of an antenna. | |||
=== | ===Behavior=== | ||
Upon spotting a player, the Bombradier Beeb will activate the fuse on its head and chase them. After about 5 seconds, it will stand in place and panic for a second before exploding, causing an explosion that will damage nearby players, enemies, and destructible blocks similar to standard bombs. | Upon spotting a player, the Bombradier Beeb will activate the fuse on its head and chase them. After about 5 seconds, it will stand in place and panic for a second before exploding, causing an explosion that will damage nearby players, enemies, and destructible blocks similar to standard bombs. | ||
===Strategy=== | |||
It is not recommended to attack the Bombardier Beeb directly because of the short time it takes before exploding compared to the high amount of health it often has. Instead, the Bombardier Beeb can be used to the players' advantage to destroy other enemies and obstacles, but they must be careful to not get caught in the blast radius, or else they will be engulfed in the explosion. | |||
===Monita's Notes=== | ===Monita's Notes=== | ||
| Line 329: | Line 353: | ||
<gallery> | <gallery> | ||
PA Bombardier Beeb Lit Fuse.png|When the Bombardier Beeb statue is touched a second time, it will panic like it will explode. | |||
PA Bombardier Beeb Lit Fuse.png|When the Bombardier Beeb statue is touched a second time, it | Bombardier Beeb NL.png|Four Bombardier Beebs ready to blow up. | ||
</gallery> | </gallery> | ||
| Line 363: | Line 387: | ||
{{clear}} | {{clear}} | ||
== Blowhog == | ==Blowhog== | ||
[[File:Blowhog | [[File:PA Blowhog Statue.png|thumb|The Blowhog [[Pikmin Adventure prizes|statue]] as seen in the ''Nintendo Land'' Plaza.]] | ||
The '''Blowhog''' (known as the '''Puffy Blowhog''' in the European version of ''Pikmin Adventure'') is a rare enemy that | |||
The '''Blowhog''' ({{j|フーセンドックリ|Fūsen Dokkuri|Balloon Tokkuri}}; known as the '''Puffy Blowhog''' in the European version of ''Pikmin Adventure'') is a rare enemy that appears in [[Pikmin Adventure]]'s later levels. It is a purple orb with a blue snout that is lifted by a propellor and features eyes that are often covered up by its eyelids almost always being nearly closed. | |||
===Behavior=== | |||
Instead of blowing from its snout at Pikmin like other Blowhogs, the Blowhog turns its snout into a spike and tries to ram the players head-on in a straight line. | |||
===Strategy=== | ===Strategy=== | ||
Since the Blowhog's entire body is a weak point similar to the Creepy Beeb, attacking it is easier then with most enemies. However, it is very mobile, making precision in throwing slightly difficult, and it usually hovers over [[pits]], making it difficult to throw Pikmin at it without losing them. The player can either attack them from afar with a [[Whip Seed]] or try to lure it over solid ground to minimize losses. | |||
===Monita's Notes=== | ===Monita's Notes=== | ||
| Line 378: | Line 404: | ||
<gallery> | <gallery> | ||
Blowhog NL.png|A Blowhog in an arena. | |||
Blowhog Spike NL.png|A Blowhog with a spike coming out of its snout. | Blowhog Spike NL.png|A Blowhog with a spike coming out of its snout. | ||
</gallery> | </gallery> | ||
| Line 386: | Line 413: | ||
|Jap = フーセンドックリ | |Jap = フーセンドックリ | ||
|JapR = Fūsen Dokkuri | |JapR = Fūsen Dokkuri | ||
|JapM = | |JapM = Balloon Tokkuri | ||
|Dut = Opgeblazen Blowhog | |Dut = Opgeblazen Blowhog | ||
|DutM = | |DutM = | ||
| Line 413: | Line 440: | ||
==Telescoping Pumphog== | ==Telescoping Pumphog== | ||
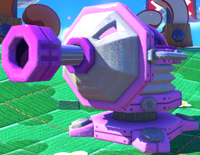
[[File:Telescoping Pumphog | [[File:PA Telescoping Pumphog statue.png|thumb|The Telescoping Pumphog [[Pikmin Adventure prizes|statue]] in the ''[[Nintendo Land]]'' plaza.]] | ||
The '''Telescoping Pumphog''' is a common enemy found in ''Pikmin Adventure''. | |||
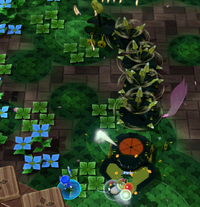
The '''Telescoping Pumphog''' ({{j|ポンプドックリ|Ponpu Dokkuri|Pump Tokkuri}}) is a common enemy found in ''Pikmin Adventure''. Its face bears a resemblance to the [[Fiery Blowhog]], sharing very similar eyes and snout, but is otherwise very different, being a stationary tower that can pump out projectiles. | |||
===Behavior=== | |||
Most Telescoping Pumphogs are completely stationary and are unable to do much other than shoot projectiles while others can delve underground and pop back up to shoot projectiles and temporarily avoid damage from players. | |||
When it is stationary, the Telescoping Pumphog sits about, facing a set direction. When it notices a player, it will start rising up, revealing its tube-like under-segment which inflates. It will then push down, which fires out a projectile from its snout. This projectile is usually a [[Spike Ball]], but there are a few variants that shoot bombs and water. | |||
===Strategy=== | ===Strategy=== | ||
The Telescoping Pumphog | The Telescoping Pumphog's weak-spot is located directly on its head, making it hard to hit when it rises up to charge its attack. However, when it is on the ground, right after attacking, it is extremely vulnerable, so it is advised to attack them then. | ||
It should be noted, however, that some variants of the Telescoping Pumphog do not have a weak-point at all, making it the only enemy in ''Pikmin Adventure'' that is completely invincible. If | It should be noted, however, that some variants of the Telescoping Pumphog do not have a weak-point at all, making it the only enemy in ''Pikmin Adventure'' that is completely invincible. If a player has to come across this variant, their only option is to advance to the next part of the level quickly while avoiding the indestructible Pumphog's projectiles. | ||
===Monita's Notes=== | ===Monita's Notes=== | ||
| Line 429: | Line 460: | ||
<gallery> | <gallery> | ||
Telescoping Pumphog extend NL.png|The Telescoping Pumphog [[Pikmin Adventure prizes|statue]] extending upward. | Telescoping Pumphog extend NL.png|The Telescoping Pumphog [[Pikmin Adventure prizes|statue]] extending upward. | ||
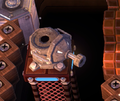
Stone Pumphog.png| | PA Telescoping Pumphog Miniboss Cutscene.png|A large Telescoping Pumphog trapped in an enclosed area. | ||
Telescoping Pumphog NL.png|A Telescoping Pumphog. | |||
Stone Pumphog.png|The invulnerable variant of the Telescoping Pumphog in ''Lord of a Barren Land''. | |||
</gallery> | </gallery> | ||
| Line 465: | Line 497: | ||
==Bosses== | ==Bosses== | ||
These are the following bosses in ''Pikmin Adventure'': | |||
*[[Bulblord]] | *[[Bulblord]] | ||
*[[Large-Mouth Wollywog]] | *[[Large-Mouth Wollywog]] | ||
*[[Emperor Pinchipede]] | *[[Emperor Pinchipede]] | ||
*[[Bladed Beeb]] | *[[Bladed Beeb|Greater Bladed Beeb]] | ||
*[[Grand Bulblord]] | *[[Grand Bulblord]] | ||
*[[Translucent Wollywog]] | *[[Translucent Wollywog]] | ||
| Line 484: | Line 516: | ||
= '''Pikmin Adventure Boss Edits''' = | = '''Pikmin Adventure Boss Edits''' = | ||
The following W.I.P.s are | The following W.I.P.s are edits of the ''Pikmin Adventure'' boss pages based on the rewritten enemies above. | ||
{{clear}} | {{clear}} | ||
== King Beeb == | == King Beeb == | ||
[[File: | [[File:King_Beeb_NL.png|thumb|300px|The King Beeb during its introduction cutscene.]] | ||
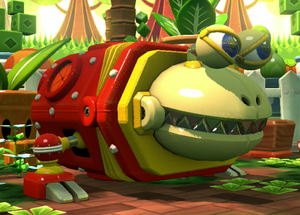
The '''King Beeb''' ({{j|キングザコワラジ|Kingu Zako Waraji|King Small Fry Woodlouse}}; known as the '''Queen Baub''' in the European version of ''[[Pikmin Adventure]]'']]) is the second miniboss encountered in ''Pikmin Adventure'', first seen in both enemy and miniboss form in ''Boss of the Beebs''. It is a large [[Pikmin Adventure Enemies#Creepy Beeb|Creepy Beeb]] that has yellow feet, blue flexible legs, and a blue and yellow antenna resembling the large Creepy Beeb. The primary differences between the King Beeb and the Creepy Beeb is that the Creepy Beeb has flatter, almost googly eyes while the King Beeb has far more spherical eyes like the [[Bladed Beeb|Geater Bladed Beeb]]. | |||
{{ | |||
==Behavior== | |||
Upon noticing the player, the King Beeb will slowly wander towards them before flashing yellow and curl up into a ball. It will proceed to roll around the area for an extended amount of time, trying to crush the Olimar and Pikmin players. After a short time, the King Beeb may stop rolling by ending up on its back, unable to move for a little bit. | |||
==Strategy== | |||
The King Beeb rolls around faster and longer than the Creepy Beeb so it is advised that players takes advantage of their ability to jump by flicking the GamePad's screen or press {{button|wii|2}} on their Wiimote in order to avoid being crushed. Some arenas are shaped like an octogon, so running from corner-to-corner while it is rolling around is the best solution to avoid being crushed. | |||
Sometimes, there will be bombs and rocks that can be grabbed. These are good to use against the King Beeb during its rolling attack. While it is possible to stun the King Beeb with a rock throw, there is also a chance that a successful rock throw will not stun it. After rolling the King Beeb will end up laying on its back trying to regain its composure, allowing for the Olimar and Pikmin players to deal tons of damage without much risk of getting hurth themselves. | |||
== | ==Monita's Notes== | ||
{{US|y}}: {{transcript|This royal Beeb of all Beebs curls into a ball and rolls around. You'd think its eyes would get in the way when it rolls, but no, it just pulls them in.}} | |||
{{EU|y}}: {{transcript|This big, bad Baub blasts light, curls into a ball and rolls around. ◆ You'd think its eyes would get in the way when it rolls, but no, it just pulls them in.}} | |||
==Names in other languages== | ==Names in other languages== | ||
| Line 538: | Line 569: | ||
==Gallery== | ==Gallery== | ||
<gallery> | <gallery> | ||
File:PA King Beeb Statue.png|The King Beeb [[Pikmin Adventure prizes|statue]] in the ''[[Nintendo Land]]'' Plaza. | |||
File:PA King Beeb Statue Knocked Down.png|The King Beeb statue knocked down after being interacted with. | |||
File:PikAdv_KingBeeb.jpg|The King Beeb being knocked on its back during a battle. | File:PikAdv_KingBeeb.jpg|The King Beeb being knocked on its back during a battle. | ||
File:Pikmin adventure 3.png|A King Beeb in a Versus Mode match. | File:Pikmin adventure 3.png|A King Beeb in a Versus Mode match. | ||
</gallery> | </gallery> | ||
==Trivia== | ==Trivia== | ||
The first two small King Beebs in ''Boss of the Beebs'' are mistakenly referred to as [[Bombardier Beeb|Bombardier Beebs]] in the [[Prima Games]] ''Nintendo Land'' guide. | The first two small King Beebs in ''Boss of the Beebs'' are mistakenly referred to as [[Pikmim Adventure enemies#Bombardier Beeb|Bombardier Beebs]] in the [[Prima Games]] ''Nintendo Land'' guide. | ||
{{clear}} | {{clear}} | ||
== Bulblord == | == Bulblord == | ||
[[File:Bulblord NL.png|thumb|The Bulblord during its | [[File:Bulblord NL.png|thumb|300px|The Bulblord during its introduction cutscene.]] | ||
The '''Bulblord''' ({{j|トノサマチャッピー|Tonosama Chappī|Lord Chappy}}) is the | The '''Bulblord''' ({{j|トノサマチャッピー|Tonosama Chappī|Lord Chappy}}) is the first major boss in ''Pikmin Adventure'', appearing in the fourth standard challenge, ''Overthrow the Bulblord''. The Bulblord is an incredibly large [[Bulborb]] that has weak spots and smaller white spots dotted all over its back, stalked eyes that can be destroyed, retractable legs, and a mechanism that allows the head to move independently from the rest of the body. | ||
== | ==Behavior== | ||
Once the battle starts, the Bulblord will start walking towards the players, and will do one of three attacks during its first phase. One attack involves the biting of any players near its mouth. Another attack involves the retraction of its legs and weakpoints and rolling from side-to-side across the stage, much like the [[Empress Bulblax]]. The last attack the Bulblord will do during its first phase will be rushing in a straigt line similar to the [[Pikmin Adventure enemies#Red Bulborb|Bulborb]]. | |||
[[ | During the second phase, the Bulblord will only attack either with its roll or with a combination of the bite and rush attacks that functions similar to the [[Pikmin Adventure enemies#Green Bulborb|Green Bulborb]]'s homing charge. | ||
==Strategy== | ==Strategy== | ||
{{guide}} | {{guide}} | ||
It is advised to use a strategy similar to the one used to defeat the [[Pikmin Adventure enemies#Bilious_Bulborb|Bilious Bulborb]], as getting it to turn around in single player is hard; simply have [[Olimar]] run behind it, causing it to turn around to attack them. While still dodging its attacks, get the other Mii Pikmin players to attack its weak points. | |||
After all of the weakpoints have been destroyed, it will gain 2 new ones on its knees. It is best to use the distracting method to aim at these, as the Bulblord will begin to move much faster once these are exposed. Its main attack is a charging-bite in which it dashes across the whole stage in a single direction. | |||
Once both of the weakpoints on thelegs are destroyed, it will helplessly roll onto his back, revealing its final weakpoint on its underbelly. Simply throw all your Pikmin and destroy it, which will cause the Bulblord to roar in agony before exploding into ''Nintendo Land'' Coins, the park's currency. After defeating the Bulblord, it is possible to unlock it as a [[Pikmin Adventure prizes|statue]] in the Plaza. | |||
Destroying both of the Bulblord's eyes will not contribute to the fight in any way aside from rewarding the player with a stamp, the ''Eyes of the Bulblord''. | |||
==Monita's Notes== | |||
{{US|y}}: {{transcript|With its sharp teeth and devastating roll attack, this is a foe to fear. I highly advise you to take caution if you don't want to get crushed into scrap metal!}} | |||
{{EU|y}}: {{transcript|With its sharp teeth and devastating roll attack, this is a foe to fear. ◆ Take Bulblords on one at a time or you'll end up with Pikmin pâté!}} | |||
==Naming== | ==Naming== | ||
| Line 607: | Line 638: | ||
==Gallery== | ==Gallery== | ||
<gallery> | <gallery> | ||
PA Bulblord Statue.png|The Bulblord [[Pikmin Adventure prizes|statue]] as seen in the ''Nintendo Land'' Plaza. | |||
PA Bulblord Statue roar.png|The Bulblord statue roaring after being interacted with once. | |||
PA Bulblord Statue retracted.png|The Bulblord statue with its legs retracted after interacting with it two times. | |||
PA Bulblord Statue retracting.png|The Bulblord statue in the middle of getting back on its legs after interacting with it three times. | |||
PA Bulblord Statue alternate roar.png|The Bulblord statue roaring while rotating its head after interacting with it four times. | |||
PA Bulblord Sleeping.png|The Bulblord sleeping at the start of its introductory cutscene in ''Overthrow the Bulblord''. | |||
PA Bulblord Awakening.png|The Bulblord waking up during its introduction cutscene. | |||
PA Bulblord Roar.png|The Bulblord roaring during its introduction cutscene. | |||
NintendoLand PikminAdv.png|The Bulblord boss fight. | |||
PA Bulblord roll attack.png|The Bulblord while it is rolling. | |||
PA Bulblord bite attack.png|The Bulblord biting. | |||
PA Bulblord tired.png|The Bulblord panting, unable to do any attacks. | |||
PA Bulblord stunned.png|The Bulblord while it is stunned, unable to do any attacks. | |||
PA Bulbord Extra Weak Spots.png|The Bulblord revealing extra weak spots during the transition cutscene between phase 1 and 2. | |||
PA Enraged Bulblord.png|The Bulborb getting enraged. | |||
PA Bulblord charging bite attack.png|The Bulblord doing its charging bite attack exclusively in phase 2. | |||
PA Bulblord knocked over.png|The Bulblord while it is knocked over. | |||
PA Bulblord Defeat.png|The Bulblord after being defeated. | |||
</gallery> | </gallery> | ||
{{clear}} | {{clear}} | ||
== Large- | == Large-Mouth Wollywog == | ||
[[File:Large-Mouth_Wollywog_NL.png|thumb|The Large-Mouth Wollywog sticking out its tounge during its | [[File:Large-Mouth_Wollywog_NL.png|thumb|300px|The Large-Mouth Wollywog sticking out its tounge during its introduction cutscene.]] | ||
The '''Large-Mouth Wollywog ''' ({{j|オオグチイモガエル|Oo Guchi Imo Gaeru|Big-mouthed Potato Frog}}; known as the '''Largemouth Wollyhop''' in the European version of ''[[Pikmin Adventure]]'') is the second major boss fought in ''Pikmin Adventure'', being found in the eight challange, ''Swamp Master'' (known as ''Master of the Marsh'' in the European version). It has almost no resemblance to the [[Wollyhop|Wollywog]] aside from its basic shape being somewhat similar, instead featuring large cheecks hiding weak spots, stalked eyes, and a large, gaping mouth with a long tongue that ends with either a weak point or a [[Spike Ball]]. | |||
{{ | |||
==Behavior== | |||
Once the battle starts, the Large-Mouth Wollywog will stay put in the pond in the middle of the arena, where it will either go underwater or do its attack. The Large-Mouth Wollywog's attack is different from other [[Amphituber family|Wollywogs]] due to the fact that it attacks by unraveling its spiked tongue out of its large, gaping mouth to damage players. After 3 attacks or if the weakspot is hit, the Large-Mouth Wollywog will be stunned by the tounge hitting its head, unable to attack for a short time while the tounge and the weak spot on it is exposed. Once the weak spot on the tounge has been destroyed, the Large-Mouth Wollywog will proceed to hop up before landing back into the pond it started in, leaving the pond dry and the boss stunned with the weak points on its cheeks exposed. After it recovers, the boss will then start to hop around the arena and unrevel its tounge with a [[Spike Ball]] in place of the broken weak spot. It will repeat this process until it eventually hops back into the pond and it refills with water and hide the weak spots on its cheeks. Once both weak spots on its cheeks are detroyed, the Large-Mouth Wollywog will yell and close the now destroyed weak spots while the pond is being refilled. During phase 2 the Large-Mouth Wollywog will hop out of the pond and around the stage and unraveling its spiked tongue 3 times in a row before it hops back into the water and repeats the process until it is defeated. | |||
==Strategy== | ==Strategy== | ||
{{guide}} | {{guide}} | ||
As soon as the battle starts, you must be moving constantly to ensure the creature's tongue does not hit you. Staying near the edges of the pond will make it easier to dodge, since the boss has a hard time rotating while in the pond. Once its tongue hits the creature's face on its way back, it will be stunned and the weak spot at the end of the tongue can be attacked without much risk. Once the tongue is destroyed, the Large-Mouth Wollywog will hop and clear the pond of water alongside opening the weak spots on the cheecks. Once it recovers it will start attacking at a much faster pace with a [[Spike Ball]] at the end of the tongue. | |||
Once the weak spots on the cheecks are destroyed, the Large-Mouth Wollywog will enter its second phase, beginning to jump wildly across the stage counterclockwise, and after four hops (two small, two large), it will shoot out its tongue. Stay on the opposite side of the arena during this, and dodge the attacks. Once the Wollywog finishes, quickly chase after where it is going to land and stay near it. Circle it so that you are always behind its back, making it easy to dodge the tongue. When it finishes its attack, shoot an onslaught of Pikmin at the weak spot on its back. Once this weak spot has been destroyed, it will be defeated. | |||
==Monita's Notes== | |||
{{US|y}}: {{transcript|The dreaded master of the swamp, this alien creature wields its tongue like a lead-plated yo-yo. It also has the ability to absorb great quantities of water to keep its skin nice and slimy.}} | |||
{{EU|y}}: {{transcript|The dreaded master of the swamp, this alien creature wields its tongue like a lead-plated yo-yo. It also has the ability to absorb great quantities of water to keep its skin nice and slimy.}} | |||
==Names in other languages== | ==Names in other languages== | ||
| Line 667: | Line 709: | ||
==Gallery== | ==Gallery== | ||
<gallery> | <gallery> | ||
PA Large-Mouth Wollywog Statue.png|The [[Pikmin Adventure prizes|statue]] of the Large-Mouth Wollywog as seen in the ''[[Nintendo Land]]'' plaza. | |||
PA Large-Mouth Wollywog Statue Knocked Down.png|The Large-Mouth Wollywog statue knocked down after being interacted with once. | |||
PA Large-Mouth Wollywog Statue Recovering.png|The Large-Mouth Wollywog statue recovering from its knockout after being interacted with twice. | |||
PA Large-Mouth Wollywog Statue Roar.png|The Large-Mouth Wollywog statue roaring after being interacted with three times. | |||
</gallery> | </gallery> | ||
{{clear}} | {{clear}} | ||
| Line 675: | Line 718: | ||
==Emperor Pinchipede== | ==Emperor Pinchipede== | ||
[[File:Emperor Pinchipede NL.png|thumb|300px|The Emperor Pinchipeede during its introductory cutscene.]] | [[File:Emperor Pinchipede NL.png|thumb|300px|The Emperor Pinchipeede during its introductory cutscene.]] | ||
The '''Emperor Pinchipede''' ({{j|ダイオウハサミムカデ|Daiō Hasami Mukade|Great King Scissors Centipede}}) is the third major boss encountered in ''[[Pikmin Adventure]]''. It is a centipede like creature with a green side with weak spots and an orange side featuring spikes to take out players. Its seperated appearance and mandibles bears a resemblance to the [[Armored Mawdad]], a creature in ''[[Pikmin 3]]''. | |||
{{ | |||
==Strategy== | ==Strategy== | ||
| Line 691: | Line 731: | ||
After its head weakpoint is damaged down to half of its health, the Emperor Pinchipede will seperate from all but one segment and start constantly moving while biting. During this phase all of the other segments will once again turn to their orange sides and start moving independantly. The Emperor Pinchipede will periodically stop moving for a but before continuing to move around the stage, making for a great time to attack it while dodging the other segments. | After its head weakpoint is damaged down to half of its health, the Emperor Pinchipede will seperate from all but one segment and start constantly moving while biting. During this phase all of the other segments will once again turn to their orange sides and start moving independantly. The Emperor Pinchipede will periodically stop moving for a but before continuing to move around the stage, making for a great time to attack it while dodging the other segments. | ||
==Monita's Notes== | |||
{{transcript|This beast's segmented body has plenty of weak points, making it easy to target. However, it will hide them when it is upset. Just don't get too close to its snapping jaws.|block=y}} | |||
==Names in other languages== | ==Names in other languages== | ||
| Line 729: | Line 772: | ||
==Greater Bladed Beeb== | ==Greater Bladed Beeb== | ||
[[File: | [[File:Greater_Bladed_Beeb.png|thumb|300px|The Greater Bladed Beeb during its introduction cutscene.]] | ||
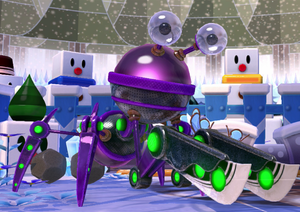
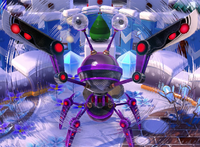
The '''Greater Bladed Beeb''' ({{j|キザミワラジ|Kizami Waraji|Cutting Woodlouse}}; known as the '''Greater Bladed Baub''' in the European version of ''Pikmin Adventure'') is the fourth and final boss of the standard challenges in ''[[Pikmin Adventure]]''. It is a large, glossy, purple praying mantis-like creature with blades on its arms. It is the only boss in ''Pikmin Adventure'' to be treated like a normal enemy in the advanced stages. | The '''Greater Bladed Beeb''' ({{j|キザミワラジ|Kizami Waraji|Cutting Woodlouse}}; known as the '''Greater Bladed Baub''' in the European version of ''Pikmin Adventure'') is the fourth and final boss of the standard challenges in ''[[Pikmin Adventure]]''. It is a large, glossy, purple praying mantis-like creature with blades on its arms. It is the only boss in ''Pikmin Adventure'' to be treated like a normal enemy in the advanced stages. | ||
| Line 736: | Line 779: | ||
{{US|y}}: {{transcript|This alien insect is slow to wake but quick to anger. The adrenaline rush causes it to speed up and turn red with fury.}} | {{US|y}}: {{transcript|This alien insect is slow to wake but quick to anger. The adrenaline rush causes it to speed up and turn red with fury.}} | ||
{{EU|y}}: {{transcript|This alien insect | {{EU|y}}: {{transcript|This alien insect is slow to wake but quick to anger. The adrenaline rush causes it to speed up and turn a furious red.}} | ||
==Attacks== | ==Attacks== | ||
| Line 748: | Line 791: | ||
Once the second phase of the battle is initiated, it becomes harder to attack. Wait until it misses with its blade spin attack and use the short moment of time to attack it's backside or the back of its head. A wise strategy is to run around it while at a close distance. If executed correctly, it will not harm the player. Wait until it is finished attacking to attack it in the short window of time in between attacks. | Once the second phase of the battle is initiated, it becomes harder to attack. Wait until it misses with its blade spin attack and use the short moment of time to attack it's backside or the back of its head. A wise strategy is to run around it while at a close distance. If executed correctly, it will not harm the player. Wait until it is finished attacking to attack it in the short window of time in between attacks. | ||
Another slightly more risky strategy is when it comes to slice up, walk straight into it. The Bladed Beeb only hits where the player is at a certain time, and by moving closer, the blades will not harm you. This is risky, since it could very easily get you while coming in. Another wise strategy for the Olimar player is to utilize the [[Pikmin Adventure#Whip Seed|Whip Seed]] or [[Pikmin Adventure#Knuckle Seed|Knuckle Seed]]. By staying far away from it, the | Another slightly more risky strategy is when it comes to slice up, walk straight into it. The Bladed Beeb only hits where the player is at a certain time, and by moving closer, the blades will not harm you. This is risky, since it could very easily get you while coming in. Another wise strategy for the Olimar player is to utilize the [[Pikmin Adventure#Whip Seed|Whip Seed]] or [[Pikmin Adventure#Knuckle Seed|Knuckle Seed]]. By staying far away from it, the GamePad user can easily pelt it from a safe distance. This works even better in multiplayer, where the Pikmin can distract the Beeb while the GamePad user pelts it from afar. | ||
In ''Cage of Terror'', you must fight 3 smaller Elemental Bladed Beebs with lower health. The same strategies apply here, but the Beebs now have a shorter attack range and less health, making it an easier fight. | In ''Cage of Terror'', you must fight 3 smaller Elemental Bladed Beebs with lower health. The same strategies apply here, but the Beebs now have a shorter attack range and less health, making it an easier fight. | ||
| Line 784: | Line 827: | ||
==Gallery== | ==Gallery== | ||
<gallery> | <gallery> | ||
BladedBeebStuck.png|The Greater Bladed Beeb stuck in the ground. | |||
BladedBeebStuck.png|The Greater Bladed Beeb stuck in the ground. | BladedBeebFight.png|Fighting the Greater Bladed Beeb during its second phase. | ||
BladedBeebFight.png|Fighting the Greater Bladed Beeb during its second phase. | |||
BladedBeebDefeat.png|The Greater Bladed Beeb is defeated. | BladedBeebDefeat.png|The Greater Bladed Beeb is defeated. | ||
File:Bladed Beeb 1.jpg|The statue of the Greater Bladed Beeb. | File:Bladed Beeb 1.jpg|The statue of the Greater Bladed Beeb. | ||
| Line 795: | Line 837: | ||
==Trivia== | ==Trivia== | ||
*The bottom half of its spherical head seems to resemble a microphone or speaker. This may explain how it makes its deafening roar, despite having no mouth. | *The bottom half of its spherical head seems to resemble a microphone or speaker. This may explain how it makes its deafening roar, despite having no mouth. | ||
*The Bladed Beeb has a lot of characteristics that other bosses don't possess. Its the only boss seen multiple times in some levels, be seen in both the main and advanced stages, and | *The Greater Bladed Beeb has a lot of characteristics that other bosses don't possess. Its the only boss seen multiple times in some levels, be seen in both the main and advanced stages, and be treated as a normal enemy. | ||
* The Greater Bladed Beeb is referred to as the "Bladed Beeb" during its introductory cutscene. | * The Greater Bladed Beeb is referred to as the "Bladed Beeb" during its introductory cutscene. | ||
{{clear}} | |||
==Grand Bulblord== | |||
[[File:Grand Bulblord NL.png|thumb|300px|The Grand Bulblord during its introduction cutscene.]] | |||
The '''Grand Bulblord''' ({{j|ショーグンチャッピー|Shōgun Chappī|General Chappy}}) is the first boss in the extra challenges of ''[[Pikmin Adventure]]''. It is a variant of the [[Bulblord]] found in the standard challenges. It has a similar color scheme to the [[Emperor Bulblax]] from the [[Pikmin series|main series games]] and the [[Pikmin Adventure enemies#Green Bulborb|Green Bulborb]] also seen in ''Pikmin Adventure''. | |||
==Behavior== | |||
The Grand Bulblord's attacks are very similar to those of the Bulblord, only faster. | |||
==Strategy== | |||
{{guide}} | |||
The Grand Bulblord has the same strategy as the original Bulblord, but the Grand Bulblord has more health, does not react when the weak points on its back are destroyed, and is faster during its second phase. | |||
What you must do is remove all of its weak points from its back. If you are low leveled, it is recommend to go for the smaller ones first, as they break easily and give you lots of [[Nectar#Pikmin Adventure|nectar]] for you to level up with. In the last challenge of the attraction, '''Goodbye Pikmin''', which is a boss rush, a few Creepy Beebs and a [[Bulborb#Pikmin Adventure|Bulborb]] will spawn in. Getting rid of these first will provide a decent amount of nectar. | |||
Once the Grand Bulblord's back weakpoints have been destroyed, its sclera will turn black, and the rings around it's pupils red with rage. The joints on its legs open up into weakpoints, providing the next objective. Begin targeting only one of the legs so that when it breaks, the Grand Bulblord will fall over onto its back, revealing its major weak spot on its underbelly. Once it starts falling over, call your Pikmin and teammates and begin throwing them on top so that everyone can help out. Like the Bulblord, it is possible to get a stamp by attacking and breaking its eyes, which act similar to its weakpoints. | |||
When the final weak point breaks, the Grand Bulblord's head begins to spin ferociously, slowing down gradually until the entire body explodes. | |||
Destroying both of the Grand Bulblord's eyes will reward the player with a stamp, the ''Eyes of the Bulblord''. | |||
==Naming== | |||
{{see also|Grub-dog family#Naming}} | |||
===Names in other languages=== | |||
{{foreignname | |||
|Jap = ショーグンチャッピー | |||
|JapR = Shōgun Chappī | |||
|JapM = General Chappy | |||
|Dut = Bezeten Bulblord | |||
|DutM = | |||
|Fra = Général Bulblord | |||
|FraM = | |||
|FraN = | |||
|Ger = Königspunktkäfer | |||
|GerM = | |||
|GerN = | |||
|Ita = Gran Bosscoleto | |||
|ItaM = Big Boss-Bulborb | |||
|ItaN = | |||
|PorP = Baub Encrustado | |||
|PorPM = | |||
|PorPN = | |||
|Rus = Главный клубнекороль | |||
|RusR = | |||
|RusM = | |||
|RusN = | |||
|Spa = Gran bulbo feroz | |||
|SpaM = | |||
|SpaN = | |||
|notes = y | |||
}} | |||
==Gallery== | |||
<gallery> | |||
File:Grand Bulblord angry NL.png|The Grand Bulblord enrages during its transition cutscene. | |||
</gallery> | |||
{{clear}} | |||
==Translucent Wollywog== | |||
[[File:Translucent_Wollywog_NL.png|thumb|300px|The Translucent Wollywog during its introduction cutscene.]] | |||
The '''Translucent Wollywog''' ({{j|オオグチカスミガエル|Oo Guchi Kasumi Gaeru|Big-mouthed Haze Frog}}; known as '''Translucent Wollyhop''' in the European version) is the second boss to be fought in the extra challenges of ''[[Pikmin Adventure]]''. It is almost the same exact boss as the [[Large-Mouth Wollywog]] from the 16 standard challenges. The only differences between the two are that the Translucent Wollywog is see-through compared to the Large-Mouth Wollywog which is yellow, and that it shoots its tongue out three times in a row instead of just one time. | |||
==Strategy== | |||
The strategy used for the Large-Mouth Wollywog also applies here. When it shoots out its tongue, attack it while it is still out, and it will hit itself in the head and be dazed for a bit. Use this interval of time to attack the weak point on its tongue, which should break in no time. Once it breaks, the Translucent Wollywog will move back into the center of the pond. Its cheeks are now open as weak points, proceed to throw Pikmin at them, dodging any tongue attacks. After the player breaks both cheeks, its back becomes the final weak point. At this time, it is best to locate a rock, and throw it at the Translucent Wollywog. Chances are that it will be stunned for a decent amount of time, so get behind the Wollywog and throw Pikmin at its back until it breaks, finishing the fight. | |||
===Names in other languages=== | |||
{{foreignname | |||
|Jap = オオグチカスミガエル | |||
|JapR = | |||
|JapM = | |||
|Dut = Doorzichtige Wollyhop | |||
|DutM = | |||
|Fra = Wog Translucide | |||
|FraM = | |||
|FraN = | |||
|Ger = Durchsichtiger Orcalog | |||
|GerM = | |||
|GerN = | |||
|Ita = Ranuca idropica traslucida | |||
|ItaM = | |||
|ItaN = | |||
|PorP = Batrassalto Translúcido | |||
|PorPM = | |||
|PorPN = | |||
|Rus = Прозрачный вопапрыг | |||
|RusR = | |||
|RusM = | |||
|RusN = | |||
|Spa = Sapo gigante translúcido | |||
|SpaM = | |||
|SpaN = | |||
|notes = y | |||
}} | |||
==Trivia== | |||
Interestingly, the Translucent Wollywog is classified under the "wollywog family", not the [[Amphituber|amphituber family]], likely due belonging to a separate family in the Japanese version of the game ({{j|カスミガエル科|Kasumi Gaeru Ka|haze frog family}}). This is not the case in the European version. | |||
{{clear}} | |||
==Monochromatic Pinchipede== | |||
[[File:Monochromatic Pinchipede NL.png|thumb|300px|The Monochromatic Pinchipede during its introduction cutscene.]] | |||
{{clean}} | |||
The '''Monochromatic Pinchipede''' ({{j|シロクロハサミムカデ|Shirokuro Hasami Mukade|Monochrome Scissors Centipede}}) is the third boss fought during {{pa}}{{'s}} extra challenges. Like other members of the [[Pinchipede family]], it is a long centipede-like insect with huge serrated pincers. It looks very similar to the [[Emperor Pinchipede]], only here, it is colored white and has higher speed and health. It looks blue in the first battle it is fought, due to the ambient lighting; during the Boss Rush, it has an orange tint, for the same reasons. | |||
{{clear}} | |||
==Strategy== | |||
{{guide}} | |||
The Monochromatic Pinchipede is fought more-or-less the same way as one would fight the Emperor Pinchipede. The only difference is that the fight requires more care to be taken overall: The Monochromatic Pinchipede has more health compared to it's predecessor, and is generally faster overall. | |||
Begin by targeting the smaller segments of its body. Ironically, these smaller segments have significantly more health than the larger ones, presumably because the larger weak points double as spinning spike tops that circle the arena. | |||
Once the smaller portions are removed, quickly remove the larger, more threatening, weak points, which should be easier due to their smaller health pool. After all of the portions are destroyed, the larger spinning sections will stop, and retract back to their original place on the Monochromatic Pinchipede. | |||
[[File:Monochromatic Pinchipede angry NL.png|thumb|The Monochromatic Pinchipede's black, more dangerous side.]] | |||
The Monochromatic Pinchipede will now pull itself backward and charge up an attack, which reveals its last weak point located on its head. Use this opportunity to dish out as much damage as possible. It will flip over to its black side and rampage across the arena, trying to corner you and crush you with its gaping mandibles. After a few seconds, it will start to slow down, indicating it will start to charge up its attack again. | |||
Once this weak point reaches a quarter of its health, all segments will fling away from the Monochrome Pinchipede and spin around the stage. Care must be taken during this phase. Avoid the spinning platforms, and wait for the Pinchipede to charge into you. Dodge its attack and begin throwing Pikmin onto its back. These Pikmin will stay on there forever, as the Pinchipede now has no way to shake them off. At this point, you can wait out the battle by avoiding it's attacks while the Pikmin whittle it down, or try to add more Pikmin to the attack to kill it faster. Be careful, though, because the Monochromatic Pinchipede will now constantly chomp it's mandibles during this phase. | |||
Eventually, the last weak spot will reach 0 HP, and the Monochromatic Pinchipede will die. | |||
===Names in other languages=== | |||
{{todo|Find the Russian name due to it not being easily extractable.}} | |||
{{foreignname | |||
|Jap = シロクロハサミムカデ | |||
|JapR = | |||
|JapM = | |||
|Dut = Zwart-witte Pinchipede | |||
|DutM = | |||
|Fra = Mille-Klak Bicolore | |||
|FraM = | |||
|FraN = | |||
|Ger = Schwarzweißkaufüßler | |||
|GerM = | |||
|GerN = | |||
|Ita = Centiciompo monocromatico | |||
|ItaM = | |||
|ItaN = | |||
|PorP = Centopinça Monocromática | |||
|PorPM = | |||
|PorPN = | |||
|Rus = | |||
|RusR = | |||
|RusM = | |||
|RusN = | |||
|Spa = Ciempiédulo bicolor | |||
|SpaM = | |||
|SpaN = | |||
|notes = y | |||
}} | |||
==Gallery== | |||
<gallery> | |||
</gallery> | |||
{{clear}} | |||
==Greater Studded Beeb== | |||
[[File:Greater_Studded_Beeb_NL.png|thumb|300px|The Greater Studded Beeb during its introduction cutscene.]] | |||
The '''Greater Studded Beeb''' ({{j|アバレワラジ|Abare Waraji|Raging Woodlouse}}; known as '''Greater Studded Baub''' in the European version) is the boss of the nineteenth level (''The Tyrant Arrives'' in the European version) and the final boss of the ''Nintendo Land'' attraction ''[[Pikmin Adventure]]''. It shares the same basic shape with the [[Bladed Beeb]], only it has [[Spike Ball]]s for hands instead of blades, and starts off with yellow lights instead of green. | |||
==Strategy== | |||
The strategy for killing this beast is basically exactly the same as the Bladed Beeb. Just be wary that the Greater Studded Beeb has significantly more vitality, and is better at blocking attacks from the [[Pikmin Adventure#Power-ups|Knuckle Seed]] with its Spike Balls. | |||
[[File:Greater Studded Beeb roar NL.png|thumb|The Greater Studded Beeb enraged after one of its weakspots are destroyed for the first time.]] The first thing that must be completed to defeat this foe is breaking one of its weak points. Once one of them breaks, it will roar in rage and the yellow lights will turn red, speeding up its attacks and adding consecutive strikes to its attacks. | |||
Keeping your distance using Knuckle Seed or [[Pikmin Adventure#Power-ups|Whip Seed]] is one good strategy, and dashing to either direction when he prepares his double arm smash attack is wise if you want to keep you power-up. | |||
Another quick but sometimes dangerous technique is getting up close and personal with the mantis-monster. If you stay right up against the Greater Studded Beeb and pummel it with your Knuckle Seed power-up, it wont be able to strike you with its attacks most of the time, excluding its spin attack, in which case you want to jump away. | |||
Once defeated, its eyes will widen, and it will collapse on the floor. Your Miis will pose, and the Greater Studded Beeb's body will proceed to explode into tons of ''Nintendo Land'' Coins. | |||
===Names in other languages=== | |||
{{foreignname | |||
|Jap = アバレワラジ | |||
|JapR = | |||
|JapM = | |||
|Dut = Pletterbaub Grand | |||
|DutM = | |||
|Fra = Brok Piquant | |||
|FraM = | |||
|FraN = | |||
|Ger = Killerkugelkäfer | |||
|GerM = | |||
|GerN = | |||
|Ita = Ultrapidolino borchiato | |||
|ItaM = | |||
|ItaN = | |||
|PorP = Baub Encrustado | |||
|PorPM = | |||
|PorPN = | |||
|Rus = Большой шиполап | |||
|RusR = | |||
|RusM = | |||
|RusN = | |||
|Spa = Boloide tachonado | |||
|SpaM = | |||
|SpaN = | |||
|notes = y | |||
}} | |||
{{clear}} | |||
Latest revision as of 00:33, June 2, 2024
Sandbox to hold my W.I.P. edits for certain articles.
Single Noun Edits
The following W.I.P.s of a few enemy articles with minor edits, the biggest of which includes using single nouns throughout.
Albino Dwarf Bulborb
The Albino Dwarf Bulborb (コチャッピーモドキ?, lit.: "Pseudo Small Chappy") is a small nocturnal enemy that only appears in Pikmin 4. This enemy resembles the Dwarf Bulborb in appearance, but has a white to red ombré back instead of a spotted one, similar to the Bulborb Larva, and additionally have slightly larger snouts compared to most Dwarf Bulborbs. These differences largely stem from both its very young age, being the first molt of a Bulborb Larva, and because it is a true member of the grub-dog family rather than a breadbug mimic.
Despite being their young, adult Bulborbs are known to cannibalize Albino Dwarf Bulborbs. In order to avoid this, they are only active at night and in caverns, where the poor visibility allows them to evade predation. The Albino Dwarf Bulborb is noticeably tougher than the Dwarf Bulborb, requiring two direct Pikmin throws to the back to dispatch.
Anode Beetle
The Anode Beetle (エレキムシ?, lit.: "Electric Bug") is a small enemy found in Pikmin 2 and Pikmin 4. This creature is blissfully unaware of Pikmin, and if found alone, is harmless; but if there is a partner nearby, an electrical barrier can be produced between the two, subjecting any nearby Pikmin to electrocution. As such, it is commonly found in groups of 2 or more.
Swarming will not harm it, as it has a protective shell, similar to the Flint Beetles. To damage it, one must throw a Pikmin on top of it to flip it over, then proceed to swarm it. Purple Pikmin can cause them to flip over even if not directly hit.
Arachnode
The Arachnode (マリグモ?, lit.: "Temari Spider") is a spider-like enemy in Pikmin 3 and Pikmin 4. While dormant on its web, the Arachnode resembles a cocoon, with a black and yellow striped and sphere-shaped body. This shape and coloring comes from the eight legs wrapped tightly around its body; its actual body is comprised of small black orbs with yellow circles instead of stripes. Once a Pikmin or leader gets caught in an Arachnode's web, it will uncurl its legs after a while, and wander up to its prey, consuming them quickly once it has reached them. It may also wander around the web freely in order to avoid Pikmin that are being thrown at it. The web will collapse once the Arachnode is defeated.
Pikmin caught in the web can be saved by whistling at them. This is important, especially with a small squad, as Pikmin shaken off by the Arachnode will usually get stuck in the web. Winged Pikmin carrying objects will get stuck in webs that are along their route, making webs the primary obstacle for these types of Pikmin.
Arctic Cannon Larva
The Arctic Cannon Larva (ユキフタクチ?, lit.: "Snow Two-Mouth") is an enemy in Pikmin 3 and Pikmin 4. It is bright green, with a lavender underbelly, and are accustomed to cold conditions. They are the larval form of the Arctic Cannon Beetle.
Unlike their rock-spitting relatives, the Arctic Cannon Larva launches giant snowballs. While mostly equivalent to boulders in functionality, snowballs are incapable of killing Pikmin, instead simply picking them up and carrying them along until they crash into something (even other snowballs); Winged Pikmin won't even be picked up by the projectiles, only knocked back. Leaders will be picked up as well, which also traps them until the snowball is destroyed. As a result, the creature is annoying at best, and is only a threat if the Pikmin it rolls away end up next to some other enemy or hazard without the player noticing, but can be killed with relative ease by any Pikmin type.
Bulborb
The Bulborb (チャッピー?, lit.: "Chappy"), known as the Spotty Bulborb in Pikmin and the Red Bulborb (アカチャッピー?, lit.: "Red Chappy") in Pikmin 2, is a common enemy found throughout the Pikmin series. The Bulborb is one of the most prominent enemies in the franchise and appear in all 4 numbered Pikmin games. It also has apperances in Hey! Pikmin, Pikmin Adventure, Pikmin Short Movies, has several pieces of merchandise based on it, and are the focus of the first game's North American boxart. The Bulborb is the most commonly encountered member of the particularly extensive and diverse Grub-dog family.
The Bulborb has pointed snouts, eyes on stalks, and a red back with white spots. It only has two sharp fangs on either side of its mouth. It is a largely nocturnal creature and spends much of its time sleeping, only waking up when detecting potential prey, or during the night. It is often found sleeping near Dwarf Bulborbs, which are actually members of the Breadbug family.
Yellow Wollyhop
The Yellow Wollyhop (イモガエル?, lit.: "Potato Frog"; known as the Yellow Wollywog depending on the game and region) is a frog-like enemy found in the Pikmin games. It is a large, round, yellow creature with large eyes and beady pupils, and short front legs with larger hind legs. Its skin is tinted green towards the top of its head, with green spots along the sides. It can usually be found in or around large, open-air bodies of water, but also in moist, rainy areas.
It is known to leap into the air, floating temporarily, and dropping, with the intent of landing on and crushing any Pikmin below, a behavior which is most readily explained as an attempt to drive predators away from developing eggs. According to Olimar's notes, these are Wolpole eggs, revealing that the Yellow Wollyhop and the Wolpole are the same exact species.
It is the only mature species of amphituber in both Pikmin 3 and Hey! Pikmin. In these games, they also have a reasoning for it's floating ability: it's throat inflates, presumably allowing it to float in the air temporarily. In Hey! Pikmin, it seems to have slightly increased in size and move slightly faster.
Pikmin Adventure Enemy List
The following lists the appearance of enemies in each level in Pikmin Adventure.
Enemies found in Bulborb Forest
Red Bulborb x9
Creepy Beeb x17
Yellow Bulborb x1
Enemies found in Boss of the Beebs
Red Bulborb x18
Creepy Beeb x14
Yellow Bulborb x1
King Beeb x3
Enemies found in Five Seconds to Takeoff
Creepy Beeb x28
Red Bulborb x1
Enemies found in Overthrow the Bulblord
Bulblord x1
Enemies found in Cannon Smash
Creepy Beeb x15
Yellow Bulborb x8
Red Bulborb x9
Telescoping Pumphog x8
Enemies found in King Beeb is Back
Red Bulborb x15
Yellow Bulborb x14
Telescoping Pumphog x7
Creepy Beeb x30
King Beeb x1
Enemies found in Through the Darkness
King Beeb x15
Telescoping Pumphog
Red Bulborb x7
Yellow Bulborb x5
Enemies found in Swamp Master
Large-mouth Wollywog x1
Enemies found in Lord of a Barren Land
Blowhog x5
invincible Telescoping Pumphog x8
Bombardier Beeb x5
King Beeb x4
Red Bulborb x10
Yellow Bulborb x4
Bilious Bulborb x1
Enemies found in Burst the Giant Balloon
Bombardier Beeb x9
Red Bulborb x7
Yellow Bulborb x5
Telescoping Pumphog x3
King Beeb x4
Blowhog x7
Enemies in Pikmin Adventure Rewrite
The following W.I.P. is a rewrite of the Pikmin Adventure enemies page.
Bulborb
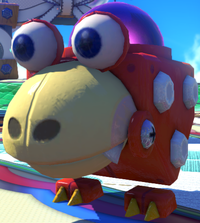
The Bulborb (チャッピー?, lit.: "Chappy") is the most common Bulborb variant found in Pikmin Adventure, being found in almost every level. It bears a resemblance to the Bulborb from the mainline Pikmin series, featuring three large white spots on its sides, large stalkless eyes that turn red when attacking, screws connecting the mouth to the main body, a hole on its back to expel Bulborb Droppings, and lacks any legs connecting the body to the feet. The average Bulborb is slightly bigger than the player, but there are larger Bulborbs found in certain areas.
Behavior
The Bulborb can be found either sleeping or being sent into the area by a gashapon capsule before it starts walking towards the player. It has three walking speeds, a slow walk, a slightly faster walk that is replaced by an attack once the Bulborb is close to the players, and a small hop that helps close the gap between thte Bulborb and the players. Once the Bulborb is close enough to a player, it will either charge a dash in a straight line or try to eat a player depending on how far they are to the Bulborb. If the Bublorb is able to catch a player, it will toss them up, eat them, and turn them into a Bulborb Dropping, making it impossible for them to be whistled at or attack enemies. In this state, the player must be broken out by Olimar or other Pikmin. If the Bulborb is defeated while a player is bring eaten, the player will be sent flying out of its mouth.
Strategy
The Bulborb is one of the easiest enemies to defeat in Pikmin Adventure. It is easy to dodge its charge, but can take out a player if they aren't careful. The only weak spot the Bulborb has is on its back. The Bulborb will try to shake off Pikmin that are on its weak spot, causing them to be knocked over for a little bit. There are ways to circumvent the Bulborb's movement and shaking, however, either by waiting for it to do its slow walk, move out of its sight while it is attacking, or wait for it to start panting. These are the ideal times to attack the Bulborb since it won't be able to shake off the Pikmin on its back until after it starts trying to move.
Monita's notes
![]() US version: “These grub-dog predators tend to sleep during the day and attack aggressively if woken from a nap. Bulborbs come in a wide variety of colors--now on sale at our gift shop!”
US version: “These grub-dog predators tend to sleep during the day and attack aggressively if woken from a nap. Bulborbs come in a wide variety of colors--now on sale at our gift shop!”
![]() European version: “These Grub-dog predators tend to sleep during the day and attack aggressively if woken. ◆ Bulborbs come in a variety of colours and are now on sale at our souvenir shop.”
European version: “These Grub-dog predators tend to sleep during the day and attack aggressively if woken. ◆ Bulborbs come in a variety of colours and are now on sale at our souvenir shop.”
Gallery
Names in other languages
| Language | Name | Meaning | Notes |
|---|---|---|---|
| チャッピー? Chappī |
Chappy | ||
| Bulborb | |||
| Bulborbe | |||
| Punktkäfer | |||
| Coleto | Bulborb | ||
| Orbolbo | |||
| Bulbo | |||
| Клубнеголов |
Yellow Bulborb
|
Since this subject has no official name, the name "Yellow Bulborb" is conjectural. |
The Yellow Bulborb is a common Bulborb variant found in Pikmin Adventure, and acts as the first mini-boss in the attraction. It is almost identical to the Bulborb in appearance, but is colored yellow instead of red or green. Much like the Bulborb, the Yellow Bulborb is typically found slightly larger than players but larger ones are slightly more common to encounter than standard large Bulborbs.
Behavior
The Yellow Bulborb, unlike other Bulborb variants, does not charge at far away players, instead it shoots a projectile to attack the player. On top of this, the Yellow Bulborb will hop around often to dodge attacks and get close to eat players.
The Yellow Bulborb can spew orbs of water that ensnare players, rendering them helpless until they are freed, or a Spike Ball, which will take out a player that gets hit by it. If a player is trapped in a water bubble, they have to be freed by having other Pikmin attack them, similar to the Bulborb Dropping.
Strategy
Due to being a variant of the standard Bulborb, it has a very similar method to defeat it. It will not shake off Pikmin when it is panting or when it is shooting projectiles, being a good time to attack if the projectile misses all players.
Green Bulborb
|
Since this subject has no official name, the name "Green Bulborb" is conjectural. |
The Green Bulborb is a semi-common Bulborb variant found in Pikmin Adventure. It is nearly identical to the Bulborb in appearance, except it is green instead of red or yellow. It usually appears in groups, requiring players to either take on a small group of them, or in some cases, simply run away from them.
Behavior
The Green Bulborb, unlike the other Bulborb variants, can only charge at the players on sight and has no other methods of attack, but it can follow the player when charging, unlike the other Bulborb variants. Once it finishes a charge, it will start panting for a short amount of time..
Strategy
Because the Green Bulborb starts panting after charging, it is very easy to attack it when it isn't charging. When the Green Bulborb is charging however, it is advised to run away because the homing charge makies it difficult to attack without getting hit by it. If possible, one should try to lure charging the Green Bulborb into a pit or a small area to deal with them from a safe area.
Gallery
Bilious Bulborb
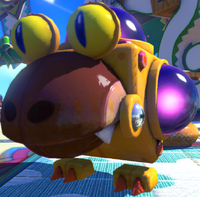
The Bilious Bulborb (テンテンチャッピー?, lit.: "Dotted Chappy") is the rarest standard Bulborb variant found in Pikmin Adventure, and is the seventh mini-boss the player fights. Its thinner eyes and orange color scheme resembles that of the Orange Bulborb. It has smaller spots than other Bulborb variants, so it is suggested by Monita that it may not be a Bulborb subspecies.
Behavior
The Bilious Bulborb shares most of the attacks that are used by the three standard Bulborb variants. It can shoot out Spike Balls and water like the Yellow Bulborb, except it shoots out 6 spike balls in different directions. It also charges in a straight line and pants afterwards like the Red and Green Bulborbs respectively.
Strategy
The best way to defeat the Bilious Bulborb is with multiple players. Have the Olimar player run around it so the other Mii Pikmin can get to the weak-points dotting its back. If the arena has rocks or bombs nearby, Olimar or the Pikmin can pick them up to throw them at the Bilious Bulborb. If the rocks hit the creature on a weak-point or directly on its face, it will be stunned for a few seconds. If the bombs land close enough to the Bilious Bulborb, it can deal massive damage to all the weak spots at once. If utilized properly, the rocks and bombs can turn the tide in a losing battle and defeat the Bilious Bulborb.
Monita's Notes
![]() US version: “The different-sized spots suggest that these may not be a true subspecies of Bulborb at all. Or perhaps they're just normal Bulborbs feeling a little under the weather.”
US version: “The different-sized spots suggest that these may not be a true subspecies of Bulborb at all. Or perhaps they're just normal Bulborbs feeling a little under the weather.”
![]() European version: “The different-sized spots suggest that these may not be a true subspecies of Bulborb at all. ◆ Or perhaps they're just normal Bulborbs feeling a little under the weather.”
European version: “The different-sized spots suggest that these may not be a true subspecies of Bulborb at all. ◆ Or perhaps they're just normal Bulborbs feeling a little under the weather.”
Names in other languages
| Language | Name | Meaning | Notes |
|---|---|---|---|
| テンテンチャッピー? Tenten Chappī |
Dotted Chappy | ||
| Galkleurige Bulborb | |||
| Bulborbe putride | |||
| Bleich-Punktkäfer | |||
| Coleto bilioso | Bilious Bulborb | ||
| Orbolbo Biliar | |||
| Bulbo bilioso | |||
| Желчный клубнеголов |
Creepy Beeb
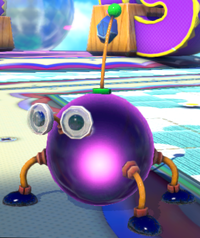
The Creepy Beeb (ザコワラジ?, lit.: "Small Fry Woodlouse"; known as the Worker Baub in the European version of Pikmin Adventure) is the most common enemy found in Pikmin Adventure. The standard appearance features a purple orb with four flexible yellow legs with black feet, stalked googly eyes, and a yellow and green antenna coming out of the top of its head. There is also a variant that features blue legs and yellow feet like the King Beeb, but also features a ring around the yellow tip of its antenna.
Behavior
When it is not attacking players, the Creepy Beeb will try to move towards the player even if they are away from its spawning point. The Creepy Beeb attacks by rolling forward a short distance that can take out careless players.
Strategy
The Creepy Beeb is the easiest enemy to kill in Pikmin Adventure, as it can die in one direct hit and get weighed down by a single Pikmin due to its entire body being a single weak-point. It only rolls forward a little bit, so avoiding its attack is very simple. Some Creepy Beebs take slightly more hits to kill, but are still very simple to get rid of as their attacks are the same as the small ones.
Monita's Notes
![]() US version: “Creepy Beebs are about the size of Olimar and move in packs. They're usually quite peaceful creatures, but their flexible legs and formidable charge attack help them when they feel threatened.”
US version: “Creepy Beebs are about the size of Olimar and move in packs. They're usually quite peaceful creatures, but their flexible legs and formidable charge attack help them when they feel threatened.”
![]() European version: “Worker Baubs are about the size of Olimar and move in groups. These industrious creatures are usually peaceful, but their flexible legs and formidable charge help them when they feel threatened.”
European version: “Worker Baubs are about the size of Olimar and move in groups. These industrious creatures are usually peaceful, but their flexible legs and formidable charge help them when they feel threatened.”
Four large Creepy Beebs resembling the King Beeb, with a player weighing one down.
Names in other languages
| Language | Name | Meaning | Notes |
|---|---|---|---|
| ザコワラジ? Zako Waraji |
Small Fry Woodlouse | ||
| Werkbaub | |||
| Brok rampant | |||
| Krümelkugelkäfer | |||
| Pidolino operaio | |||
| Baub Operário | |||
| Boloide obrero | |||
| Тапколап-рабочий |
Bombardier Beeb
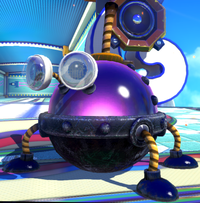
The Bombardier Beeb (サクレワラジ?, lit.: "Bursting Woodlouse"; known as the Bombardier Baub in the European version of Pikmin Adventure) is one of the rarer enemies seen in Pikmin Adventure. It is a variant of the Creepy Beeb that explodes after a few seconds of spotting a player. It has a number of common characteristics to the Creepy Beeb with the black feet and stalked googly eyes, but it also has a few major differences as well including rivets on its sides and a fuse in place of an antenna.
Behavior
Upon spotting a player, the Bombradier Beeb will activate the fuse on its head and chase them. After about 5 seconds, it will stand in place and panic for a second before exploding, causing an explosion that will damage nearby players, enemies, and destructible blocks similar to standard bombs.
Strategy
It is not recommended to attack the Bombardier Beeb directly because of the short time it takes before exploding compared to the high amount of health it often has. Instead, the Bombardier Beeb can be used to the players' advantage to destroy other enemies and obstacles, but they must be careful to not get caught in the blast radius, or else they will be engulfed in the explosion.
Monita's Notes
![]() US version: “This creature is equipped with a fuse and will detonate when approached. Whatever you do, don't go anywhere near it carrying something flammable. Or inflammable, for that matter.”
US version: “This creature is equipped with a fuse and will detonate when approached. Whatever you do, don't go anywhere near it carrying something flammable. Or inflammable, for that matter.”
![]() European version: “This creature is equipped with a fuse and will detonate when approached. ◆ Whatever you do, don't go anywhere near it carrying something flammable. Or inflammable for that matter.”
European version: “This creature is equipped with a fuse and will detonate when approached. ◆ Whatever you do, don't go anywhere near it carrying something flammable. Or inflammable for that matter.”
Names in other languages
| Language | Name | Meaning | Notes |
|---|---|---|---|
| サクレワラジ? Sakure Waraji |
Bursting Woodlouse | ||
| Bombaub | |||
| Brok à retardement | |||
| Knallkugelkäfer | |||
| Pidolino bombardiere | Bombing Beeb | ||
| Baub Bomba | |||
| Boloide bomba | |||
| Тапколап-бомбардир |
Blowhog
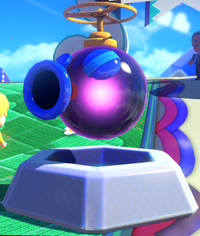
The Blowhog (フーセンドックリ?, lit.: "Balloon Tokkuri"; known as the Puffy Blowhog in the European version of Pikmin Adventure) is a rare enemy that appears in Pikmin Adventure's later levels. It is a purple orb with a blue snout that is lifted by a propellor and features eyes that are often covered up by its eyelids almost always being nearly closed.
Behavior
Instead of blowing from its snout at Pikmin like other Blowhogs, the Blowhog turns its snout into a spike and tries to ram the players head-on in a straight line.
Strategy
Since the Blowhog's entire body is a weak point similar to the Creepy Beeb, attacking it is easier then with most enemies. However, it is very mobile, making precision in throwing slightly difficult, and it usually hovers over pits, making it difficult to throw Pikmin at it without losing them. The player can either attack them from afar with a Whip Seed or try to lure it over solid ground to minimize losses.
Monita's Notes
![]() US version: “This unfriendly beast attacks by shooting needles from its mouth but mellows considerably after the initial assault. Still, a balloon with needles inside of it... That sounds like a dangerous combination!”
US version: “This unfriendly beast attacks by shooting needles from its mouth but mellows considerably after the initial assault. Still, a balloon with needles inside of it... That sounds like a dangerous combination!”
![]() European version: “This unfriendly beast attacks by shooting needles from its mouth but mellows considerably after the initial assault. ◆ Still, a balloon with needles inside it... That sounds like a dangerous combination!”
European version: “This unfriendly beast attacks by shooting needles from its mouth but mellows considerably after the initial assault. ◆ Still, a balloon with needles inside it... That sounds like a dangerous combination!”
Names in other languages
| Language | Name | Meaning | Notes |
|---|---|---|---|
| フーセンドックリ? Fūsen Dokkuri |
Balloon Tokkuri | ||
| Opgeblazen Blowhog | |||
| Puffy volant | |||
| Ballonerus | |||
| Moschita vacua | |||
| Sopro Voador | |||
| Verraco volador | |||
| Толстый ветросвин |
Telescoping Pumphog
The Telescoping Pumphog (ポンプドックリ?, lit.: "Pump Tokkuri") is a common enemy found in Pikmin Adventure. Its face bears a resemblance to the Fiery Blowhog, sharing very similar eyes and snout, but is otherwise very different, being a stationary tower that can pump out projectiles.
Behavior
Most Telescoping Pumphogs are completely stationary and are unable to do much other than shoot projectiles while others can delve underground and pop back up to shoot projectiles and temporarily avoid damage from players.
When it is stationary, the Telescoping Pumphog sits about, facing a set direction. When it notices a player, it will start rising up, revealing its tube-like under-segment which inflates. It will then push down, which fires out a projectile from its snout. This projectile is usually a Spike Ball, but there are a few variants that shoot bombs and water.
Strategy
The Telescoping Pumphog's weak-spot is located directly on its head, making it hard to hit when it rises up to charge its attack. However, when it is on the ground, right after attacking, it is extremely vulnerable, so it is advised to attack them then.
It should be noted, however, that some variants of the Telescoping Pumphog do not have a weak-point at all, making it the only enemy in Pikmin Adventure that is completely invincible. If a player has to come across this variant, their only option is to advance to the next part of the level quickly while avoiding the indestructible Pumphog's projectiles.
Monita's Notes
![]() US version: “This creature compresses air in its bellows-shaped body and uses the pressure to shoot water or projectiles. I called them Huffy Puffers in my younger days. Oh, the quirks of a single core processor.”
US version: “This creature compresses air in its bellows-shaped body and uses the pressure to shoot water or projectiles. I called them Huffy Puffers in my younger days. Oh, the quirks of a single core processor.”
![]() European version: “This creature compresses air in its bellow-shaped body and uses the pressure to shoot water or projectiles. ◆ I called them Huffy Puffers in my younger days. Oh, the quirks of a single-core processor.”
European version: “This creature compresses air in its bellow-shaped body and uses the pressure to shoot water or projectiles. ◆ I called them Huffy Puffers in my younger days. Oh, the quirks of a single-core processor.”
The Telescoping Pumphog statue extending upward.
Names in other languages
| Language | Name | Meaning | Notes |
|---|---|---|---|
| ポンプドックリ? Ponpu Dokkuri |
Pump Tokkuri | ||
| Blaasbalgblowhog | |||
| Souffy téléscopique | |||
| Pump-Ballonerus | |||
| Eruptor telescopico | |||
| Sopro Telescópico | |||
| Verraco fuelle | |||
| Телескопический ветросвин |
Bosses
These are the following bosses in Pikmin Adventure:
- Bulblord
- Large-Mouth Wollywog
- Emperor Pinchipede
- Greater Bladed Beeb
- Grand Bulblord
- Translucent Wollywog
- Monochromatic Pinchipede
- Greater Studded Beeb
See also
Pikmin Adventure Boss Edits
The following W.I.P.s are edits of the Pikmin Adventure boss pages based on the rewritten enemies above.
King Beeb
The King Beeb (キングザコワラジ?, lit.: "King Small Fry Woodlouse"; known as the Queen Baub in the European version of Pikmin Adventure]]) is the second miniboss encountered in Pikmin Adventure, first seen in both enemy and miniboss form in Boss of the Beebs. It is a large Creepy Beeb that has yellow feet, blue flexible legs, and a blue and yellow antenna resembling the large Creepy Beeb. The primary differences between the King Beeb and the Creepy Beeb is that the Creepy Beeb has flatter, almost googly eyes while the King Beeb has far more spherical eyes like the Geater Bladed Beeb.
Behavior
Upon noticing the player, the King Beeb will slowly wander towards them before flashing yellow and curl up into a ball. It will proceed to roll around the area for an extended amount of time, trying to crush the Olimar and Pikmin players. After a short time, the King Beeb may stop rolling by ending up on its back, unable to move for a little bit.
Strategy
The King Beeb rolls around faster and longer than the Creepy Beeb so it is advised that players takes advantage of their ability to jump by flicking the GamePad's screen or press ![]() on their Wiimote in order to avoid being crushed. Some arenas are shaped like an octogon, so running from corner-to-corner while it is rolling around is the best solution to avoid being crushed.
on their Wiimote in order to avoid being crushed. Some arenas are shaped like an octogon, so running from corner-to-corner while it is rolling around is the best solution to avoid being crushed.
Sometimes, there will be bombs and rocks that can be grabbed. These are good to use against the King Beeb during its rolling attack. While it is possible to stun the King Beeb with a rock throw, there is also a chance that a successful rock throw will not stun it. After rolling the King Beeb will end up laying on its back trying to regain its composure, allowing for the Olimar and Pikmin players to deal tons of damage without much risk of getting hurth themselves.
Monita's Notes
![]() US version: “This royal Beeb of all Beebs curls into a ball and rolls around. You'd think its eyes would get in the way when it rolls, but no, it just pulls them in.”
US version: “This royal Beeb of all Beebs curls into a ball and rolls around. You'd think its eyes would get in the way when it rolls, but no, it just pulls them in.”
![]() European version: “This big, bad Baub blasts light, curls into a ball and rolls around. ◆ You'd think its eyes would get in the way when it rolls, but no, it just pulls them in.”
European version: “This big, bad Baub blasts light, curls into a ball and rolls around. ◆ You'd think its eyes would get in the way when it rolls, but no, it just pulls them in.”
Names in other languages
| Language | Name | Meaning | Notes |
|---|---|---|---|
| キングザコワラジ? | |||
| Koninginnebaub | |||
| Reine Brok | |||
| Kugelkäferkönigin | |||
| Regina dei Pidolini | |||
| Rainha Baub | |||
| Boloide reina | |||
| Тапколап-королева |
Gallery
The King Beeb statue in the Nintendo Land Plaza.
Trivia
The first two small King Beebs in Boss of the Beebs are mistakenly referred to as Bombardier Beebs in the Prima Games Nintendo Land guide.
Bulblord
The Bulblord (トノサマチャッピー?, lit.: "Lord Chappy") is the first major boss in Pikmin Adventure, appearing in the fourth standard challenge, Overthrow the Bulblord. The Bulblord is an incredibly large Bulborb that has weak spots and smaller white spots dotted all over its back, stalked eyes that can be destroyed, retractable legs, and a mechanism that allows the head to move independently from the rest of the body.
Behavior
Once the battle starts, the Bulblord will start walking towards the players, and will do one of three attacks during its first phase. One attack involves the biting of any players near its mouth. Another attack involves the retraction of its legs and weakpoints and rolling from side-to-side across the stage, much like the Empress Bulblax. The last attack the Bulblord will do during its first phase will be rushing in a straigt line similar to the Bulborb.
During the second phase, the Bulblord will only attack either with its roll or with a combination of the bite and rush attacks that functions similar to the Green Bulborb's homing charge.
Strategy
|
The following article or section contains guides. |
It is advised to use a strategy similar to the one used to defeat the Bilious Bulborb, as getting it to turn around in single player is hard; simply have Olimar run behind it, causing it to turn around to attack them. While still dodging its attacks, get the other Mii Pikmin players to attack its weak points.
After all of the weakpoints have been destroyed, it will gain 2 new ones on its knees. It is best to use the distracting method to aim at these, as the Bulblord will begin to move much faster once these are exposed. Its main attack is a charging-bite in which it dashes across the whole stage in a single direction.
Once both of the weakpoints on thelegs are destroyed, it will helplessly roll onto his back, revealing its final weakpoint on its underbelly. Simply throw all your Pikmin and destroy it, which will cause the Bulblord to roar in agony before exploding into Nintendo Land Coins, the park's currency. After defeating the Bulblord, it is possible to unlock it as a statue in the Plaza.
Destroying both of the Bulblord's eyes will not contribute to the fight in any way aside from rewarding the player with a stamp, the Eyes of the Bulblord.
Monita's Notes
![]() US version: “With its sharp teeth and devastating roll attack, this is a foe to fear. I highly advise you to take caution if you don't want to get crushed into scrap metal!”
US version: “With its sharp teeth and devastating roll attack, this is a foe to fear. I highly advise you to take caution if you don't want to get crushed into scrap metal!”
![]() European version: “With its sharp teeth and devastating roll attack, this is a foe to fear. ◆ Take Bulblords on one at a time or you'll end up with Pikmin pâté!”
European version: “With its sharp teeth and devastating roll attack, this is a foe to fear. ◆ Take Bulblords on one at a time or you'll end up with Pikmin pâté!”
Naming
- See also: Grub-dog family#Naming.
Names in other languages
| Language | Name | Meaning | Notes |
|---|---|---|---|
| トノサマチャッピー? Tonosama Chappī |
Lord Chappy | ||
| Bulblord | |||
| Bulblord | |||
| Oberpunktkäfer | Chief Bulborb | ||
| Bosscoleto | Boss-Bulborb | ||
| Lordbolbo | |||
| Bulbo feroz | |||
| Клубнекороль |
Gallery
The Bulblord statue as seen in the Nintendo Land Plaza.
Large-Mouth Wollywog
The Large-Mouth Wollywog (オオグチイモガエル?, lit.: "Big-mouthed Potato Frog"; known as the Largemouth Wollyhop in the European version of Pikmin Adventure) is the second major boss fought in Pikmin Adventure, being found in the eight challange, Swamp Master (known as Master of the Marsh in the European version). It has almost no resemblance to the Wollywog aside from its basic shape being somewhat similar, instead featuring large cheecks hiding weak spots, stalked eyes, and a large, gaping mouth with a long tongue that ends with either a weak point or a Spike Ball.
Behavior
Once the battle starts, the Large-Mouth Wollywog will stay put in the pond in the middle of the arena, where it will either go underwater or do its attack. The Large-Mouth Wollywog's attack is different from other Wollywogs due to the fact that it attacks by unraveling its spiked tongue out of its large, gaping mouth to damage players. After 3 attacks or if the weakspot is hit, the Large-Mouth Wollywog will be stunned by the tounge hitting its head, unable to attack for a short time while the tounge and the weak spot on it is exposed. Once the weak spot on the tounge has been destroyed, the Large-Mouth Wollywog will proceed to hop up before landing back into the pond it started in, leaving the pond dry and the boss stunned with the weak points on its cheeks exposed. After it recovers, the boss will then start to hop around the arena and unrevel its tounge with a Spike Ball in place of the broken weak spot. It will repeat this process until it eventually hops back into the pond and it refills with water and hide the weak spots on its cheeks. Once both weak spots on its cheeks are detroyed, the Large-Mouth Wollywog will yell and close the now destroyed weak spots while the pond is being refilled. During phase 2 the Large-Mouth Wollywog will hop out of the pond and around the stage and unraveling its spiked tongue 3 times in a row before it hops back into the water and repeats the process until it is defeated.
Strategy
|
The following article or section contains guides. |
As soon as the battle starts, you must be moving constantly to ensure the creature's tongue does not hit you. Staying near the edges of the pond will make it easier to dodge, since the boss has a hard time rotating while in the pond. Once its tongue hits the creature's face on its way back, it will be stunned and the weak spot at the end of the tongue can be attacked without much risk. Once the tongue is destroyed, the Large-Mouth Wollywog will hop and clear the pond of water alongside opening the weak spots on the cheecks. Once it recovers it will start attacking at a much faster pace with a Spike Ball at the end of the tongue.
Once the weak spots on the cheecks are destroyed, the Large-Mouth Wollywog will enter its second phase, beginning to jump wildly across the stage counterclockwise, and after four hops (two small, two large), it will shoot out its tongue. Stay on the opposite side of the arena during this, and dodge the attacks. Once the Wollywog finishes, quickly chase after where it is going to land and stay near it. Circle it so that you are always behind its back, making it easy to dodge the tongue. When it finishes its attack, shoot an onslaught of Pikmin at the weak spot on its back. Once this weak spot has been destroyed, it will be defeated.
Monita's Notes
![]() US version: “The dreaded master of the swamp, this alien creature wields its tongue like a lead-plated yo-yo. It also has the ability to absorb great quantities of water to keep its skin nice and slimy.”
US version: “The dreaded master of the swamp, this alien creature wields its tongue like a lead-plated yo-yo. It also has the ability to absorb great quantities of water to keep its skin nice and slimy.”
![]() European version: “The dreaded master of the swamp, this alien creature wields its tongue like a lead-plated yo-yo. It also has the ability to absorb great quantities of water to keep its skin nice and slimy.”
European version: “The dreaded master of the swamp, this alien creature wields its tongue like a lead-plated yo-yo. It also has the ability to absorb great quantities of water to keep its skin nice and slimy.”
Names in other languages
| Language | Name | Meaning | Notes |
|---|---|---|---|
| オオグチイモガエル? | |||
| Breedgebekte Wollyhop | |||
| Wog Sauteur à Grande Gueule | |||
| Großmaul-Orcalog | |||
| Ranuca idropica boccamagna | |||
| Batrassalto de Boca Larga | |||
| Sapo gigante bocazas | |||
| Большеротый вопапрыг |
Gallery
The statue of the Large-Mouth Wollywog as seen in the Nintendo Land plaza.
Emperor Pinchipede
The Emperor Pinchipede (ダイオウハサミムカデ?, lit.: "Great King Scissors Centipede") is the third major boss encountered in Pikmin Adventure. It is a centipede like creature with a green side with weak spots and an orange side featuring spikes to take out players. Its seperated appearance and mandibles bears a resemblance to the Armored Mawdad, a creature in Pikmin 3.
Strategy
The Emperor Pinchipede's body is divided into 11 segments, 9 of which have their own weakpoints. 4 of these segments are larger than the others, and are linked together by the smaller segments. Its head, which is its 1st segment, is equipped with a large pair of sharp mandibles which will instantly take out anyone in its way. It is impossible to stun it, leaving you without your stun strategy.
As the Emperor Pinchipede crawls around the battlefield, its weak points can be openly attacked. However, whenever one of the 4 larger segments is broken off, it will land back into the arena and starts to move around the stage, spinning wildly on its orange side with spikes all over it. It is best advised to take out the smaller segments first so the battlefield will be less cluttered.
After all its weak points are destroyed, it will enter its second phase, gaining 1 more on its head segment. However, it will attack by constantly compacting his body segments like an accordion before turning onto its orange side and start shooting itself across the stage. During this process, the weakpoint is also turned over, revealing spikes, making the entire body a dangerous hazard. After it finishes this attack it will immediatly start charging another attack. This time is the ideal time to attack the head.
After its head weakpoint is damaged down to half of its health, the Emperor Pinchipede will seperate from all but one segment and start constantly moving while biting. During this phase all of the other segments will once again turn to their orange sides and start moving independantly. The Emperor Pinchipede will periodically stop moving for a but before continuing to move around the stage, making for a great time to attack it while dodging the other segments.
Monita's Notes
Names in other languages
| Language | Name | Meaning | Notes |
|---|---|---|---|
| ダイオウハサミムカデ? | |||
| Keizerpinchipede | |||
| Empereur Mille-Klak Pinceur | |||
| Kaiserkaufüßler | |||
| Centiciompo imperatore | |||
| Centopinça Imperial | |||
| Ciempiédulo emperador | |||
| Императорская сорокодавка |
Trivia
- The name "Pinchipede" is a combination of "pinch" and "centipede".
Greater Bladed Beeb
The Greater Bladed Beeb (キザミワラジ?, lit.: "Cutting Woodlouse"; known as the Greater Bladed Baub in the European version of Pikmin Adventure) is the fourth and final boss of the standard challenges in Pikmin Adventure. It is a large, glossy, purple praying mantis-like creature with blades on its arms. It is the only boss in Pikmin Adventure to be treated like a normal enemy in the advanced stages.
Monita's Notes
![]() US version: “This alien insect is slow to wake but quick to anger. The adrenaline rush causes it to speed up and turn red with fury.”
US version: “This alien insect is slow to wake but quick to anger. The adrenaline rush causes it to speed up and turn red with fury.”
![]() European version: “This alien insect is slow to wake but quick to anger. The adrenaline rush causes it to speed up and turn a furious red.”
European version: “This alien insect is slow to wake but quick to anger. The adrenaline rush causes it to speed up and turn a furious red.”
Attacks
Once the Greater Bladed Beeb notices the player, it will crawl about the stage, widely swinging its blades. It has three different attacks: one attack with one blade two consecutive times, a seecond attack using both blades and dashes forward shaking off Pikmin, and a third attack where it spins in a circle, which also shakes off Pikmin. Once one of its weak points is broken, it will roar very loudly and turn red, starting the second phase. Now it will use its strike attack and double blade attacks 3 times consecutively.
Strategy
|
The following article or section contains guides. |
Both the head and abdomen are the Greater Bladed Beeb's weak points, but attacking them is made difficult by the boss's reflexes and ability to quickly turn around. Therefore, this boss is best fought in multiplayer. It can be dazed temporarily with a rock, unlike most bosses. Bombs will not stun it, though it will deal a sizable amount of damage. It will occasionally strike, but miss, and its blades will remain stuck in the ground. This is a great time to attack, as well as throw a rock at it, as it will stun it even further.
Once the second phase of the battle is initiated, it becomes harder to attack. Wait until it misses with its blade spin attack and use the short moment of time to attack it's backside or the back of its head. A wise strategy is to run around it while at a close distance. If executed correctly, it will not harm the player. Wait until it is finished attacking to attack it in the short window of time in between attacks.
Another slightly more risky strategy is when it comes to slice up, walk straight into it. The Bladed Beeb only hits where the player is at a certain time, and by moving closer, the blades will not harm you. This is risky, since it could very easily get you while coming in. Another wise strategy for the Olimar player is to utilize the Whip Seed or Knuckle Seed. By staying far away from it, the GamePad user can easily pelt it from a safe distance. This works even better in multiplayer, where the Pikmin can distract the Beeb while the GamePad user pelts it from afar.
In Cage of Terror, you must fight 3 smaller Elemental Bladed Beebs with lower health. The same strategies apply here, but the Beebs now have a shorter attack range and less health, making it an easier fight.
Names in other languages
| Language | Name | Meaning | Notes |
|---|---|---|---|
| キザミワラジ? | |||
| Vlijmscherpe Baub | |||
| Grand Brok Faucheur | |||
| Klingenkugelkäfer | |||
| Ultrapidolino fochista | |||
| Baub Encrustado | |||
| Boloide cortante | |||
| Большой лезволап |
Gallery
Trivia
- The bottom half of its spherical head seems to resemble a microphone or speaker. This may explain how it makes its deafening roar, despite having no mouth.
- The Greater Bladed Beeb has a lot of characteristics that other bosses don't possess. Its the only boss seen multiple times in some levels, be seen in both the main and advanced stages, and be treated as a normal enemy.
- The Greater Bladed Beeb is referred to as the "Bladed Beeb" during its introductory cutscene.
Grand Bulblord
The Grand Bulblord (ショーグンチャッピー?, lit.: "General Chappy") is the first boss in the extra challenges of Pikmin Adventure. It is a variant of the Bulblord found in the standard challenges. It has a similar color scheme to the Emperor Bulblax from the main series games and the Green Bulborb also seen in Pikmin Adventure.
Behavior
The Grand Bulblord's attacks are very similar to those of the Bulblord, only faster.
Strategy
|
The following article or section contains guides. |
The Grand Bulblord has the same strategy as the original Bulblord, but the Grand Bulblord has more health, does not react when the weak points on its back are destroyed, and is faster during its second phase.
What you must do is remove all of its weak points from its back. If you are low leveled, it is recommend to go for the smaller ones first, as they break easily and give you lots of nectar for you to level up with. In the last challenge of the attraction, Goodbye Pikmin, which is a boss rush, a few Creepy Beebs and a Bulborb will spawn in. Getting rid of these first will provide a decent amount of nectar.
Once the Grand Bulblord's back weakpoints have been destroyed, its sclera will turn black, and the rings around it's pupils red with rage. The joints on its legs open up into weakpoints, providing the next objective. Begin targeting only one of the legs so that when it breaks, the Grand Bulblord will fall over onto its back, revealing its major weak spot on its underbelly. Once it starts falling over, call your Pikmin and teammates and begin throwing them on top so that everyone can help out. Like the Bulblord, it is possible to get a stamp by attacking and breaking its eyes, which act similar to its weakpoints.
When the final weak point breaks, the Grand Bulblord's head begins to spin ferociously, slowing down gradually until the entire body explodes.
Destroying both of the Grand Bulblord's eyes will reward the player with a stamp, the Eyes of the Bulblord.
Naming
- See also: Grub-dog family#Naming.
Names in other languages
| Language | Name | Meaning | Notes |
|---|---|---|---|
| ショーグンチャッピー? Shōgun Chappī |
General Chappy | ||
| Bezeten Bulblord | |||
| Général Bulblord | |||
| Königspunktkäfer | |||
| Gran Bosscoleto | Big Boss-Bulborb | ||
| Baub Encrustado | |||
| Gran bulbo feroz | |||
| Главный клубнекороль |
Gallery
Translucent Wollywog
The Translucent Wollywog (オオグチカスミガエル?, lit.: "Big-mouthed Haze Frog"; known as Translucent Wollyhop in the European version) is the second boss to be fought in the extra challenges of Pikmin Adventure. It is almost the same exact boss as the Large-Mouth Wollywog from the 16 standard challenges. The only differences between the two are that the Translucent Wollywog is see-through compared to the Large-Mouth Wollywog which is yellow, and that it shoots its tongue out three times in a row instead of just one time.
Strategy
The strategy used for the Large-Mouth Wollywog also applies here. When it shoots out its tongue, attack it while it is still out, and it will hit itself in the head and be dazed for a bit. Use this interval of time to attack the weak point on its tongue, which should break in no time. Once it breaks, the Translucent Wollywog will move back into the center of the pond. Its cheeks are now open as weak points, proceed to throw Pikmin at them, dodging any tongue attacks. After the player breaks both cheeks, its back becomes the final weak point. At this time, it is best to locate a rock, and throw it at the Translucent Wollywog. Chances are that it will be stunned for a decent amount of time, so get behind the Wollywog and throw Pikmin at its back until it breaks, finishing the fight.
Names in other languages
| Language | Name | Meaning | Notes |
|---|---|---|---|
| オオグチカスミガエル? | |||
| Doorzichtige Wollyhop | |||
| Wog Translucide | |||
| Durchsichtiger Orcalog | |||
| Ranuca idropica traslucida | |||
| Batrassalto Translúcido | |||
| Sapo gigante translúcido | |||
| Прозрачный вопапрыг |
Trivia
Interestingly, the Translucent Wollywog is classified under the "wollywog family", not the amphituber family, likely due belonging to a separate family in the Japanese version of the game (カスミガエル科?, lit.: "haze frog family"). This is not the case in the European version.
Monochromatic Pinchipede
|
This article or section needs to be cleaned up, either its format or general style. |
The Monochromatic Pinchipede (シロクロハサミムカデ?, lit.: "Monochrome Scissors Centipede") is the third boss fought during Pikmin Adventure's extra challenges. Like other members of the Pinchipede family, it is a long centipede-like insect with huge serrated pincers. It looks very similar to the Emperor Pinchipede, only here, it is colored white and has higher speed and health. It looks blue in the first battle it is fought, due to the ambient lighting; during the Boss Rush, it has an orange tint, for the same reasons.
Strategy
|
The following article or section contains guides. |
The Monochromatic Pinchipede is fought more-or-less the same way as one would fight the Emperor Pinchipede. The only difference is that the fight requires more care to be taken overall: The Monochromatic Pinchipede has more health compared to it's predecessor, and is generally faster overall.
Begin by targeting the smaller segments of its body. Ironically, these smaller segments have significantly more health than the larger ones, presumably because the larger weak points double as spinning spike tops that circle the arena.
Once the smaller portions are removed, quickly remove the larger, more threatening, weak points, which should be easier due to their smaller health pool. After all of the portions are destroyed, the larger spinning sections will stop, and retract back to their original place on the Monochromatic Pinchipede.
The Monochromatic Pinchipede will now pull itself backward and charge up an attack, which reveals its last weak point located on its head. Use this opportunity to dish out as much damage as possible. It will flip over to its black side and rampage across the arena, trying to corner you and crush you with its gaping mandibles. After a few seconds, it will start to slow down, indicating it will start to charge up its attack again.
Once this weak point reaches a quarter of its health, all segments will fling away from the Monochrome Pinchipede and spin around the stage. Care must be taken during this phase. Avoid the spinning platforms, and wait for the Pinchipede to charge into you. Dodge its attack and begin throwing Pikmin onto its back. These Pikmin will stay on there forever, as the Pinchipede now has no way to shake them off. At this point, you can wait out the battle by avoiding it's attacks while the Pikmin whittle it down, or try to add more Pikmin to the attack to kill it faster. Be careful, though, because the Monochromatic Pinchipede will now constantly chomp it's mandibles during this phase.
Eventually, the last weak spot will reach 0 HP, and the Monochromatic Pinchipede will die.
Names in other languages
|
To do: Find the Russian name due to it not being easily extractable. |
| Language | Name | Meaning | Notes |
|---|---|---|---|
| シロクロハサミムカデ? | |||
| Zwart-witte Pinchipede | |||
| Mille-Klak Bicolore | |||
| Schwarzweißkaufüßler | |||
| Centiciompo monocromatico | |||
| Centopinça Monocromática | |||
| Ciempiédulo bicolor |
Gallery
Greater Studded Beeb
The Greater Studded Beeb (アバレワラジ?, lit.: "Raging Woodlouse"; known as Greater Studded Baub in the European version) is the boss of the nineteenth level (The Tyrant Arrives in the European version) and the final boss of the Nintendo Land attraction Pikmin Adventure. It shares the same basic shape with the Bladed Beeb, only it has Spike Balls for hands instead of blades, and starts off with yellow lights instead of green.
Strategy
The strategy for killing this beast is basically exactly the same as the Bladed Beeb. Just be wary that the Greater Studded Beeb has significantly more vitality, and is better at blocking attacks from the Knuckle Seed with its Spike Balls.
The first thing that must be completed to defeat this foe is breaking one of its weak points. Once one of them breaks, it will roar in rage and the yellow lights will turn red, speeding up its attacks and adding consecutive strikes to its attacks.
Keeping your distance using Knuckle Seed or Whip Seed is one good strategy, and dashing to either direction when he prepares his double arm smash attack is wise if you want to keep you power-up.
Another quick but sometimes dangerous technique is getting up close and personal with the mantis-monster. If you stay right up against the Greater Studded Beeb and pummel it with your Knuckle Seed power-up, it wont be able to strike you with its attacks most of the time, excluding its spin attack, in which case you want to jump away.
Once defeated, its eyes will widen, and it will collapse on the floor. Your Miis will pose, and the Greater Studded Beeb's body will proceed to explode into tons of Nintendo Land Coins.
Names in other languages
| Language | Name | Meaning | Notes |
|---|---|---|---|
| アバレワラジ? | |||
| Pletterbaub Grand | |||
| Brok Piquant | |||
| Killerkugelkäfer | |||
| Ultrapidolino borchiato | |||
| Baub Encrustado | |||
| Boloide tachonado | |||
| Большой шиполап |
