Category:Hey! Pikmin images
Jump to navigation
Jump to search
Images of Hey! Pikmin.
Subcategories
This category has the following 18 subcategories, out of 18 total.
B
- Brilliant Garden images (99 F)
H
- Hey! Pikmin April 2017 images (15 F)
- Hey! Pikmin artwork (54 F)
- Hey! Pikmin demo images (empty)
- Hey! Pikmin website images (9 F)
L
- Leafswirl Lagoon images (72 F)
- Lushlife Murk images (78 F)
P
- Pikmin Park images (41 F)
R
- Ravaged Rustworks images (75 F)
S
- Snowfall Field images (76 F)
- Sparkling Labyrinth images (79 F)
- Sweltering Parchlands images (83 F)
T
- The Final Stretch images (22 F)
V
- Verdant Waterfront images (83 F)
Media in category "Hey! Pikmin images"
The following 200 files are in this category, out of 1,453 total.
(previous page) (next page) Colossus in Suspenders 2.jpg 320 × 240; 59 KB
 Colossus in Suspenders icon.png 64 × 64; 6 KB
 Colossus in Suspenders Secret Spot.jpg 320 × 240; 61 KB
 Conformity Enhancers icon.png 64 × 64; 3 KB
 Conformity Enhancers.png 300 × 100; 25 KB
 Consolation Prize icon.png 64 × 64; 4 KB
 Consolation Prize Log Picture alt angle.jpg 320 × 240; 56 KB
 Consolation Prize Log Picture.jpg 320 × 240; 55 KB
 Consolation Prize.jpg 74 × 72; 5 KB
 Constitution Gate icon.png 64 × 64; 4 KB
 Constitution Gate log.jpg 320 × 240; 57 KB
 Constitution Gate underside.jpg 320 × 240; 56 KB
 Constitution Gate.png 330 × 191; 66 KB
 Coppelercarrying.jpg 400 × 240; 165 KB
 Coppeller icon.png 64 × 64; 6 KB
 Coppeller.png 344 × 260; 59 KB
 Crammed Wraith icon.png 64 × 64; 6 KB
 Crammed Wraith.png 600 × 631; 237 KB
 Creativity Stimulator icon.png 64 × 64; 3 KB
 Crested Mockiwi icon.png 64 × 64; 6 KB
 Crested Mockiwi.png 468 × 545; 131 KB
 Crestedmockiwibucking.jpg 320 × 240; 75 KB
 Crestedmockiwidying.jpg 320 × 240; 71 KB
 Crestedmockiwieating.jpg 320 × 240; 74 KB
 Crestedmockiwihurt.jpg 320 × 240; 72 KB
 Crestedmockiwiscreaming.jpg 320 × 240; 71 KB
 Crestedmockiwisleep.jpg 320 × 240; 77 KB
 Crumbug icon.png 64 × 64; 5 KB
 Crumbug.png 298 × 280; 77 KB
 Crumbugwalking.jpg 320 × 240; 73 KB
 Crystal Tunnels 1.jpg 320 × 240; 57 KB
 Crystal Tunnels 2.jpg 400 × 512; 125 KB
 Crystal Tunnels 3.jpg 320 × 240; 74 KB
 Crystal Tunnels 4.jpg 400 × 512; 128 KB
 Crystal Tunnels 5.jpg 400 × 512; 121 KB
 Crystal Tunnels 6.jpg 320 × 240; 64 KB
 Crystal Tunnels 7.jpg 400 × 512; 139 KB
 Crystal Tunnels 8.jpg 320 × 240; 51 KB
 Crystal Tunnels doorway cutscene.jpg 320 × 240; 52 KB
 Crystal Tunnels headbutt cutscene.jpg 320 × 240; 49 KB
 Crystal Tunnels Rock Pikmin cutscene.jpg 320 × 240; 51 KB
 Crystalline Crushblat icon.png 64 × 64; 5 KB
 CrystallineCrushblat.png 645 × 639; 316 KB
 Deluxe Something-or-Other icon.png 64 × 64; 4 KB
 Despair o sphere alt.jpg 320 × 240; 53 KB
 Despair o sphere.jpg 320 × 240; 53 KB
 Despair-o-Sphere Hey Pikmin.jpg 556 × 497; 51 KB
 Despair-o-Sphere icon.png 64 × 64; 4 KB
 Despair-o-Sphere.png 208 × 213; 45 KB
 Devious Drencher 1.jpg 320 × 240; 59 KB
 Devious Drencher 2.jpg 320 × 240; 60 KB
 Devious Drencher icon.png 64 × 64; 6 KB
 Devious Drencher Secret Spot.jpg 400 × 240; 178 KB
 Devious Drencher.png 212 × 399; 98 KB
 Dirt block Cavern of Confusion.jpg 253 × 190; 30 KB
 Distinguished Speaker icon.png 64 × 64; 4 KB
 Distinguished Speaker.png 290 × 223; 70 KB
 Distortion Chamber 2D.png 128 × 128; 13 KB
 Distortion Chamber discovery.jpg 400 × 240; 214 KB
 Distortion Chamber icon.png 64 × 64; 5 KB
 Distortion Chamber.png 291 × 191; 88 KB
 Dotenemy01.png 310 × 256; 66 KB
 Downpour Thicket 1.jpg 320 × 240; 55 KB
 Downpour Thicket 2.jpg 400 × 240; 59 KB
 Downpour Thicket 3.jpg 320 × 240; 54 KB
 Downpour Thicket 4.jpg 320 × 240; 44 KB
 Downpour Thicket 5.jpg 400 × 240; 63 KB
 Downpour Thicket 6.jpg 320 × 240; 50 KB
 Downpour Thicket branch cutscene.jpg 320 × 240; 31 KB
 Downpour Thicket frame cutscene.jpg 320 × 240; 48 KB
 Downpour Thicket Wollywog cutscene.jpg 320 × 240; 44 KB
 Drenchnozzle Den 1.jpg 320 × 240; 45 KB
 Drenchnozzle Den 2.jpg 320 × 240; 44 KB
 Drenchnozzle Den 3.jpg 320 × 240; 49 KB
 Drenchnozzle Den 4.jpg 320 × 240; 51 KB
 Drenchnozzle Den 5.jpg 320 × 240; 58 KB
 Drenchnozzle Den 6.jpg 320 × 240; 55 KB
 Drenchnozzle Den doorway cutscene.jpg 320 × 240; 35 KB
 Drenchnozzle Den scouts cutscene.jpg 320 × 240; 42 KB
 Drenchnozzle Den stuck cutscene.jpg 320 × 240; 38 KB
 Dual Wheeler icon.png 64 × 64; 3 KB
 Dutiful Watchdog Area.jpg 320 × 240; 76 KB
 Dutiful Watchdog Collected.jpg 400 × 240; 133 KB
 Dutiful Watchdog icon.png 64 × 64; 5 KB
 Dutiful Watchdog Weight.jpg 320 × 240; 69 KB
 Dutiful Watchdog.jpg 119 × 118; 27 KB
 Echo Cavern 1.jpg 320 × 240; 67 KB
 Echo Cavern 2.jpg 320 × 240; 60 KB
 Echo Cavern 3.jpg 320 × 240; 54 KB
 Echo Cavern 4.jpg 320 × 240; 53 KB
 Echo Cavern 5.jpg 320 × 240; 51 KB
 Echo Cavern 6.jpg 400 × 512; 130 KB
 Echo Cavern 7.jpg 320 × 240; 49 KB
 Echo Cavern bomb rock cutscene.jpg 320 × 240; 55 KB
 Echo Cavern Rock Pikmin cutscene.jpg 320 × 240; 44 KB
 Eel boss.png 387 × 180; 128 KB
 Electric Cottonade attacked.jpg 400 × 240; 59 KB
 Electric Cottonade attacking.jpg 400 × 240; 57 KB
 Electric Cottonade Creature Log.png 390 × 626; 124 KB
 Electric Cottonade dead.jpg 320 × 240; 48 KB
 Electric Cottonade defeated.jpg 400 × 512; 107 KB
 Electric Cottonade icon.png 64 × 64; 4 KB
 Electric Cottonade idling.jpg 400 × 240; 55 KB
 Electric Cottonade shooting.jpg 400 × 512; 105 KB
 Electric Cottonade sucking.jpg 400 × 512; 102 KB
 Electric Cottonade vulnerable 1.jpg 400 × 512; 108 KB
 Electric Cottonade vulnerable 2.jpg 400 × 512; 110 KB
 Electric Cottonade vulnerable 3.jpg 400 × 512; 104 KB
 Electric Spectralid Creature Log.png 349 × 460; 85 KB
 Electric Spectralid icon.png 64 × 64; 5 KB
 Electric-Lime Hairdo 1.jpg 320 × 240; 63 KB
 Electric-Lime Hairdo 2.jpg 320 × 240; 63 KB
 Electric-Lime Hairdo icon.png 64 × 64; 7 KB
 Electric-Lime Hairdo Secret Spot.jpg 320 × 240; 76 KB
 Electripede icon.png 64 × 64; 5 KB
 Electripede.png 672 × 354; 99 KB
 Elongated Crushblat icon.png 64 × 64; 6 KB
 Elongated Crushblat vulnerable.jpg 320 × 240; 73 KB
 Elongated Crushblat walking.jpg 400 × 512; 108 KB
 Elongated Crushblat.png 352 × 616; 106 KB
 Embarrassment Target 1.jpg 320 × 240; 57 KB
 Embarrassment Target 2.jpg 320 × 240; 57 KB
 Embarrassment Target icon.png 64 × 64; 5 KB
 Embarrassment Target Secret Spot.jpg 320 × 240; 75 KB
 Emperor Bulblax Creature Log.png 633 × 642; 200 KB
 Emperor Bulblax HP attacked.jpg 400 × 512; 120 KB
 Emperor Bulblax HP burrowing.jpg 320 × 240; 57 KB
 Emperor Bulblax HP chewing.jpg 400 × 240; 64 KB
 Emperor Bulblax HP chomping.jpg 400 × 512; 116 KB
 Emperor Bulblax HP dead.jpg 400 × 512; 114 KB
 Emperor Bulblax HP defeated.jpg 400 × 512; 126 KB
 Emperor Bulblax HP exploded.jpg 400 × 512; 114 KB
 Emperor Bulblax HP growling.jpg 400 × 512; 121 KB
 Emperor Bulblax HP icon.png 64 × 64; 6 KB
 Emperor Bulblax HP idling.jpg 400 × 512; 124 KB
 Emperor Bulblax HP jumping.jpg 400 × 240; 58 KB
 Emperor Bulblax HP lips.jpg 400 × 512; 118 KB
 Emperor Bulblax HP missed.jpg 400 × 512; 117 KB
 Emperor Bulblax HP shaking.jpg 400 × 512; 124 KB
 Emperor Bulblax HP tongue.jpg 400 × 512; 122 KB
 Emperor Bulblax HP turning.jpg 400 × 240; 64 KB
 Emperor Bulblax HP vulnerable.jpg 320 × 240; 48 KB
 Enduring Partnership icon.png 64 × 64; 5 KB
 Enduring Partnership JP.png 363 × 232; 121 KB
 Enduring Partnership.png 363 × 232; 120 KB
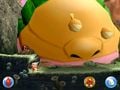
 Enemy01.png 213 × 244; 52 KB
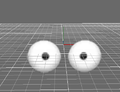 Enemy02 Eyes.png 464 × 356; 32 KB
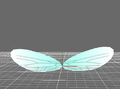 Enemy02 wings.png 488 × 360; 37 KB
 Enemy03 angryeyes.png 424 × 320; 8 KB
 Enemy03 bigeyes.png 484 × 380; 13 KB
 Enemy03 body.png 344 × 416; 28 KB
 Enemy03 butt.png 364 × 440; 32 KB
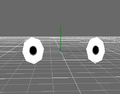
 Enemy03 smalleyes.png 496 × 432; 12 KB
 Enemy03 wings.png 496 × 404; 25 KB
 Ever-Night Windows icon.png 64 × 64; 4 KB
 Everyday Cell icon.png 64 × 64; 3 KB
 Everyday Cell.png 287 × 99; 50 KB
 Evidence Pulverizer Hey Pikmin.jpg 673 × 408; 53 KB
 Evidence Pulverizer icon.png 64 × 64; 4 KB
 Exhausted Soldier 1.jpg 320 × 240; 62 KB
 Exhausted Soldier 2.jpg 320 × 240; 62 KB
 Exhausted Soldier Hey Pikmin.jpg 110 × 124; 14 KB
 Exhausted Soldier icon.png 64 × 64; 7 KB
 Exhausted Soldier Map Screen.jpg 624 × 483; 135 KB
 Exhausted Soldier Secret Spot 2.jpg 606 × 462; 118 KB
 Exhausted Soldier Secret Spot.jpg 320 × 240; 81 KB
 Exposed Crystalline Crushblat.jpg 320 × 240; 76 KB
 Extended Hand of Friendship icon.png 64 × 64; 3 KB
 Eye-Stalker Bulbeel icon.png 64 × 64; 5 KB
 Eye-Stalker Bulbeel.png 437 × 629; 119 KB
 Eyestalkerbulbeeldying.jpg 320 × 240; 33 KB
 Eyestalkerbulbeelpeeking.jpg 320 × 240; 35 KB
 Fanged Marshmallow 1.jpg 320 × 240; 57 KB
 Fanged Marshmallow 2.jpg 320 × 240; 56 KB
 Fanged Marshmallow icon.png 64 × 64; 4 KB
 Fanged Marshmallow Secret Spot.jpg 400 × 240; 150 KB
 FangedMarshmallowModel.png 750 × 650; 176 KB
 Fashion Mystery 1.jpg 320 × 240; 57 KB
 Fashion Mystery 2.jpg 320 × 240; 58 KB
 Fashion Mystery icon.png 64 × 64; 4 KB
 Fashion Mystery Secret Spot.jpg 400 × 240; 171 KB
 FashionMysteryModel.png 750 × 650; 146 KB
 Fearsome Boss 1.jpg 320 × 240; 66 KB
 Fearsome Boss 2.jpg 320 × 240; 67 KB
 Fearsome Boss icon.png 64 × 64; 7 KB
 Fearsome Boss Secret Spot.jpg 400 × 240; 191 KB
 FearsomeBossModel.png 750 × 650; 345 KB
 Fiery Blowhog Creature Log.png 761 × 592; 180 KB
 Fiery Blowhog HP bomb rock.jpg 400 × 240; 62 KB
 Fiery Blowhog HP boulders.jpg 400 × 240; 64 KB
 Fiery Blowhog HP dead.jpg 320 × 240; 45 KB
 Fiery Blowhog HP defeated.jpg 400 × 512; 106 KB
 Fiery Blowhog HP fire ball.jpg 400 × 512; 116 KB
 Fiery Blowhog HP fire balls.jpg 400 × 512; 118 KB
 Fiery Blowhog HP fire.jpg 400 × 512; 120 KB
 Fiery Blowhog HP hanging back.jpg 400 × 512; 109 KB
 Fiery Blowhog HP hanging front.jpg 400 × 240; 65 KB
 Fiery Blowhog HP icon.png 64 × 64; 6 KB
 Fiery Blowhog HP idling.jpg 400 × 240; 61 KB
 Fiery Blowhog HP inhaling.jpg 400 × 512; 118 KB


