High scores menu
The high scores menu contains some records and statistics for runs of the main story mode. Generally, the faster and more efficient the player is, the higher they score in the tables.
Pikmin
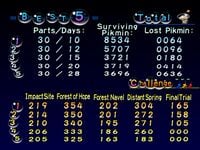
In Pikmin, the top half of the screen contains records for the story mode, while the bottom half contains records for Challenge Mode. In the story mode section, there are four columns, one for the ship parts gathered, one for the days it took to complete, one for the final number of surviving Pikmin, and one for the total of lost Pikmin. There are 5 rows, each one dedicated for a place in the high score table. The Challenge Mode section contains columns for each area, and rows for each of the five top places.
Pikmin 2
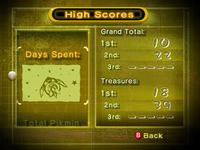
In Pikmin 2, the left side of the screen contains a scrollable list with the categories. The right side contains the top three values for that category, separated into two types: the value when the debt was repaid ("Grand Total") and the value for when all treasures were collected ("Treasures"). Any missing values are filled with "-----" or "--:--". The pictures used for the categories have a stylized simple look. The following categories exist:
- Days Spent: The fewer days spent to complete the game, the better.
- Total Pikmin Lost: The smaller the amount of Pikmin lost, the better. The same applies for the following categories as well.
- Pikmin Lost in Battle
- Pikmin Left Behind
- Pikmin Lost to Fire
- Pikmin Lost to Water
- Pikmin Lost to Electricity
- Pikmin Lost to Explosions
- Pikmin Lost to Poison
- Pikmin Born: The smaller the amount of Pikmin born, the harder it is to complete the game, so the higher the player scores. 1 is added to a type when a Pikmin of that type is born, but is subtracted by 1 when a Pikmin of that type gets converted. As a result, this can lead to negative numbers. All of this also applies to the following categories too.
- Red Pikmin Born
- Yellow Pikmin Born
- Blue Pikmin Born
- White Pikmin Born
- Purple Pikmin Born
- Total Play Time: The less time it takes to complete the game, the better.
A different high score screen also appears after the ending cutscene in Pikmin 2. This screen has a black background and a blue table. It still contains a scrollable list with the categories, but the records are also inside the list. Atop the best 3 scores is the player's score for that category. If this score enters the table, it gets highlighted in yellow on the individual score, and purple on the table. To the right of the screen, 8 pairs of icons appear, indicating the categories represented in each page of the list. The pictures used for this screen are full 3D renders, as opposed to the previously mentioned simplistically-styled images.
Pikmin 3
|
This article is a stub. You can help Pikipedia by expanding it. |

