Obstacles
Obstacles are a main feature in every Pikmin game. Each type of obstacle requires different amounts of types of Pikmin to overcome them. Every area in each game has at least 1 type of obstacle.
Types of Obstacles
Walls
Walls are obstacles that block paths or shortcuts and must be broken down with Pikmin. There are different types of gates in each game, most of which are Pikmin-specific.
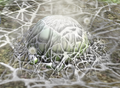
Bramble Wall - These are the most common type of wall, and can be destroyed by any type of Pikmin unless hazards are located within or around it. They come in different colors; the darker the color, the longer they take to destroy. In Pikmin 3, these are replaced by Dirt Walls.
Dirt Wall - A basic wall made of dirt. It is the replacement of Bramble Walls in Pikmin 3. Any Pikmin can destroy it, though Rock Pikmin are not an effective way of destroying it. All Dirt walls take 1 Bomb Rock to take down. It is more effective to have Pikmin attack from the top than the bottom.
Reinforced Wall - These are stone walls present in Pikmin and Pikmin 3. They must be destroyed by having Pikmin drop Bomb Rocks next to them. They also come in different colors, with the darker ones (Pikmin only) requiring more Bomb Rocks to be used on them. All Reinforced Walls in Pikmin 3 take 3 bombs to take down.
Electric Gate - These types of walls are present in Pikmin 2 and Pikmin 3, and can only be destroyed with Yellow Pikmin. They go down much faster in Pikmin 3.
Crystal Wall - These walls are composed of a sheet of glass between a large metal clamp. They are present in Pikmin 3 and can only be destroyed with either Rock Pikmin or 2 Bomb Rocks. How many hits from a Rock Pikmin varies, with some taking 20 hits, and others taking more than 35.
Bamboo Gate - These walls are composed to short bamboo stalks strung together with ropes. They are present in Pikmin 3, and can only be overcome with Winged Pikmin. The Pikmin keeping them up must be left holding it up or else it will fall back down.
Hazards
Hazards are a common obstacle found in every Pikmin game and act as both a weakness and specialty to each Pikmin type.
Fire - Fire is found being emitted by enemies, as well as erupting out of the ground in the form of a geyser. Only Red Pikmin are immune to this hazard.
Water - Water is found in every area of every game. It is lethal to all Pikmin except for Blue Pikmin, although Winged Pikmin can fly over bodies of water. If Pikmin come into contact with water ejected from enemies, it will collect on their leaves and they will suffocate unless they are called back.
Electricity - Electricity is found in Pikmin 2 and Pikmin 3. In the second game, it will instantly kill all Pikmin except for Yellow Pikmin.However, in Pikmin 3, it is non-lethal and simply stuns Pikmin who will lay on the ground immobilized and twitching until called back.
Poison - Poison is found in Pikmin 2 in the form of fumes emitted by pipes or by certain enemies. Only White Pikmin are immune to this hazard. In addition, there are forms of poison in Pikmin 3, one of which, is produced by the Toady Bloyster, another form is released by the Vehemoth Phosbat.
Blunt Force - Blunt force is present in all Pikmin games. In the first game, it is present in the form of crushing, but in the other two games, it is also presented in the form of piercing attacks. Rock Pikmin are immune to this hazard.
Explosions - Explosions are a lethal hazard to every single enemy in the series as well as every Pikmin type. Explosions are caused by certain enemies and the detonation of Bomb Rocks.
Abyss - The Abyss is a term used to refer to any bottomless pit found in any Pikmin game. Any Pikmin or creature that fall into the abyss will die immediately. These pits are found most commonly in some caves of Pikmin 2.
Consumption - A large number of creatures in the Pikmin games are capable of eating Pikmin. While no Pikmin is immune to this feat, they can be saved if the enemy is killed or forced to recoil before it swallows the Pikmin. At the end of each day, any Pikmin not with the captains or near the Onion will be consumed by nocturnal predators.
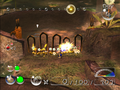
Bridges
Bridges are obstacles that must be constructed by Pikmin in order to allow access to another section of a level. They are usually found over gaps or a body of water. They are present in every Pikmin game.
In the first two games, bridges were built by having Pikmin roll out a pile of twigs. In Pikmin 3, they are built by having Pikmin construct them out of ceramic fragments.
Crystals
Crystals are obstacles found in Pikmin 3, and appear as transparent crystaline formations.
Large Crystals - These are large formations that usually block paths or encase important items. They can be destroyed with either Rock Pikmin or Bomb Rocks.
Crystal Nodules - These are small crystaline pebbles that pose no threat to Pikmin on their own. However, if there is a Skutterchuck nearby, it may pick it up and try to throw it at the Pikmin in an attempt to crush them. They can be destroyed by a direct hit from a Rock Pikmin.
Fungus and Fauna
Different types of Fungi and Plants appear in the Pikmin games in many forms, and pose as obstacles to the player in different ways.
Spotcaps and Kingcaps - These are large mushrooms found in Pikmin 3. They are usually found in clusters, blocking a path or block access to an item of importance. They can be attacked with Pikmin to break them down. Kingcaps have health meters, but Spotcaps can be destroyed in a single hit by any Pikmin.
Bouncy Mushrooms - These are large, flat mushrooms found in Pikmin 3. They allow access to higher areas if Captains or Pikmin are thrown directly on top of them.
Spiderwort Mold - This mold-like formation is found in Pikmin 2. When alive, it does not allow Burgeoning Spiderworts in the area to grow. Once killed, they can grow normally until the Mold grows back.
Bloominous Stemple - Cave-dwelling plants that grow in crevices in Pikmin 3. Once a nearby Electrode is activated, the nearby Stemples will bloom. Once bloomed, their petals can act as platforms to cross the crevices.
Paper Bags
Paper Bags are found in Pikmin 2 and Pikmin 3, but work differently in each game.
In Pikmin 2, they block access to areas and must be crushed by weighing them down with Pikmin.
In Pikmin 3, they are closed at the top, giving them a sloped shape. They can be pushed of a ledge to allow easier access to the higher area.
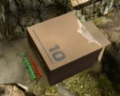
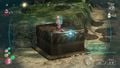
Boxes
Boxes are found in Pikmin and in Pikmin 3.
Cardboard Box - Normal boxes can can be pushed with Pikmin to open up new paths.
Tin Box - Same as normal boxes, but require more Pikmin to push.
Mechanical
These obstacles are electronic man-made in appearance.
Electrodes - Broken circuits found in many caves in Pikmin 3. Yellow Pikmin can join hands while touching these, which passes the electricity through their bodies to complete the circuit, activating a lightbulb somewhere in the cave. Once turned on, they remain on and cannot be deactivated.
Conveyor Switch - Conveyor Switches are sets of yellow and blue buttons found throughout Clockwork Chasm. When a Pikmin or Captain is thrown on top of the currently-unpressed button, it will become pressed, causing the other button to rise and also causing every conveyor belt in the area to change direction. If a Pikmin or Captain is standing on the pressed button when the other is activated, they will be thrown off by the force of the button rising up.
Conveyor Belts - Convery Belts are found only in Clockwork Chasm. They are large, metallic belts that constantly rotate in a single direction. If Pikmin or Captains walk across them moving in the same direction as they are, they will move twice as fast. If they are moving against them, however, they will be slowed down drastically. The direction they rotate in can be changed by Conveyor Switches.
Miscellaneous
There are many obstacles that are unique and do not fit in any specific category.
Clipboards- Clipboards are obstacles that block items and also open up certain paths. They lay flat on the ground, usually covering something, and can be moved by having Winged Pikmin lift the handle.
Climbing Sticks - Obstacles that are present in Pikmin and Pikmin 3. They are found as a pile of twigs on the floor. When Pikmin are directed towards them, they will construct a large stick out of the pile and use it to climb to a higher area.
Flukeweed - Pink plants that bare a resemblace to Fiddleheads. They can be uprooted with Winged Pikmin to reveal whatever is attached to their roots. Pellets, Fruit, and Sheargrubs can be found under Flukeweeds. The blue Onion in Pikmin 3 is activated by pulling the Flukeweed on top.
Geysers - Small geysers that can be used to get to higher areas. In the first game, they must be activated with Pikmin. In Pikmin 2, geysers are larger and are used to exit a cave. In Challenge Mode, Pikmin must dig at the geyser in order to activate it. In Pikmin 3, some are already active, and others are encased in a Crystal Nodule. As such, most of them can only be activated by Rock Pikmin.
Iron Balls - Large metallic balls that sit at the top of slopes. They require 20 Pikmin to push them down a slope, causing them to crush enemies in the way and smash through walls. Other Pikmin not pushing the ball can also be crushed, however.
Hay - Hay is an uncommon obstacle only present in Pikmin 3. It is only found once in Story Mode (located in the Distant Tundra) and a few times in the Jigsaw Fortress level in Bingo Battle mode. It is found as a large bundle of hay, but when Pikmin are ordered towards it, they will take off small pieces and place them elsewhere. When all the pieces are relocated, they form a slope that can be used to access a higher area, much like Paper Bags.
Dirt Mounds - Small burrows that contain different items. To retrieve the items, simply send Pikmin to enter the mounds, and they will dig the items out. They usually contain Bomb Rocks, but can also contain Pellets, Data Files, and sometimes even Fragments that can be used to build bridges.
Lily Pads - Aquatic plants that float on the surface of water allowing for captains and Pikmin to use them as boats to get across watery areas.
Seasaw Blocks - A set of blocks that work as a scale. The side with the most weight will be weighed down, and the opposite side will be lifted up. In Pikmin 2, they are always found next to eachother. There is even a more complicated set of Seasaw Blocks in the Perplexing Pool that involves 4 blocks. The way this works is that alternate blocks act as one scale. In Pikmin 3, they are found apart from eachother, but still function the same.
Elevator Platforms - A scale that is hanging from a pulley system. It has the same concept of the Seasaw Blocks, that being that the side with more weight will fall down, and the other will rise up. There is one with some bolts on it, which requires more weight to weigh down. This is needed to get the Astringent Clump in the Garden of Hope, although Winged Pikmin can retrieve the fruit without the need of the Platforms.
Pictures
- Stone wall.png
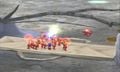
A Reinforced Wall from Pikmin.
A cardboard box from Pikmin
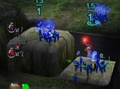
An Electric Fence in Pikmin 2.
A Black Bramble Wall.
A White Bramble Wall.

A Poisonous Black Bramble Wall.
- Geyser.png
A Geyser from Pikmin 2.
A deflated Paper Bag from Pikmin 2.
A basic set of Seesaw Blocks in Pikmin 2.
A complex set of Seesaw Blocks in Pikmin 2.
- Pikmin2BombRock.jpg
A Bomb Rock about to explode.

An Electric Trap.
- Fire Geyser.png
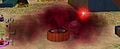
A Fire Geyser from Pikmin 2.
A Poison pipe.
Burgeoning Spiderwort Mold.

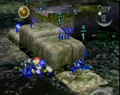
A Bridge from Pikmin 2.
- BouncyMushroom.jpeg
A Small Bouncy Mushroom.
- Pikmin3 DirtWall.png
A Dirt Wall.
- GiantpieceofampratSHIT.jpg
A stack of Hay.
- Bigbox.PNG
A Cardboard Box from Pikmin 3.
A set of Elevator Platforms.
A Crystal Nodule with a Golden Sunseed inside.
- Spotcap.jpeg
A Spotcap.
A Bridge from Pikmin 3.
- BloominousStemple1.jpeg
A dormant Bloominous Stemple.
- BloominousStemple2.jpeg
2 Activated Bloominous Stemples.
- BloominousStemple.jpeg
Bloominous Stemples seen from the bottom.
- TheresAWallThere.PNG
A Reinforced Wall from Pikmin 3.
- ZlCfzRFt6R0UUKA9OU.jpg
An Electrode.
- ZlCfzRE4Yk4QPrxX58.jpg
A Pile of Fragments.
- ZlCfzRE4TzsXhYaGqN.jpg
A Dirt Mound.
- ZlCfzRE4WRIj4 RYWN.jpg
A Bomb Rock in Pikmin 3.
- ZlCfzRE3rgsaq6fu89.jpg
A Crystal Wall.
- ZlCfzRE41-odw19XII.jpg
A Bamboo Gate.
- ZlCfzRE3q3wQh9JX2t.jpg
An Electric Gate in Pikmin 3.
- ZlCfzRFt-t840CfNpv.jpg
A Climbing Stick in Pikmin 3.
- Flukeweed.jpeg
A Flukeweed.
- Kingcap2.jpeg
A Kingcap.
A Seasaw Block in Pikmin 3.
A pair of Elevator Platforms.
- Screen Shot 2014-03-02 at 9.39.19 AM.png
A single Elevator Platform.
- FireGeyserPikmin3.png
A Fire Geyser from Pikmin 3.


Locations
Pikmin
- 1 white bramble wall
- 1 white reinforced wall
- 1 Cardboard Box
- 1 Climbing Stick
- Water
- Explosions
- Consumption
- 3 white bramble walls
- 2 black bramble walls
- 3 white reinforced walls
- 1 black reinforced wall
- 2 Bridges
- Water
- Blunt Force
- Explosions
- Consumption
- 1 white bramble walls
- 2 black bramble walls
- 3 gray reinforced walls
- 2 black reinforced walls
- 1 Climbing Stick
- 3 Bridges
- Water
- Fire
- Blunt Force
- Explosions
- Consumption
- 2 white bramble walls
- 1 black bramble wall
- 1 grey reinforced wall
- 1 black reinforced wall
- 2 Climbing Sticks
- 3 Bridges
- Water
- Fire
- Blunt Force
- Explosions
- Consumption
- 2 white bramble walls
- 1 white reinforced wall
- 1 Cardboard Box
- Fire
- Water
- Explosions
- Blunt Force
- Consumption
Pikmin 2
- 2 white bramble walls
- 1 poison bramble wall
- 2 Bridges
- 2 Paper Bags
- Fire
- Water
- Poison
- Blunt Force
- Consumption
- 1 black wall
- 2 poison white walls
- 2 electric gates
- 3 Bridges
- 1 Paper Bag
- 1 Spiderwort Mold
- Water
- Electricity
- Poison
- Blunt Force
- Consumption
- 1 white wall
- 2 black walls
- 1 poison white wall
- 3 electric gates
- 2 Bridges
- 1 Spiderwort Mold
- Water
- Fire
- Electricity
- Poison
- Blunt Force
- Consumption
- 1 white walls
- 2 poison black walls
- 1 electric gate
- 1 Bridge
- 3 Spiderwort Mold
- Water
- Electricity
- Fire
- Poison
- Blunt Force
- Explosions
- Consumption
Pikmin 3
- 3 Dirt Walls
- 3 Reinforced Walls
- 1 Electric Gate
- 2 Bridge
- 5 Dirt Mounds
- 1 Paper Bag
- 1 Bouncy Mushroom
- Flukeweeds
- Kingcaps
- Spotcaps
- 1 Cardboard Box
- Fire
- Water
- Electricity
- Blunt Force
- Explosions
- Consumption
- 5 Dirt Walls
- 3 Electric Gates
- 3 Crystal Walls
- 1 Bamboo Gate
- 4 Bridges
- 1 Dirt Mound
- 6 Large Crystals
- Crystal Nodules
- Flukeweeds
- Fire
- Water
- Electricity
- Blunt Force
- Consumption
- 3 Dirt Walls
- 2 Electric Gates
- 2 Crystal Walls
- 2 Bamboo Gates
- 3 Bridges
- 10 Large Crystals
- Flukeweeds
- 1 Hay
- 3 Bouncy Mushrooms
- 4 Geysers
- 8 Electrodes
- 2 Iron Balls
- 1 Paper Bag
- Spotcaps
- Kingcaps
- Bloominous Stemples
- Fire
- Water
- Electricity
- Blunt Force
- Consumption
- 2 Dirt Walls
- 2 Reinforced Walls
- 1 Electric GateBamboo Gate
- 2 Bridges
- 1 Bouncy Mushroom
- 4 Large Crystals
- Lily Pads
- 1 Electrode
- Flukeweeds
- 2 Paper Bags
- 1 Dirt Mound
- Water
- Electricity
- Blunt Force
- Explosions
- Consumption
- 3 Dirt Walls
- 1 Reinforced Wall
- 1 Crystal Wall
- 2 Large Crystals
- 2 Bridges
- 1 Geyser
- 1 Dirt Mound
- 1 Paper Bag
- 4 Electrodes
- Bluminous Stemples
- 1 Iron Ball
- Crystal Nodules
- Fire
- Water
- Electricity
- Blunt Force
- Explosions
- Consumption
- Obstacles
- Pikmin 1
- Pikmin 2
- Pikmin 3
- The Impact Site
- The Forest of Hope
- The Forest Navel
- The Distant Spring
- The Final Trial
- Valley of Repose
- Awakening Wood
- Perplexing Pool
- Wistful Wild
- Tropical Wilds
- Garden of Hope
- Distant Tundra
- Twilight River
- Formidable Oak
- Pikmin 2 Challenge Mode
- Mission Mode
- Pikmin Adventure
- Twilight Hollow
- Bingo Battle