The Impact Site: Difference between revisions
mNo edit summary |
(→Names in other languages: The Nintendo Switch versions of Pikmin 1 and 2 can now be played in Chinese, so adding Traditional Chinese name.) |
||
| (87 intermediate revisions by 29 users not shown) | |||
| Line 1: | Line 1: | ||
{{game icons|p=y}} | {{game icons|p=y}} | ||
{{infobox area | {{infobox area | ||
|screenshot | |screenshot = 01 Site Impact Site.png | ||
|map | |map = The Impact Site HD.jpg | ||
|parts | |parts = 2 | ||
| | |pikmin_discovered = [[Red Pikmin]] | ||
|music = ''[[Music in Pikmin#The Impact Site|The Impact Site]]'' | |||
|music = ''[[Music in Pikmin#The Impact Site|The Impact Site]]'' | |||
}} | }} | ||
'''The Impact Site''' ({{j|遭難地点|Sōnan Chiten|Shipwreck Point}}) is the first [[area]] in {{p1}}. It is set in a sandy forest and, as its name suggests, is the site where the [[S.S. Dolphin]] crash-lands at the start of the game, serving as a tutorial area since it is where [[Captain Olimar]] first discovers the Pikmin. The area contains only two [[ship part]]s, one of which is collected in the tutorial. [[Red Pikmin]] are discovered in this area and it contains few enemies, though two [[boss]]es, the [[Mamuta]] and the [[Goolix]], do appear on alternating days from day 8 onwards. This area was reused in {{p2}} as part of the [[Wistful Wild]]. | |||
==General layout== | |||
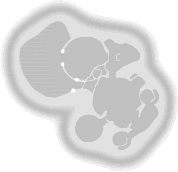
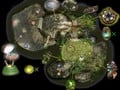
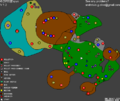
{{Location map | width = 350 | height = 338 | image = IS texture.png | bg = #111 | caption = Map of all ship parts and the location of the ship in The Impact Site. | icons = | |||
{{map icon | S.S. Dolphin | 275 | 238 | bg = none}} | |||
{{map icon | Main Engine | 259 | 110}} | |||
{{map icon | Positron Generator | 62 | 135}} | |||
}} | |||
This area features lush green grass terrain and natural environments, giving it a forest-like vibe. The level consists of a small pool of water that is not accessible on day 1, a number of tree stumps, and a few relatively small grassy clearings. It is not very large in size, since it is mostly meant to teach the player how the game works. The main defining parts of the area are quite open, but the paths between them are very narrow, which helps split the area into well-defined sections. This, combined with the area progression's linear nature, makes it an easy level to navigate. Even so, it manages to incorporate slanted terrain and a fair amount of vertical variation, which helps the player understand that the ground is not flat all the time. | |||
The Impact Site contains only two ship parts, one of which is collected on the first day in the tutorial-like beginning of the game. After day 1, the amount of [[Pellet Posy|Pellet Posies]] increases, and some enemies appear: the large amounts of pellets from then on make this area arguably the best place for boosting Pikmin population. The only hazard in the area is [[water]], but it cannot be reached on day 1, which stops the player from having Pikmin killed before they are ready to understand the consequences. | |||
There are two main sections to this area: the grassy plain where Olimar lands, to the south, and the beach section with a large tree trunk to the north. To reach the trunk, the player must first push the [[cardboard box]] out of the way on day 1. Reaching the beach requires breaking a [[stone wall]], with the help of [[Yellow Pikmin]]. | |||
Starting on day 8, the large tree stump near the water becomes the only location of the [[Goolix]] and the [[Mamuta]] in this game, with the former being found on odd-numbered days, and the latter on even-numbered days. | |||
To note is that the Pellet Posies, Pearly Clamclamps, and [[Iridescent Flint Beetle]]s will be there every day, making this area one of the best to increase the Pikmin population. The highest amount of Pikmin one could raise in The Impact Site in one day is 301 (unless one were to hit the Flint Beetles more than eight times – hitting each nine times would produce 307, hitting each one twelve times would produce 322 – but this is highly unlikely). | |||
==Key sections== | ===Key sections=== | ||
===Crash | ====Crash site==== | ||
This is the landing site for the area. | This is the landing site for the area. The terrain is quite open and flat, except for the tree stumps that have small paths curving upwards, some higher tree stumps that cannot be reached, and one or two higher ledges that help show the importance of [[throw]]ing Pikmin. There are a few Pellet Posies here, as well as a 10 pellet of each color on the large stump. To the north, this area connects to the Main Engine room, but is initially blocked off by a [[cardboard box]]. | ||
===Engine | ====Main Engine room==== | ||
This is the small area that holds the Main Engine. | This is the small area that holds the [[Main Engine]]. It is quite crowded and small, serving mostly to suggest the importance of navigating an area and utilizing the objects scattered around for the player's advantage. There is a ramp at the center of this room that can be used to access the stump arena, after the cardboard box has been pushed to create a bridge. On later days [[bomb rock]]s can be found inside the box, which may be used to destroy the [[reinforced wall]] with the help of [[Yellow Pikmin]]. | ||
===Stump | ====Stump arena==== | ||
This | This large open stump is where the player fights either the Goolix or the Mamuta, depending on the day. It has walls stopping the player from walking out of it, except to the east, where the access cardboard box is, and to the west, where there is a [[reinforced wall]] leading to the pond. Some of the walls surrounding the arena have high ledges with pellets on them. | ||
===Pond=== | ====Pond==== | ||
This | This section has a beach and a large pond. The beach connects all the way to the south, where it curves and leads back down to the crash site, although it is blocked by a [[white bramble gate]]. This is a one-way path, since the beach is at a higher level. This section houses three [[Pearly Clamclamp]]s, as well as a red 20 pellet and a blue 20 pellet. One of the Clamclamps also holds the Positron Generator, and must be defeated in order to obtain it. | ||
==Objects== | |||
===Ship parts=== | |||
*{{icon|Main Engine|y}} (day 1 only) | |||
*{{icon|Positron Generator|y}} (Blue and Yellow Pikmin required) | |||
==Enemies== | ===Enemies=== | ||
* | {{columns|2| | ||
* | *{{icon|Goolix|y}} × 1 (starting day 9, on odd-numbered days) | ||
*{{icon|Iridescent Flint Beetle|y}} × 3 (starting day 2) | |||
*1 | *{{icon|Mamuta|y}} × 1 (starting day 8, on even-numbered days) | ||
*{{icon|Pearly Clamclamp|y}} × 3 (× 1 on day 1) | |||
}} | |||
==Challenge Mode breakdown== | ===Obstacles=== | ||
{{columns|2| | |||
*{{icon|White bramble gate|y}} × 1 | |||
*{{icon|White reinforced wall|v=P1|y}} × 1 | |||
*{{icon|Cardboard box|y}} × 1 | |||
*{{icon|Water body|y}} × 1 | |||
}} | |||
===Tools=== | |||
*{{icon|Geyser|y}} × 1 | |||
*{{icon|Climbing stick|y}} × 1 | |||
===Vegetation=== | |||
{{columns|2| | |||
*{{icon|Pellet Posy|y}} × 24 (only 3 on day 1) | |||
*{{icon|Figwort|y}} (small) × 16 | |||
*{{icon|Figwort|y}} (large) × 8 | |||
*{{icon|Shoot|y}} (small) × 1 | |||
*{{icon|Nectar weed|y}} × 2 | |||
}} | |||
==Guide== | |||
{{Guide}} | |||
After gaining control of [[Captain Olimar]], head towards the [[Onion#Red Onion|Red Onion]] and pluck the newly sprouted [[Red Pikmin]]. Using Pikmin, gather all of the [[pellet]]s, [[pluck]] all Pikmin, and push the [[cardboard box]]. Continue collecting all the pellets on the stump and finish the day by collecting the [[Main Engine]]. | |||
Once [[Blue Pikmin]] and [[Yellow Pikmin]] have been discovered, the final part in this area can be collected. Start by taking some Blue and Yellow Pikmin into the area where the Main Engine was located, and collect at least 3 [[bomb rock]]s from inside the box. Head up the slope to the stump and, using the bomb rocks, break the [[gate#Reinforced wall|white reinforced wall]]. Be careful on the stump as a [[Mamuta]] or [[Goolix]] can spawn depending on what day you are on. Once you enter the pond, head to the farthest left [[Pearly Clamclamp]] and use Blue Pikmin to free the [[Positron Generator]]. Pikmin must be thrown and whistled in bursts to avoid them being eaten by the Clam. Break the [[gate#Bramble gate|white bramble gate]] and retrieve the part to complete the area. | |||
==In Challenge Mode== | |||
[[File:P1 Challenge Mode Impact Site Beach.jpg|thumb|250px|The beach section of the area in Challenge Mode.]] | |||
The Impact Site is the simplest and shortest [[Challenge Mode (Pikmin)|Challenge Mode]] stage, giving the player 10 minutes and 48 seconds to grow up to 278 Pikmin. The area is filled with [[pellet]]s of all types, and the only enemies are a [[Breadbug]] near the Onions and a harmless [[Iridescent Flint Beetle]]. | |||
===Object breakdown=== | |||
{|class="wikitable sortable" | {|class="wikitable sortable" | ||
!Pikmin source!!{{tt|Seeds|Max produced with correct harvesting}}!!Amount!!Total | !Pikmin source!!{{tt|Seeds|Max produced with correct harvesting}}!!Amount!!Total | ||
| Line 95: | Line 132: | ||
| colspan="3" style="text-align: center;" | 278 | | colspan="3" style="text-align: center;" | 278 | ||
|} | |} | ||
==Gallery== | ==Gallery== | ||
<gallery widths="120"> | <gallery widths="120"> | ||
01 Site Impact Site.png|The landing zone of The Impact Site. | |||
Pikminlast11.jpg|The Impact Site in [[Challenge Mode (Pikmin)|Challenge Mode]] (Japanese [[Region|version]]). | |||
TIS start.png|Olimar right after landing. | |||
TIS start 2.png|The area around the landing zone. | |||
TIS flint 1.png|The first [[Iridescent Flint Beetle]] in the area. | |||
TIS flint 2.png|The second Flint Beetle and the location of the bomb-rocks. | |||
TIS goolix.png|The main tree stump, with a [[Goolix]]. | |||
Pikmatt8.jpg|Entrance to the watery portion. | |||
TIS clam.png|The [[Pearly Clamclamp]] pond. | |||
TIS exit.png|Back exit from the pond. | |||
TIS trunk 1.png|The southernmost tree stump. | |||
TIS trunk 2.png|The easternmost tree stump. | |||
The Impact Site preview.png|Preview image on the [[area selection menu]]. | |||
The Impact Site.jpg|[[Captain Olimar]] discovers [[Red Pikmin]] ([[Pikmin prerelease information|prerelease]] image). | |||
</gallery> | </gallery> | ||
=== | ===Maps=== | ||
<gallery> | <gallery> | ||
The Impact Site HD.jpg|Overview map. | |||
P1 Impact Site Map.jpg|Map of the area. | |||
The Impact Site Challenge.png|Fan-made map of the area in [[Challenge Mode (Pikmin)|Challenge Mode]]. | |||
IS texture.png|The [[radar]] pattern for The Impact Site. | |||
IS overview.png|An early overview of part of The Impact Site. The textures for this image are loaded on the game itself, but go [[unused content in Pikmin|unused]]. | |||
</gallery> | </gallery> | ||
==Trivia== | ==Trivia== | ||
* | *A [[Spotty Bulborb]] enters Olimar's base during the end of day [[cutscene]], even though there are no Bulborbs present in the area during daytime. | ||
*In the ''[[New Play Control!]]'' version, the white [[gate]] leading to the beach with the Clamclamps can be broken down on day 1 by throwing Pikmin onto the ledge as far as possible and getting onto the stump. | *In the ''[[New Play Control!]]'' version, the white [[gate]] leading to the beach with the Clamclamps can be broken down on day 1 by throwing Pikmin onto the ledge as far as possible and getting onto the stump. | ||
*The Impact Site is one of two areas with an optional boss, the other being [[The Distant Spring]]. | *The Impact Site is one of two areas with an optional boss, the other being [[The Distant Spring]]. | ||
* | *[[Music in Pikmin#The Impact Site|The Impact Site's music]] has inspired multiple tracks in later games: | ||
**[[Music in Pikmin 3#Alph's Crash Site|Alph's crash site's theme]] in {{p3}}. | |||
**The most common [[Music in Pikmin 3#Bingo Battle 1 (nature)|Bingo Battle theme]]. | |||
**The [[Music in Pikmin Adventure#Tutorial stage|tutorial stage theme]] from {{pa}}. | |||
**The [[Music in Pikmin 4#Sun-Speckled Terrace (Olimar)|music]] for the [[Sun-Speckled Terrace]] in [[Olimar's Shipwreck Tale]]. | |||
==Names in other languages== | |||
{{Foreignname | |||
|Jap=遭難地点 | |||
|JapR=Sōnan Chiten | |||
|JapM=Shipwreck Point | |||
|FraA=Site de l'écrasement | |||
|FraAM=Crash site | |||
|FraE=Site du crash (GameCube version)<br>Site du Crash (Wii and Switch version) | |||
|FraEM=Crash site<br>Crash Site | |||
|Ger=Absturzstelle | |||
|GerM=Crash site | |||
|Ita=Luogo dell'impatto | |||
|ItaM=Impact place | |||
|ItalL=Luogo dell'Impatto | |||
|Kor=불시착 지점 | |||
|KorR=bulsichag jijeom | |||
|KorM=Crash Landing Site | |||
|SpaA=Lugar del impacto | |||
|SpaAM=Impact place | |||
|SpaE=Lugar del impacto<br>Lugar del ímpacto (GameCube version's area selection menu) | |||
|SpaEM=Impact place | |||
|SpaEN=The "í" of "ímpacto" should be "i" instead. | |||
|ChiTrad=落難地點 | |||
|ChiTradR=luò nàn dì diǎn | |||
|ChiTradM= | |||
|notes=y | |||
}} | |||
==See also== | ==See also== | ||
*[[Main Engine]] | *[[Main Engine]] | ||
*[[ | *[[Wistful Wild]] | ||
*[[Valley of Repose]] | |||
*[[Tropical Wilds]] | |||
*[[First Expedition]] | |||
*[[Rescue Command Post]] | |||
*[[Goolix]] | *[[Goolix]] | ||
{{featured|{{date|1|February|2019}}|{{date|2|April|2019}}}} | |||
{{The Impact Site}} | {{The Impact Site}} | ||
{{P1 areas|e0ffe0|005500|005500|000|fff}} | {{P1 areas|e0ffe0|005500|005500|000|fff}} | ||
{{DEFAULTSORT:Impact Site, The}} | |||
[[Category:The Impact Site| ]] | [[Category:The Impact Site| ]] | ||
Latest revision as of 19:38, February 13, 2024
| The Impact Site | |
|---|---|
| |
| Ship parts | 2 |
| Pikmin discovered | Red Pikmin |
| Requirements | None |
| Music | The Impact Site |


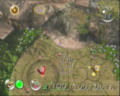
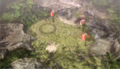
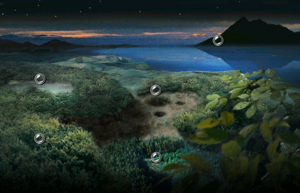
The Impact Site (遭難地点?, lit.: "Shipwreck Point") is the first area in Pikmin. It is set in a sandy forest and, as its name suggests, is the site where the S.S. Dolphin crash-lands at the start of the game, serving as a tutorial area since it is where Captain Olimar first discovers the Pikmin. The area contains only two ship parts, one of which is collected in the tutorial. Red Pikmin are discovered in this area and it contains few enemies, though two bosses, the Mamuta and the Goolix, do appear on alternating days from day 8 onwards. This area was reused in Pikmin 2 as part of the Wistful Wild.
General layout[edit]
This area features lush green grass terrain and natural environments, giving it a forest-like vibe. The level consists of a small pool of water that is not accessible on day 1, a number of tree stumps, and a few relatively small grassy clearings. It is not very large in size, since it is mostly meant to teach the player how the game works. The main defining parts of the area are quite open, but the paths between them are very narrow, which helps split the area into well-defined sections. This, combined with the area progression's linear nature, makes it an easy level to navigate. Even so, it manages to incorporate slanted terrain and a fair amount of vertical variation, which helps the player understand that the ground is not flat all the time.
The Impact Site contains only two ship parts, one of which is collected on the first day in the tutorial-like beginning of the game. After day 1, the amount of Pellet Posies increases, and some enemies appear: the large amounts of pellets from then on make this area arguably the best place for boosting Pikmin population. The only hazard in the area is water, but it cannot be reached on day 1, which stops the player from having Pikmin killed before they are ready to understand the consequences.
There are two main sections to this area: the grassy plain where Olimar lands, to the south, and the beach section with a large tree trunk to the north. To reach the trunk, the player must first push the cardboard box out of the way on day 1. Reaching the beach requires breaking a stone wall, with the help of Yellow Pikmin.
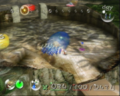
Starting on day 8, the large tree stump near the water becomes the only location of the Goolix and the Mamuta in this game, with the former being found on odd-numbered days, and the latter on even-numbered days.
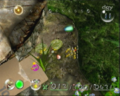
To note is that the Pellet Posies, Pearly Clamclamps, and Iridescent Flint Beetles will be there every day, making this area one of the best to increase the Pikmin population. The highest amount of Pikmin one could raise in The Impact Site in one day is 301 (unless one were to hit the Flint Beetles more than eight times – hitting each nine times would produce 307, hitting each one twelve times would produce 322 – but this is highly unlikely).
Key sections[edit]
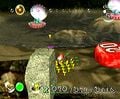
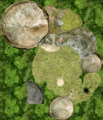
Crash site[edit]
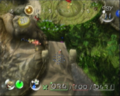
This is the landing site for the area. The terrain is quite open and flat, except for the tree stumps that have small paths curving upwards, some higher tree stumps that cannot be reached, and one or two higher ledges that help show the importance of throwing Pikmin. There are a few Pellet Posies here, as well as a 10 pellet of each color on the large stump. To the north, this area connects to the Main Engine room, but is initially blocked off by a cardboard box.
Main Engine room[edit]
This is the small area that holds the Main Engine. It is quite crowded and small, serving mostly to suggest the importance of navigating an area and utilizing the objects scattered around for the player's advantage. There is a ramp at the center of this room that can be used to access the stump arena, after the cardboard box has been pushed to create a bridge. On later days bomb rocks can be found inside the box, which may be used to destroy the reinforced wall with the help of Yellow Pikmin.
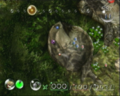
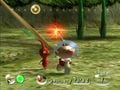
Stump arena[edit]
This large open stump is where the player fights either the Goolix or the Mamuta, depending on the day. It has walls stopping the player from walking out of it, except to the east, where the access cardboard box is, and to the west, where there is a reinforced wall leading to the pond. Some of the walls surrounding the arena have high ledges with pellets on them.
Pond[edit]
This section has a beach and a large pond. The beach connects all the way to the south, where it curves and leads back down to the crash site, although it is blocked by a white bramble gate. This is a one-way path, since the beach is at a higher level. This section houses three Pearly Clamclamps, as well as a red 20 pellet and a blue 20 pellet. One of the Clamclamps also holds the Positron Generator, and must be defeated in order to obtain it.
Objects[edit]
Ship parts[edit]
 Main Engine (day 1 only)
 Positron Generator (Blue and Yellow Pikmin required)
Enemies[edit]
 Goolix × 1 (starting day 9, on odd-numbered days)
 Iridescent Flint Beetle × 3 (starting day 2)
 Mamuta × 1 (starting day 8, on even-numbered days)
 Pearly Clamclamp × 3 (× 1 on day 1)
Obstacles[edit]
 White bramble gate × 1
 White reinforced wall × 1
 Cardboard box × 1
 Water body × 1
Tools[edit]
 Geyser × 1
 Climbing stick × 1
Vegetation[edit]
 Pellet Posy × 24 (only 3 on day 1)
 Figwort (small) × 16
- Figwort (large) × 8
 Shoot (small) × 1
 Nectar weed × 2
Guide[edit]
|
The following article or section contains guides. |
After gaining control of Captain Olimar, head towards the Red Onion and pluck the newly sprouted Red Pikmin. Using Pikmin, gather all of the pellets, pluck all Pikmin, and push the cardboard box. Continue collecting all the pellets on the stump and finish the day by collecting the Main Engine.
Once Blue Pikmin and Yellow Pikmin have been discovered, the final part in this area can be collected. Start by taking some Blue and Yellow Pikmin into the area where the Main Engine was located, and collect at least 3 bomb rocks from inside the box. Head up the slope to the stump and, using the bomb rocks, break the white reinforced wall. Be careful on the stump as a Mamuta or Goolix can spawn depending on what day you are on. Once you enter the pond, head to the farthest left Pearly Clamclamp and use Blue Pikmin to free the Positron Generator. Pikmin must be thrown and whistled in bursts to avoid them being eaten by the Clam. Break the white bramble gate and retrieve the part to complete the area.
In Challenge Mode[edit]

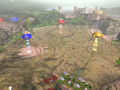
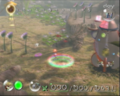
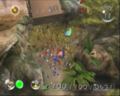
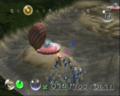
The Impact Site is the simplest and shortest Challenge Mode stage, giving the player 10 minutes and 48 seconds to grow up to 278 Pikmin. The area is filled with pellets of all types, and the only enemies are a Breadbug near the Onions and a harmless Iridescent Flint Beetle.
Object breakdown[edit]
| Pikmin source | Seeds | Amount | Total |
|---|---|---|---|
| Starting Reds | 3 | 3 | |
| Starting Yellows | 3 | 3 | |
| Starting Blues | 3 | 3 | |
| Red 1 pellets | 2 | 16 | 32 |
| Red 5 pellets | 5 | 2 | 10 |
| Red 10 pellets | 10 | 1 | 10 |
| Red 20 pellets | 20 | 1 | 20 |
| Yellow 1 pellets | 2 | 11 | 22 |
| Yellow 5 pellets | 5 | 4 | 20 |
| Yellow 10 pellets | 10 | 1 | 10 |
| Yellow 20 pellets | 20 | 1 | 20 |
| Blue 1 pellets | 2 | 10 | 20 |
| Blue 5 pellets | 5 | 4 | 20 |
| Blue 10 pellets | 10 | 1 | 10 |
| Blue 20 pellets | 20 | 1 | 20 |
| Pellet Posy | 2 | 2 | 4 |
| Pellet Posy | 2 | 2 | 4 |
| Pellet Posy | 2 | 2 | 4 |
| Pellet Posy | 2 | 8 | 16 |
| Breadbug | 13 | 1 | 13 |
| Iridescent Flint Beetle | 14 | 1 | 14 |
| Total | 278 | ||
Gallery[edit]
The landing zone of The Impact Site.
The Impact Site in Challenge Mode (Japanese version).
Olimar right after landing.
The area around the landing zone.
The first Iridescent Flint Beetle in the area.
The second Flint Beetle and the location of the bomb-rocks.
The main tree stump, with a Goolix.
Entrance to the watery portion.
The Pearly Clamclamp pond.
Back exit from the pond.
The southernmost tree stump.

The easternmost tree stump.
Preview image on the area selection menu.
Captain Olimar discovers Red Pikmin (prerelease image).


Maps[edit]
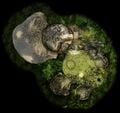
Overview map.
Map of the area.
Fan-made map of the area in Challenge Mode.
The radar pattern for The Impact Site.
An early overview of part of The Impact Site. The textures for this image are loaded on the game itself, but go unused.


Trivia[edit]
- A Spotty Bulborb enters Olimar's base during the end of day cutscene, even though there are no Bulborbs present in the area during daytime.
- In the New Play Control! version, the white gate leading to the beach with the Clamclamps can be broken down on day 1 by throwing Pikmin onto the ledge as far as possible and getting onto the stump.
- The Impact Site is one of two areas with an optional boss, the other being The Distant Spring.
- The Impact Site's music has inspired multiple tracks in later games:
- Alph's crash site's theme in Pikmin 3.
- The most common Bingo Battle theme.
- The tutorial stage theme from Pikmin Adventure.
- The music for the Sun-Speckled Terrace in Olimar's Shipwreck Tale.
Names in other languages[edit]
| Language | Name | Meaning | Notes |
|---|---|---|---|
| 遭難地点? Sōnan Chiten |
Shipwreck Point | ||
(traditional) |
落難地點 luò nàn dì diǎn |
||
| Site de l'écrasement | Crash site | ||
| Site du crash (GameCube version) Site du Crash (Wii and Switch version) |
Crash site Crash Site |
||
| Absturzstelle | Crash site | ||
| Luogo dell'impatto | Impact place | ||
| 불시착 지점 bulsichag jijeom |
Crash Landing Site | ||
| Lugar del impacto | Impact place | ||
| Lugar del impacto Lugar del ímpacto (GameCube version's area selection menu) |
Impact place | The "í" of "ímpacto" should be "i" instead. |
See also[edit]
- Main Engine
- Wistful Wild
- Valley of Repose
- Tropical Wilds
- First Expedition
- Rescue Command Post
- Goolix
| The Impact Site | |
|---|---|
|
Click an object |
|

| Pikmin areas |
|---|
 Click an area on the image
The Impact Site • The Forest of Hope • The Forest Navel • The Distant Spring • The Final Trial animtest • codetest • E3play_3 • map_06 • play_4 • route • shapetst • testmap • tuto1 • tuto2 |