User:Chazmatron
Yo yo yo!!! I first started playing Pikmin when Pikmin 3 came out on the Wii U. I then had Pikmin 2 (Wii version) given to me for my birthday and then the following year I had the original (Wii version). At some point, I bought Hey! Pikmin and I started playing Pikmin Bloom a few years back, although I've stopped recently;;
July 10, 2026
- 20:5220:52, July 10, 2026 diff hist −1 m Enemy →In Pikmin Adventure current
(FISH)
| edit | This user has 6,784 total edits on this wiki. |
| Chazmatron | |
|---|---|

| |
| Games | |
| don’t have a GameCube 😫 | |
| 100% | |
| 100% | |
| still no GameCube 😔 | |
| 100% | |
| 100% | |
| 100% 😎 | |
| 100% | |
| 100% | |
| ~90% not got all the amiibos | |
| 39 | |
| 100% x2 | |
Subpages
- A more (in)accurate biology section involving certain creatures. So far, it only has Bulborbs and Fiery Blowhogs and Burrowing Snagrets (Incomplete)
- A Pikmin 4 run where I only use Red Pikmin, no Yellow, Blue, White, Purple, Rock, Winged or Ice Pikmin involved. (Incomplete)
User:Chazmatron/Location Tests
- Page to hold my, mainly enemy, location WIPS
- Page testing multiple bridge articles, similar to the gates.
- Big tests that won't fit on this page.
User:Chazmatron/Yellow Wollyhop and User:Chazmatron/Gildemander
- Enemy article test, based on both PopitTart's and Twins1105's versions. Mine are of a Yellow Wollyhop and a Gildemander, PopitTart's is of a Fiery Blowhog, and Twins1105's is of a Bulborb
User:Chazmatron/Nintendo Today!
- A WIP for a Nintendo Today! article.
Pikmin Merchandise

Red.
Yellow.

Blue.
Purple.

White.
Winged.
Glow.
Red.

Yellow.

Blue.
Encounter.
Pocket.


.jpg)
.jpg)
.jpg)


Field Camera images
- P4 Field Camera Albino Dwarf Bulborb.jpg
- P4 Field Camera Jumbo Bulborb.jpg
- P4 Field Camera Dwarf Orange Bulborb.jpg
- P4 Field Camera Orange Bulborb.jpg
- P4 Field Camera Dwarf Bulbear.jpg
- P4 Field Camera Spotty Bulbear.jpg
- P4 Field Camera Dwarf Frosty Bulborb.jpg
- P4 Field Camera Frosty Bulborb.jpg
- P4 Field Camera Fiery Bulblax.jpg
- P4 Field Camera Whiptongue Bulborb.jpg
- P4 Field Camera Bulborb Larva.jpg
- P4 Field Camera Empress Bulblax.jpg
- P4 Field Camera Emperor Bulblax.jpg
- P4 Field Camera Sovereign Bulblax.jpg
- P4 Field Camera Watery Blowhog.jpg
- P4 Field Camera Titan Blowhog.jpg
- P4 Field Camera Blizzarding Blowhog.jpg
- P4 Field Camera Tusked Blowhog.jpg
- P4 Field Camera Armored Cannon Larva.jpg
- P4 Field Camera Horned Cannon Beetle.jpg
- P4 Field Camera Arctic Cannon Larva.jpg
- P4 Field Camera Arctic Cannon Beetle.jpg
- P4 Field Camera Mama Sheargrub.jpg
- P4 Field Camera Shearflea.jpg
- P4 Field Camera Joustmite.jpg
- P4 Field Camera Flighty Joustmite.jpg
- P4 Field Camera Swooping Snitchbug.jpg
- P4 Field Camera Skitter Leaf.jpg
- P4 Field Camera Desiccated Skitter Leaf.jpg
- P4 Field Camera Fiery Dweevil.jpg
- P4 Field Camera Anode Dweevil.jpg
- P4 Field Camera Hydro Dweevil.jpg
- P4 Field Camera Iceblown Dweevil.jpg
- P4 Field Camera Venom Dweevil.jpg
- P4 Field Camera Arachnode.jpg
- P4 Field Camera Baldy Long Legs.jpg
- P4 Field Camera Man-at-Legs.jpg
- P4 Field Camera Groovy Long Legs.jpg
- P4 Field Camera Anode Beetle.jpg

- P4 Field Camera Doodlebug.jpg
- P4 Field Camera Iridescent Glint Beetle.jpg
- P4 Field Camera Mitite.jpg
- P4 Field Camera Skutterchuck.jpg
- P4 Field Camera Skeeterskate.jpg
- P4 Field Camera Muckerskate.jpg
- P4 Field Camera Yellow Spectralids.jpg
- P4 Field Camera Red Spectralids.jpg
- P4 Field Camera Snowfake Fluttertail.jpg
- P4 Field Camera Creeping Chrysanthemum.jpg
- P4 Field Camera Startle Spore.jpg
- P4 Field Camera Breadbug.jpg
- P4 Field Camera Giant Breadbug.jpg
- P4 Field Camera Gildemandwee.jpg
- P4 Field Camera Gildemander.jpg
- P4 Field Camera Miniature Snootwhacker.jpg
- P4 Field Camera Mammoth Snootwhacker.jpg
- P4 Field Camera Sunsquish.jpg
- P4 Field Camera Foolix.jpg
- P4 Field Camera Downy Snagret.jpg
- P4 Field Camera Burrowing Snagret.jpg
- P4 Field Camera Waddlequaff.jpg
- P4 Field Camera Shockcake.jpg
- P4 Field Camera Freezecake.jpg
- P4 Field Camera Puffstool.jpg
- P4 Field Camera Toxstool.jpg
- P4 Field Camera Moldy Dwarf Bulborb.jpg
- P4 Field Camera Moldy Slooch.jpg
- P4 Field Camera Pyroclasmic Slooch.jpg
- P4 Field Camera Bearded Amprat.jpg
- P4 Field Camera Mamuta.jpg
- P4 Field Camera Porquillion.jpg
- P4 Field Camera Honeywisp.jpg
- P4 Field Camera Puffy Blowhog.jpg
- P4 Field Camera Icy Blowhog.jpg
- P4 Field Camera Withering Blowhog.jpg
- P4 Field Camera Lesser Spotted Jellyfloat.jpg
- P4 Field Camera Greater Spotted Jellyfloat.jpg
- P4 Field Camera Yellow Wollyhop.jpg
- P4 Field Camera Wollyhop.jpg
- P4 Field Camera Chillyhop.jpg
- P4 Field Camera Masterhop.jpg
- P4 Field Camera Water Dumple.jpg
- P4 Field Camera Puckering Blinnow.jpg
- P4 Field Camera Pricklepuff.jpg
- P4 Field Camera Waddlepus.jpg
- P4 Field Camera Aristocrab Offspring.jpg
- P4 Field Camera Peckish Aristocrab.jpg
- P4 Field Camera Grubchucker.jpg
- P4 Field Camera Hermit Crawmad.jpg
- P4 Field Camera Bug-Eyed Crawmad.jpg
- P4 Field Camera Crusted Rumpus.jpg
- P4 Field Camera Pearly Clamclamp.jpg
- P4 Field Camera Toady Bloyster.jpg
- P4 Field Camera Bloomcap Bloyster.jpg
- P4 Field Camera Bogswallow.jpg
- P4 Field Camera Waterwraith.jpg
- P4 Field Camera Smoky Progg.jpg
- P4 Field Camera Ancient Sirehound.jpg
- P4 Field Camera Moss.jpg


Korean Enemy Names
| Name | KR Nickname | KR Name |
|---|---|---|
| 꼬마차피 Kkoma-Chapi Dwarf Chappy |
붉은툭눈점박이닮은꼴 Bulgeun-Tugnun-Jeombag'i-Dalmeunkkol Red Bug-eye Spotted Look-alike | |
| 꼬마차피닮은꼴 Kkoma-Chapi-Dalmeunkkol Dwarf Chappy Look-alike |
툭눈점박이 2살 유생 Tugnun-Jeombag'i 2-sal Yusaeng Bug-eye Spotted 2-year-old larva | |
| 차피 Chapi Chappy |
붉은툭눈점박이 Bulgeun-Tugnun-Jeombag'i Red Bug-eye Spotted | |
| 점보차피 Jeombo-Chapi Jumbo Chappy |
붉은툭눈점박이 배수체 Bulgeun-Tugnun-Jeombag'i Baesuche Red Bug-eye Spotted Polyploid | |
| 무당꼬마차피 Mudang-Kkoma-Chapi Ladybug Dwarf Chappy |
주황툭눈점박이닮은꼴 Juhwang-Tugnun-Jeombag'i-Dalmeunkkol Orange Bug-eye Spotted Look-alike | |
| 무당꼬마차피 Mudang-Chapi Ladybug Chappy |
주황툭눈점박이 Juhwang-Tugnun-Jeombag'i Orange Bug-eye Spotted Look-alike | |
| 꼬마곰차피 Kkoma-Gom-Chapi Dwarf Bear Chappy |
곰툭눈점박이 3살 유생 Gom-Tugnun-Jeombag'i 3-sal Yusaeng Bear Bug-eye Spotted 3-year-old larva | |
| 곰차피 Gom-Chapi Bear Chappy |
곰툭눈점박이 Gom-Tugnun-Jeombag'i Bear Bug-eye Spotted | |
| 꼬마얼음차피 Kkoma-Eoreum-Chapi Dwarf Ice Chappy |
서리툭눈점박이 3살 유생 Seoli-Tugnun-Jeombag'i 3-sal Yusaeng Frost Bug-eye Spotted 3-year-old larva | |
| 얼음차피 Eoreum-Chapi Ice Chappy |
서리툭눈점박이 Seoli-Tugnun-Jeombag'i Frost Bug-eye Spotted | |
| 불꽃차피 Bulkkot-Chapi Flame Chappy |
불툭눈점박이 Bul-Tugnun-Jeombag'i Fire Bug-eye Spotted | |
| 채찍혀차피 Chaejjig-Hyeo-Chapi Whiptongue Chappy |
긴혀툭눈점박이 Gin-Hyeo-Tugnun-Jeombag'i Long Tongue Bug-eye Spotted | |
| 베이비차피 Beibi-Chapi Baby Chappy |
툭눈점박이 1살 유생 Tugnun-Jeombag'i 1-sal Yusaeng Bug-eye Spotted 1-year-old larva | |
| 여왕차피 Yeowang-Chapi Queen Chappy |
툭눈점박이 난낭 비대 개체 Tugnun-Jeombag'i Nannang Bidae Gaeche Bug-eye Spotted Egg Sac Hypertrophy Specimen | |
| 대왕툭눈점박이 Daewang-Tugnun-Jeombag'i Great King Bug-eye Spotted |
Same as Korean nickname | |
| 황제툭눈점박이 Hwangje-Tugnun-Jeombag'i Emperor Bug-eye Spotted |
대왕툭눈점박이 장수 개체 Daewang-Tugnun-Jeombag'i Jangsu Gaeche Great King Bug-eye Spotted Long-Lived Specimen | |
| 돼지호롱 Dwaeji-Holong Pig Oil Lamp |
불뿜기돼지호롱 Bulppumgi-Dwaeji-Holong Fire-Breathing Pig Oil Lamp | |
| 물돼지호롱 Mul-Dwaeji-Holong Water Pig Oil Lamp |
불뿜기돼지호롱(물뿜기 변종) Bulppumgi-Dwaeji-Holong (Mulppumgi Byeonjong) Fire-Breathing Pig Oil Lamp (Water-Breathing Variant) | |
| 눈돼지호롱 Nun-Dwaeji-Holong Snow Pig Oil Lamp |
눈뿜기돼지호롱 Nunppumgi-Dwaeji-Holong Snow-Breathing Pig Oil Lamp | |
| 코끼리돼지호롱 Kokkiri-Dwaeji-Holong Elephantine Pig Oil Lamp |
불뿜기돼지호롱 비대 개체 Bulppumgi-Dwaeji-Holong Bidae Gaeche Fire-Breathing Pig Oil Lamp Hypertrophy Specimen | |
| 눈보라돼지호롱 Nunbora-Dwaeji-Holong Blizzard Pig Oil Lamp |
눈뿜기돼지호롱 비대 개체 Nunppumgi-Dwaeji-Holong Bidae Gaeche Snow-Breathing Pig Oil Lamp Hypertrophy Specimen | |
| 멧돼지호롱 Mesdwaeji-Holong Boar Oil Lamp |
회색멧돼지호롱 Hoesaeg-Mesdwaeji-Holong Grey Boar Oil Lamp | |
| 두입호롱 Du-Ip-Holong Two-Mouth Oil Lamp |
동방바위보따리 유충 Dongbang-Bawi-Bottali Yuchung Eastern Stone Wrapper Larva | |
| 두입투구호롱 Du-Ip-Tugu-Holong Two-Mouth Helmet Oil Lamp |
강철바위보따리 성충 Gangcheol-Bawi-Bottali Seongchung Steel Stone Wrapper Adult | |
| 눈두입호롱 Nun-Du-Ip-Holong Snow Two-Mouth Oil Lamp |
눈보따리 유충 Nun-Bottali Yuchung Snow Stone Wrapper Larva | |
| 거대눈투구호롱 Geodae-Nun-Tugu-Holong Giant Snow Helmet Oil Lamp |
눈보따리 성충 Nun-Bottali Seongchung Snow Stone Wrapper Adult | |
| 땅벼룩♀ Ttang-Byeorug ♀ Ground Flea ♀ |
땅가위턱 암컷 Ttang-Gawi-Teog Amkeos Ground Scissor Jaw Female | |
| 땅벼룩♀ Ttang-Byeorug ♂ Ground Flea ♂ |
땅가위턱 수컷 Ttang-Gawi-Teog Sukeos Ground Scissor Jaw Male | |
| 엄마땅벼룩 Eomma-Ttang-Byeorug Mother Ground Flea |
땅가위턱 유형 성숙 개체 Ttang-Gawi-Teog Yuhyeong Seongsug Gaeche Ground Scissor Jaw Neotenic Specimen | |
| 날개벼룩 Nalgae-Byeorug Winged Flea |
날개가위턱 Nalgae-Gawi-Teog Winged Scissor Jaw | |
| 벼룩 Byeorug Flea |
붉은점핑벼룩 Bulgeun-Jeomping-Byeolug Red Jumping Flea | |
| 덮구벌레 Deopgu-Beolle Cover Bug |
거꾸로붉은눈덮개 Geokkulo-Bulgeun-Nun-Deopgae Inverted Red Eye Cover | |
| 비상덮구 Bisang-Deopgu Flying Cover (Bug) |
거꾸로푸른눈비상덮개 Geokkulo-Puleun-Nun-Bisang-Deopgae Inverted Blue Eye Flying Cover | |
| 납치벌레 Napchi-Beolle Abduction Bug |
긴다리동붙이납치벌레 Gin-Dali-Dongbut'i-Nabchi-Beolle Long-Legged Copper-like Abduction Bug | |
| 잎사귀쟁이 Ipsagwi-Jaengi Leaf Pond Skater |
초록잎사귀벌레 Cholog-Ipsagwi-Beolle Green Leaf Bug | |
| 마른잎사귀쟁이 Maleun-Ipsagwi-Jaengi Dry Leaf Pond Skater |
뾰족마른잎사귀닮은꼴 Ppyojog-Maleun-Ipsagwi-Dalmeunkkol Sharp Dry Leaf Look-alike | |
| 빨강업어거미 Ppalgang-Eobeo-Geomi Red Carrying Spider |
업은등왕거미 Eobeun-Deung-Wang-Geomi Back-Carrying Great Spider | |
| 노랑업어거미 Nolang-Eobeo-Geomi Yellow Carrying Spider |
업은등왕거미 Eobeun-Deung-Wang-Geomi Back-Carrying Great Spider | |
| 파랑업어거미 Palang-Eobeo-Geomi Blue Carrying Spider |
업은등왕거미 Eobeun-Deung-Wang-Geomi Back-Carrying Great Spider | |
| 하양업어거미 Hayang-Eobeo-Geomi White Carrying Spider |
업은등왕거미 Eobeun-Deung-Wang-Geomi Back-Carrying Great Spider | |
| 초록업어거미 Cholog-Eobeo-Geomi Green Carrying Spider |
업은등왕거미 Eobeun-Deung-Wang-Geomi Back-Carrying Great Spider | |
| 구슬거미 Guseul-Geomi Marble Spider |
가로줄박닮은꼴 Galo-Jul-Bag-Dalmeunkkol Horizontal-Striped Gourd Look-alike | |
| 대머리박거미 Daemeoli-Bag-Geomi Bald Gourd Spider |
대머리벽제거미 Daemeoli-Byeogje-Geomi Bald Wall-Hanging Spider | |
| 박거미캐넌 Bag-Geomi-Kaeneon Gourd Spider Cannon |
얇은다리염라벽제거미 Yalbeun-Dali-Yeomla-Byeogje-Geomi Thin-Legged Yama Wall-Hanging Spider | |
| 박거미인페르노 Bag-Geomi-Inpereuno Gourd Spider Inferno |
큰발춤사위벽제거미 Keun-Bal-Chumsawi-Byeogje-Geomi Big-Footed Dancing Wall-Hanging Spider | |
| 전기벌레 Jeongi-Beolle Electric Bug |
노랑무늬전기벌레 Nolang-Munui-Jeongi-Beolle Yellow Pattern Electric Bug | |
| 황금벌레 Hwanggeum-Beolle Gold Bug |
수박무늬황금벌레 Subag-Munui-Hwanggeum-Beolle Watermelon Pattern Gold Bug | |
| 방귀벌레 Banggwi-Beolle Fart Bug |
초록공주방귀벌레 Cholog-Gongju-Banggwi-Beolle Green Princess Fart Bug | |
| 순금벌레 Sungeum-Beolle Pure Gold Bug |
관료황금벌레 Gwanlyo-Hwanggeum-Beolle Bureaucratic Gold Bug | |
| 알벌레 Al-Beolle Egg Bug |
동글누에벌레 Donggeul-Nue-Beolle Round Silkworm Bug | |
| 구체투수벌레 Guche-Tusu-Beolle Orb Thrower Bug |
넓적배꼬마용수철 Neolbjeog-Bae-Kkoma-Yongsucheol Broad-Belly Small Spring | |
| 물쟁이 Mul-Jaeng'i Water Pond Skater |
세로줄물쟁이 Selo-Jul-Mul-Jaeng'i Vertical-Striped Water Pond Skater | |
| 진흙쟁이 Jinheulg-Jaengi Mud Pond Skater |
세로줄물쟁이 진흙형 Selo-Jul-Mul-Jaeng'i Jinheulg-Hyeong Vertical-Striped Water Pond Skater Mud Type | |
| 하양바지락나비 Hayang-Bajilag-Nabi White Clam Butterfly |
배추하양집바지락나비 Baechu-Hayang-Jib-Bajilag-Nabi Cabbage White House Clam Butterfly | |
| 노랑바지락나비 Nolong-Bajilag-Nabi Yellow Clam Butterfly |
노랑집바지락나비 Nolong-Jib-Bajilag-Nabi Yellow House Clam Butterfly | |
| 빨강바지락나비 Ppalgang-Bajilag-Nabi Red Clam Butterfly |
산붉은집바지락나비 San-Bulgeun-Jib-Bajilag-Nabi Mountain Red House Clam Butterfly | |
| 흰눈호랑나비 Huin-Nun-Holang-Nabi White Snow Swallowtail Butterfly |
흰눈호랑나비닮은꼴 Huin-Nun-Holang-Nabi-Dalmeunkkol White Snow Swallowtail Butterfly Look-alike | |
| 깜짝국화 Kkamjjag-Gughwa Startle Chrysanthemum |
국화흉내 Gughwa-Hyungnae Chrysanthemum Mimicry | |
| 깜짝버섯 Kkamjjag-Beoseos Startle Mushroom |
버섯흉내 Beoseos-Hyungnae Mushroom Mimicry | |
| 빵닮은꼴 Ppang-Dalmeunkkol Bread Look-alike |
소라빵닮은꼴 Sola-Ppang-Dalmeunkkol Corone Look-alike | |
| 거대빵닮은꼴 Geodae-Ppang-Dalmeunkkol Giant Bread Look-alike |
식빵닮은꼴 Sig-Ppang-Dalmeunkkol Bread Loaf Look-alike | |
| 꼬마도롱뇽 Kkoma-Dolongnyong Dwarf Salamander |
가짜금육지도롱뇽 유생 Gajja-Geum-Yugji-Dolongnyong Yusaeng False Gold Terrestrial Salamander Larva | |
| 보물도롱뇽 Bomul-Dolongnyong Treasure Salamander |
가짜금육지도롱뇽 Gajja-Geum-Yugji-Dolongnyong False Gold Terrestrial Salamander | |
| 꼬마코치기 Kkoma-Ko-Chigi Dwarf Nose-Whacker |
검은줄무늬말린코오이 유생 Geomeun-Julmunui-Mallin-Ko-Oi Yusaeng Black-Striped Coiled Nose Melon Larva | |
| 거대코치기 Geodae-Ko-Chigi Giant Nose Whacker |
검은줄무늬말린코오이 Geomeun-Julmunui-Mallin-Ko-Oi Black-Striped Coiled Nose Melon | |
| 달걀젤리 Dalgyal-Jelli Fried Egg Jelly |
노른자말랑멍게 Noleunja-Mallang-Meongge Egg Yolk Squishy Sea Squirt | |
| 정수해파리 Jeongsu-Haepari Nectar Jellyfish |
긴꼬리별정수해파리 Gin-Kkoli-Byeol-Jeongsu-Haepali Long Tail Star Nectar Jellyfish | |
| 까마귀병아리 Kkamagwi-Byeongali Crow Chick |
흰꼬리뱀까마귀 병아리 Huin-Kkoli-Baem-Kkamagwi Byeongali White Tail Snake Crow Chick | |
| 뱀까마귀 Baem-Kkamagwi Snake Crow |
흰꼬리뱀까마귀 Huin-Kkoli-Baem-Kkamagwi White Tail Snake Crow | |
| 쭉쭉새 Jjug-Jjug-Sae Sucking-Up Bird |
굵은부리호리병새 Gulgeun-Buli-Holibyeong-Sae Fat Beak Gourd Bird | |
| 불빵 Bul-Ppang Fire Bread |
석탄빵조개 Seogtan-Ppang-Jogae Coal Bread Shellfish | |
| 마비빵 Mabi-Ppang Shock Bread |
마비빵조개 Mabi-Ppang-Jogae Shock Bread Shellfish | |
| 얼음빵 Eoleum-Ppang Ice Bread |
눈집빵조개 Nun-Jib-Ppang-Jogae Snow House Bread Shellfish | |
| 멍텅버섯 Meongteong Beoseos Stupid Mushroom |
빨강멍텅거대버섯 Ppalgang-Meongteong-Geodae-Beoseos Red Stupid Giant Mushroom | |
| 독멍텅버섯 Dog-Meongteong-Beoseos Posion Stupid Mushroom |
멍텅버섯닮은꼴 Meongteong-Beoseos-Dalmeunkkol Stupid Mushroom Look-alike | |
| 곰팡이꼬마차피 Gompang'i-Kkoma-Chapi Mold Dwarf Chappy |
멍텅버섯닮은꼴과 그 숙주 Meongteong-Beoseos-Dalmeunkkol-Gwa Geu Sugju Stupid Mushroom Look-alike and its host | |
| 곰팡이뿌리기 Gompang'i-Ppurigi Mold Sprinkler |
멍텅버섯닮은꼴과 그 숙주 Meongteong-Beoseos-Dalmeunkkol-Gwa Geu Sugju Stupid Mushroom Look-alike and its host | |
| 방화벌레 Banghwa-Beolle Arson Bug |
푸른혀방화벌레 Puleunh-Yeo-Banghwa-Beolle Blue-Tongued Arson Bug | |
| 수염쥐 Suyeom-Jwi Beard Rat |
천축마비쥐 Cheonchug-Mabi-Jwi Guinea Pig Paralysis Rat | |
| 마뮤타 Mamyuta Mamuta |
Same as Korean nickname | |
| 고슴도저 Goseumdojeo Hedgepine |
오디밤송이껍질 Odi-Bamsong'i-Kkeobjil Mulberry Chestnut Burr Shell | |
| 피크진디 Pikeu-Jindi Pik Aphid |
피크진디꿀벌레 Pikeu-Jindi Kkul-Beolle Pik Aphid Honey Bug | |
| 풍선호롱 Pungseon-Holong Balloon Oil Lamp |
줄무늬가시풍선호롱 Julmunui-Gasi-Pungseon-Holong Striped Thorn Balloon Oil Lamp | |
| 얼음풍선호롱 Eoreum-Pungseon-Holong Ice Balloon Oil Lamp |
민무늬가시풍설호롱 Minmunui-Gasi-Pungseol-Holong Plain-Pattern Thorn Snowstorm Oil Lamp | |
| 시들풀무 Sideul-Pulmu Wilt Bellows |
바람시들풀무 Balam-Sideul-Pulmu Wind Wilt Bellows | |
| 꼬마해파리 Kkoma-Haepali Dwarf Jellyfish |
순진해파리 Sunjin-Haepali Innocent Jellyfish | |
| 거대해파리 Geodae-Haepali Giant Jellyfish |
황천해파리 Hwangcheon-Haepali Underworld Jellyfish | |
| 올챙 Olchaeng Tadpole |
노랑덩이줄기개구리 유생 Nolang-Deong'ijulgi-Gaeguri Yusaeng Yellow Tuber Frog Larva | |
| 덩이줄기개구리 Deong'ijulgi-Gaeguri Tuber Frog |
노랑덩이줄기개구리 Nolang-Deong'ijulgi-Gaeguri Yellow Tuber Frog | |
| 둥글개구리 Dunggeul-Gaeguri Rotund Frog |
둥글덩이줄기개구리 Dunggeul-Deong'ijulgi-Gaeguli Rotund Tuber Frog | |
| 얼음덩이줄기개구리 Eoreum-Deong'ijulgi-Gaeguri Ice Tuber Frog |
함박눈덩이줄기개구리 Hambagnun-Deong'ijulgi-Gaeguli Heavy-Snow Tuber Frog | |
| 터줏개구리 Teojut-Gaeguri Master Frog |
노랑덩이줄기개구리 장수 개체 Nolang-Deong'ijulgi-Gaeguri Jangsu Gaeche Yellow Tuber Frog Long-Lived Specimen | |
| 동글메기 Donggeul-Megi Rotund Catfish |
그물무늬둥글메기 Geumul-Munui Donggeul-Megi Reticulated Rotund Catfish | |
| 긴주둥이물고기 Gin-Judung'i-Mulgogi Long-Snout Fish |
가는입바나나물고기 Ganeun-Ib-Banana-Mulgogi Thin-Mouthed Banana Fish | |
| 가시망둥이 Gasi-Mangdung'i Thorn Goby |
참깨무늬가시망둥이 Chamkkae-Munui-Gasi-Mangdung'i Sesame-Pattern Thorn Goby | |
| 거품문어 Geopum-Muneo Bubble Octopus |
풍선문어 Pungseon-Muneo Balloon Octopus | |
| 꼬마게양 Kkoma-Geyang Dwarf Crab-Onion |
양파머리게 유생 Yangpa-Meoli-Ge Yusaeng Onion Crab Head Larva | |
| 게양 Geyang Crab-Onion |
양파머리게 Yangpa-Meoli-Ge Onion Crab Head | |
| 던져먹기 Deonjyeo-Meokgi Throwing Devourer |
긴다리두껍주둥이게 Gin-Dali-Dukkeob-Judung'i-Ge Long-Legged Thick-Mouthed Grab | |
| 갯가재닮은꼴 Gaesgajae-Dalmeunkkol Mantis Shrimp Look-alike |
서양갯가재게 Seoyang-Gaesgajae-Ge Western Mantis Shrimp Crab | |
| 툭눈갯가재 Tug-Nun-Gaesgajae Bug-Eyed Mantis Shrimp |
대륙갯가재게 Daelyug-Gaesgajae-Ge Continent Mantis Shrimp Crab | |
| 꼬리갑옷 Kkoli-Gabos Tail Armour |
털꼬리갑옷전갈 Teol-Kkoli-Gabos-Jeongal Hairy-Tail Armour Scorpion | |
| 먹보진주조개 Meogbo-Jinju-Jogae Gluttonous Pearl Clam |
벌레잡이먹보진주조개 Beolle-Jab'i-Meogbo-Jinju-Jogae Bug-Catching Gluttonous Pearl Clam | |
| 동글눈맨들민달팽이 Donggeul-Nun-Maendeul-Mindalpaeng'i Round-Eyed Smooth Slug |
반숙맨들민달팽이 Ban-Sug-Maendeul-Mindalpaeng'i Half-Boiled Smooth Slug | |
| 꽃우산맨들민달팽이 Kkoch-Usan-Maendeul-Mindalpaeng'i Flower-Umberella Smooth Slug |
툭눈꽃우산맨들민달팽이 Tug-Nun-Kkoch-Usan-Maendeul-Mindalpaeng'i Bug-Eyed Flower-Umberella Smooth Slug | |
| 진흙호록이 Jinheulg-Holog'i Mudslurper |
무턱여섯눈장어 Muteog-Yeoseos-Nun-Jangeo Jawless Six-Eyed Eel | |
| 비유령 Bi-Yulyeong Rain Ghost |
동방비인간 Dongbang-Bi-Yulyeong Eastern Rain Ghost | |
| 머드로그 Meodeu-Rogeu Mud(f)rog?? |
거대머드바다달팽이 Geodae-Meodeu-Bada-Dalpaeng'i Giant Mud Sea Snail | |
| 잊혀진 고대견 Ijhyeojin Godae-Gyeon Forgotten Ancient Dog |
견신의 사도 Gyeonsin-ui Sado Messanger of the Dog Deity | |
| 모스 Moseu Moss |
한잎집강아지 Han-Ip-Jib-Gangaji One-Leaf House Puppy |
| Name | KR Nickname | KR Name |
|---|---|---|
| 한입빵닮은꼴 Hanib-Ppang-Dalmeunkkol Bite-Sized Bread Look-alike |
꼬마빵닮은꼴 Kkoma-Ppang-Dalmeunkkol Small Bread Look-alike | |
| 비상금벌레 Bisang-Geum-Beolle Emergency Fund Bug |
초록납치벌레 Cholog-Nabchi-Beolle Green Kidnapping Bug | |
| 마키 Maki Yellow Ducky |
키위둥글노란새 Kiwi-Dunggeul-Nolan-Sae Kiwi Round Yellow Bird | |
| 솜털투척벌레 Somteol-Tucheok-Beolle Cotton-Throwing Bee |
독솜털투척벌 Dog-Somteol-Tucheok-Beolle Poison Cotton-Throwing Bee | |
| 볏마키 Byeos-Maki Crest Mockiwi |
볏둥글푸른새 Byeos-Dunggeul-Puleun-Sae Crest-Round Blue Bird | |
| 참새벌레 Chamsae-Beolle Sparrow Bug |
점박이꼬마벌새벌레 Jeombag'i-Kkoma-Beolsae-Beolle Spotted Small Hummingbird Bug | |
| 땅벼룩(수컷) Ttang-Byeolug (Sukeos) Tiny Flea (Male) |
땅가위턱 Ttang-Gawi-Teog Ground Scissor Jaw | |
| 멍텅새송이버섯 Meongteong-Saesong'i-Beoseos Stupid Pine Mushroom |
빨강멍텅버섯 Ppalgang-Meongteong-Beoseos Red Stupid Mushroom | |
| 발사거미(암컷) Balsa-Geomi (Amkeos) Firing Spider (Female) |
긴다리엉겅퀴거미 Gin-Dali-Eonggeongkwi-Geomi Long-Legged Thistle Spider | |
No diference |
긴주둥이물고기 Gin-Judung'i-Mulgogi Long-Snout Fish |
가는입바나나물고기 Ganeun-Ib-Banana-Mulgogi Thin-Mouthed Banana Fish |
| 해저툭눈곰치 Haejeo-Tug-Nun-Gomchi Seabed Bug-Eyed Moray Eel |
해저툭눈점박이 Haejeo-Tug-Nun-Jeombag'i Seabed Spotted Bug-Eye | |
| 거대둥글성게 Geodae-Dung-Geulseong-ge Giant Round Sea Urchin |
거대돌기둥글성게 Geodae-Dolgi-Dung-Geulseong-ge Giant Spine Round Sea Urchin | |
| 둥글벌레 Dunggeul-Beolle Round Bug |
둥글가위턱 Dunggeul-Gawi-Teog Round Scissor Jaw | |
| 큰입전기벌레 Keun-Ib-Jeongi-Beolle Large-Mouthed Electric Bug |
기문큰입전기벌레 Gimun-Keun-Ib-Jeongi-Beolle Yellow Pattern Large-Mouthed Electric Bug | |
| 꼬마덩이줄기개구리 Kkoma-Deong-Ijulgi-Gaeguli Dwarf Tuber Frog |
노랑덩이줄기개구리 Nolang-Deong-Ijulgi-Gaeguli Yellow Tuber Frog | |
| 별사탕닮은꼴 Byeolsatang-Dalmeunkkol Konpeitō Look-alike |
알사탕떨구리 Alsatang-Tteolguli Hard-Candy Dropper | |
| 돌기벌레 Dolgi-Beolle Spiked Bug |
돌기가위턱 Dolgi-Gawi-Teog Spiked Scissor Jaw | |
| 가짜갯가재닮은꼴 Gajja-Gaesgajae-Dalmeunkkol Fake Mantis Shrimp Look-alike |
육지툭눈소라게 Yugji-Tug-Nun-Solage Land Bug-Eyed Hermit Crab | |
| 불꽃놀이벌레 Bulkkochnol'i-Beolle Fireworks Bug |
무색나무열매벌레 Musaeg-Namu-Yeolmae-Beolle Colourless Nut Bug | |
No difference |
구체투수벌레 Guche-Tusu-Beolle Orb Thrower Bug |
넓적배꼬마용수철 Neolbjeog-Bae-Kkoma-Yongsucheol Broad-Belly Small Spring |
| 토끼벌레 Tokki-Beolle Rabbit Bug |
붉은눈점프벌레 Bulgeun-Nun-Jeompeu-Beolle Red-Eye Jump Bug | |
| 불꽃총알금붕어 Bulkkoch-Chongal-Geumbungeo Flame Bullet Goldfish |
용암금붕어 Yong-Amgeumbungeo Lava Goldfish | |
| 깜짝투수벌레 Kkamjjag-Tusu-Beolle Surprise Thrower Bug |
납작날리기 Nabjag-Nalligi Flat Launcher | |
| 발사거미(수컷) Balsa-Geomi (Sukeos) Firing Spider (Male) |
솜털투수거미 Somteol-Tusu-Geomi Cotton-Throwing Spider | |
| 가시벼룩 Gasi-Byeolug Thorn Flea |
낙하가위턱 Nagha-Gawi-Teog Dropping Scissor Jaw | |
| 붉은툭눈물방울 Bulgeun-Tug-Nun-Mulbangul Red Bug-Eyed Teardrop |
붉은유리툭눈물방울 Bulgeun-Yuli-Tug-Nun-Mulbangul Red Glassy Bug-Eyed Teardrop | |
| 문어불가사리 Muneo-Bulgasali Octopus Starfish |
연줄문어불가사리 Yeonjul Muneo-Bulgasali Kite-String Octopus Starfish | |
| 긴다리쿵쿵이 Gin-Dali-Kung-Kung'i Long-Legged Thumper |
긴다리키위둥글벚꽃새 Gin-Dali-Kiwi-Dunggeul-Beojkkoch-Sae Long-Legged Kiwi Round Cherry Blossom Bird | |
| 전기바지락 Jeongi-Bajilak Electric Clam |
반투명전기바지락 Bantumyeong-Jeongi-Bajilak Translucent Electric Clam | |
| 뾰족가시벌레 Ppyojog-Gasi-Beolle Pointed Thorn Bug |
보라뾰족뾰족가시꼬마벌레 Bola-Ppyojog-Ppyojog-Gasi-Kkoma-Beolle Purple Pointy Thorn Dwarf Bug | |
| 플라잉해파리 Peullaing-Haepali Flying Jellyfish |
하늘해파리 Haneul-Haepali Sky Jellyfish | |
No difference |
덩이줄기개구리 Deong'ijulgi-Gaeguri Tuber Frog |
노랑덩이줄기개구리 Nolang-Deong'ijulgi-Gaeguri Yellow Tuber Frog |
| 불똥점박이 Bulttong-Jeombag'i Spotted Fire-Droplets |
Same as Korean nickname | |
| 꼬마돼지호롱 Kkoma-Dwaeji-Horong Dwarf Pig Oil Lamp |
불뿜기꼬마돼지호롱 Bulppumgi-Kkoma-Dwaeji-Holong Fire-Breathing Dwarf Pig Oil Lamp | |
| 불꽃꼬마차피 Bulkkoch-Kkoma-Chapi Fiery Dwarf Bulblax |
불툭눈알꼬마점박이 Bul-Tug-Nunal-Kkoma-Jeombag-i Fiery Bug-Eyed Dwarf Spotted | |
| 전기애벌레 Jeongi-Ae-Beolle Electric Centipede |
부정전기덩이줄기벌레 Bujeong-Jeongi-Deong'ijulgi-Beolle Negative Electric Tuber Bug | |
| 불뿜기호롱 Bulppumgi-Holong Fire-Breathing Oil Lamp |
불뿜기바위보따리 Bulppumgi-Bawi-Bottali Fire-Breathing Stone Wrapper | |
| 불꽃꼬마덩이줄기개구리 Bulkkoch-Kkoma-Deong-Ijulgi-Gaeguli Fiery Young Tuber Frog |
노랑덩이줄기개구리 Nolang-Deong'ijulgi-Gaeguri Yellow Tuber Frog | |
| 꼬마낚시벌레 Kkoma-Nakksi-Beolle Dwarf Fishing-Bug |
낼름낼름벌레 Naelleum-Naelleum-Beolle Tongue-Flicking Bug | |
| 거대방울벌레 Geodae-Bang-Ul-Beolle Giant Bell Bug |
방울열매벌레 Bang-Ul-Yeolmae-Beolle Bell Nut Bug | |
| 복어벌레 Bogeo-Beolle Pufferfish Bug |
꼬마복어고무공벌레 Kkoma-Bogeo-Gomu-Gong-Beolle Dwarf Pufferfish Rubber Ball Bug | |
| 복어미끌벌레 Bogeo-Mikkeul-Beolle Slippery Pufferfish Bug |
거대복어눈미끌벌레 Geodae-Bogeo-Nun-Mikkeul-Beolle Giant Pufferfish Snow Slippery Bug | |
| 지네잠자리 Jine-Jamjali Centipede Dragonfly |
벚꽃지네잠자리 Beojkkoch-Jine-Jamjali Cherry Blossom Centipede Dragonfly | |
| 돌덩구리 Dol-Deong-guli Rock Pushing Beetle |
철덩구리힘벌레 Cheol-Deong-guli-Him-Beolle Iron-Pushing Strong Bug | |
| 거대지네잠자리 Geodae-Jine-Jamjali Giant Centipede Dragonfly |
벚꽃지네잠자리 Beojkkoch-Jine-Jamjali Cherry Blossom Centipede Dragonfly | |
| 나무열매용벌레 Namu-Yeolmae-Yong-Beolle Nut Dragon Bug |
Same as Korean nickname | |
No difference |
납치벌레 Napchi-Beolle Abduction Bug |
긴다리동붙이납치벌레 Gin-Dali-Dongbut'i-Nabchi-Beolle Long-Legged Copper-like Abduction Bug |
No difference |
차피 Chapi Chappy |
붉은툭눈점박이 Bulgeun-Tugnun-Jeombag'i Red Bug-eye Spotted |
| 긴둥글메기 Gindung-Geulmegi Long-Rotund Catfish |
점박이둥글거대메기 Jeombag'i-Dunggeul-Geodae-Megi Spotted Round Giant Catfish | |
| 거대알갑옷벌레 Geodae-Al-Gabos-Beolle Giant Egg Armoured Bug |
갑옷입은데굴벌레 Gabos-ibeun-Degul-Beolle Armoured Rolling Bug | |
| 전기솜털벌레 Jeongi-Somteol-Beolle Electric Cotton Bug |
Same as Korean nickname | |
| 여왕날개벼룩 Yeowang-Nalgae-Byeorug Queen Tiny Flea |
군대날개가위턱 Gundae-Nalgae-Gawi-Teog Army-Winged Scissor Jaw | |
No difference |
돼지호롱 Dwaeji-Holong Pig Oil Lamp |
불뿜기돼지호롱 Bulppumgi-Dwaeji-Holong Fire-Breathing Pig Oil Lamp |
| 낚시벌레 Nakksi-Beolle Fishing-Bug |
물색낼름벌레 Mul-Saeg-Naelleum-Beolle Water-Coloured Tongue-Flicking Bug | |
No difference |
대왕툭눈점박이 Daewang-Tugnun-Jeombag'i Great King Bug-eye Spotted |
Same as Korean nickname |
| 기생아메히드라 Gisaeng-Ame-Hideula Parasite Rain Hydra |
Same as Korean nickname | |
| 폭주기생아메히드라 Pogju-Gisaeng-Ame-Hideula Berserk Parasite Rain Hydra |
N/A |
Tables
| Colspan and Rowspan 2 (sortable) |
Sortable and Rowspan 2 |
Unsortable and Colspan 2 |
Same as Style Header | ||||
|---|---|---|---|---|---|---|---|
| Header under Header |
Long Header | Header with No Cells | |||||
| h H s E i A d D e E h R |
Adjacent Header 1 |
Mawdad | FISH | Red Bulborb | Orange Bulborb | Hairy Bulborb | |
| Adjacent Header 2 |
Bouncing | A Purple Pikmin | LOOONG ROW | ||||
| Adjacent Header 3 |
Oatchi's Teeth | ||||||
| Adjacent Header 4 |
| ||||||
| Olimar's Sock |
12 | ||||||
| Sizzling Floor | Sunseed Berry | ||||||
| A Quantum Jumping Jellybean | |||||||
| A Talking Rock | Mr. Lui's talk “I was alone, so I picked it up. When I gave it rice, Nadetsed.” | ||||||
| I FISH a fish today. | Shoot today. | ||||||
Tests
Pikmin 4 Enemy Attack
| Enemy Name | Max Pikmin Death |
|---|---|
| Dwarf Bulborb - Eat | With a single bite: 1 |
| Albino Dwarf Bulborb - Eat | With a single bite: 1 |
| Bulborb - Eat | With a single bite: 5 |
| Jumbo Bulborb - Eat | With a single bite: Unknown With all three bites: 10 |
| Dwarf Orange Bulborb - Eat | With a single bite: 1 |
| Orange Bulborb - Eat | With a single bite: 5 |
| Dwarf Bulbear - Eat | With a single bite: 1 |
| Spotty Bulbear - Eat | With a single bite: 5 |
| Dwarf Frosty Bulborb - Eat | With a single bite: 1 |
| Frosty Bulborb - Eat | With a single bite: 5 |
| Fiery Bulblax - Eat + Fire | With a single bite: 5 With its fire: 100 (except Reds or Glows) |
| Whiptongue Bulborb - Eat | With a single tongue attack: 5 |
| Bulborb Larva - Eat | With a single bite: 1 |
| Empress Bulblax - Crush | With a single roll: 100 (except Rocks) |
| Emperor Bulblax - Eat + Crush + Confuse | With a single tongue attack: 9 With a single jump: Likely 100 (except Rocks) With a single roar: 100 |
| Sovereign Bulblax - Eat + Crush + Consume | With a single bite: 15 With a single jump: Likely 100 (except Rocks) With a single roar: 100 |
| Fiery Blowhog - Fire | With a single fire attack: 100 (except Reds or Glows) |
| Watery Blowhog - Water | With a single water attack: 100 (except Blues or Glows) |
| Snowy Blowhog - Ice | With a single ice attack: 100 (Ice and Glows are immune to being frozen; no Pikmin will be killed) |
| Titan Blowhog - Fire | With a single fire attack: 100 (except Reds or Glows) |
| Blizzarding Blowhog - Ice | With a single ice attack: 100 (Ice and Glows are immune to being frozen; no Pikmin will be killed) |
| Tusked Blowhog - Eat | With a single charged-bite: 3 |
| Armored Cannon Larva - Crush | With a single rock: 10 (except Rocks; other Pikmin are knocked away but not killed) |
| Horned Cannon Beetle - Crush | With a single rock: 20 (except Rocks; other Pikmin are knocked away but not killed) |
| Arctic Cannon Larva - Crush (Harmless) | With a single snowy-rock: 0 (100 Pikmin are caught in the snowy-rock, but are not killed) |
| Arctic Cannon Beetle - Eat + Crush (Harmless) | With a single snowy-rock: 0 (100 Pikmin are caught in the snowy-rock, but are not killed) With a single suck attack: Half of the Pikmin caught in the attack, 50 therefore being the max. For an odd-numbered amount, the extra Pikmin will be eaten; if the amount was 19 Pikmin then 10 Pikmin would be eaten. |
| Female Sheargrub - N/A | Harmless enemy: 0 |
| Male Sheargrub - Eat | With a single bite: 1 |
| Mama Sheargrub - Crush | With a jump attack: Likely 100 (except Rocks) |
| Shearwig - Eat | With a single bite: 1 |
| Shearflea - Eat | With a single bite: 1 |
| Joustmite - Eat | With a single pierced bite: 3 (except Rocks) |
| Flighty Joustmite - Eat | With a single pierce attack: 3 (except Rocks) |
| Swooping Snitchbug - N/A (Grabs Pikmin) | Harmless enemy: 0 (two Pikmin can be picked up in one swoop) |
| Skitterleaf - N/A | Harmless enemy: 0 |
| Desiccated Skitter Leaf - Eat | With a single leafy-attack: 2 |
| Fiery Dweevil - Fire | With a single fire attack: 100 (except Reds and Glows) |
| Anode Dweevil - Electric | With a single electric attack: 100 (except Yellows and Glows) |
| Hydro Dweevil - Water | With a single water attack: 100 (except Blues and Glows) |
| Iceblown Dweevil - Ice | With a single ice attack: 100 (except Ice and Glows; no Pikmin will be killed) |
| Venom Dweevil - Poison | With a single poison attack: 100 (except Whites and Glows; ones with the bomb rocks can kill 100 Pikmin as well) |
| Arachnode - Eat | With a single bite (in web): 3 |
| Baldy Long Legs - Crush | With a single stomp attack: Likely 100 |
| Man-at-Legs - Explode | With a single shot (sequence): Unknown, possibly 100 |
| Groovy Long Legs - Crush + Confuse | With a single stomp attack: Likely 100 With a single panic attack: 100 |
| Anode Beetle - Electric | With a single electric attack: 100 (except Yellows and Glows) |
| Iridescent Flint Beetle - N/A | Harmless enemy: 0 |
| Doodlebug - Poison | With a single poison attack: 100 (except Whites and Glows) |
| Iridescent Glint Beetle - N/A | Harmless enemy: 0 |
| Mitite - N/A | Harmless enemy: 0 (100 Pikmin panic once they are revealed) |
| Skutterchuck - Crush (+ Explode) | With a single crush attack (from the crystal: Likely 100 With a bomb rock: 100 |
| Skeeterskate - Water | With a single water attack: Possibly 100 (If all Pikmin were bunched together. I had a maximum of 10 hit at once, most tests had around 1-3) |
| Muckerskate - Mud | With a single mud attack: Same as Skeeterskate |
| White Spectralids - N/A | Harmless enemy: 0 |
| Yellow Spectralids - N/A | Harmless enemy: 0 |
| Red Spectralids - N/A | Harmless enemy: 0 |
| Snowfake Fluttertail - Eat + Ice | With a single tongue attack: 5 With a single ice attack: 100 (except Ice and Glows; no Pikmin will be killed) |
| Creeping Chrysanthemum - Eat | With a single tongue attack: Unknown (usually around 5, but some results have given larger amounts) |
| Startle Spore - Eat + Poison | With a single tongue attack: Same as Creeping Chrysanthemum With a single poison attack (from its tongue): 100 (except Whites and Glows) |
| Breadbug - N/A | Harmless enemy: 0 (Pikmin just stop carrying back the item) |
| Giant Breadbug - N/A | Harmless enemy: 0 (Pikmin just stop carrying back the item) |
| Gildemandwee - Eat | With a single tongue sweep: 3 With a single tongue sweep (for the gold): Likely 8 |
| Gildemander - Eat | With a single tongue sweep: Unknown (usually around 6, but some results have given larger amounts) With a single tongue sweep (for the gold): 100 |
| Miniature Snootwhacker - N/A | Harmless enemy: 0 (100 Pikmin can get caught up in its trunk sweep) |
| Mammoth Snootwhacker - Crush | With a single trunk slam attack: 100 (except Rocks; 100 Pikmin can get caught up in its trunk sweep) |
| Sunsquish - Eat | With a single ensnare attack: 5 (other Pikmin will get pushed away) |
| Foolix - Eat | With a single charged attack: 100 (Pikmin will get caught in its jelly-like body during the attack) |
| Downy Snagret - Eat | With a single peck: 1 |
| Burrowing Snagret - Eat | With a single peck: 1 With a full peck sequence (5 at most): Possibly 5 (results give either 3 or 4, but P3 allowed for 5) |
| Waddlequaff - Eat | With a single suck attack: 6 |
| Scorchcake - Crush + Fire | With a single crush attack: Likely 100 (except Rocks) With a single crush attack (fire): 100 (except Reds and Glows, Rocks will die to the fire and crush attack) |
| Shockcake - Crush + Electric | With a single crush attack: Likely 100 (except Rocks) With a single crush attack (electric): 100 (except Yellows and Glows, Rocks will die to the electric and crush attack) |
| Freezecake - Crush + Ice | With a single crush attack: Likely 100 With a single crush attack (ice): 100 (except Ice and Glows, Rocks will die to the ice and crush attack; Pikmin aren't killed by the surrounding ice, but will be when crushed) |
| Puffstool - Confuse | With a single confusion spray: 100 (Pikmin aren't killed, just panicked) |
| Toxstool - Poison | With a single poison attack: 100 (except Whites and Glows) |
| Moldy Dwarf Bulborb - Eat + Poison | With a single bite: 1 With a single poison attack: 100 (except Whites and Glows) |
| Moldy Slooch - Eat + Poison | With a single tongue sweep: 3 With a single poison attack (from its trail): 100 (except Whites and Glows) |
| Pyroclasmic Slooch - Eat + Fire | With a single tongue sweep: 3 With a single fire attack (from its trail): 100 (except Reds and Glows) |
| Bearded Amprat - Eat + Electric | With a single charged-bite: 2 (One per hand) With a single charge attack (electric): 100 (except Yellows and Glows) |
| Mamuta | With a single hand-slam: 100 (Pikmin aren't killed, just turned into flowered sprouts) |
| Porquillion | With a single spike attack: Likely 100 (Pikmin aren't bunched together enough, but a majority are killed) |
| Honeywisp - N/A | Harmless enemy: 0 |
| Puffy Blowhog - Blow Wind | With a single blow: 100 (all Pikmin get knocked back, except Purples) |
| Icy Blowhog - Blow Icy Wind | With a single icy blow: 100 (all Pikmin get knocked back and frozen, except Purple only get frozen) |
| Withering Blowhog - Blow Wind | With a single blow: 100 (all Pikmin get deflowered, but not knocked back) |
| Lesser Spotted Jellyfloat - Eat (Harmless) | With a single suck: 10 (can store up to 30 Pikmin, except Purples; Pikmin aren't killed) |
| Greater Spotted Jellyfloat | With a single suck: 20 (can store up to 60 Pikmin, except Purples) |
| Wolpole - N/A | Harmless enemy: 0 |
| Yellow Wollyhop - Crush | With a single jump attack: Likely 100 (Pikmin aren't bunched together enough, but a majority are killed; Rock Pikmin are immune) |
| Wollyhop - Crush | With a single jump attack: Likely 100 (Pikmin aren't bunched together enough, but a majority are killed; Rock Pikmin are immune) |
| Chillyhop - Crush + Ice | With a single jump attack: Likely 100 (Pikmin aren't bunched together enough, but a majority are killed. Rock Pikmin are killed when frozen. Ice Pikmin are immune to the ice, but not being crushed) |
| Masterhop - Crush | With a single jump attack: Likely 100 (Pikmin aren't bunched together enough, but a majority are killed; Rock Pikmin are immune) |
| Water Dumple - Eat | With a single bite: 2 |
| Puckering Blinnow - Eat | With a single bite: 1 |
| Pricklepuff - Eat | With a single pierce: 5 (Rock Pikmin are immune) |
| Waddlepus - Bubble | With a single bubble: 1 (Purples and Ice are immune) With its whole bubble attack: Unknown (seems to release a random amount of bubbles) |
| Aristocrab Offspring - Eat and Bubble | With a single claw sweep: 2 (can hold two Pikmin in its claw, and can grab Pikmin from the bubbles) With its whole bubble attack: 5 |
| Peckish Aristocrab - Eat and Bubble | With a single claw sweep: 3 (can hold three Pikmin in its claw) With its whole bubble attack: Unknown (multiple bubbles created, and around at least 30) |
| Grubchucker - Eat | With a single claw: 1 (has two claws, so it grabs two Pikmin during one attack phase) During its whole attack phase: 6 (once its done its grabbing three times, it stops and swats away other Pikmin) |
| Hermit Crawmad - Eat | With a single charge attack: 1 (has two pincers, so it grabs two Pikmin in each one) |
| Bug-Eyed Crawmad - Eat | With a single charge attack: 10 (has two pincers, so it grabs five Pikmin in each one) |
| Crusted Rumpup - Eat | With a single charge attack: 5 |
| Pearly Clamclamp - Eat | With a single bite: 100 |
| Toady Bloyster - Eat + Poison | With a single tongue attack: Unknown (each result it ate a different amount of Pikmin, but a lot of them) With a single posion attack: 100 (except Glow Pikmin) |
| Bloomcap Bloyster - Eat | With a single tongue attack: 5 (one at a time, until five are eaten, then it stops moving) |
| Bogswallow - Eat | With a single suck: Unknown (each result it ate a different amount of Pikmin, but a lot of them; Purple Pikmin are immune) |
| Waterwraith - Crush | With a single roll: 100 (except Rocks) |
| Smoky Progg - Gloom | With a single gloom attack: 100 |
| Ancient Sirehound | With a single charged-bite: 10 (rest are knocked away) With a single jump attack: 100 With all of its elemental hazard: 100 (except their respective Pikmin type) |
Pellet Posy Test
- Pikmin
- The Impact Site - 24 total (3 on day 1)
 1-pellet Pellet Posy (Cycling) × 24 (3 during day 1 will be Red)
- The Forest of Hope - 25 total (20 after day 4)
- 1-pellet Pellet Posy (Red) × 7 (0 after day 4)
- 1-pellet Pellet Posy (Yellow) × 10 (20 after day 4)
- 1-pellet Pellet Posy (Cycling) × 8 (0 after day 4)
- The Forest Navel - 17 total (12, 10 days after the Blue Onion has been discovered)
- 1-pellet Pellet Posy (Blue) × 6 (1, 10 days after the Blue Onion has been discovered)
- 1-pellet Pellet Posy (Cycling) × 11
| Name | Number | Color | Spawning |
|---|---|---|---|
| 1-pellet | 4 | Red | Only spawns on day 1 |
| 5-pellet | 2 | Red | Only spawns on day 1 |
| 1-pellet | 1 | Yellow | Spawns after day 1; respawns after 1 day |
| 1-pellet | 1 | Blue | Spawns after day 1; respawns after 1 day |
| 10-pellet | 1 | Red | Spawns after day 1; respawns after 1 day |
| 10-pellet | 1 | Yellow | Spawns after day 1; respawns after 1 day |
| 10-pellet | 1 | Blue | Spawns after day 1; respawns after 1 day |
| 20-pellet | 1 | Red | Spawns after day 1; respawns after 1 day |
| 20-pellet | 1 | Yellow | Spawns after day 1; respawns after 1 day |
| 20-pellet | 1 | Blue | Spawns after day 1; respawns after 1 day |
| Pellet Posy | 3 | Red | Spawns after day 1; respawns after 1 day |
| Pellet Posy | 21 | Cycling | Spawns after day 1; respawns after 1 day |
| Name | Number | Color | Spawning |
|---|---|---|---|
| 1-pellet | 1 | Red | Does not respawn |
| 1-pellet | 4 | Yellow | Does not respawn |
| 5-pellet | 1 | Red | Does not respawn |
| 10-pellet | 1 | Red | Does not respawn |
| 20-pellet | 1 | Yellow | Spawns until day 4; respawns after 1 day |
| Pellet Posy | 7 | Red | Spawns until day 4; respawns after 1 day |
| Pellet Posy | 10 | Yellow | Spawns until day 4; respawns after 1 day |
| Pellet Posy | 10 | Cycling | Respawns after 1 day |
| Pellet Posy | 10 | Cycling | Spawns after day 4; respawns after 1 day |
- Pikmin 3
- Tropical Wilds - 20 total (5 on day 1)
 1-pellet Pellet Posy (Cycling) × 14 (4 during the day 1 tutorial will be Red)
- 5-pellet Pellet Posy (Cycling) × 4 (1 during the day 1 tutorial will be Red)
- 10-pellet Pellet Posy (Red) × 1
- 10-pellet Pellet Posy (Cycling) × 1
- Garden of Hope - 21 total (25 in Pikmin 3 Deluxe)
- 1-pellet Pellet Posy (Blue) × 2 (with both beyond the cinder block)
- 1-pellet Pellet Posy (Cycling) × 12 (15 in Pikmin 3 Deluxe; with seven beyond the cinder block and on the Quaggled Mireclops' corpse)
- 5-pellet Pellet Posy (Red) × 1
- 5-pellet Pellet Posy (Blue) × 1 (beyond the cinder block)
- 5-pellet Pellet Posy (Cycling) × 5 (6 in Pikmin 3 Deluxe; with two beyond the cinder block and on the Quaggled Mireclops' corpse)
- Distant Tundra - 14 total
- 1-pellet Pellet Posy (Cycling) × 10 (5 during the Yellow Pikmin tutorial will be Yellow)
- 5-pellet Pellet Posy (Cycling) × 4 (1 during the Yellow Pikmin tutorial will be Yellow)
- Twilight River - 17 total
- 1-pellet Pellet Posy (Red) × 1 (after the electrode is complete)
- 1-pellet Pellet Posy (Yellow) × 1 (after the electrode is complete)
- 1-pellet Pellet Posy (Winged) × 3
- 1-pellet Pellet Posy (Cycling) × 4
- 5-pellet Pellet Posy (Rock) × 1 (after the electrode is complete)
- 5-pellet Pellet Posy (Winged) × 4
- 5-pellet Pellet Posy (Cycling) × 2
- 10-pellet Pellet Posy (Winged) × 1
Sublevel Tables
- Crackling Cauldron sublevel 1
| Treasure | Quantity | Notes |
|---|---|---|
| × 1 | ||
| × 1 | Hanging from a cobweb. | |
| × 1 | Partially buried. |
| Enemy | Quantity | Notes |
|---|---|---|
| × 3 | Each drops 1 raw material. | |
| × 4 | One will be above ground flying, two will be below ground. |
| Obstacle | Quantity | Notes |
|---|---|---|
| × 1 | Has 1667 HP and drops 2 raw materials. | |
| × 1 | Has a weight of 10. |
| Wild Pikmin | Quantity | Notes | |
|---|---|---|---|
| × 10 | × 5 (idle) | Replaced with a Yellow Candypop Bud if the player has more than 50 Yellow Pikmin or more than 95 Pikmin. | |
| × 5 (sprouts) | Replaced with a Yellow Candypop Bud if the player has more than 50 Yellow Pikmin or more than 95 Pikmin. | ||
| × 1 | This is what replaces the 5 idle Yellow Pikmin. | ||
| Others | Quantity | Notes | |
|---|---|---|---|
| × 3 | × 2 | ||
| × 1 | Replaces the 5 Yellow Pikmin sprouts. | ||
| × 1 | Pile of 15 raw materials. | ||
| × 5 | 3 from the Fiery Blowhogs and 2 from the electric gate. | ||
- Crackling Cauldron sublevel 2
| Treasure | Quantity | Notes |
|---|---|---|
| × 1 | On a high ledge. | |
| × 1 | Partially buried inside sizzling floor. | |
| × 1 | On a high ledge. |
| Enemy | Quantity | Notes |
|---|---|---|
| × 1 | The first hit drops 3 raw materials, the second hit drops 6 raw materials, and the third hit drops 10 raw materials. 19 raw materials in total. | |
| × 1 | Drops 1 raw material. It guards an alternate base location. | |
| × 3 | One will be above ground flying, two will be below ground. |
| Obstacle | Quantity | Notes |
|---|---|---|
| × 1 | Has 5333 HP and drops 4 raw materials. | |
| × 1 | Has 5333 HP and drops 4 raw materials. | |
| × 5 | 2 floors have 1 piece of charcoal, 2 floors have 2 pieces of charcoal, and 1 floor has 3 pieces of charcoal. |
| Wild Pikmin | Quantity | Notes |
|---|---|---|
| × 10 | Two groups of 5 Yellow Pikmin sprouts. One group is replaced with a nectar egg if the player has more than 50 Yellow Pikmin or more than 95 Pikmin (need to check). The other group is replaced with a Yellow Candypop Bud if the player has more than 50 Yellow Pikmin or more than 95 Pikmin (need to check). | |
| × 1 | Disappears if the player has more than 5 Red Pikmin. | |
| × 1 | This is what replaces a group of 5 Yellow Pikmin sprouts. |
| Others | Quantity | Notes |
|---|---|---|
| × 1 | On a high ledge. | |
| × 3 | 1 egg is what replaces the 5 Yellow Pikmin sprouts. | |
| × 2 | Pile of 15 and 20 raw materials. | |
| × 28 | 19 from the Iridescent Flint Beetle, 4 from the dirt wall, and 4 from the electric gate. |
Side Mode Tables
Side Mode General Tables
| Name and Objective |
Pikmin | Onions | Requirements | Time limit | |||||||||||||||
|---|---|---|---|---|---|---|---|---|---|---|---|---|---|---|---|---|---|---|---|
 Flower Garden Collect Fruits and Nuggets! |
|
9:00 |
| Name and Objective |
Pikmin | Onions | Requirements | Time limit | ||||
|---|---|---|---|---|---|---|---|---|
| Red | Rock | Yellow | Winged | Blue | ||||
| Flower Garden Collect Fruits and Nuggets! |
9:00 | |||||||
 Inside Forest Collect Fruits and Nuggets! |
10:00 | |||||||
 River Collect Fruits! |
10:00 | |||||||
 Tundra Collect Fruits and Nuggets! |
12:00 | |||||||
| Name | Sublevels | Pikmin | Sprays | ||||
|---|---|---|---|---|---|---|---|
| Red | Yellow | Blue | Purple | White | |||
 Explorer's Cave |
2 | (leaf) |
|||||
 Novice Training |
2 | (leaf) |
|||||
 Lost Toy Box |
2 | (flower) |
|||||
 Creator's Garden |
1 | (flower) |
|||||
 Green Hole |
2 | (leaf) |
(leaf) |
(leaf) |
|||
 Hot House |
2 | (leaf) |
(leaf) |
(leaf) |
|||
 Brawny Abyss |
2 | (flower) |
|||||
 Red Chasm |
1 | (flower) |
|||||
 Trampled Garden |
1 | (flower) |
(flower) |
(flower) |
|||
 Twilight Garden |
1 | ||||||
 Cryptic Cavern |
5 | (flower) |
(flower) |
||||
 Concrete Maze |
3 | (flower) |
|||||
 Collector's Room |
7 | (flower) |
|||||
 Dweevil Nest |
1 | (flower) |
(flower) |
(flower) |
(flower) |
||
 Cavernous Abyss |
1 | (leaf) |
(leaf) |
||||
 Snack Pit |
1 | (leaf) |
(leaf) |
(leaf) |
(leaf) |
(leaf) |
|
 Three Color Training |
1 | (leaf) |
(leaf) |
(leaf) |
|||
 Hazard Training |
2 | (flower) |
(flower) |
||||
 Cave of Snarls |
2 | (flower) |
(flower) |
(flower) |
|||
 The Giant's Bath |
2 | (flower) |
|||||
 Rumbling Grotto |
2 | (flower) |
(flower) |
||||
 Subterranean Lair |
1 | (flower) |
(flower) |
(flower) |
|||
 Hidden Garden[note 1] |
1 | ||||||
 Abduction Den |
1 | (flower) |
(flower) |
||||
 Secret Testing Range |
2 | (flower) |
(flower) |
(flower) |
(flower) |
(flower) |
|
 Breeding Ground |
3 | (flower) |
|||||
 Cave of Pain |
1 | (flower) |
|||||
 Bully Den |
1 | (flower) |
|||||
 Sniper Room |
1 | (flower) |
(flower) |
||||
 Emperor's Realm |
5 | (flower) |
(flower) |
(flower) |
|||
- ^ 2 flower Bulbmin are given at the start of this sublevel. When selecting this stage in the Challenge Mode menu, no Pikmin appear to jump into the stage.
| Image | Name | Starting Pikmin | Maximum Score | Time limit |
|---|---|---|---|---|

|
The Impact Site | 278 | 10:48 | |

|
The Forest of Hope | 569 | 18:54 | |

|
The Forest Navel | 482 | 16:12 | |

|
The Distant Spring | 752 [note 1] | 18:54 | |

|
The Final Trial | 299 | 13:30 |
- ^ Despite being the maximum score, it is extremely difficult to achieve due to the large amount of enemies and the randomly-colored pellets. The maximum score has never been achieved by humans on the GameCube or the Wii, though few have completed it on the Nintendo Switch due to the crushing glitch occuring less frequently. The maximum score has only been achieved using a TAS.
| Name | Pikmin | Onions | Requirements | Time limit | |||||||||
|---|---|---|---|---|---|---|---|---|---|---|---|---|---|
| Red | Rock | Yellow | Winged | Blue | Purple | White | |||||||
Tropical Forest |
1000 |
1400 |
1800 |
2100 |
7:00 | ||||||||
Silver Lake |
1500 |
2000 |
2500 |
2920 |
8:00 | ||||||||
Thirsty Desert |
1500 |
2000 |
2700 |
3340 |
10:00 | ||||||||
Twilight Hollow |
1500 |
2000 |
2500 |
3240 |
10:00 | ||||||||
Shaded Garden |
1500 |
2000 |
2500 |
3180 |
8:00 | ||||||||
Tropical Forest Remix |
800 |
1100 |
1500 |
1810 |
8:00 | ||||||||
Silver Lake Remix |
750 |
1500 |
2250 |
3000 |
9:00 | ||||||||
Thirsty Desert Remix |
2500 |
3500 |
4500 |
5125 |
8:00 | ||||||||
Twilight Hollow Remix |
1800 |
2300 |
2800 |
3300 |
9:00 | ||||||||
Shaded Garden Remix |
800 |
1300 |
1800 |
2400 |
8:00 | ||||||||
Fortress of Festivity |
2000 |
3000 |
4500 |
5900 |
12:00 | ||||||||
The Rustyard |
1100 |
1400 |
1700 |
1950 |
7:00 | ||||||||
Beastly Caverns |
2000 |
2500 |
3000 |
3500 |
12:00 | ||||||||
Forgotten Cove |
900 |
1800 |
2700 |
3480 |
11:00 | ||||||||
Clockwork Chasm |
700 |
1000 |
1500 |
2185 |
13:00 | ||||||||
| Name | Pikmin | Onions | Requirements | Time limit | ||||||
|---|---|---|---|---|---|---|---|---|---|---|
| Red | Rock | Yellow | Winged | Blue | Purple | White | ||||
Tropical Forest |
7:00 | |||||||||
Silver Lake |
8:00 | |||||||||
Thirsty Desert |
8:00 | |||||||||
Twilight Hollow |
9:00 | |||||||||
Shaded Garden |
9:00 | |||||||||
Tropical Wilds Remix |
13:00 | |||||||||
Garden of Hope Remix |
7:00 | |||||||||
Distant Tundra Remix |
9:00 | |||||||||
Twilight River Remix |
10:00 | |||||||||
Formidable Oak Remix |
5:55 | |||||||||
Fortress of Festivity |
7:30 | |||||||||
The Rustyard |
6:00 | |||||||||
Beastly Caverns |
6:00 | |||||||||
Forgotten Cove |
9:00 | |||||||||
Clockwork Chasm |
7:00 | |||||||||
| Stage | Name | Image | Pikmin | Requirements | Time limit | |||
|---|---|---|---|---|---|---|---|---|
| 11 | Fortress of Festivity | 2000 |
3000 |
4500 |
5900 |
12:00 | ||
| 1 | Tropical Forest | 250 |
400 |
550 |
650 |
7:00 | ||
| Stage | Name | Pikmin | Time limit |
|---|---|---|---|
| 11 | Fortress of Festivity |
12:00 | |
| 1 | Tropical Forest |
7:00 |
Mission Mode Layout
Option 1
Extremely wide table. (You can see the whole table further up this page, I'm not having a duplicate. This table is slightly edited however)
| Stage | Name | Pikmin | Onions | Requirements | Time limit | |||||||||
|---|---|---|---|---|---|---|---|---|---|---|---|---|---|---|
| Red | Rock | Yellow | Winged | Blue | Purple | White | ||||||||
| 1 | Tropical Forest |
1000 |
1400 |
1800 |
2100 |
7:00 | ||||||||
Option 2
No Pikmin or Onion columns and no Pikmin quantity.
| Stage | Name | Image | Pikmin | Requirements | Time limit | |||
|---|---|---|---|---|---|---|---|---|
| 11 | Fortress of Festivity | 2000 |
3000 |
4500 |
5900 |
12:00 | ||
Option 3
Basically the same as Option 1, although it could be done as columns
| Stage | Name | |
|---|---|---|
| Collect Treasures | Battle Enemies! | |
| 11 | Fortress of Festivity |
Fortress of Festivity |
Play Nintendo
| Name | Image | Description | Link | ||||||||||||||||
|---|---|---|---|---|---|---|---|---|---|---|---|---|---|---|---|---|---|---|---|
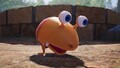
| Pikmin pairs! |  |
Pikmin pairs! Different Pikmin types from the Pikmin 4 game are hidden under cards. Can you flip them and find matching pairs in this free online activity? You can try to find pairs of Red Pikmin, Blue Pikmin, Ice Pikmin, Glow Pikmin, and more! Good luck on this Memory Match-up inspired by the Pikmin 4 game, available exclusively for the Nintendo Switch family of systems.
|
[1] | ||||||||||||||||
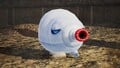
| Pikmin puzzle: What a world! |  |
Pikmin puzzle: What a world! This scene of a mysterious world is inspired by the Pikmin 4 game, where you can lead your Pikmin on missions, solve puzzles, and fight wild creatures with the help of your Rescue Pup, Oatchi. The Pikmin 4 game is available exclusively for the Nintendo Switch family of systems. For this puzzle, you can choose between Easy (8 pieces), Medium (18 pieces), or Hard (50 pieces).
|
[2] | ||||||||||||||||
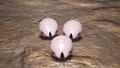
| Spring poll: All grown up! |  |
Spring poll: All grown up! With springtime comes all sorts of fresh blooms, from the buds on the trees to budding friendships. This Play Nintendo online poll asks the question: What do you think you might want to grow this spring: flowers, veggies, or something else?
|
[3] |


- References