User:Soprano/Gallery: Difference between revisions
m (Soprano moved page User:Soprano/gallery to User:Soprano/Gallery: Capitalized for consistency with other user subpages) |
(Added more images, and also customized the size of each gallery to make the page more compact and to expand some images.) |
||
| Line 4: | Line 4: | ||
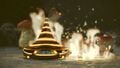
===Menus=== | ===Menus=== | ||
My main documentation focus for {{p3d}} was the [[menu]]s. | My main documentation focus for {{p3d}} was the [[menu]]s. | ||
<gallery> | <gallery widths="160" heights="90"> | ||
P3D Menu Pause.jpg|I | P3D Menu Pause.jpg|I really like this menu. | ||
P3D Menu Pause Retry.jpg | P3D Menu Pause Retry.jpg | ||
P3D Menu Pause Settings Radar.jpg | P3D Menu Pause Settings Radar.jpg | ||
| Line 49: | Line 49: | ||
P3D Loading Story Mode (No Objective).jpg | P3D Loading Story Mode (No Objective).jpg | ||
P3D Loading Side Stories.jpg | P3D Loading Side Stories.jpg | ||
P3D Check In Conversation.jpg | |||
P3D Menu Area Selection.jpg | |||
</gallery> | </gallery> | ||
===Walls=== | ===Walls=== | ||
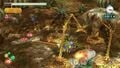
I took photos of every [[wall]] in Story Mode and edited together particular walls into these photo montages. | I took photos of every [[wall]] in Story Mode and edited together particular walls into these photo montages. | ||
<gallery> | <gallery widths="180" heights="180"> | ||
P3D Electric Gates.jpg | P3D Electric Gates.jpg | ||
P3D Dirt Walls.jpg | P3D Dirt Walls.jpg | ||
| Line 62: | Line 64: | ||
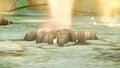
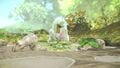
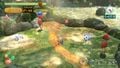
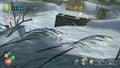
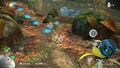
===Landing sites=== | ===Landing sites=== | ||
In the landing cutscene at the start of each day, there's a 1-frame window at the end where the "Press {{button|wiiu|+|switch|+}} to skip" box disappears and the [[HUD]] hasn't started appearing from the edges of the screen. To get these screenshots, I had to press the screenshot button at exactly the right time, and restart the day if I missed. When there were weather effects, I also had to restart the day. And in the Formidable Oak, the first day you land has is a cutscene that leaves the camera in a different place, and once the final boss has appeared, the weather is always rainy, so I had to take the screenshot on the second day of the area without having finished the puzzle. These screenshots were taken to replace an earlier set of screenshots from the original game, and those are linked on the file pages. It's fun to compare the differences. An interesting detail in these screenshots is the locations of the cursor – on the same frame as the frame without the HUD, it's in a seemingly random location, and the next frame it goes to underneath the Onion (unless motion controls are turned on, which they weren't). Some areas seem to have the same location for the cursor. | In the landing cutscene at the start of each day, there's a 1-frame window at the end where the "Press {{button|wiiu|+|switch|+}} to skip" box disappears and the [[HUD]] hasn't started appearing from the edges of the screen. To get these screenshots, I had to press the screenshot button at exactly the right time, and restart the day if I missed. When there were weather effects, I also had to restart the day. And in the Formidable Oak, the first day you land has is a cutscene that leaves the camera in a different place, and once the final boss has appeared, the weather is always rainy, so I had to take the screenshot on the second day of the area without having finished the puzzle. These screenshots were taken to replace an earlier set of screenshots from the original game, and those are linked on the file pages. It's fun to compare the differences. An interesting detail in these screenshots is the locations of the cursor – on the same frame as the frame without the HUD, it's in a seemingly random location, and the next frame it goes to underneath the Onion (unless motion controls are turned on, which they weren't). Some areas seem to have the same location for the cursor. | ||
<gallery> | <gallery widths="160" heights="90"> | ||
P3D Landing Site Tropical Wilds.jpg | P3D Landing Site Tropical Wilds.jpg | ||
P3D Landing Site Garden of Hope.jpg | P3D Landing Site Garden of Hope.jpg | ||
| Line 68: | Line 70: | ||
P3D Landing Site Twilight River.jpg | P3D Landing Site Twilight River.jpg | ||
P3D Landing Site Formidable Oak.jpg | P3D Landing Site Formidable Oak.jpg | ||
</gallery> | |||
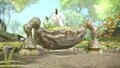
===Radar maps=== | |||
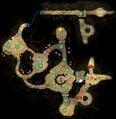
A few years ago, Espyo made a [[:File:Tropical Wilds map.png|set]] [[:File:Garden of Hope map.png|of]] [[:File:Distant Tundra map.png|high]]-[[:File:Twilight River map.png|quality]] [[:File:Formidable Oak map.png|maps]] of ''Pikmin 3'' areas, using the textures from the [[radar]]. ''Pikmin 3 Deluxe'' changed the radar textures, and also introduced a new mini radar which used a stylized version of the terrain. For months we had no maps with these new radar textures, but eventually Espyo was able to get the textures and I was able to combine them into these maps, arranging them to align exactly with the maps from the original game. It was a very fun project, and it's great to have these maps on the wiki. | |||
<gallery widths="180" heights="180"> | |||
Tropical Wilds map P3D.png | |||
Garden of Hope map P3D.png | |||
Distant Tundra map P3D.png | |||
Twilight River map P3D.png | |||
Formidable Oak map P3D.png | |||
Tropical Wilds minimap.png | |||
Garden of Hope minimap.png | |||
Distant Tundra minimap.png | |||
Twilight River minimap.png | |||
Formidable Oak minimap.png | |||
</gallery> | </gallery> | ||
| Line 74: | Line 91: | ||
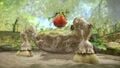
====Gameplay screenshots==== | ====Gameplay screenshots==== | ||
Screenshots taken during gameplay | Screenshots taken during gameplay or [[cutscene]]s. | ||
<gallery> | <gallery widths="120" heights="70"> | ||
P3D Distant Tundra Bridge Building.jpg | P3D Distant Tundra Bridge Building.jpg | ||
P3D Twilight River Ramp.jpg|I like the way the camera zooms out on this hill. | P3D Twilight River Ramp.jpg|I like the way the camera zooms out on this hill. | ||
| Line 88: | Line 105: | ||
P3D Formidable Oak Olimar Captured.jpg | P3D Formidable Oak Olimar Captured.jpg | ||
P3D Winged Pikmin On Water.jpg | P3D Winged Pikmin On Water.jpg | ||
P3D 2 Player Ghost Leaders.jpg|Do they see each other? | |||
P3D Frozen Whistle Glitch Sunset Bulborb.jpg|A really cool glitch. | |||
P3D Distant Tundra Impact Cutscene.jpg | |||
</gallery> | </gallery> | ||
====KopPad photographs==== | ====KopPad photographs==== | ||
Images taken with the [[KopPad]] camera. | Images taken with the [[KopPad]] camera. | ||
<gallery> | <gallery widths="120" heights="70"> | ||
Tropical Tunnel.jpg|The tunnel has 9 sides. | Tropical Tunnel.jpg|The tunnel has 9 sides. | ||
P3D Elevator Platform Pair.jpg | P3D Elevator Platform Pair.jpg | ||
| Line 129: | Line 149: | ||
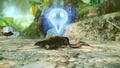
P3D Quaggled Mireclops Head.jpg | P3D Quaggled Mireclops Head.jpg | ||
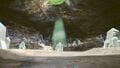
P3D Rock Onion Cave.jpg|You rarely get to see that this cave has a hole in the ceiling. | P3D Rock Onion Cave.jpg|You rarely get to see that this cave has a hole in the ceiling. | ||
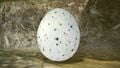
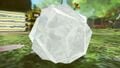
P3D Screw.jpg | |||
P3D Egg.jpg | |||
P3D Formidable Oak Entrance Corridor.jpg | |||
P3D Formidable Oak Spectralids Room.jpg | |||
P3D Formidable Oak Circle Room West Entrance.jpg | |||
P3D Formidable Oak Circle Room Bridge.jpg | |||
P3D Distant Tundra Crystals.jpg | |||
P3D Crystal Nodule.jpg | |||
P3D Skutterchuck Defeated.jpg | |||
</gallery> | </gallery> | ||
| Line 135: | Line 164: | ||
====Olimar's Assignment==== | ====Olimar's Assignment==== | ||
<gallery> | <gallery widths="120" heights="70"> | ||
P3D Flower Garden Start.jpg | P3D Flower Garden Start.jpg | ||
P3D Flower Garden Dwarf Bulborbs.jpg | P3D Flower Garden Dwarf Bulborbs.jpg | ||
| Line 165: | Line 194: | ||
====Olimar's Comeback==== | ====Olimar's Comeback==== | ||
<gallery> | <gallery widths="120" heights="70"> | ||
P3D Pikmin Reunion Start.jpg | P3D Pikmin Reunion Start.jpg | ||
P3D Pikmin Reunion Plateau.jpg | P3D Pikmin Reunion Plateau.jpg | ||
| Line 212: | Line 241: | ||
P3D Golden Shaggy Long Legs Defeated.jpg | P3D Golden Shaggy Long Legs Defeated.jpg | ||
P3D Olimar's Comeback Ending.jpg | P3D Olimar's Comeback Ending.jpg | ||
</gallery> | |||
====Maps==== | |||
<gallery widths="120" heights="120"> | |||
Land, Sea, and Sky Map.jpg|[[Land, Sea, and Sky]] | |||
First Part Found Map.jpg|[[First Part Found]] | |||
Channel Gone Dry Map.jpg|[[Channel Gone Dry]] | |||
Big Fruit Carnival Map.jpg|[[Big Fruit Carnival]] | |||
Another Part Found Map.jpg|[[Another Part Found]] (this one required editing) | |||
</gallery> | </gallery> | ||
===HUD=== | ===HUD=== | ||
Images of [[HUD]] elements in ''Pikmin 3 Deluxe''. | Images of [[HUD]] elements in ''Pikmin 3 Deluxe''. | ||
<gallery> | <gallery widths="120" heights="120"> | ||
HUD Pikmin counter P3D.jpg | HUD Pikmin counter P3D.jpg | ||
HUD Standby Pikmin P3D.jpg | HUD Standby Pikmin P3D.jpg | ||
| Line 233: | Line 271: | ||
===Hints=== | ===Hints=== | ||
Screenshots of every page of every [[hint]]. It was a fun project to document all of these. | Screenshots of every page of every [[hint]]. It was a fun project to document all of these. | ||
<gallery> | <gallery widths="80" heights="45"> | ||
Hint KMA P1.jpg | Hint KMA P1.jpg | ||
Hint KMA P2.jpg | Hint KMA P2.jpg | ||
Hint DT1 P1.jpg | Hint DT1 P1.jpg | ||
Hint DT1 P2.jpg | Hint DT1 P2.jpg | ||
| Line 253: | Line 290: | ||
Hint GH6 P1.jpg | Hint GH6 P1.jpg | ||
Hint GH7 P1.jpg | Hint GH7 P1.jpg | ||
Hint EDG P1.jpg | |||
Hint DT2 P1.jpg | Hint DT2 P1.jpg | ||
Hint DT3 P1.jpg | Hint DT3 P1.jpg | ||
| Line 265: | Line 303: | ||
Hint DT8 P2.jpg | Hint DT8 P2.jpg | ||
Hint DT9 P1.jpg | Hint DT9 P1.jpg | ||
Hint EDT P1.jpg | |||
Hint TW5 P1.jpg | Hint TW5 P1.jpg | ||
Hint TW5 P2.jpg | Hint TW5 P2.jpg | ||
| Line 273: | Line 312: | ||
Hint TW8 P2.jpg | Hint TW8 P2.jpg | ||
Hint TW9 P1.jpg | Hint TW9 P1.jpg | ||
Hint EDW P1.jpg | |||
Hint TR1 P1.jpg | Hint TR1 P1.jpg | ||
Hint TR2 P1.jpg | Hint TR2 P1.jpg | ||
| Line 285: | Line 325: | ||
Hint TR5 P3.jpg | Hint TR5 P3.jpg | ||
Hint TR6 P1.jpg | Hint TR6 P1.jpg | ||
Hint EDR P1.jpg | |||
Hint GH8 P1.jpg | Hint GH8 P1.jpg | ||
Hint GH9 P1.jpg | Hint GH9 P1.jpg | ||
| Line 293: | Line 334: | ||
Hint GH10 P3.jpg | Hint GH10 P3.jpg | ||
Hint GH11 P1.jpg | Hint GH11 P1.jpg | ||
Hint EDO P1.jpg | |||
Hint FO1 P1.jpg | Hint FO1 P1.jpg | ||
Hint FO2 P1.jpg | Hint FO2 P1.jpg | ||
| Line 311: | Line 353: | ||
Hint 2PC P1.jpg | Hint 2PC P1.jpg | ||
Hint 2PC P2.jpg | Hint 2PC P2.jpg | ||
</gallery> | </gallery> | ||
===Demo=== | ===Demo=== | ||
Images from the [[Pikmin 3 Deluxe#Demo|game's demo]]. | Images from the [[Pikmin 3 Deluxe#Demo|game's demo]]. | ||
<gallery> | <gallery widths="120" heights="70"> | ||
P3D Demo Title Screen 1.jpg | P3D Demo Title Screen 1.jpg | ||
P3D Demo Title Screen 2.jpg | P3D Demo Title Screen 2.jpg | ||
| Line 335: | Line 368: | ||
====Gameplay screenshots==== | ====Gameplay screenshots==== | ||
<gallery> | <gallery widths="120" heights="70"> | ||
P3DX Prerelease Distant Tundra Path.jpg|This image revealed that some areas were changing slightly. | P3DX Prerelease Distant Tundra Path.jpg|This image revealed that some areas were changing slightly. | ||
P3DX Prerelease Bulborb Targeting.jpg| This image showed that dirt walls had texture changes. This was big news at the time. | P3DX Prerelease Bulborb Targeting.jpg| This image showed that dirt walls had texture changes. This was big news at the time. | ||
| Line 347: | Line 380: | ||
====Menu screenshots==== | ====Menu screenshots==== | ||
<gallery> | <gallery widths="120" heights="70"> | ||
P3DX Prerelease Map Twilight River.jpg|The first image I uploaded. | P3DX Prerelease Map Twilight River.jpg|The first image I uploaded. | ||
P3DX Prerelease Badges English.jpg | P3DX Prerelease Badges English.jpg | ||
| Line 360: | Line 393: | ||
====No HUD==== | ====No HUD==== | ||
<gallery> | <gallery widths="120" heights="70"> | ||
P3DX Prerelease Armored Mawdad.jpg|I didn't really need to upload these images, but I did it for the sake of completion (and because someone else had already uploaded some of them). | P3DX Prerelease Armored Mawdad.jpg|I didn't really need to upload these images, but I did it for the sake of completion (and because someone else had already uploaded some of them). | ||
P3DX Prerelease Bulborb.jpg | P3DX Prerelease Bulborb.jpg | ||
| Line 373: | Line 406: | ||
====Website images==== | ====Website images==== | ||
<gallery> | <gallery widths="120" heights="70"> | ||
P3DX Prerelease Red Fire Resistance.jpg | P3DX Prerelease Red Fire Resistance.jpg | ||
P3DX Prerelease Rock Crystal Breaking.jpg | P3DX Prerelease Rock Crystal Breaking.jpg | ||
| Line 382: | Line 415: | ||
====Video screenshots==== | ====Video screenshots==== | ||
These images was created by taking a screenshot of either the trailer or one of the demonstration videos, and then cropping and resizing the image. | These images was created by taking a screenshot of either the trailer or one of the demonstration videos, and then cropping and resizing the image. | ||
<gallery> | <gallery widths="120" heights="70"> | ||
P3DX Prerelease Tropical Wilds Dirt Wall.jpg|A better view of the altered dirt walls. | P3DX Prerelease Tropical Wilds Dirt Wall.jpg|A better view of the altered dirt walls. | ||
P3DX Prerelease Banana.jpg|Grass in the Tropical Wilds? | P3DX Prerelease Banana.jpg|Grass in the Tropical Wilds? | ||
| Line 401: | Line 434: | ||
===October promotional images=== | ===October promotional images=== | ||
There aren't many images to upload from this period since the demo also came out and much better images could be taken from there. The excitement of images with tiny differences was gone. | There aren't many images to upload from this period since the demo also came out and much better images could be taken from there. The excitement of images with tiny differences was gone. | ||
<gallery> | <gallery widths="120" heights="70"> | ||
P3D Prerelease Missing Bridge.jpg|This image was very mysterious, as all the evidence pointed towards it being from the hidden epilogue. | P3D Prerelease Missing Bridge.jpg|This image was very mysterious, as all the evidence pointed towards it being from the hidden epilogue. | ||
P3D Prerelease Garden of Hope.jpg|Another beautiful aerial view, sadly spoilt by the watermark in the corner. | P3D Prerelease Garden of Hope.jpg|Another beautiful aerial view, sadly spoilt by the watermark in the corner. | ||
| Line 413: | Line 446: | ||
==''Pikmin mobile application'' promotional images== | ==''Pikmin mobile application'' promotional images== | ||
<gallery> | <gallery widths="120" heights="70"> | ||
Pikmin Mobile Application Promotional Image.png|The very first promotional image. Someone else uploaded this before but it was in JPG format; this one is in PNG format. | Pikmin Mobile Application Promotional Image.png|The very first promotional image. Someone else uploaded this before but it was in JPG format; this one is in PNG format. | ||
</gallery> | </gallery> | ||
| Line 419: | Line 452: | ||
==Real world images== | ==Real world images== | ||
Most of these were uploaded to replace existing images on the wiki that were probably just taken from Google Images without checking the source or license. These all have open licenses. | Most of these were uploaded to replace existing images on the wiki that were probably just taken from Google Images without checking the source or license. These all have open licenses. | ||
<gallery> | <gallery widths="120" heights="120"> | ||
Real Banana.jpg | Real Banana.jpg | ||
Kiwifruit collection.jpg | Kiwifruit collection.jpg | ||
| Line 433: | Line 466: | ||
==''Super Smash Bros.'' images== | ==''Super Smash Bros.'' images== | ||
The first is from the website; the rest were taken by me in-game. | The first is from the website; the rest were taken by me in-game. | ||
<gallery> | <gallery widths="120" heights="70"> | ||
SSBU Garden of Hope thumbnail.jpg | SSBU Garden of Hope thumbnail.jpg | ||
SSBU Olimar Launch.jpg | SSBU Olimar Launch.jpg | ||
Revision as of 23:28, September 21, 2021
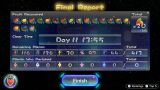
This is a list of all the images I've uploaded to Pikipedia.
Pikmin 3 Deluxe images
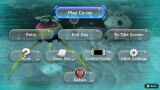
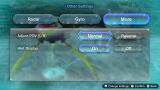
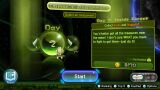
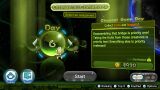
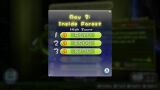
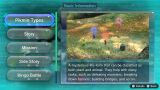
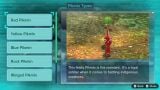
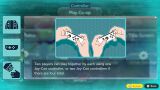
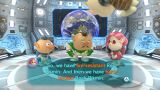
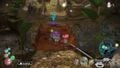
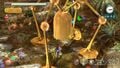
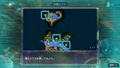
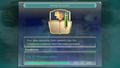
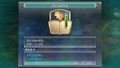
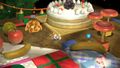
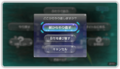
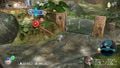
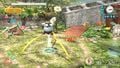
Menus
My main documentation focus for Pikmin 3 Deluxe was the menus.
I really like this menu.
My first singleplayer run of the game.


I did this day specifically for these images.


The icon used in the action menu and other places.


.jpg)
.jpg)


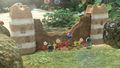
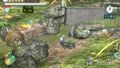
Walls
I took photos of every wall in Story Mode and edited together particular walls into these photo montages.


Landing sites
In the landing cutscene at the start of each day, there's a 1-frame window at the end where the "Press ![]() /
/ ![]() to skip" box disappears and the HUD hasn't started appearing from the edges of the screen. To get these screenshots, I had to press the screenshot button at exactly the right time, and restart the day if I missed. When there were weather effects, I also had to restart the day. And in the Formidable Oak, the first day you land has is a cutscene that leaves the camera in a different place, and once the final boss has appeared, the weather is always rainy, so I had to take the screenshot on the second day of the area without having finished the puzzle. These screenshots were taken to replace an earlier set of screenshots from the original game, and those are linked on the file pages. It's fun to compare the differences. An interesting detail in these screenshots is the locations of the cursor – on the same frame as the frame without the HUD, it's in a seemingly random location, and the next frame it goes to underneath the Onion (unless motion controls are turned on, which they weren't). Some areas seem to have the same location for the cursor.
to skip" box disappears and the HUD hasn't started appearing from the edges of the screen. To get these screenshots, I had to press the screenshot button at exactly the right time, and restart the day if I missed. When there were weather effects, I also had to restart the day. And in the Formidable Oak, the first day you land has is a cutscene that leaves the camera in a different place, and once the final boss has appeared, the weather is always rainy, so I had to take the screenshot on the second day of the area without having finished the puzzle. These screenshots were taken to replace an earlier set of screenshots from the original game, and those are linked on the file pages. It's fun to compare the differences. An interesting detail in these screenshots is the locations of the cursor – on the same frame as the frame without the HUD, it's in a seemingly random location, and the next frame it goes to underneath the Onion (unless motion controls are turned on, which they weren't). Some areas seem to have the same location for the cursor.


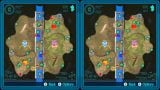
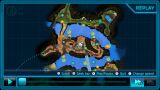
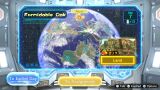
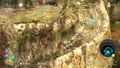
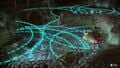
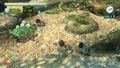
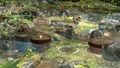
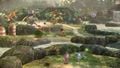
Radar maps
A few years ago, Espyo made a set of high-quality maps of Pikmin 3 areas, using the textures from the radar. Pikmin 3 Deluxe changed the radar textures, and also introduced a new mini radar which used a stylized version of the terrain. For months we had no maps with these new radar textures, but eventually Espyo was able to get the textures and I was able to combine them into these maps, arranging them to align exactly with the maps from the original game. It was a very fun project, and it's great to have these maps on the wiki.


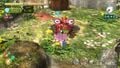
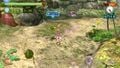
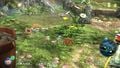
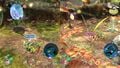
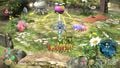
Story Mode
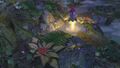
Various Story Mode images.
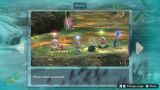
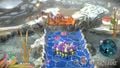
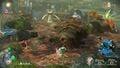
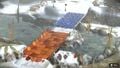
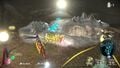
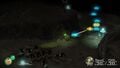
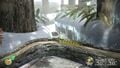
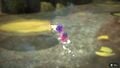
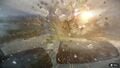
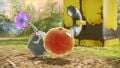
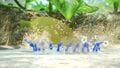
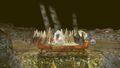
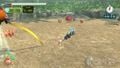
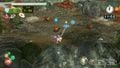
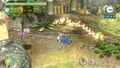
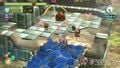
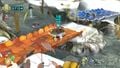
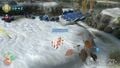
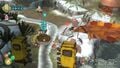
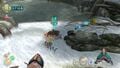
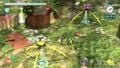
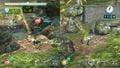
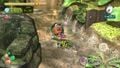
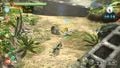
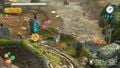
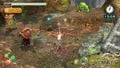
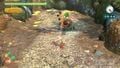
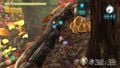
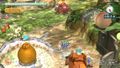
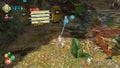
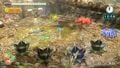
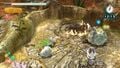
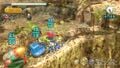
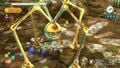
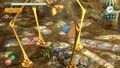
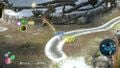
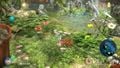
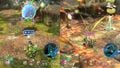
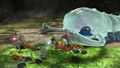
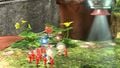
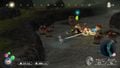
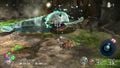
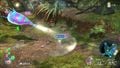
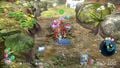
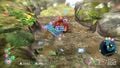
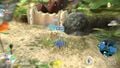
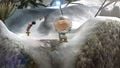
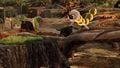
Gameplay screenshots
Screenshots taken during gameplay or cutscenes.
I like the way the camera zooms out on this hill.
Where do they go?
This helped me understand the structure of this room.
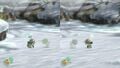
RUN
Do they see each other?
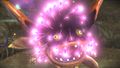
A really cool glitch.


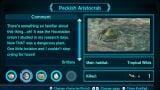
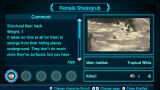
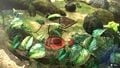
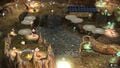
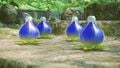
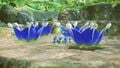
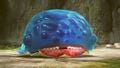
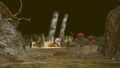
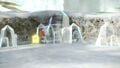
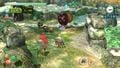
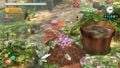
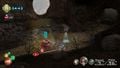
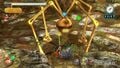
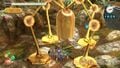
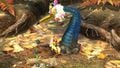
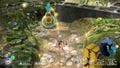
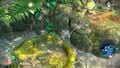
KopPad photographs
Images taken with the KopPad camera.
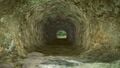
The tunnel has 9 sides.

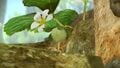
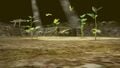
Will it ever grow?

Aligning the camera with the center of the plant was hard.


Cropped to a square shape.


These images were taken by getting on top of the ledge that surrounds the arena.

You rarely get to see that this cave has a hole in the ceiling.


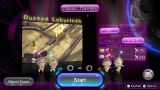
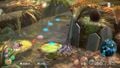
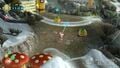
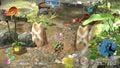
Side Stories
Images taken during the Side Stories.
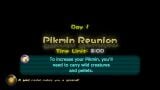
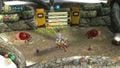
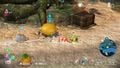
Olimar's Assignment


Olimar's Comeback
The low camera in this area is so weird.
Why do they walk in a line?

A nicely timed shot.
Separated Onions?
swap
I really like this image.
The way the Flighty Joustmite is in the air is so weird to look at.
Camera clipping through the wall.
Taken in 2-player mode.
The bridge here is very odd.
I timed the parts to get this shot.


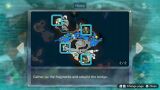
Maps
Another Part Found (this one required editing)


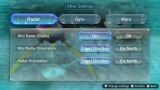
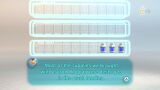
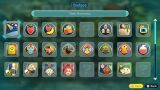
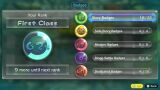
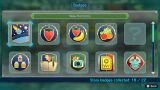
HUD
Images of HUD elements in Pikmin 3 Deluxe.

_P3D.jpg)
_P3D.jpg)

_P3D.jpg)


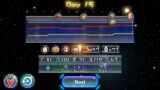
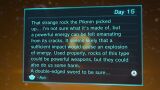
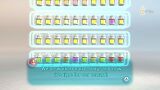
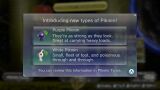
Hints
Screenshots of every page of every hint. It was a fun project to document all of these.
Demo
Images from the game's demo.


Pikmin 3 Deluxe prerelease images
August 5 announcement
Almost all of the screenshots from the initial announcement have been uploaded here.
Gameplay screenshots
This image revealed that some areas were changing slightly.

This image showed that dirt walls had texture changes. This was big news at the time.
This image and a few other ones have separate Japanese and English versions, and there are slight differences between them.
English version
Japanese version
English version
Japanese version

English version


Menu screenshots
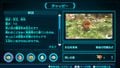
The first image I uploaded.
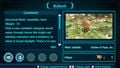
This image revealed that all 5 leaders had comments on the Piklopedia. There was a lot of theorizing early on about what these comments could be like.
What could that meteor be?


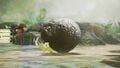
No HUD
I didn't really need to upload these images, but I did it for the sake of completion (and because someone else had already uploaded some of them).

This one has no HUD, but still has an arrow pointing to the fruit.
This image left a lot of unanswered questions. Why was there a cinder block, or a Cupid's Grenade, or a brick in the ground, or a SPERO?


August 28 Japanese website update
It's so strange that so many images were only put on the Japanese website...
Website images
The wind effect looks different to how it looked in the original game.
This image was the most mysterious one in the August 28th release. What could those additional options in the background be?


Video screenshots
These images was created by taking a screenshot of either the trailer or one of the demonstration videos, and then cropping and resizing the image.
A better view of the altered dirt walls.
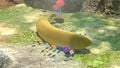
Grass in the Tropical Wilds?
Camera angles like this certainly weren't possible in the original...
My favorite image from the set.
This confirmed that it wasn't just dirt walls getting texture changes.

This confirmed that there were actually object changes in areas.
This showed that the
 button was used to lock on. The changed lock-on mechanics caused a lot of speculation around controls.
This image was incredibly interesting at the time, because it showed an entirely new way of switching leaders.
This was also very interesting, as it showed that there was a way to charge with only 1 Pikmin type at a time.

For the Pikmin family article.


October promotional images
There aren't many images to upload from this period since the demo also came out and much better images could be taken from there. The excitement of images with tiny differences was gone.
This image was very mysterious, as all the evidence pointed towards it being from the hidden epilogue.
Another beautiful aerial view, sadly spoilt by the watermark in the corner.
This would have been incredibly interesting a month earlier, but a lot of image excitement was removed by the demo.
Uploaded as a comparison to the first side story image.

Beautiful.


Pikmin mobile application promotional images

The very first promotional image. Someone else uploaded this before but it was in JPG format; this one is in PNG format.

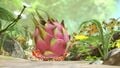
Real world images
Most of these were uploaded to replace existing images on the wiki that were probably just taken from Google Images without checking the source or license. These all have open licenses.


- Lily pads 2.jpg


Super Smash Bros. images
The first is from the website; the rest were taken by me in-game.


