User:Chazmatron/Big Tests
Bulborb Forest
| Bulborb Forest | |
|---|---|

| |
| Challenge type | Standard |
| Master Rank time | 2:10 |
| Area style | Spring |
| Next area | Boss of the Beebs |
| Music | Spring area |
Bulborb Forest (チャッピーの森?, lit.: "Chappy's Forest") is the first challenge mode stage in Pikmin Adventure. As it is the first stage in this attraction, there are no difficult fights, objectives or puzzles for the player to complete, as the stage is supposed to teach the player how to play.
Layout
This stage is split into multiple different sections. The first section, the starting one, is full of Clovers, Fungiforms, Seeding Dandelions, as well as breakable and unbreakable blocks. There is also a large ? Block near the end of this section, with a gate at the end. On the other side of this gate lies a few more vegetation and blocks, as well as a small water body. The main thing on the other side of this gate is the first enemy encounter; dropped by Dark Monita. She will drop a Red Bulborb, which is inside of a capsule, along with a trio of Creepy Beebs, also dropped from their own capsules. Once these 4 enemies have been defeated, an additional 7 Creepy Beebs will be dropped straight after. Afterwards, a second large ? Block will spawn, containing multiple nectars.
Further on, the section opens up a bit more. It is still full of the same vegetation and blocks but further north lies a larger body of water to the left and a huge pile of breakable blocks, which act as a wall. At the top of some of these breakable blocks lie some smaller ? blocks, each dropping 1 nectar. Behind the more wall-like row of blocks lies a pit with a third large ? Block in front of it. Breaking it causes a large bridge to spawn, allowing the player to reach the Draft Jumper, a tool that takes players to the next part of the stage. Some of them will need to be activated but this one does not.
The next main segment of this stage will have players cross a bridge littered with numerous Creepy Beebs. The Draft Jumper will land the players at the bottom-left corner of the stage. This small section is still full of vegetation (minus Seeding Dandelions), another large ? Block and a Red Bulborb, which spawns from a capsule after the ? Block is destroyed – though Dark Monita will not be shown dropping it. Defeating this enemy lowers the nearby gate, allowing players to reach the previously-mentioned bridge.
The opposite side of this bridge lie 4 sleeping Red Bulborbs. Once defeated, a large ? Block will spawn, the other gate will lower, and the next Draft Jumper will be unlocked.
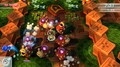
The last segment of this stage takes place in an open arena. For the first few seconds, not much will happen until Dark Monita appears. She drops a large Yellow Bulborb, along with 3 Red Bulborbs. Once the Yellow Bulborb has been defeated, the Hocotate ship will land near the center of the stage, allowing the players to escape.
Enemies
- Creepy Beeb × 18
- 3 dropped by Dark Monita; 7 dropped by Dark Monita; 8 already spawned
- Red Bulborb × 9
- 1 dropped by Dark Monita; 1 dropped by a capsule; 4 already spawned; 3 dropped by Dark Monita
- Yellow Bulborb (boss) × 1
- Dropped by Dark Monita
Guide
|
The following article or section contains guides. |
As there are only 2:10 on the clock for Master Rank, you should not dilly dally. In the starting zone, quickly break the large ? Block to lower the gate in front. Then, skip the rest of this opened section until you reach the ? Block that spawns the bridge – you can defeat these enemies if you'd like, but it is not mandatory. Cross the bridge and use the Draft Jumper.
Once you land in the second segment, head straight for the lone Red Bulborb. Defeat it and cross the bridge. Whilst the 8 Creepy Beebs are not required to be defeated, you risk the change of being damaged by them; if you skipped the previous round of enemies, you should have enough time to dispatch these orby enemies. Once you've crossed the bridge, defeat the 4 Red Bulborbs – a good strategy involved getting them to charge into the surrounding pit. After they've been defeated, use the now-unlocked Draft Jumper.
The third and final segment is a fight against a Yellow Bulborb. A larger, yellower, version of the Red Bulborb. They are a bit more tricky to defeat, as they hop around and throw projectiles at you. Also in the fight, Dark Monita will drop a trio of Red Bulborbs. You should prioritise the Yellow Bulborb, as once it's defeated the backup crew will also go. You should attack right after it has thrown its projectile, as it is incapable of shaking off Pikmin during this animation.
If all goes well, the ship should land and you should have enough time to get the Master Rank.
Gallery
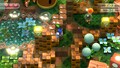
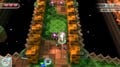
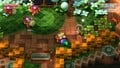
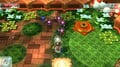
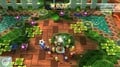
First segment
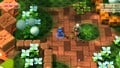
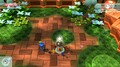
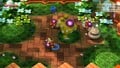
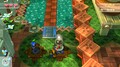
The starting zone for the first segment.

The end of the starting zone, before the gate has been lowered.
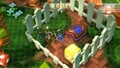
Dark Monita about to drop some enemies on the player.
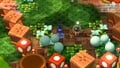
Wave 1 of the first phase of enemies, featuring a Red Bulborb and 3 Creepy Beebs.
Wave 2 of the first phase of enemies, featuring 7 Creepy Beebs.
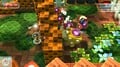
A large pile of breakable and unbreakable blocks.
The constructed bridge leading to the Draft Jumper.


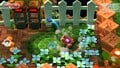
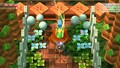
Second segment
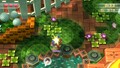
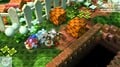
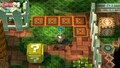
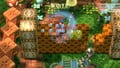
The starting zone for the second segment.
A Red Bulborb, which spawns from a capsule after the large ? Block is destroyed.
The Creepy Beeb-infested bridge.
An angle seen from the GamePad of the bridge.
Red Bulborbs fighting the players.
The second Draft Jumper.


Third segment
The starting zone for the third segment.
The cutscene that plays at the start of this segment.
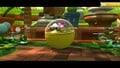
The Yellow Bulborb after escaping the capsule.
A player being flung into the air by the Yellow Bulborb.
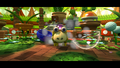
Players fighting the Yellow Bulborb and its entourage.
The reward for the end of the battle.


Names in other languages
| Language | Name | Meaning |
|---|---|---|
| チャッピーの森? Chappī no mori |
Chappy's Forest | |
| Het bos van de Bulborbs | The Forest of the Bulborbs | |
| Le bois aux bulborbes | The bulborb wood | |
| Punktkäfer-Wald | Dot Beetle-Forest | |
| Foresta dei Coleti | Bulborb Forest | |
| Floresta dos Orbolbos | Forest of Bulborbs | |
| En el bosque de los bulbos | In the forest of the Bulborbs | |
| Роща клубнеголовов Roshcha klubnegolovov |
Grove of Bulborbs |
See also
Boss of the Beebs
| Boss of the Beebs | |
|---|---|

| |
| Challenge type | Standard |
| Master Rank time | 3:35 |
| Area style | Spring |
| Next area | Five Seconds to Takeoff |
| Music | Spring area |
Boss of the Beebs (ザコの王様をやっつける?, lit.: "Defeat the King of Beebs"; known as Boss of the Baubs in the British version of Pikmin Adventure}}) is the second challenge mode stage in Pikmin Adventure. This second stage features the same types of enemies seen in Bulborb Forest, and a Yellow Bulborb can be fought not as a boss but as a regular enemy.
Layout
Unlike like Bulborb Forest, this stage is split into 7 main segments, though they are a bit smaller. The starting zone has the player spawn with a wall made of breakable blocks in front of them, and the camera will be at an angle. A bit further past this wall is another, slightly smaller, one that has an already-spawned Red Bulborb behind it. Beyond this Red Bulborb lies a gate, which leads further into the segment. The southern part of this section has a large pit, and if players walk around the pit they can find a small ? Block.
In the next part of this segment, there lies 2 switches (multiple if there is more than 2 people playing) that, when pressed, creates a bridge across the nearby body of water. Across this bridge, players can find the Jump Switch, which takes them to the next segment of this stage.
This second segment only has one section, which is an arena where Dark Monita will drop a single wave of enemies. The wave will contain 3 Red Bulborbs and 3 Creepy Beebs, and once defeated, the Draft Jumper will unlock. Additionally, a large ? Block will spawn that contains multiple nectars and enough Hammer Seeds for 1 player each.
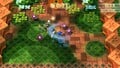
Players will land in the third segment, which is a bit longer than the previous 2. The starting zone has a long and wide path in front of it, leading to a wall made of breakable blocks. The opposite side of this wall has a sleeping Yellow Bulborb, and Dark Monita will spawn numerous Red Bulborbs. Specifically, 4 will spawn from capsules, and when 1 is defeated, she will drop another – this only happens twice however.
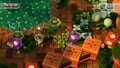
On the opposite side of the wall lies another large pit. If players run through the blue flowers along the thin path, they can find a couple of nectars. At the end of this section lies another locked Draft Jumper. Once players get close enough, Dark Monita will appear once more and drop 13 Creepy Beebs, 5 during the first wave and 7 during the second. Directly south of this Draft Jumper lies another pit, and if players once again walk around it, they can find 3 small ? Blocks.
The fourth section is incredible small, only featuring a large ? Block containing a big Heart, a smaller one, and a Jump Switch. This zone gears the players up for the upcoming fight.
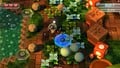
When players land, numerous Red Bulborbs will charge towards them. They spawn along a wide and straight pathway, with a locked Draft Jumper at the end. Defeat these 8 Red Bulborbs will unlock it, taking them into the sixth segment. This segment features a large body of water in the middle, along with a pair of miniature King Beebs. These two enemies are relatively easy to defeat, so long as the player can dodge their rolling attacks. This segment gives the player an idea of the attacks the boss of this stage can do, which they can access by using the final Jump Switch.
Akin to the last stage, this final segment takes place in an open arena, until all of a sudden, Dark Monita appears and drops a much larger King Beeb. It will fight the players along, and once it has been defeated, the Hocotate ship will land near the center of the stage, allowing the players to escape.
Enemies
- Creepy Beeb × 18
- 3 dropped by Dark Monita; 15 dropped by Dark Monita
- Red Bulborb × 18
- 1 already spawned; 3 dropped by Dark Monita; 6 dropped by Dark Monita; 8 already spawned
- Yellow Bulborb × 1
- Already spawned
- King Beeb × 3 (1 is the boss)
- 2 already spawned; 1 dropped by Dark Monita (boss)
Guide
|
The following article or section contains guides. |
Whilst this stage has more than a minute longer on the clock for Master Rank, you are required to battle more enemies. When you start, quickly rush through the section and defeat the Red Bulborb. This causes the gate located further ahead to drop. Pass through the gate and stand on the switch – you could travel through the water but this will take longer. Cross the bridge and use the Jump Switch.
As soon as you land in the second segment, be prepared to fight 3 Creepy Beebs and Red Bulborbs each. The former are a lot weaker than the latter, so you could take them out first to focus on the Red Bulborbs but this is up to you. Defeating these foes are required however, as they unlock the nearby Draft Jumper upon all of their defeats. Make use of the nearby Bombs if you'd like, just be careful of their large blast radius. Before you use the Draft Jumper, the large ? Block that spawns contains a Hammer Seed, which increases the player's damage by a bit.
In the third segment, you will need to face off against 6 Red Bulborbs at the start, as well as a Yellow Bulborb, though it is not a boss this time around. 4 Red Bulborbs will be dropped off by Dark Monita at the start, and she will drop 2 more during the fight; 1 for every Red Bulborb defeat. Continue past these foes once defeated and you will find another locked Draft Jumper. Dark Monita will appear once more and drop a total of 13 Creepy Beebs; 5 during the first wave and 7 during the second. They are quite weak, and if you have the Hammer Seed upgrade still, they are easy work.
These next two segments are a bit small. The first one has you fight against 8 already-spawned Red Bulborbs, and the latter has you fight against 2 small King Beebs. Take note of how the King Beebs fight, as the boss of this stage is a much larger and tanker version of them.
During the fight with the large King Beeb, you should only attack after it has stopped rolling (if it has no white on it, you're good to go). Make use of the nearby Rocks and Bombs to damage it, being careful not to damage yourself or allies in the process. It is a relatively simple foe, just make sure to get away from it when it is rolling.
If all goes well, the ship should land and you should have enough time to get the Master Rank.
Gallery
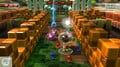
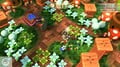
First and second segments
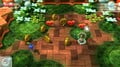
The starting zone for the first segment.
The first Red Bulborb seen near the starting zone.
The constructed bridge leading to the Jump Switch.

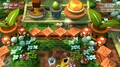
A screenshot of the fight that occurs in the second segment.


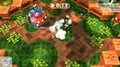
Third and fourth segments
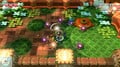
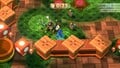
The starting zone for the third segment.

Dark Monita about to drop multiple Red Bulborbs.
Players fighting against the different Bulborbs.
The gate now lowered after the fight ended.
Multiple Creepy Beebs attacking the players.
More Beebs fighting them.
The starting zone for the fourth segment.

The other side of the starting zone.


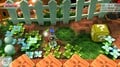
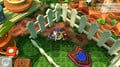
Fifth and sixth segments
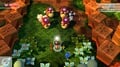
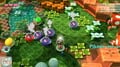
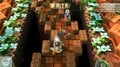
The starting zone for the fifth segment.
All 8 Red Bulborbs fighting the players.
The starting zone for the sixth segment.
A pair of mini King Beebs.


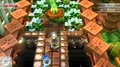
Seventh segment

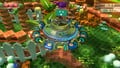
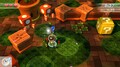
King Beeb arriving in a capsule.

The starting zone for the seventh segment.

King Beeb rolling around in its arena.

The death animation for King Beeb.


Names in other languages
| Language | Name | Meaning |
|---|---|---|
| ザコの王様をやっつける? Zako no ōsama o yattsukeru |
Defeat the King of Beebs | |
| Bazin van de Baubs | Boss of the Baubs | |
| La chute de la reine Brok | The fall of queen Beeb | |
| Die Käfer-Königin | The Queen Beetle | |
| La regina dei Pidolini | The queen of Beebs |
Five Seconds to Take-Off
| Five Seconds to Takeoff | |
|---|---|
|
| |
| Challenge type | Timed |
| Master Rank time | 1:15 |
| Area style | Spring |
| Next area | Overthrow the Bulblord |
| Music | Spring area (fast) |
Five Seconds to Takeoff (ロケット発射5秒前?, lit.: "5 seconds before rocket launch"; known as Five Seconds to Take-Off in the British version of Pikmin Adventure) is the third challenge mode stage in Pikmin Adventure. This is the attractions first Timed Challenge, meaning that small and large clocks can be found scattered throughout the stage. As the player's main goal is to reach the ship quickly, enemies can be often skipped. Compared to the previous 2 stages, this one has the most segments, though only by 1. They are a lot smaller in comparison too.
Layout
The first segment takes placed in a thin and straight forward path, with some white fences acting as barriers on either side. This segment is split in half by a wall made of breakable blocks. In front of this wall lie 5 small clocks, and the opposite side lie 3 more clocks. Additionally, a large ? Block is located a bit further north, which contains a few more small clocks and 1 large one. At the end of this small segment lies an active Jump Switch.
The second segment is a lot smaller, with it only being a square-shaped room with 8 sleeping Creepy Beebs. Once players land from using the Jump Switch, they will land in the middle of these sleeping Beebs, which are sleeping in a circle formation. Defeating these enemies unlocks the nearby Draft Jumper. Additionally, a handful of clocks will fall from the sky.
The third segment has players face off a few waves of Creepy Beebs back-to-back, with some clocks dropping as rewards when one wave is defeated. Once all waves have been dealt with, the pillar gates will lower, unlocking the northern section of this stage. This northern part is full of more retractable pillars, which are moving up and down, acting as an odd form of obstacles. The end of this section lies an active Draft Jumper.
The fourth segment is even smaller than the second one, with it only containing a large clock and a Jump Switch. It is square in shape, and it likely acts as a "rest room" of sorts. Using the Jump Switch launches the players towards fifth segment, which is also quite small. However, it houses a sleeping Red Bulborb, which will need to be defeated in order to unlock the next Jump Switch. This Jump Switch launches the players to the sixth segment, one of the two smallest segments in this stage. It is a box-shaped arena surrounded by white fences, and the only thing of note is the Jump Switch only a few Mii steps away. The seventh segment is also shaped similarly, though in the bottom right corner there lies a large ? Block containing some additional clocks.
The eighth and final segment is where the ship is located. The ship is towards the north, and players land toward the south. Just in front of the ship lies a large wall made of breakable blocks, and a pit lies a bit north of the players, where they need to build a bridge to cross using the red switches on the floor.
Enemies
- Creepy Beeb × 23
- 8 already spawned; 15 dropped by capsules
- Red Bulborb × 1
- Already spawned
Guide
|
The following article or section contains guides. |
Time is not your friend in this stage, even if you aren't aiming to Master the stage. You start with 20 seconds on the clock. Head forward until you come across a breakable wall. Smash through and keep going north. You'll find a large ? Block full of clocks. One small clock adds 1 second to the timer, and a larger clock adds 10. You can find a total of 8 small clocks along this thin path, as well as a few more and a large clock in the ? Block.
Once you land, swiftly deal with the 8 sleeping Creepy Beeb to unlock the Draft Jumper and progress onwards. When you land, you'll have to face 3 waves of Creepy Beebs, where there are 5 in each. Defeating 1 wave causes 5 small clocks to drop from the sky; defeating all 15 lowers the nearby pillars, letting you head north. This northern section is full of pillars moving up and down. Either jump your way across, or time your movements right to cross them when lowered, and use the Draft Jumper at the end.
The next few segments are incredibly small. The first one you land in only has a Jumper Switch. The second one has a Red Bulborb that needs defeating, and the next two are very small; the latter having a large ? Block full of clocks. The final segment is where the ship is located. To reach the ship, you will need to first build a bridge across the pit, using the red switches on the floor, then crossing the bridge and destroying the large breakable wall. To save a few seconds, once the wall is low enough, you can just jump over the blocks instead.
Gallery

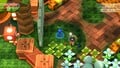
The starting zone for the first segment.
The 8 Creepy Beebs in the second segment.
The waves of Beebs in the third segment.

The rows of pillars in the third segment.
The small rest area in the fourth segment.
Players fighting the Red Bulborb in the fifth segment.
Segment 6, one of the two smaller segments.
Segment 7, the other small segment.
The landing site for the eighth segment.
Crossing the bridge in the eighth segment.
The breakable wall just in front of the ship in the eighth segment.


Names in other languages
| Language | Name | Meaning |
|---|---|---|
| ロケット発射5秒前? Roketto hassha 5-byō mae |
5 seconds before rocket launch | |
| Lancering over vijf seconden | Launch in five seconds |
| Pikmin Adventure Challenge Mode stages | |
|---|---|
| Standard challenges | 1: Bulborb Forest • 2: Boss of the Beebs • 3: Five Seconds to Takeoff • 4: Overthrow the Bulblord • 5: Cannon Smash • 6: King Beeb is Back • 7: Through the Darkness • 8: Swamp Master • 9: Lord of a Barren Land • 10: Burst the Giant Balloon • 11: Back-Garden Escape • 12: Shining Eyes • 13: Icy Arena • 14: Out of the Darkness • 15: Bulborb Baths • 16: The Chopping Block |
| Advanced challenges | 17: The Green Menace • 18: Desperate Dash • 19: The Tyrant Arrives • 20: Cage of Terror • 21: Breaking Boundaries • 22: Good-Bye, Pikmin |