Emergence Cave: Difference between revisions
NWPlayer123 (talk | contribs) m (Added Japanese Name (from the files) (Needs translation)) |
TheSneakySpy (talk | contribs) No edit summary |
||
| Line 1: | Line 1: | ||
{{Infobox cave | {{Template:Infobox cave | ||
|image = Emergence_Cave_Entrance.png | |||
|location = Valley of Repose | |||
|sublevels = 2 | |||
|treasures = 3 | |||
|total_pokos = 480 | |||
}} | |hazards = }}hazards '''Emergence Cave''' is the first [[cave]] the player comes upon in ''[[Pikmin 2]]'', and is by far the easiest. It acts as the game's tutorial for caves, featuring a simple layout in each [[sublevel]] and no particularly harmful enemies or [[boss]]es. [[Purple Pikmin]] are first encountered here, which are needed to collect a certain treasure to progress to the next area. In this cave, there are {{Pokos}}x480 worth of treasures. | ||
'''Emergence Cave''' is the first [[cave]] the player comes upon in ''[[Pikmin 2]]'', and is by far the easiest. It acts as the game's tutorial for caves, featuring a simple layout in each [[sublevel]] and no particularly harmful | |||
Past the large manhole where a [[Red Bulborb]] lies, you need to destroy a white gate, beyond which lies the cave. | |||
==Treasures== | |||
*[[Quenching Emblem]] | |||
*[[Citrus Lump]] | |||
*[[Spherical Atlas]] | |||
==Enemies== | |||
*[[Snow Bulborb]] | |||
== | ==Plants== | ||
[[ | *[[Figwort]] | ||
*[[Clover]] | |||
*[[Candypop Bud#Violet Candypop Bud|Violet Candypop Bud]] | |||
==Music== | |||
Emergence Cave | |||
Cold Chasm | |||
The first sublevel of this cave has two treasures, which are guarded by four Snow Bulborbs; these are easily killed by swarming or throwing Pikmin on their behinds. Once defeated, the | ==Guide== | ||
===Sublevel 1=== | |||
[[Image:Emergencecavesub1.JPG|thumb|175px|Sublevel 1. The layout never changes.]] | |||
The first sublevel of this cave has two treasures, which are guarded by four Snow Bulborbs; these are easily killed by swarming or throwing Pikmin on their behinds. Once defeated, the Citrus Lump and Quenching Emblem can be brought to the [[Research Pod]]. Bringing defeated beasts back will trigger a cutscene the first time a corpse is picked up by the Pod. | |||
===Sublevel 2 (Final Floor)=== | |||
==Sublevel 2 (Final Floor)== | [[Image:Emergencecavesub2.JPG|thumb|left|250px|Sublevel 2. Again, the layout is always the same.]] | ||
[[Image:Emergencecavesub2.JPG|thumb| | The globe half should be ignored, and the Snow Bulborbs along the way should be defeated instead. At the end, in a spherical room, there are two [[Candypop Bud#Violet Candypop Bud|Violet Candypop Bud]]. Throwing five Red Pikmin into each flower will produce ten Pikmin seeds; when plucked, these will be the very first [[Purple Pikmin]] in the game. The [[Spherical Atlas]] at the start of the sublevel can now be brought back to the Ship's Pod, which will unlock the [[Sphere Chart]], an item allowing the player to travel to the [[Awakening Wood]]. | ||
It is possible to obtain more Purple Pikmin on this day by leaving the cave without collecting the treasure, and then returning to it. Because the Candypop Buds disappear only after the player has obtained twenty Purples, three trips of ten, nine and ten make the maximum twenty nine from this cave. This allows the player to get [[White Pikmin]] earlier on in the Awakening Wood, without having to obtain the Purple Pikmin from [[Hole of Beasts]]; as a total Pikmin weight of two hundred to squash the Paper Bag. | |||
<gallery> | |||
| | Quenching Emblem .jpg|Quenching Emblem (sublevel 1) | ||
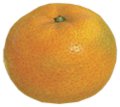
Citrus lump.png|Citrus Lump (sublevel 1) | |||
250px-Spherical_Atlas.jpg|Spherical Atlas (sublevel 2) | |||
| | </gallery> | ||
| | |||
==Trivia== | |||
*This cave was originally going to be called the Cave of Emergence. | |||
It is | *It is the only cave without a boss on the final sublevel. | ||
*It is the shortest cave. | |||
{{ | *It has the least amount of treasures(3), and the least amount of enemies(11) of any cave. | ||
*There is a total of {{Pokos}}x22 that can be obtains from enemies in this cave. So, one could pay off the entire debt in this cave alone, though it would take a long time. | |||
*It would take at least 413 runs though the Emergence Cave to pay off the debt if all the bodies and treasures in the cave, as well as the Courage Reactor and Utter Scrap, were collected. [[File:Pikmin 2 - Emergence Cave Run Completed|thumb|right|335 px|Emergence Cave Run Completion. As you can see Wistful Wild is not unlocked meaning you need to unlock Perplexing Pool first.]] | |||
{{Map Valley of Repose}} | |||
[[de:Höhle_des_Ursprungs]]{{Caves}} | |||
[[Category:Pikmin 2]] | |||
[[Category:Valley of Repose]] | |||
{{ | |||
}} | |||
{{Caves}} | |||
[[Category: | |||
Revision as of 02:30, June 17, 2014
| Emergence Cave | |
|---|---|
| File:Emergence Cave Entrance.png | |
| Location | Valley of Repose |
| Sublevels | 2 |
| Treasures | 3 |
hazards Emergence Cave is the first cave the player comes upon in Pikmin 2, and is by far the easiest. It acts as the game's tutorial for caves, featuring a simple layout in each sublevel and no particularly harmful enemies or bosses. Purple Pikmin are first encountered here, which are needed to collect a certain treasure to progress to the next area. In this cave, there are ![]() x480 worth of treasures.
x480 worth of treasures.
Past the large manhole where a Red Bulborb lies, you need to destroy a white gate, beyond which lies the cave.
Treasures
Enemies
Plants
Music
Emergence Cave
Cold Chasm
Guide
Sublevel 1
The first sublevel of this cave has two treasures, which are guarded by four Snow Bulborbs; these are easily killed by swarming or throwing Pikmin on their behinds. Once defeated, the Citrus Lump and Quenching Emblem can be brought to the Research Pod. Bringing defeated beasts back will trigger a cutscene the first time a corpse is picked up by the Pod.
Sublevel 2 (Final Floor)
The globe half should be ignored, and the Snow Bulborbs along the way should be defeated instead. At the end, in a spherical room, there are two Violet Candypop Bud. Throwing five Red Pikmin into each flower will produce ten Pikmin seeds; when plucked, these will be the very first Purple Pikmin in the game. The Spherical Atlas at the start of the sublevel can now be brought back to the Ship's Pod, which will unlock the Sphere Chart, an item allowing the player to travel to the Awakening Wood.
It is possible to obtain more Purple Pikmin on this day by leaving the cave without collecting the treasure, and then returning to it. Because the Candypop Buds disappear only after the player has obtained twenty Purples, three trips of ten, nine and ten make the maximum twenty nine from this cave. This allows the player to get White Pikmin earlier on in the Awakening Wood, without having to obtain the Purple Pikmin from Hole of Beasts; as a total Pikmin weight of two hundred to squash the Paper Bag.
- Quenching Emblem .jpg
Quenching Emblem (sublevel 1)
Citrus Lump (sublevel 1)
- 250px-Spherical Atlas.jpg
Spherical Atlas (sublevel 2)

Trivia
- This cave was originally going to be called the Cave of Emergence.
- It is the only cave without a boss on the final sublevel.
- It is the shortest cave.
- It has the least amount of treasures(3), and the least amount of enemies(11) of any cave.
- There is a total of
 x22 that can be obtains from enemies in this cave. So, one could pay off the entire debt in this cave alone, though it would take a long time.
 - It would take at least 413 runs though the Emergence Cave to pay off the debt if all the bodies and treasures in the cave, as well as the Courage Reactor and Utter Scrap, were collected. File:Pikmin 2 - Emergence Cave Run CompletedEmergence Cave Run Completion. As you can see Wistful Wild is not unlocked meaning you need to unlock Perplexing Pool first.
Template:Map Valley of Repose de:Höhle_des_Ursprungs
|
This page is currently pending deletion. Reason: |
#REDIRECT Template:P2 caves