The Final Trial: Difference between revisions
Prezintenden (talk | contribs) mNo edit summary |
Greenpickle (talk | contribs) (think of those with tiny screens...) |
||
| Line 8: | Line 8: | ||
==General Layout== | ==General Layout== | ||
To the south lies the landing site, along with three different colored Candypop Buds. In the center lies a small pool of water | To the south lies the landing site, along with three different colored Candypop Buds. In the center lies a small pool of water. To the left of it, a narrow path with fire geysers. To the right, some small islands with [[Bomb-rock]]s. In the middle of the pool are two bridges and a [[gate]]. To the north is a box, the arena where Emperor Bulblax is fought and then a wall that leads to three pipes with several Bomb-rocks. | ||
==Enemies== | ==Enemies== | ||
*[[Emperor Bulblax]] | *[[Emperor Bulblax]] | ||
==Challenge Mode | ==Challenge Mode enemies== | ||
*[[Dwarf Red Bulborb]] | *[[Dwarf Red Bulborb]] | ||
*[[Dwarf Bulbear]] | *[[Dwarf Bulbear]] | ||
| Line 22: | Line 22: | ||
*[[Beady Long Legs]] | *[[Beady Long Legs]] | ||
==Rocket | ==Rocket parts== | ||
*[[Secret Safe]] | *[[Secret Safe]] | ||
==Guide== | ==Guide== | ||
The following videos are guides to the Final Trial in story mode. | |||
<youtube width=" | <youtube width="350" height="300">0XxeWgLIuNI</youtube> | ||
<youtube width="350" height="300">WZY_NxoSY30</youtube> | |||
<youtube width=" | |||
{{Areas|ffffcc|772200|772200}} | {{Areas|ffffcc|772200|772200}} | ||
Revision as of 12:02, May 20, 2009
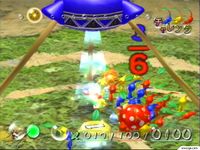
The Final Trial is the last area you may unlock in Pikmin 1. It is across a small body of water, (most likely a lake), on the area select map from the other areas, and has radically different terrain. It only has one part and is almost enemy free, save Emperor Bulblax, which holds the last ship part, the Secret Safe. This area would later become a part of the Wistful Wild level, along with The Impact Site.
As a side note, this level can be completed purely with Yellow Pikmin. This is done by making the Pikmin "swim" to the bridges, and by throwing them over the slanted part of the metal wall between the second bridge and the box, then making the Pikmin run over to the before mentioned box. Since Pikmin cannot be produced here unless the Boss is killed, 3 Candypop Buds are present at the landing site next to the Yellow Onion. Each one can change 50 Pikmin, and then wilt.
General Layout
To the south lies the landing site, along with three different colored Candypop Buds. In the center lies a small pool of water. To the left of it, a narrow path with fire geysers. To the right, some small islands with Bomb-rocks. In the middle of the pool are two bridges and a gate. To the north is a box, the arena where Emperor Bulblax is fought and then a wall that leads to three pipes with several Bomb-rocks.
Enemies
Challenge Mode enemies
- Dwarf Red Bulborb
- Dwarf Bulbear
- Female Sheargrub
- Male Sheargrub
- Yellow Wollywog
- Burrowing Snagret
- Beady Long Legs
Rocket parts
Guide
The following videos are guides to the Final Trial in story mode. <youtube width="350" height="300">0XxeWgLIuNI</youtube> <youtube width="350" height="300">WZY_NxoSY30</youtube>
