Twilight Hollow: Difference between revisions
m (Correct capitalization.) |
AeroBlaze777 (talk | contribs) (Half-merge.) |
||
| Line 1: | Line 1: | ||
[[File:TwilightHollowOverview.jpg|thumb|300px|An overview of Twilight Hollow.]] | |||
'''Twilight Hollow''' is a level in [[Pikmin 3|''Pikmin 3'']]'s [[Mission Mode]], and is the fall based area. It is made up of a large pool of water surrounded by areas of land separated by different barriers. Lily pads are used to traverse the water in this area. It is based off of the Twilight River in Pikmin 3's story mode. | |||
{{Infobox | == Collect treasure! == | ||
| | {{Infobox mission | ||
|map = Twilight Hollow.png | |||
|time = 10:00 | |time = 10:00 | ||
| | |platinum = 3240 | ||
|wr = 13740 | |wr = 13740 | ||
| | |coopwr = 13380 | ||
| | |yellow = 22 | ||
| | |purple = 15 | ||
| | |wing = 43}} | ||
===Pikmin=== | |||
=== Pikmin | |||
* 22 [[Yellow Pikmin]] | * 22 [[Yellow Pikmin]] | ||
* 15 [[Purple Pikmin]] | * 15 [[Purple Pikmin]] | ||
* 43 [[Winged Pikmin]] | * 43 [[Winged Pikmin]] | ||
=== Enemies | ===Enemies=== | ||
*[[Swooping Snitchbug]] (x4) | *[[Swooping Snitchbug]] (x4) | ||
*[[Red Bulborb]] (x1) | *[[Red Bulborb]] (x1) | ||
*[[Puffy Blowhog]] (x1) | *[[Puffy Blowhog]] (x1) | ||
=== Treasure | ===Treasure=== | ||
*[[Sunseed Berry]] (x8) | *[[Sunseed Berry]] (x8) | ||
*[[Cupid's Grenade]] (x9) | *[[Cupid's Grenade]] (x9) | ||
| Line 34: | Line 31: | ||
* [[Nuggets]] (x200; 4 piles) | * [[Nuggets]] (x200; 4 piles) | ||
* Enemies (x6) | * Enemies (x6) | ||
=== Strategy === | === Strategy === | ||
{{Clean|This should be split into multiple paragraphs. It should also be simpler to understand.}} | |||
Bring all three leaders north onto the revolving lily pads. Leave two in this area to collect the [[Insect Condo]], [[Face Wrinkler]] and [[Golden Sunseed]]. Have the other pluck the yellow pikmin on the northeastern shore and begin destroying the nearby electric gate. Once the waterlogged fruit has been collected, send one leader back to the [[SPERO]] and send the other to join the leader at the electric gate. After the gate has been destroyed, unearth the flying pikmin and defeat the first [[Swooping Snitchbug]]. Meanwhile, the leader at the SPERO should take the winged pikmin there, collect the six [[Cupid's Grenade]]s and then break down the nearby dirt wall. After the first Snitchbug has been defeated, throw a winged pikmin onto the wall of mushrooms blocking the way to the lone [[Red Bulborb]] and continue to move counter-clockwise around the map, unearthing more yellow pikmin and defeating the second Snitchbug. Toss all your pikmin and a leader across the small pond of water. By this time the dirt wall will have broken and the two leaders can join forces to take down the third Snitchbug and destroy the second electric gate. Once this is done, charge all your pikmin at the 24 bridge fragments, and then use the leftovers to take down the last Snitchbug. As flying pikmin take the fourth Snitchbug back to the SPERO, toss a leader onto the western ledge so they can start unearthing the winged pikmin there. Once the bridge is complete, move your leader who has been waiting nearby to meet up with the one on the ledge, making sure to collect any stray pikmin on the way and calling back any pikmin at the SPERO. Throw all your pikmin onto the ledge with the leader and the winged pikmin and take down the [[Puffy Blowhog]]. You should have around 36 winged pikmin and eleven yellow pikmin. Have 30 winged pikmin take back the three [[Insect Condo]]s and the Blowhog's remains. Make sure you have at least 3 winged pikmin and ten yellow pikmin left over. Descend the ledge, and then throw three winged pikmin to collect the [[Golden Sunseed]] on the ledge next to the unbroken dirt wall. Take the ten yellow pikmin and throw them onto the stump near the (now cleared) electric gate to collect the fifth [[Insect Condo]]. Now take two leaders up the ramp on the west side of the SPERO while the third leader heads back to the SPERO itself. Throw one of the leaders onto the raised wooden platform on the east side of the SPERO. As the thrown leader unearths six winged pikmin, have the leader on the western platform unearth ten yellow pikmin and use them to carry away the sixth insect condo. Have this leader then unearth the four nearby purple pikmin and use them to carry away the four remaining fruit on the western side. On the eastern side, use three winged pikmin on each [[Sunseed Berry]] and then unearth the five nearby purple pikmin and use them to transport the remaining fruit on the eastern ledge. Once the pikmin have finished transporting fruit from the western side, have the leader waiting at the SPERO call the whole group there and then proceed to the piles of gold, starting with those on the west side and making their way counter-clockwise, throwing five winged pikmin onto each of the four piles. The leader should throw three winged pikmin onto the last Sunseed Berry in the northeast corner before charging the sleeping Red Bulborb and unearthing the final four purple pikmin. Allow purple pikmin to carry the Bulborb and the majority of the Sunseed Berries back to the SPERO. Finally, distribute any remaining pikmin onto the piles of gold as needed. | Bring all three leaders north onto the revolving lily pads. Leave two in this area to collect the [[Insect Condo]], [[Face Wrinkler]] and [[Golden Sunseed]]. Have the other pluck the yellow pikmin on the northeastern shore and begin destroying the nearby electric gate. Once the waterlogged fruit has been collected, send one leader back to the [[SPERO]] and send the other to join the leader at the electric gate. After the gate has been destroyed, unearth the flying pikmin and defeat the first [[Swooping Snitchbug]]. Meanwhile, the leader at the SPERO should take the winged pikmin there, collect the six [[Cupid's Grenade]]s and then break down the nearby dirt wall. After the first Snitchbug has been defeated, throw a winged pikmin onto the wall of mushrooms blocking the way to the lone [[Red Bulborb]] and continue to move counter-clockwise around the map, unearthing more yellow pikmin and defeating the second Snitchbug. Toss all your pikmin and a leader across the small pond of water. By this time the dirt wall will have broken and the two leaders can join forces to take down the third Snitchbug and destroy the second electric gate. Once this is done, charge all your pikmin at the 24 bridge fragments, and then use the leftovers to take down the last Snitchbug. As flying pikmin take the fourth Snitchbug back to the SPERO, toss a leader onto the western ledge so they can start unearthing the winged pikmin there. Once the bridge is complete, move your leader who has been waiting nearby to meet up with the one on the ledge, making sure to collect any stray pikmin on the way and calling back any pikmin at the SPERO. Throw all your pikmin onto the ledge with the leader and the winged pikmin and take down the [[Puffy Blowhog]]. You should have around 36 winged pikmin and eleven yellow pikmin. Have 30 winged pikmin take back the three [[Insect Condo]]s and the Blowhog's remains. Make sure you have at least 3 winged pikmin and ten yellow pikmin left over. Descend the ledge, and then throw three winged pikmin to collect the [[Golden Sunseed]] on the ledge next to the unbroken dirt wall. Take the ten yellow pikmin and throw them onto the stump near the (now cleared) electric gate to collect the fifth [[Insect Condo]]. Now take two leaders up the ramp on the west side of the SPERO while the third leader heads back to the SPERO itself. Throw one of the leaders onto the raised wooden platform on the east side of the SPERO. As the thrown leader unearths six winged pikmin, have the leader on the western platform unearth ten yellow pikmin and use them to carry away the sixth insect condo. Have this leader then unearth the four nearby purple pikmin and use them to carry away the four remaining fruit on the western side. On the eastern side, use three winged pikmin on each [[Sunseed Berry]] and then unearth the five nearby purple pikmin and use them to transport the remaining fruit on the eastern ledge. Once the pikmin have finished transporting fruit from the western side, have the leader waiting at the SPERO call the whole group there and then proceed to the piles of gold, starting with those on the west side and making their way counter-clockwise, throwing five winged pikmin onto each of the four piles. The leader should throw three winged pikmin onto the last Sunseed Berry in the northeast corner before charging the sleeping Red Bulborb and unearthing the final four purple pikmin. Allow purple pikmin to carry the Bulborb and the majority of the Sunseed Berries back to the SPERO. Finally, distribute any remaining pikmin onto the piles of gold as needed. | ||
== Battle enemies! == | == Battle enemies! == | ||
{{Infobox mission | |||
=== Pikmin | |time = 9:00 | ||
|size=250px | |||
|platinum = 465 | |||
|wr = 12465 | |||
|coopwr = 11835 | |||
|map = TwilightHollowBattleEnemiesMap.jpg | |||
|noicons=y | |||
|red = 6 | |||
|winged = 10 | |||
|rock = 6}} | |||
===Pikmin=== | |||
* 6 [[Red Pikmin]] | * 6 [[Red Pikmin]] | ||
* 6 [[Rock Pikmin]] | * 6 [[Rock Pikmin]] | ||
* 10 [[Winged Pikmin]] | * 10 [[Winged Pikmin]] | ||
=== Enemies | ===Enemies=== | ||
* [[Shearwig]] (x11) | * [[Shearwig]] (x11) | ||
* Female [[Sheargrubs]] (x6) | * Female [[Sheargrubs]] (x6) | ||
| Line 64: | Line 63: | ||
* [[Calcified Crushblat]] (x1) | * [[Calcified Crushblat]] (x1) | ||
=== | ===Plants=== | ||
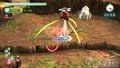
==Gallery== | ==Gallery== | ||
<gallery> | <gallery> | ||
| Line 76: | Line 69: | ||
</gallery> | </gallery> | ||
[[Category:Pikmin 3]] | [[Category:Pikmin 3]] | ||
[[Category:Mission Mode]] | [[Category:Mission Mode]] | ||
[[Category:Pikmin areas]] | [[Category:Pikmin areas]] | ||
[[Category:Downloadable content]] | [[Category:Downloadable content]] | ||
Revision as of 20:23, November 24, 2014

Twilight Hollow is a level in Pikmin 3's Mission Mode, and is the fall based area. It is made up of a large pool of water surrounded by areas of land separated by different barriers. Lily pads are used to traverse the water in this area. It is based off of the Twilight River in Pikmin 3's story mode.
Collect treasure!
| Twilight Hollow Collect Treasure! | |||||||||
|---|---|---|---|---|---|---|---|---|---|

| |||||||||
| Starting Pikmin | |||||||||
| |||||||||
| Requirements | |||||||||
| |||||||||
| Time limit | 10:00 | ||||||||
| Music | {{{music}}} | ||||||||
Pikmin
- 22 Yellow Pikmin
- 15 Purple Pikmin
- 43 Winged Pikmin
Enemies
- Swooping Snitchbug (x4)
- Red Bulborb (x1)
- Puffy Blowhog (x1)
Treasure
- Sunseed Berry (x8)
- Cupid's Grenade (x9)
- Insect Condo (x7)
- Face Wrinkler (x2)
- Golden Sunseed (x4)
- Golden Grenade (x2)
- Nuggets (x200; 4 piles)
- Enemies (x6)
Strategy
|
This article or section needs to be cleaned up, either its format or general style. |
Bring all three leaders north onto the revolving lily pads. Leave two in this area to collect the Insect Condo, Face Wrinkler and Golden Sunseed. Have the other pluck the yellow pikmin on the northeastern shore and begin destroying the nearby electric gate. Once the waterlogged fruit has been collected, send one leader back to the SPERO and send the other to join the leader at the electric gate. After the gate has been destroyed, unearth the flying pikmin and defeat the first Swooping Snitchbug. Meanwhile, the leader at the SPERO should take the winged pikmin there, collect the six Cupid's Grenades and then break down the nearby dirt wall. After the first Snitchbug has been defeated, throw a winged pikmin onto the wall of mushrooms blocking the way to the lone Red Bulborb and continue to move counter-clockwise around the map, unearthing more yellow pikmin and defeating the second Snitchbug. Toss all your pikmin and a leader across the small pond of water. By this time the dirt wall will have broken and the two leaders can join forces to take down the third Snitchbug and destroy the second electric gate. Once this is done, charge all your pikmin at the 24 bridge fragments, and then use the leftovers to take down the last Snitchbug. As flying pikmin take the fourth Snitchbug back to the SPERO, toss a leader onto the western ledge so they can start unearthing the winged pikmin there. Once the bridge is complete, move your leader who has been waiting nearby to meet up with the one on the ledge, making sure to collect any stray pikmin on the way and calling back any pikmin at the SPERO. Throw all your pikmin onto the ledge with the leader and the winged pikmin and take down the Puffy Blowhog. You should have around 36 winged pikmin and eleven yellow pikmin. Have 30 winged pikmin take back the three Insect Condos and the Blowhog's remains. Make sure you have at least 3 winged pikmin and ten yellow pikmin left over. Descend the ledge, and then throw three winged pikmin to collect the Golden Sunseed on the ledge next to the unbroken dirt wall. Take the ten yellow pikmin and throw them onto the stump near the (now cleared) electric gate to collect the fifth Insect Condo. Now take two leaders up the ramp on the west side of the SPERO while the third leader heads back to the SPERO itself. Throw one of the leaders onto the raised wooden platform on the east side of the SPERO. As the thrown leader unearths six winged pikmin, have the leader on the western platform unearth ten yellow pikmin and use them to carry away the sixth insect condo. Have this leader then unearth the four nearby purple pikmin and use them to carry away the four remaining fruit on the western side. On the eastern side, use three winged pikmin on each Sunseed Berry and then unearth the five nearby purple pikmin and use them to transport the remaining fruit on the eastern ledge. Once the pikmin have finished transporting fruit from the western side, have the leader waiting at the SPERO call the whole group there and then proceed to the piles of gold, starting with those on the west side and making their way counter-clockwise, throwing five winged pikmin onto each of the four piles. The leader should throw three winged pikmin onto the last Sunseed Berry in the northeast corner before charging the sleeping Red Bulborb and unearthing the final four purple pikmin. Allow purple pikmin to carry the Bulborb and the majority of the Sunseed Berries back to the SPERO. Finally, distribute any remaining pikmin onto the piles of gold as needed.
Battle enemies!
| Twilight Hollow Collect Treasure! | |||||||||
|---|---|---|---|---|---|---|---|---|---|

| |||||||||
| Starting Pikmin | |||||||||
| |||||||||
| Requirements | |||||||||
| |||||||||
| Time limit | 9:00 | ||||||||
| Music | {{{music}}} | ||||||||
Pikmin
- 6 Red Pikmin
- 6 Rock Pikmin
- 10 Winged Pikmin
Enemies
- Shearwig (x11)
- Female Sheargrubs (x6)
- Male Sheargrubs (x5)
- Skutterchuck (x3)
- Pyroclasmic Slooch (x3)
- Dwarf Bulbear (x7)
- Spotty Bulbear (x1)
- Calcified Crushblat (x1)
Plants
Gallery
Twilight Hollow in Battle enemies!
