
Frontier Cavern
| Frontier Cavern | |
|---|---|

| |
| Location | Valley of Repose |
| Sublevels | 8 |
| Treasures | 15 |
| Hazards |     
|
|
The following article or section contains guides. |
The Frontier Cavern (辺境の洞窟?, lit.: "Frontier Cave") is a cave in the Valley of Repose in Pikmin 2, and is the furthest away from the landing site. It is of above-average difficulty, featuring most major types of grub-dogs and lithopods. The cave features a distinct "festive" theme, with Christmas-themed treasures, sublevels with snow hallways that have red brick walls (as if the player were inside a chimney), and unique music featuring idiophone instruments for two sublevels. The cave's boss is the Empress Bulblax, which is slightly different than the one in Hole of Beasts in that it gives birth to Bulborb Larva every few seconds. In this cave, there are  × 1395 worth of treasures.
How to reach[edit]
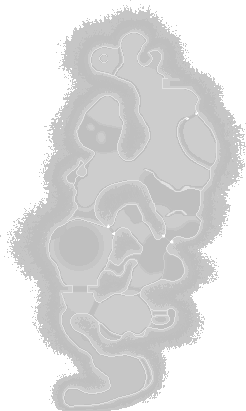

Like the Subterranean Complex, it is impossible to reach the cave before getting Blue Pikmin. Use Blue Pikmin to remove the clog in the first pond and build a bridge over the second. Once this is done, Pikmin of all types can be brought across. Traveling in a straight line from the bridge will lead to the snowman with the Unspeakable Wonder on its head. Nearby is a slanted bridge that can be built to reach the cave. Defeating the Decorated Cannon Beetles, the various Blowhogs and the Cloaking Burrow-Nit is recommended, but not strictly necessary.
The cave features all hazards, so a Pikmin squad featuring all types of Pikmin is recommended. The Worthless Statue and the Priceless Statue have a high chance of spawning in water, so bringing at least ten Blue Pikmin, or leaving enough room in your squad to obtain the cave's Bulbmin, is highly recommended. Many treasures are buried, so White Pikmin are a must.
Notes
Ship's dialogs
“Yet another cave discovered! Venturing to the farthest reaches has proven rewarding!
You may be tired of walking, but now just one last leap remains! Now, go get that treasure!”Sublevel 1[edit]


- Theme: Snow
- Music: Frontier Cavern
- Treasures:
 Essence of Rage (fully buried)
 Essential Furnishing (fully buried)
- Enemies:
 Doodlebug × 3
 Hairy Bulborb × 2
 Snow Bulborb × 6
- Obstacles:
 Bomb-rock × 4
- Vegetation:
 Figwort (large brown) × 0 or 24[Sublevel 1 note 1]
- Figwort (small brown) × 0 or 24[Sublevel 1 note 1]
 Shoot (large) × 1 or 12[Sublevel 1 note 1]
 Violet Candypop Bud × 1 (if max Pikmin requirement is met)
- Others:
- None
This sublevel has many Snow Bulborbs and a couple of Hairy Bulborbs. Before engaging the Hairy Bulborbs, take out any Snow Bulborbs near it first. Explore the sublevel and have your White Pikmin unearth any buried treasures.
There is a Violet Candypop Bud if you have less than 20 total Purple Pikmin. When wandering about the area, you may encounter Doodlebugs. After they have emerged from their cover, they may skitter into a Figwort or a Shoot. If this happens you can wait until they move and release flatulence to locate them. This is a good time to stock up on ultra-bitter sprays.
| Technical sublevel information | |||||
|---|---|---|---|---|---|
| Internal cave name | tutorial_3 | ||||
| "Main" object maximum (?) | 9 or 35 | ||||
| "Treasure" object maximum (?) | 2 | ||||
| "Gate" object maximum (?) | 0 | ||||
| Dead end unit probability (?) | 50 | ||||
| Number of rooms (?) | 3 | ||||
| Corridor-to-room ratio (?) | 0 | ||||
| Escape geyser (?) | No | ||||
| Clogged hole (?) | No | ||||
| Cave units file (?) | 3_MAT_nor4_hit2_blk1_snow.txt | ||||
| Lighting file (?) | normal_light_lv1.ini | ||||
| Background (?) | None | ||||
| Cave units (?) | |||||
 |
 |
 |
 |
 |
 |
| Dead end with item | Three-way crossing | Four-way crossing | Turning corridor | Corridor | Long corridor |
 |
 |
 |
|||
| Circular room with lumber | Room with 5 exits | Room with hole in wall | |||
| Detailed object list | ||||
|---|---|---|---|---|
| The game spawns these "main" objects: | ||||
| ID | Object | Amount | Fall method | Spawn location |
| 1 | Hairy Bulborb
|
2 | None | "Hard" enemy spots |
| 2 | Snow Bulborb
|
3 | None | "Easy" enemy spots |
| 3 | Snow Bulborb
|
3 | None | "Easy" enemy spots |
| 4 | Doodlebug
|
1 | None | "Hard" enemy spots |
| 6 | Figwort (small brown)
|
N/A or 8[Sublevel 1 note 1] | None | "Easy" enemy spots |
| 7 | Figwort (large brown)
|
N/A or 2[Sublevel 1 note 1] | None | "Hard" enemy spots |
| 8 | Figwort (large brown)
|
N/A or 8[Sublevel 1 note 1] | None | "Easy" enemy spots |
| 9 | Figwort (small brown)
|
N/A or 6[Sublevel 1 note 1] | None | "Easy" enemy spots |
| 10 | Figwort (large brown)
|
N/A or 2[Sublevel 1 note 1] | None | Cave unit seams |
| Then it spawns these "decoration" objects: | ||||
| ID | Object | Amount | Fall method | Spawn location |
| 5 | Doodlebug
|
2 | None | Plant spots |
| 11 | Figwort (small brown)
|
N/A or 10[Sublevel 1 note 1] | None | Plant spots |
| 12 | Figwort (large brown)
|
N/A or 12[Sublevel 1 note 1] | None | Plant spots |
| 13 | Shoot (large)
|
1 or 12[Sublevel 1 note 1] | None | Plant spots |
| Then it spawns these "treasure" objects: | ||||
| ID | Object | Amount | Fall method | Spawn location |
| 14 | Essential Furnishing
|
1 | None | Treasure spots |
| 15 | Essence of Rage
|
1 | None | Treasure spots |
| Then it spawns these "dead end" objects: | ||||
| ID | Object | Amount | Fall method | Spawn location |
| 16 | Violet Candypop Bud
|
1 | None | Dead ends |
| 17 | Bomb-rock
|
4 | Falls from the sky | Dead ends |
- ^ a b c d e f g h i j k In the GameCube versions, there are 35 "main" category objects. There are also 48 Figworts (24 of each type) and 1 Shoot total. In the Wii versions, the Figworts were all removed, and the Shoot entry was changed to an amount of 12. The number of "main" category objects was also changed accordingly to 9.
- For details on how objects are spawned, and how some may fail to spawn, see here.
Sublevel 2[edit]
- Theme: Snow
- Music: Frontier Cavern
- Treasures:
- Enemies:
 Decorated Cannon Beetle × 2
- Hairy Bulborb × 1
- Snow Bulborb × 6
- Obstacles:
- None
- Vegetation:
- Others:
- None
You are likely to fall where there is a large stump. Shelter all of your Pikmin behind it to protect them. Venture out into the sublevel without any Pikmin and use the Decorated Cannon Beetles to clear out any enemies. Then use one of the rocky projectiles to kill the other Decorated Cannon Beetle. Then have the rock-hurling creature kill itself by having the boulder home in on itself. Afterwards, take your Pikmin and collect the Christmas-themed treasures.
| Technical sublevel information | |||||
|---|---|---|---|---|---|
| Internal cave name | tutorial_3 | ||||
| "Main" object maximum (?) | 9 | ||||
| "Treasure" object maximum (?) | 2 | ||||
| "Gate" object maximum (?) | 0 | ||||
| Dead end unit probability (?) | 50 | ||||
| Number of rooms (?) | 3 | ||||
| Corridor-to-room ratio (?) | 0 | ||||
| Escape geyser (?) | No | ||||
| Clogged hole (?) | No | ||||
| Cave units file (?) | 3_MAT_ike3_mid2_sak1_snow.txt | ||||
| Lighting file (?) | tutorial_1_light.ini | ||||
| Background (?) | None | ||||
| Cave units (?) | |||||
 |
|
|
|
|
|
| Dead end | Three-way crossing | Four-way crossing | Turning corridor | Corridor | Long corridor |
 |
 |
 |
|||
| Room with ramp and thin ledge | Y-shaped room | Room with trunk in center | |||
| Detailed object list | ||||
|---|---|---|---|---|
| The game spawns these "main" objects: | ||||
| ID | Object | Amount | Fall method | Spawn location |
| 1 | Decorated Cannon Beetle
|
2 | None | "Hard" enemy spots |
| 2 | Hairy Bulborb
|
1 | None | "Hard" enemy spots |
| 3 | Snow Bulborb
|
3 | None | "Easy" enemy spots |
| 4 | Snow Bulborb
|
3 | None | "Easy" enemy spots |
| Then it spawns these "decoration" objects: | ||||
| ID | Object | Amount | Fall method | Spawn location |
| 5 | Figwort (small brown)
|
4 | None | Plant spots |
| 6 | Figwort (small brown)
|
4 | None | Plant spots |
| 7 | Figwort (large brown)
|
2 | None | Plant spots |
| Then it spawns these "treasure" objects: | ||||
| ID | Object | Amount | Fall method | Spawn location |
| 8 |  Joy Receptacle Joy Receptacle
|
1 | None | Treasure spots |
| 9 |  Icon of Progress Icon of Progress
|
1 | None | Treasure spots |
- For details on how objects are spawned, and how some may fail to spawn, see here.
Sublevel 3[edit]
- Theme: Snow
- Music: Emergence Cave 2
- Treasures:
 Danger Chime (inside Spotty Bulbear)
 Fleeting Art Form
 Gemstar Husband (fully buried)
- Enemies:
 Bulbmin × 1
 Dwarf Bulbear × 6
 Mitite (group of 10) × 0 - 2 (from eggs)
 Spotty Bulbear × 1
- Obstacles:
- Bomb-rock × 4
 Electrical wire × 2
 Fire geyser × 2
 Poison emitter × 2
- Vegetation:
- Figwort (small brown) × 6
 Ivory Candypop Bud × 1
- Others:
 Egg × 2
When landing on this sublevel, be warned that two wandering enemies will be patrolling the area, so it is advised you act quickly. Gather all of your Pikmin and scout the level, deactivating any electrical wires and defeating Dwarf Bulbears. If you can, locate the Bulbmin and kill it before the Spotty Bulbear as it will make things easier. Defeat these enemies using whatever killing strategy you want, just make sure you bring the Bulbear's corpse back if it did not disintegrate. Explore the area once all the hazards are cleared and collect and unearth any treasures.
| Technical sublevel information | |||||
|---|---|---|---|---|---|
| Internal cave name | tutorial_3 | ||||
| "Main" object maximum (?) | 14 | ||||
| "Treasure" object maximum (?) | 2 | ||||
| "Gate" object maximum (?) | 0 | ||||
| Dead end unit probability (?) | 50 | ||||
| Number of rooms (?) | 4 | ||||
| Corridor-to-room ratio (?) | 0 | ||||
| Escape geyser (?) | Yes | ||||
| Clogged hole (?) | No | ||||
| Cave units file (?) | 3_MAT_d_g_m_renga.txt | ||||
| Lighting file (?) | tutorial_1_light.ini | ||||
| Background (?) | None | ||||
| Cave units (?) | |||||
|
|
|
|
|
|
| Dead end with item | Three-way crossing | Four-way crossing | Turning corridor | Corridor | Long corridor |
 |
 |
 |
|||
| Room with 4 exits | Room with 5 exits and 2 walls | Room with 4 exits and 2 walls | |||
| Detailed object list | ||||
|---|---|---|---|---|
| The game spawns these "main" objects: | ||||
| ID | Object | Amount | Fall method | Spawn location |
| 1 | Bulbmin
|
1 | None | "Hard" enemy spots |
| 2 | Spotty Bulbear
|
1 | None | "Special" enemy spots |
| - | Danger Chime
|
Carried inside entry with ID 2 | ||
| 3 | Dwarf Bulbear
|
2 | None | "Easy" enemy spots |
| 4 | Dwarf Bulbear
|
2 | None | "Easy" enemy spots |
| 5 | Dwarf Bulbear
|
2 | None | "Easy" enemy spots |
| 6 | Poison emitter
|
2 | None | "Hard" enemy spots |
| 7 | Fire geyser
|
2 | None | Cave unit seams |
| 8 | Electrical wire
|
2 | None | Cave unit seams |
| Then it spawns these "decoration" objects: | ||||
| ID | Object | Amount | Fall method | Spawn location |
| 9 | Figwort (small brown)
|
2 | None | Plant spots |
| 10 | Figwort (small brown)
|
4 | None | Plant spots |
| Then it spawns these "treasure" objects: | ||||
| ID | Object | Amount | Fall method | Spawn location |
| 11 | Gemstar Husband
|
1 | None | Treasure spots |
| 12 | Fleeting Art Form
|
1 | None | Treasure spots |
| Then it spawns these "dead end" objects: | ||||
| ID | Object | Amount | Fall method | Spawn location |
| 13 | Egg
|
1 | Falls from the sky | Dead ends |
| 14 | | |||