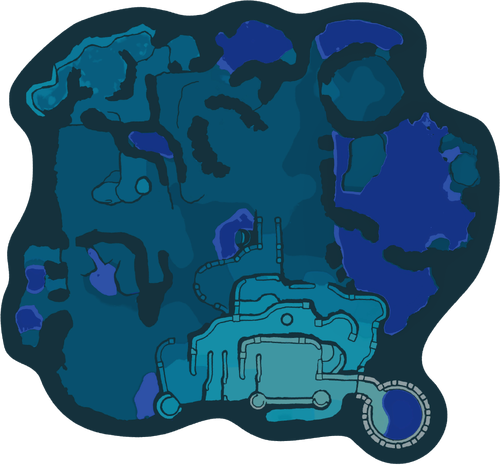
Subzero Sauna
| Subzero Sauna | |
|---|---|

| |
| Location | Serene Shores |
| Sublevels | 3 |
| Rescues | 2 |
| Treasures | 5 |
| Onions | 0 |
| Suggested Pikmin |  
|
| Wild Pikmin | 
|
|
The following article or section contains guides. |
The Subzero Sauna is a cave in the Serene Shores in Pikmin 4. It has 3 sublevels where White Pikmin can be found. There is a large amount of obstacles and enemies using ice, making Ice Pikmin a good choice to bring down. The final sublevel has an encounter with an adult Arctic Cannon Beetle. This cave has  × 545 worth of treasure.
How to reach[edit]
The cave can be found buried west of the Water's Edge base just past the alcove with the Engulfed Castle. The clay bridge near the base can be built to reach the other side of the lake if necessary, or the player can swim across with Oatchi or wait until noon for the water level to ebb. The cave is buried just around the corner past the bridge with a Peckish Aristocrab and Aristocrab Offspring prowling near the mound hiding it.
Notes[edit]
Olimar's Voyage Log[edit]
Sublevel 1[edit]

- Treasures:
 Disguised Delicacy (inside hydro jelly)
 Gold Nugget × 15 (5 inside a hydro jelly)
- Enemies:
 Chillyhop × 1
 Snowy Blowhog × 2
- Obstacles:
 Hydro jelly × 5
 Ice vent × 6
 Ice wall × 1
 Poison emitter × 1
- Tools:
- None
- Wild Pikmin:
 Ice Pikmin × 5 (inside a hydro Jelly)
 Candypop Bud × 1 (inside a hydro jelly)
- Others:
 Egg × 2
 Raw material pile × 1 (pile of 15)
The first sublevel features many ice-based enemies and hazards, so making use of your Ice Pikmin is key. The only things to worry about is the lone poison emitter and the Chillyhop, which can crush any unsuspecting Pikmin. Luckily, this sublevel has a single White Candypop Bud, so you'll be able to grow 5 White Pikmin to deal with the poison emitter.
This sublevel is comprised of three main rooms, each having a path connecting themselves to another. The southeastern room is the landing zone, which has a small hydro jelly housing 5 Gold Nuggets. The northern room has a pair of Snowy Blowhogs plus an ice vent and a Disguised Delicacy, which is stuck inside of a larger hydro jelly. The western room has a Chillyhop and three more ice vents.
Given the non-lethal nature of ice, you could safely leave some Ice Pikmin to deal with the Snowy Blowhogs whilst you deal with the Chillyhop directly. Standard Wollyhop strategies apply here, but take note that when it lands, it will generate a pool of ice around itself, which can cause non-Ice Pikmin to freeze. The lone hydro jelly in this room has the White Candypop Bud, so take those White Pikmin and follow the path downwards (past another ice vent) and you'll find the poison emitter, which is blocking access to a pile of Gold Nuggets – you could either put your White Pikmin on these Nuggets, or you could destroy the emitter and have any other Pikmin in your squad carry them. An ice wall is located in the path between the base and the Chillyhop room, so destroying it allows your Pikmin to carry back the Nuggets quicker.
Once the Disguised Delicacy and Nuggets are collected, you can find the next sublevel's entrance towards the northwest. It is blocked off by a considerably large hydro jelly, so you will need some Ice Pikmin before you can progress further.
Sublevel 2[edit]

- Treasures:
 Memory Fragment (Left Edge)
 True Goo (inside hydro jelly)
- Enemies:
 Puckering Blinnow × 3
 Arctic Cannon Larva × 2
 Iceblown Dweevil × 1
- Obstacles:
 Box × 1
- Hydro jelly × 2
 Ice block × 3
 Iron fence × 2
 Iron fence × 3
- Poison emitter × 1
 Stalactite × 5
 Water body × 3
- Tools:
 Button × 1
- Wild Pikmin:
- Ice Pikmin × 5 (Sprouts)
 Blue Pikmin × 5 (Sprouts) (if 5 or less Blue Pikmin)
- Others:
 Castaway
 Candypop Bud × 1
- Candypop Bud × 1
- Raw material pile × 1 (pile of 20)
Advice: The Rookie Rescue Officer must take the Ice Pikmin before exploring and defrost the cold air while Oatchi look after the other Pikmin, because this sublevel has iron fences which lowered later by the button
Defrost the air: You'll find the first ice block right near the start but there will be a stalactite falling in frost so you must destroy them. Next right through the tunnel with the frozen water you'll find another stalactite falling, make sure you destroy it so it would distract your Pikmin. Then go through an iron fence and there's a small room with an Arctic Cannon Larva which must be defeated and 5 buried Ice Pikmin, and there's another room with another Arctic Cannon Larva which also need to be defeated and another ice block inside a frozen hydro jelly. Finally there's another iron fence you could go through then you'll find on a frozen body of water with 3 Puckering Blinnows which you don't have to defeat yet, there's another iron fence and another ice block to destroy, make sure let you or your Ice or Blue Pikmin press the button to lower the iron fences, destroy stalactite, and move the box.
Exploring: First put some Pikmin inside the white Candypop Bud then defeat the 3 Puckering Blinnows if you want to transport the objects you can freeze the bodies of water with Ice Pikmin if you transport the objects quicker. Both treasures, the pile of raw material, and the castaway is in the same large room with one of the Arctic Cannon Larvae the True Goo is inside the other hydro jelly, but make sure destroy poison emitter to transport it. The Memory Fragment (Left Edge) and the castaway is in another body of water. Warning there's an Iceblown Dweevil falling from the sky and it might take the object so you defeat it first so it'll quit stopping the transportation.
Next sublevel: To get to the next sublevel must freeze the water where Puckering Blinnows were, with 10 Ice Pikmin or an Ice Blast then jump to the upper platform with Oatchi to reach it.
Sublevel 3[edit]

- Treasures:
- Enemies:
- Obstacles:
- Hydro jelly × 3
- Ice block × 3
 Numbered gate × 1 (lowers when 1 Arctic Cannon Beetle is defeated)
- Stalactite × 14 (plus an indefinite amount falling from the ceiling after the Arctic Cannon Beetle attacks)


Tools:
- None
- Wild Pikmin:
- Ice Pikmin × 10 (inside Hydro Jelly)
- Others:

- See also: Arctic Cannon Beetle strategy.
You must defrost the air first so you fight the boss of the cave: the Arctic Cannon Beetle. There are 5 Ice Pikmin in a blob of hydro jelly and 5 more in another one near the arena. The Arctic Cannon Beetle will drop the castaway after it's defeat and the Contemplation Station is behind the numbered gate and the cave exit is cover with a blob of hydro jelly.
First of all, try to destroy the ice blocks before waking up the giant Lithopod. Then, go to where the hydro jelly is and collect the Ice Pikmin. Then, fight the Arctic Cannon Beetle. To do it, just put you in front of him, and escape a bit before it inhales. From there, attack its backside. The strategy should work, and, finally, collect the Castaway and the Contemplation Station. Then, exit the cave. You also can bring the Beetle's body to gain extra 30 Sparklium.
Gallery[edit]
Sublevel 1[edit]
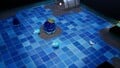
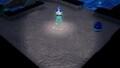 The landing site and surrounding area.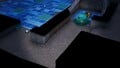
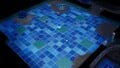
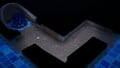 The entrance to the second sublevel engulfed in a hydro jelly and adjacent to an ice vent.


Sublevel 2[edit]
 The landing site and surrounding area.
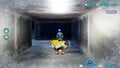 The entrance to the tunnel-like passage.
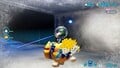 The interior of the tunnel-like passage.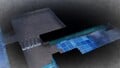
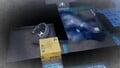 A switch, some frozen Puckering Blinnows, an iron fence, and a cardboard box impeding the way to an white Candypop Bud.
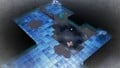 A castaway, the Memory Fragment (Left Edge), two hydro jellies, one containing the True Goo and the other containing an ice block, two iron fences, a poison emitter, and a pile of raw material.
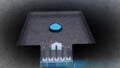 An ice block and the entrance to the third sublevel.


_SS.jpg)

Sublevel 3[edit]
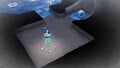 The landing site and surrounding area.
 One segment of the arena in which the Arctic Cannon Beetle is fought, with a frozen hydro jelly, nectar egg, two ice blocks, and some fallen icicles.
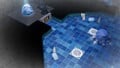 The other portion of the arena where the Arctic Cannon Beetle is fought, with fallen icicles and ice blocks, as well as a frozen hydro jelly impeding the cave's exit.

_SS.jpg)
_%26_Exit_SS.jpg)
Names in other languages[edit]
| Language | Name | Meaning |
|---|---|---|
 Japanese Japanese |
氷温サウナ? Hyōon Sauna |
Ice-Temperature Sauna |
 Chinese Chinese(traditional) |
冰凍桑拿 Bīngdòng Sāngná |
Freezing Sauna |
 Chinese Chinese(simplified) |
冰冻桑拿 Bīngdòng Sāngná |
Freezing Sauna |
 Dutch Dutch |
IJssauna | Ice sauna |
 French French |
Sauna des glaces | Ice sauna |
 German German |
Eissauna | Ice Sauna |
 Italian Italian |
Sauna sottozero | Subzero sauna |
 Korean Korean |
혹한 사우나 Hokhan Sauna |
Biting Cold Sauna |
 Portuguese Portuguese |
Sauna glacial | Glacial sauna |
 Spanish Spanish |
Sauna gélida | Icy sauna |
See also[edit]
| Serene Shores | |
|---|---|