Engulfed Castle
| Engulfed Castle | |
|---|---|

| |
| Location | Serene Shores |
| Sublevels | 5 |
| Rescues | 2 |
| Treasures | 17 |
| Onions | 0 |
| Suggested Pikmin | |
| Wild Pikmin | |
|
The following article or section contains guides. |
The Engulfed Castle (深海の城?, lit.: "Deep Sea Castle") is a cave in the Serene Shores in Pikmin 4. It has five sublevels. Only Blue Pikmin can access its entrance, as it is submerged in undrainable water. Hazards of all types appear throughout the cave; Glow Pikmin spawned from Glow Seeds or a suitably upgraded Oatchi can be utilized to clear them, although neither are strictly required, as all hazards can be destroyed or circumvented even with just Blue Pikmin.
The boss of this cave, the Waterwraith, is unique in that it will drop from the ceiling after five minutes have passed in any sublevel excluding the final sublevel. It is extremely dangerous, instantly killing both Pikmin and enemies indiscriminately. In most circumstances, it cannot be hurt whatsoever until the cave's final sublevel, where Purple Candypop Buds will allow for the creation of its only weakness, Purple Pikmin. Defeating the Waterwraith unlocks an exit leading to the top of an otherwise inaccessible hill, allowing passage to much of the Serene Shores' upper half. This cave has ![]() × 1,145 worth of treasures.
× 1,145 worth of treasures.
How to reach[edit]
The entrance to Engulfed Castle is found in a flooded alcove beneath the clay bridge next to the Water's Edge base. The entrance is submerged in undrainable water that does not ebb even after noon; as such, Blue Pikmin are the only type that can enter and exit through this hole.
Once completed, the cave's exit can also be used to re-enter the cave. Because it is not submerged, any Pikmin type can enter or exit from here, although the game will still only recommend Blue Pikmin. It is found in the area behind the Water's Edge base, up from the paper bag that must be pushed down beforehand.
Notes[edit]
Olimar's Voyage Log[edit]
Waterwraith[edit]
On the first four sublevels, the Waterwraith will drop down from the ceiling after five minutes. There are a few things to keep in mind about it:
- It will patrol the sublevel, attempting to target and crush any Pikmin with its rollers. However, these rollers will also indiscriminately destroy traps and instantly kill most enemies. Use this to your advantage.
- The Waterwraith can navigate into corners to crush Pikmin. As such, hiding in corners is generally ineffective.
- If you are being chased, run to areas with green, grassy floors, with metal arches; the Waterwraith will refuse to enter those areas and will disengage the chase, offering some breathing room.
- The Waterwraith does not move particularly quickly. It is relatively easy to outmaneuver it while riding Oatchi, but be cautious: One wrong move could result in the Waterwraith crushing him and knocking Pikmin off of him. Additionally, the Waterwraith is powerful enough to knock out Oatchi in four hits (and the rookie Rescue Officer in two) if rolled over without armor upgrades.
- The Waterwraith prioritizes crushing Pikmin above all else and pays no mind to leaders. Using either leaders as bait won't work.
- Items such as Ice Blasts and Lightning Shocks can stun it in a pinch, allowing for a getaway if cornered. However, the Waterwraith cannot get stuck in frozen bodies of water.
- The Waterwraith typically cannot be hurt until the final sublevel. However, it's rollers can be destroyed using an Ice Blast: Doing so will cause it to become mostly harmless for the remainder of the floor, allowing for the free transit of treasures, although note that the Waterwraith will still be able to knock Pikmin around if it runs into them.
- Despite the fact that it is possible to kill the Waterwraith in all sublevels before the final one using Mines and Ice Blasts, it will still spawn back in the following sublevel. Notably, it will not drop the treasure and its theme will still continue to play.
- Move quickly and efficiently to try and complete as much of the sublevel as possible before it appears. If worse comes to worst, you can always return to the cave after completing it to collect the remaining treasures.
- Once defeated on the final sublevel, the Waterwraith will never respawn, even on earlier sublevels, allowing for one to take their time when collecting any treasures that were left behind.
Sublevel 1[edit]

- Treasures:
 Hoop of Passion × 1
 Ice Sword × 1
 Juicy Gaggle × 1
 Secured Satchel × 1 (attached to iron fence)
 Vanishing Cookie × 1 (inside of the Fiery Bulblax)
- Enemies:
 Honeywisp × 1
 Fiery Blowhog × 2
 Pyroclasmic Slooch × 2
 Fiery Bulblax × 1
 Waterwraith × 1 (doesn't respawn after being defeated in sublevel 5)
- Obstacles:
 Dirt wall × 2
 Iron fence × 3 (lowered after button is pressed)
 Fire geyser × 4
- Tools:
 Button × 1 (lowers iron fences)
- Wild Pikmin:
 Blue Pikmin × 10 (if 50 or less Blue Pikmin)
- Others:
 Egg × 4
This sublevel places an emphasis on fire-related hazards and enemies, already putting you at an innate disadvantage due to your lack of Red Pikmin. Do not get discouraged, and keep in mind that this cave is possible to complete. If Oatchi has been upgraded with his ![]() Pup Scorch Guard, this sublevel will be much easier to complete, as he can safely handle most of the enemies and hazards with minimal risk to himself. Failing that, you may wish to grow some Glow Pikmin, which will be of great help throughout the entire cavern due to their immunity to most hazards.
Pup Scorch Guard, this sublevel will be much easier to complete, as he can safely handle most of the enemies and hazards with minimal risk to himself. Failing that, you may wish to grow some Glow Pikmin, which will be of great help throughout the entire cavern due to their immunity to most hazards.
From the beginning of the sublevel, the first priority should be taking out the Pyroclasmic Slooch next to the base, as it will block the transit of the sublevel's treasures, and destroying the dirt wall guarding the exit, to allow for a hasty retreat if the Waterwraith cannot be escaped from. If Oatchi is fireproof, he can swiftly defeat it in a few Chomps. If not, you will need to lure it into one of the nearby water puddles to extinguish its flames, and then charge it with your Blue Pikmin to take it out. Alternatively, if you chose to grow Glow Pikmin, a single Glowmob from a decently sized squad will quickly kill it. Once it is safely defeated, make your way towards the exit hole, which is guarded by a Fiery Blowhog, the previously mentioned dirt wall, and a fire geyser. There are also five wild Blue Pikmin sprouts here, if you entered the cave with 50 or less Blue Pikmin.
To take out the Fiery Blowhog with no causalities, have your Pikmin charge the back, and be ready to whistle them back when it bucks forward. If Glow Pikmin are available, you may instead wish to throw a handful onto it and let them kill it as you work elsewhere; their fire immunity means the Blowhog cannot kill them. Assigning Oatchi to destroy the wall in the meantime is a good idea, as he cannot slip through the nearby iron fence. Don't forget to take out the fire geyser too or it may kill Pikmin carrying items through this area.
Optionally, there are a pair of nectar eggs dead east of the base, guarded by a single fire geyser. If any Blue Pikmin have lost their flowers from the fire, or Oatchi has taken damage, you may wish to visit it to re-flower them or heal Oatchi with the nectar.
Regardless, as they work, move through the iron fences west of the hole (facing north). Your objective should be lowering the iron fence, which you can do via a white switch towards the north, in the section with the green-tinted floor on the map. Ignore the Hoop of Passion for the time being, as the route the Pikmin follow if the fences aren't lowered takes them dangerously close to a Fiery Bulblax. Instead, head north to the aforementioned area. Break the fire geyser near the button, and then have your Pikmin break the dirt wall to access the button. Hit it to lower the fences, at which point Oatchi, finished with the earlier dirt wall, should attempt to make his way back to you.
With the entire sublevel accessible, there are a few paths to take. You can safely assign three Pikmin to carry back the Hoop of Passion with the fences lowered. There is a treasure inside the Fiery Bulblax, which will require some effort to defeat. If Oatchi is not fireproof, your only chance is to extinguish its flames by luring it into a nearby pond, and then Rushing Oatchi into its back before it reignites. Given the Waterwraith's impending arrival, you may wish to instead use items on it to save time. A single Ice Blast will extinguish its flames on the spot and will freeze it solid, allowing you to Rush into it for massive damage, hopefully shattering it before it can thaw. Otherwise, using two Bomb Rocks will instantly kill it, and even a single one will dramatically simplify the battle. If Oatchi is fireproof, you may also simply have him attack the Fiery Bulblax while working on collecting the treasure on the west side of the sublevel to be efficient. However, bear in mind that he will take a significant amount of damage from its bites and may be knocked out. Keep an eye on his health and be prepared to use a Scrummy Bone, or to rouse him at the base if he is knocked out. Whatever the case, the Bulblax will spit up the Vanishing Cookie when it dies. With it dead, you can also safely assign Pikmin or Oatchi to carry the nearby Secured Satchel back, as well.
There are two treasures on the west side of the sublevel, a Juicy Gaggle and an Ice Sword, guarded by a handful of fire geysers, a Fiery Blowhog (that falls from the sky) and a Pyroclasmic Slooch. Defeat these two enemies and destroy the geysers the same way you did earlier and assign Pikmin to carry the two treasures back. If you have been relatively efficient, it is possible to collect all the treasures before the Waterwraith's arrival. If not, note that the Waterwraith will refuse to enter areas with grassy floors, such as the ones around the Secured Satchel and the exit hole. If the Waterwraith is blocking the Pikmin's route, hide in those spots until it moves away, letting you continue carrying the treasures.
Sublevel 2[edit]

- Treasures:
 Crush Nugget × 2 (inside of the Bulborb)
 Daughter of the Earth × 1 (buried)
- Enemies:
 Albino Dwarf Bulborb × 6
 Bulborb × 1
 Pearly Clamclamp × 1 (doesn’t respawn once defeated)
 Fiery Dweevil × 2
- Waterwraith × 1 (doesn't respawn after being defeated in sublevel 5)
- Obstacles:
- Dirt wall × 2
- Iron fence × 1 (lowered after button is pressed)
 Spotcap × 5
 Kingcap × 1
- Tools:
 Pup tunnel × 1
- Button × 1 (lowers iron fence)
- Wild Pikmin:
- Blue Pikmin × 10 (if 50 or less Blue Pikmin)
- Others:
 Castaway × 1 (inside of the Pearly Clamclamp)
Outside of a few Fiery Dweevils, this sublevel doesn't place an emphasis on any particular hazard. This sublevel also, mercifully, has ten wild Blue Pikmin to replenish your army with, assuming you fell below 50 Blue Pikmin on the first sublevel.
Destroying the two dirt walls blocking off the rest of the sublevel should be your first priority. Defeat the two Albino Dwarf Bulborbs near the base first, then split your army to efficiently take out both walls. The Daughter of the Earth is buried near the exit on a ledge, but you cannot collect it until the iron fences are lowered. Once the dirt wall northeast of the base is destroyed, gather your army and proceed to the rest of the sublevel.
Your first concern should be the wandering Bulborb, tailed by four Albino Dwarf Bulborbs. You may wish to use an item such as a Bomb Rock if you don't want to risk Pikmin casualties. Otherwise, having Oatchi Rush into the Bulborb from behind with a decently sized army of Blue Pikmin should kill it before the Albino Dwarf Bulborbs can react, depending on your upgrades, at which point the Dwarves should be easy pickings. Once the family is dead, you can safely assign Pikmin to carry back the two Crush Nuggets that were inside the Bulborb, but keep an eye out, as the two nearby Fiery Dweevils (one drops from the ceiling) may pick up the treasures and stall transit.
The path to the northeast is blocked with iron fences, preventing Oatchi from accessing it. Ignore this path for the time being and instead direct your attention to the pipe entrance blocked by Spotcaps and the lone Kingcap. Break these open and travel through the pipe; at the end of the passage, you will see a Pearly Clamclamp that has ingested a castaway. Defeat the Clamclamp and assign Pikmin to the castaway. Their path will likely be blocked by the iron fences, which brings us to the next objective: not far from the Clamclamp, you should see a pup tunnel near a shallow pool of water. If Oatchi hasn't learned how to Doggy-Paddle by this point, you will have to use an Ice Blast to freeze the water to allow him access, as the puddle is too large to jump over. Whatever the case, have Oatchi crawl through the pup tunnel. While he travels, double-check the area where the Bulborb patrolled; if a Fiery Dweevil grabbed one of the Crush Nuggets or is otherwise wandering around, kill it, as they may grab the castaway and waste precious time.
When Oatchi makes it to the end of the tunnel, switch to him and stomp the switch to lower the fences. This should allow the Pikmin to take the castaway back to base. If both Dweevils haven't been killed by this point, remain alert as they may try to grab the castaway. Regardless, make your way back to the exit hole. With the fences down, you can now assign Pikmin to dig up and carry the Daughter of the Earth back to base. If the Waterwraith has dropped down by this point, things will get complicated. The pipe leading to the Clamclamp, the grassy area the base sits on, and the grassy floor surrounding the exit hole are all safe places to hide, but you will likely have to wait until the Waterwraith is far away in order to safely transport whatever remains.
Sublevel 3[edit]

- Treasures:
 Child of the Earth × 1 (buried)
 Memory Fragment (Bottom...Probably?) × 1
 Scaly Custard × 1 (hanging from web)
- Enemies:
 Withering Blowhog × 1 (guarding a base)
 Wollyhop × 2
 Anode Dweevil × 2
- Honeywisp × 2
 Joustmite × 1
- Waterwraith × 1 (doesn't respawn after being defeated in sublevel 5)
- Obstacles:
- Dirt wall × 3
- Iron fence × 4 (lowered after button is pressed)
- Tools:
- Button × 1 (lowers iron fences)
 Electricity generator × 6
- Wild Pikmin:
- Blue Pikmin × 10 (sprouts) (if 50 or less Blue Pikmin)
- Others:
 Raw material pile × 1 (15 pieces)
- Egg × 4
- Base × 1 (guarded by a Withering Blowhog)
This sublevel contains several electric hazards, so be ready to whistle your Pikmin to rescue them if they come in contact with electricity. Start by going west. Defeat the Wollyhop and Joustmite, then collect the raw materials on the way to the button behind a dirt wall. Pressing this button will open iron fences around the room containing a second base, and this base is closer to the treasures in the sublevel. Go to this room and carefully defeat the Withering Blowhog, and then destroy the 2 electricity generators in the room. Once the enemy is defeated, move the S.S. Beagle to this base and collect the nearby Memory Fragment (Bottom...Probably?). Be aware that an Anode Dweevil will fall from the sky when a treasure is carried near this base. From here, head north, defeat the Wollyhop, and dig up the Child of the Earth, partially buried in water, to collect it. Then, go east and destroy the dirt wall on the way to the higher ground around the Scaly Custard, where it's possible to throw Pikmin onto the treasure to make it fall down from its web. Once all treasures have been collected, go to the exit hole to continue further into the cave.
Sublevel 4[edit]

- Treasures:
 Difficult-Choice Totem × 1
 Insect Condo × 1 (inside of the Startle Spore)
 Turn-of-Events Track × 1 (inside some sticky mold)
 Velvety Dreamdrop × 1
- Enemies:
 Moldy Dwarf Bulborb × 4
- Honeywisp × 1
 Startle Spore × 1
 Venom Dweevil × 4 (2 carrying Bomb rocks)
- Waterwraith × 1 (doesn't respawn after being defeated in sublevel 5)
- Obstacles:
- Dirt wall × 1
 Sticky mold (2 spotcaps) × 3
- Sticky mold (6 spotcaps) × 1
- Spotcap × 15 (12 in sticky mold, 3 not in sticky mold)
 Poison Spotcap × 2
- Kingcap × 1
 Poison Kingcap × 1
- Tools:
 Clay mound × 1 (requires 21 pieces of raw material)
- Wild Pikmin:
- Blue Pikmin × 10 (if 50 or less Blue Pikmin)
- Others:
- Raw material pile × 1 (15 pieces)
The theme of this sublevel is poison with a side dish of explosions, and is likely to be the first encounter of sticky mold. The first room is basically a tutorial on the substance, showing that enemies are unhindered while carrying is completely prevented. It is also likely that the Moldy Dwarf Bulborbs will cause a scare due to countering the standard strategy of throwing for a one-hit kill — don't panic, and charge them instead. Clearing out the sticky mold is simple and reveals the Turn-of-Events Track, while also revealing a Venom Dweevil from the ceiling.
From there, the sublevel can be tackled in either direction. Going to the right requires building a clay mound and taking out two more Moldy Dwarf Bulborbs next to the concealed exit before getting to the main course: a room with two fruit (the Insect Condo and Velvety Dreamdrop) and a Startle Spore. Unprepared players are almost certain to lose Pikmin to the disguised foe, so clearing the sticky mold first should be a priority. The Startle Spore should be removed before collecting the Velvety Dreamdrop, or a surprise Dweevil will make things much more complicated.
Going left instead leads to one of the more infamous rooms, with many full party wipes to its name: a pair of Venom Dweevils, prepped with Bomb Rocks and ready to charge. While both of them are easy to see out in the open, there is a small lip to the east that prevents retreat if not riding Oatchi, which can result in being cornered and subsequent complete disaster. (This is much less of a concern if coming from the direction of the Startle Spore instead.) Once the threat has been removed, all that's left is a Difficult-Choice Totem behind a wall of easy-to-destroy Spotcaps. A set of poisonous Spotcaps block a much more direct route, but they may be difficult to remove without a Sniff Saver-equipped Oatchi or the explosive help of the nearby Dweevil.
Sublevel 5[edit]

- Treasures:
 Glinty Circular Disc × 1(inside Waterwraith)
 Noble Goo × 1 (fully buried)
- Enemies:
 Mitite × 10 (inside of the large nectar egg, only if Waterwraith was defeated in an earlier visit)
- Waterwraith × 1 (doesn't respawn after being defeated in sublevel 5)
- Obstacles:
 Bag × 1 (weight of 100)
 Numbered gate × 1 (must defeat 1 Waterwraith to lower)
- Tools:
- None
- Wild Pikmin:
- Blue Pikmin × 5 (if 50 or less Blue Pikmin)
 Candypop Bud (Purple) × 2 (if 50 or less Purple Pikmin)
- Others:
- See also: Waterwraith strategy.
The final confrontation with the Waterwraith waits beyond a bag. In all likelihood, you will not have 100 Pikmin to weigh the bag down with, which is where Purple Pikmin come into play. Use the Purple Candypop Buds near the base to convert ten of your Pikmin (prioritize Glow Pikmin if any are with you, although it doesn't matter too much) into Purple Pikmin. Use the nectar eggs near the base to flower your Pikmin and heal Oatchi if necessary. When ready, deflate the bag and proceed into the arena. The Waterwraith will only drop down when you approach the large egg in the middle.
Now that you are accompanied with Purple Pikmin, the Waterwraith will not pose much of a threat anymore. Throwing a Purple Pikmin near it will make it vulnerable, at which point you can safely rush your squad into it with Oatchi to inflict massive damage. Once its first health wheel is depleted, it's rollers will break, triggering the second phase. The Waterwraith is completely harmless without its rollers and will instead attempt to flee from you; simply chase it down, throw more Purple Pikmin at it, and repeat the process until it dies.
Once it is dead, it will both drop the Glinty Circular Disc and lower the numbered gate. With the sublevel completely cleared, you are free to take back the treasure and the castaway near the exit geyser at your leisure. Note that there is another treasure - the Noble Goo - fully buried in the ground along the outer edge of the arena. Have Oatchi sniff it out and dig it up before you leave.
Completing this cave and leaving through the cave exit affects a few things throughout the entire cavern. First off, the Waterwraith will now never respawn, even if you return to an earlier sublevel; if you happened to leave any treasure behind on an earlier sublevel, you can now collect it with no time restraints. Secondly, you will leave through an exit that is not submerged and can freely reenter the cave through it. This means, assuming you re-enter the cave through that specific entrance, that you can bring any type of Pikmin in. With these two things in mind, revisiting the cave to collect anything left behind should be trivial.
Gallery[edit]
Exterior[edit]
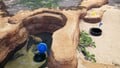
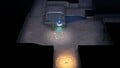
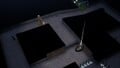
The cavern's submerged entrance (left) and exit (right).

Sublevel 1[edit]
The landing site and surrounding area.
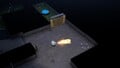
A pool of water, Pyroclasmic Slooch, two nectar eggs, some fire geysers, and an iron fence.
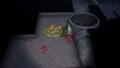
A sleeping Fiery Bulblax, some fire geysers, a Hoop of Passion, a dirt wall, and a switch.
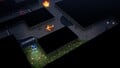
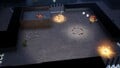
A Fiery Blowhog, some fire geysers, some Blue Pikmin sprouts, a dirt wall, and the entrance to the next sublevel.
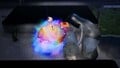
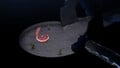
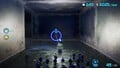
The Waterwraith running over a Fiery Bulblax.


Sublevel 2[edit]
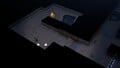
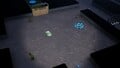
The landing site and surrounding area.

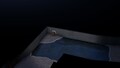
A dirt wall and the hallway it impedes.
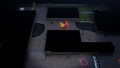
A Bulborb, some Albino Dwarf Bulborbs, some Blue Pikmin sprouts, a Kingcap, some Spotcaps, two iron fences, and a switch.

The inside of the tunnel-like pipe beyond the Spotcaps and Kingcap.

The segment of the tunnel-like pipe with its ceiling broken off.
The Pearly Clamclamp containing a castaway.
The pup tunnel.
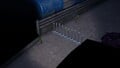
The two consecutive iron fences.

The pathway, now-pressed switch, and Fiery Dweevil where the pup tunnel leads to.

A dirt wall, iron fence, Blue Pikmin sprouts, completely buried Daughter of the Earth, and the entrance to the third sublevel.
Two defeated Albino Dwarf Bulborbs.


Sublevel 3[edit]
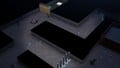
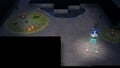
The landing site and surrounding area.
A Wollyhop, pile of raw material, dirt wall, some electricity generators, an iron fence, and the entrance to the fourth sublevel.
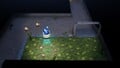
A Joustmite, some electricity generators, a dirt wall, a switch, an iron fence, and some Blue Pikmin sprouts.
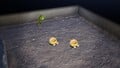
A partially buried Child of the Earth next to a Wollyhop.
A Scaly Custard, a dirt wall, some nectar eggs, some iron fences, and an electricity generator.
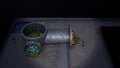
A Withering Blowhog, some electricity generators, some nectar eggs, some Blue Pikmin sprouts, the Memory Fragment (Bottom...Probably?), some iron fences, and the alternate base location.


Sublevel 4[edit]
The landing site and surrounding area.
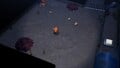
A Poison Kingcap, some Poison Spotcaps, a Kingcap, a Spotcap, two Venom Dweevils carrying Bomb Rocks, and a dissipating sparklium particle from the obstructed Difficult-Choice Totem.
A resting Startle Spore, some Spotcaps, and some sticky mold.

A dirt wall, some Moldy Dwarf Bulborbs, an unbuilt clay mound, some Spotcaps, and some sticky mold obstructing the entrance to the fifth sublevel.
The interior of the tunnel-like passage, both ends of which are displayed in the previous image.


Sublevel 5[edit]
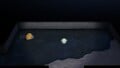
The landing site and surrounding area.

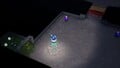
The arena in which the Waterwraith is fought.

A numbered gate obstructing the way to a castaway and the exit of the Engulfed Castle.


Names in other languages[edit]
| Language | Name | Meaning |
|---|---|---|
| 深海の城? Shinkai no Shiro |
Deep Sea Castle | |
(traditional) |
深海之城 Shēnhǎi zhī Chéng |
Deep Sea Castle |
(simplified) |
深海之城 Shēnhǎi zhī Chéng |
Deep Sea Castle |
| Onderwaterburcht | Underwater castle | |
| Fort englouti | Engulfed fort | |
| Unterwasserburg | Underwater Castle | |
| Castello subacqueo | Underwater castle | |
| 심해의 성 Simhae-ui Seong |
Deep Sea Castle | |
| Castelo abissal | Abyssal castle | |
| Castillo abisal | Abyssal castle |
Trivia[edit]
- This cave is a homage to the Submerged Castle from Pikmin 2, taking direct inspiration from both the original cave's mechanics and layout. In fact, many of the sublevel layouts are actually near-perfect recreations of the Submerged Castle's sublevels. However, there are some notable differences:
- No sublevel hole is clogged. A number of the exits are protected by dirt walls or sticky mold instead.
- In sublevel 2, a single adult Bulborb patrols the sublevel, followed by a gaggle of Albino Dwarf Bulborbs, a reference to the Bulbmin in the original cave. A Pearly Clamclamp also houses the Castaway at the end of the pipe section; in Pikmin 2, the Chocolate Cushion or Confection Hoop are in this spot, out in the open and unguarded.
- Sublevel 3 lacks any Anode Beetles. They are replaced by a single Joustmite. It also lacks the singular Ivory Candypop Bud.
- Sublevel 4 appears to lean more towards a focus on poison as opposed to the original's emphasis on explosive obstacles and enemies. To this end, many of the Bomb Rocks and Volatile Dweevils have been replaced with poison-themed enemies such as Moldy Dwarf Bulborbs. Notably, there are a handful of Venom Dweevils that hold Bomb Rocks atop their heads, as a reference to the Volatile Dweevils in the original sublevel.
- All sublevels have safe zones marked by green floors where the Waterwraith can't reach.
- The Submerged Castle's signature theme doesn't play, at least at first. A remix of it slowly fades in as the Waterwraith's arrival approaches, slowly taking over the Engulfed Castle's ambient track. It doesn't play at all after the Waterwraith has been defeated, as it no longer appears.
- If the Waterwraith is killed prior to the final sublevel through use of Ice Blasts and Mines, it will respawn anyway on the next sublevel. In Pikmin 2, if the Waterwraith somehow dies before the final sublevel, which is only typically possible through hacking, it would not respawn until the final sublevel.
- After the Waterwraith is defeated, the player can unlock the cave's exit above ground, allowing them to enter the cave with other types. The Waterwraith will also never respawn when defeated, allowing one to take their time on return visits, whereas it respawned regardless in Pikmin 2.
- The second sublevel of this cave is one of few places where a wandering Bulborb can be found, along with the second sublevel of Cavern for a King, and Sun-Speckled Terrace at night.
- Oatchi can enter the cavern even if he does not currently know how to swim, despite the entrance being submerged. Notably, Frozen Inferno, another cavern with an entrance surrounded in a hazard that cannot be destroyed, cannot be entered unless Oatchi is currently flame-proof.
See also[edit]
| Caves in Pikmin 4 | |
|---|---|
| Rescue Command Post | Burrow of Beginnings |
| Sun-Speckled Terrace | Last-Frost Cavern • Crackling Cauldron • Aquiferous Summit • Industrial Maze • Hectic Hollows |
| Blossoming Arcadia | Drafty Gallery • Secluded Courtyard • Sightless Passage • Kingdom of Beasts |
| Serene Shores | Seafloor Resort • Subzero Sauna • Below-Grade Discotheque • Engulfed Castle |
| Hero's Hideaway | Doppelgänger's Den • Frozen Inferno • Plunder Palace |
| Giant's Hearth | Ultimate Testing Range • Dream Home • Cradle of the Beast |
| Primordial Thicket | The Mud Pit • Subterranean Swarm • Cavern for a King |
| Dandori Challenges | Dandori Day Care • Hotshock Canyon • Rockaway Cellars • Test Tubs • Ice-Cross Course • Hefty Haulway • Aerial Incinerator • Strategic Freezeway • Planning Pools • Toggle Training • Cliff-Hanger's Hold • Oasis of Order • Trial of the Sage Leaf |
| Dandori Battles | Trial Run • Battle in a Box • Dandori Castle • Leafy Showdown • Hot Sandy Duel • Final Battle |