Arid Metropolis: Difference between revisions
Jump to navigation
Jump to search
(Added radar texture.) |
GreenPikmin (talk | contribs) No edit summary |
||
| Line 1: | Line 1: | ||
{{game icons|p3=y}} | {{game icons|p3=y}} | ||
[[File:ZlCfzSFvOZIKIUKF-i.jpg|thumb|300px|A portion of Arid Metropolis.]] | [[File:ZlCfzSFvOZIKIUKF-i.jpg|thumb|300px|A portion of Arid Metropolis.]] | ||
| Line 9: | Line 8: | ||
[[File:Map 10 arid metropolis a.jpg|thumb|250px|An overview of Layout A.]] | [[File:Map 10 arid metropolis a.jpg|thumb|250px|An overview of Layout A.]] | ||
This layout gives you Red Pikmin to start with, and Rock Pikmin can be found. | This layout gives you Red Pikmin to start with, and Rock Pikmin can be found. | ||
====Enemies==== | |||
* | *{{icon|Dwarf Bulbear|y|v=P3}} × 10 | ||
* | *{{icon|Female Sheargrub|y|v=P3}} × 8 | ||
* | *{{icon|Spotty Bulbear|y|v=P3}} × 2 | ||
* | ====Plants and fungi==== | ||
* | *{{icon|Pellet Posy|y}} × 22 | ||
* | ====Fruit==== | ||
* | {{columns|2| | ||
* | *{{icon|Citrus Lump|y|v=FF}} × 1 | ||
* | *{{icon|Dapper Blob|y}} × 1 | ||
* | *{{icon|Delectable Bouquet|y}} × 1 | ||
* | *{{icon|Face Wrinkler|y}} × 1 | ||
*{{icon|Golden Sunseed|y}} × 1 | |||
*[[ | *{{icon|Heroine's Tear|y}} × 1 | ||
*[[Crystallized Telepathy| | *{{icon|Insect Condo|y|v=FF}} × 1 | ||
*[[Crystallized Telekinesis| | *{{icon|Portable Sunset|y}} × 1 | ||
*[[ | *{{icon|Sunseed Berry|y|v=FF}} × 1 | ||
*Dirt Wall | *{{icon|Zest Bomb|y}} × 1 | ||
}} | |||
====Other objects==== | |||
*{{icon|Crystallized Clairvoyance}} [[Crystallized Clairvoyance|Blue Marble]] × 1 | |||
*{{icon|Crystallized Telepathy}} [[Crystallized Telepathy|Red Marble]] × 1 | |||
*{{icon|Crystallized Telekinesis}} [[Crystallized Telekinesis|Yellow Marble]] × 2 | |||
====Obstacles==== | |||
*{{crystal wall}} [[Obstacles|Crystal Wall]] × 8 | |||
*{{dirt wall}} [[Obstacles|Dirt Wall]] × 2 | |||
===Layout B=== | ===Layout B=== | ||
[[File:Map 11 arid metropolis b.jpg|thumb|250px|An overview of Layout B.]] | [[File:Map 11 arid metropolis b.jpg|thumb|250px|An overview of Layout B.]] | ||
This layout gives you Rock Pikmin to start with, and Yellow Pikmin can be found. | This layout gives you Rock Pikmin to start with, and Yellow Pikmin can be found. | ||
* | ====Enemies==== | ||
* | *{{icon|Dwarf Red Bulborb|y|v=P3}} × 5 | ||
* | *{{icon|Red Bulborb|y|v=P3}} × 3 | ||
* | ====Plants and fungi==== | ||
* | *{{icon|Pellet Posy|y}} × 22 | ||
* | ====Fruit==== | ||
* | {{columns|2| | ||
* | *{{icon|Citrus Lump|y|v=FF}} × 1 | ||
* | *{{icon|Dusk Pustules|y}} × 1 | ||
* | *{{icon|Face Wrinkler|y}} × 1 | ||
*[[ | *{{icon|Fire-Breathing Feast|y}} × 1 | ||
*[[ | *{{icon|Golden Sunseed|y}} × 1 | ||
*[[ | *{{icon|Slapstick Crescent|y}} × 1 | ||
*{{icon|Stellar Extrusion|y}} × 1 | |||
*{{icon|Sunseed Berry|y|v=FF}} × 1 | |||
*{{icon|Velvety Dreamdrop|y}} × 1 | |||
*{{icon|Zest Bomb|y}} × 1 | |||
}} | |||
====Other objects==== | |||
*{{icon|Crystallized Telepathy}} [[Crystallized Telepathy|Red Marble]] × 1 | |||
====Obstacles==== | |||
*{{crystal wall}} [[Obstacles|Crystal Wall]] × 6 | |||
*[[File:Electric gate P3 icon.png|24px]] [[Obstacles|Electric Gate]] × 4 | |||
===Layout C=== | ===Layout C=== | ||
[[File:Map 12 arid metropolis c.jpg|thumb|250px|An overview of Layout C.]] | [[File:Map 12 arid metropolis c.jpg|thumb|250px|An overview of Layout C.]] | ||
This layout gives you Yellow Pikmin, and Purple Pikmin can be found. | This layout gives you Yellow Pikmin, and Purple Pikmin can be found. | ||
====Enemies==== | |||
* | *{{icon|Armored Cannon Larva|y}} × 8 | ||
* | *{{icon|Burrowing Snagret|y|v=P3}} × 1 | ||
* | *{{icon|Female Sheargrub|y|v=P3}} × 16 | ||
* | ====Plants and fungi==== | ||
* | *{{icon|Pellet Posy|y}} × 1 | ||
* | ====Fruit==== | ||
* | {{columns|2| | ||
* | *{{icon|Dapper Blob|y}} × 1 | ||
* | *{{icon|Face Wrinkler|y}} × 1 | ||
* | *{{icon|Fire-Breathing Feast|y}} × 1 | ||
* | *{{icon|Golden Sunseed|y}} × 1 | ||
*{{icon|Heroine's Tear|y}} × 1 | |||
*[[Crystallized | *{{icon|Slapstick Crescent|y}} × 1 | ||
*[[Crystallized | *{{icon|Sunseed Berry|y|v=FF}} × 1 | ||
*[[Crystallized | *{{icon|Velvety Dreamdrop|y}} × 1 | ||
* | *{{icon|Wayward Moon|y}} × 1 | ||
}} | |||
====Other objects==== | |||
*{{icon|Crystallized Clairvoyance}} [[Crystallized Clairvoyance|Blue Marble]] × 1 | |||
*{{icon|Crystallized Telepathy}} [[Crystallized Telepathy|Red Marble]] × 1 | |||
*{{icon|Crystallized Telekinesis}} [[Crystallized Telekinesis|Yellow Marble]] × 2 | |||
*{{icon|Egg|y}} × 9 | |||
==Gallery== | ==Gallery== | ||
Revision as of 02:38, May 9, 2016
File:ZlCfzSFvOZIKIUKF-i.jpg
A portion of Arid Metropolis.
The Arid Metropolis is the fourth stage of Pikmin 3's Bingo Battle. This stage takes place in an oval-shaped sandbox near a tree. It is possible to get Red Pikmin, Yellow Pikmin, Rock Pikmin, and Purple Pikmin in this stage.
Layouts
Layout A

This layout gives you Red Pikmin to start with, and Rock Pikmin can be found.
Enemies
 Dwarf Bulbear × 10
 Female Sheargrub × 8
 Spotty Bulbear × 2
Plants and fungi
 Pellet Posy × 22
Fruit
 Citrus Lump × 1
 Dapper Blob × 1
 Delectable Bouquet × 1
 Face Wrinkler × 1
 Golden Sunseed × 1
 Heroine's Tear × 1
 Insect Condo × 1
 Portable Sunset × 1
 Sunseed Berry × 1
 Zest Bomb × 1
Other objects
 Blue Marble × 1
 Red Marble × 1
 Yellow Marble × 2
Obstacles
 Crystal Wall × 8
 Dirt Wall × 2
Layout B

This layout gives you Rock Pikmin to start with, and Yellow Pikmin can be found.
Enemies
- [icon] Dwarf Red Bulborb × 5
 Red Bulborb × 3
Plants and fungi
- Pellet Posy × 22
Fruit
- Citrus Lump × 1
 Dusk Pustules × 1
- Face Wrinkler × 1
 Fire-Breathing Feast × 1
- Golden Sunseed × 1
 Slapstick Crescent × 1
 Stellar Extrusion × 1
- Sunseed Berry × 1
 Velvety Dreamdrop × 1
- Zest Bomb × 1
Other objects
- Red Marble × 1
Obstacles
- Crystal Wall × 6
 Electric Gate × 4
Layout C

This layout gives you Yellow Pikmin, and Purple Pikmin can be found.
Enemies
 Armored Cannon Larva × 8
 Burrowing Snagret × 1
- Female Sheargrub × 16
Plants and fungi
- Pellet Posy × 1
Fruit
- Dapper Blob × 1
- Face Wrinkler × 1
- Fire-Breathing Feast × 1
- Golden Sunseed × 1
- Heroine's Tear × 1
- Slapstick Crescent × 1
- Sunseed Berry × 1
- Velvety Dreamdrop × 1
 Wayward Moon × 1
Other objects
- Blue Marble × 1
- Red Marble × 1
- Yellow Marble × 2
 Egg × 9
Gallery
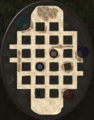
Texture used on the radar.
- Bulbear Screen Shot 2014-06-25 04-12-55.png
The Red Team's Onion in Arid Metropolis.
- Bulbear Screen Shot 2014-06-25 04-12-52.png
The Blue Team's Onion in Arid Metropolis.
- Bulbear Screen Shot 2014-06-25 04-15-00.png
Some buried fruits and some Nectar Eggs.
- Boop.png
A Bulborb in Arid Metropolis.

![[icon]](/index.php?title=Special:Upload&wpDestFile=Dwarf_Red_Bulborb_P3_icon.png)