Secret Spot
|
This article is a stub. You can help Pikipedia by expanding it. |
|
This article or section is in need of more images. |
|
The following article or section contains guides. |
Secret Spots are special areas in Hey! Pikmin. They are much smaller than a regular area, and only contain a single pellet, which usually requires a puzzle or challenge to be completed in order to access. Once the pellet is collected, the area ends immediately, and 8 Pikmin of the same type as the pellet are added to the Pikmin Park. There are 4 Secret Spots per sector, except the final sector, which has none.
The radar does not work in Secret Spots. Pikmin found in Secret Spots are not returned to the Pikmin Park.
Secret Spot 1
- Sector: Sector 1
- Pellet: Red
- Requirements: Complete First Expedition
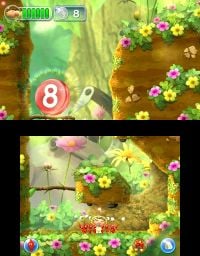
The first Secret Spot has a simple puzzle. The pellet lies on a high platform. You're given 4 Red Pikmin at the start. Olimar and the Pikmin can climb up a vine to reach a platform that's closer to the pellet. This platform is also on the same level as a ledge where a bush with 4 other Red Pikmin is. You should start by whistling the Pikmin from the bush, then climb the vine, throw the starting Pikmin at the pellet, use the jetpack to get to the ledge with the other 4 Pikmin, and throw those as well. Then, it's just a matter of waiting at the ledge.
Secret Spot 2
Secret Spot 3
Secret Spot 4
- Sector: Sector 1
- Pellet: Red
- Requirements: Complete Cherrystone Pass
You start off with 8 Red Pikmin. The pellet is on a branch high up; a fair bit below this branch is another one. While you can throw the Pikmin at the first branch, you have to take a different path to reunite with them. By climbing some ledges to the right using the jetpack, it's possible to reach the platform with the first branch, step by step. Since Pikmin are dismissed when the jetpack is used, the Pikmin must first be thrown at the branch before you head off. After reuniting, it's simply a matter of throwing the Pikmin from the first branch to the second. You will need to climb to the platform connected to the branch in order to catch the pellet.
Secret Spot 5
Secret Spot 6
- Sector: Sector 2
- Pellet: Blue
- Requirements: Complete Serene Stream
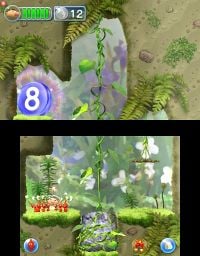
You start with 12 Red Pikmin. The level is simple: the pellet is on a high ledge, and the only way for Olimar and the Pikmin to get within throwing distance is by being lifted by the pulley system. You must get everyone on top of the pulley system's rock (using the whistle will bundle everyone together), and then throw four Pikmin at the pulley. This will be enough to lift Olimar and the other Pikmin. From there, it's a simple matter of throwing the remaining Pikmin at the pellet, and catching it after it falls down.
Secret Spot 7
Secret Spot 8
Secret Spot 9
Secret Spot 10
- Sector: Sector 3
- Pellet: Rock
- Requirements: Complete Echo Cavern
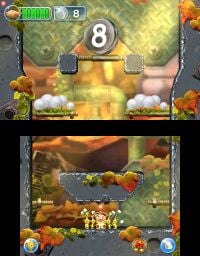
The pellet is behind a wall made of stones. There is a bomb rock that can be used to take down the stones, but unfortunately, the floor Olimar and the Pikmin have to move around is also made of stones. So the demolition needs to be controlled as to only take out the wall, not the floor. There is a small lip made of stone connected to the wall – this is where the bomb rock must be thrown to in order to grant access to the pellet. Before that, however, you have to whistle the 4 Yellow Pikmin hiding in a bush on the top screen. The bomb rock is also on the top screen, and Olimar is on the bottom, so you must use the Yellow Pikmin's high throw arc to get the bomb rock. Blowing up the stone floor will make Olimar fall into the pit, and will result in a failure.
Secret Spot 11
Secret Spot 12
Secret Spot 13
Secret Spot 14
- Sector: Sector 4
- Pellet: Rock
- Requirements: Complete Pollution Pool
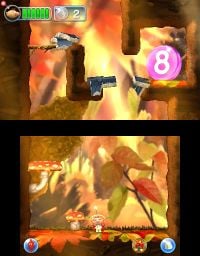
The pellet is on a platform that can be passed through from below. This platform is too high to reach from the starting point, but there is a platform above the starting point that gives Olimar the ability to throw his starting 8 Yellow Pikmin up there. You must climb to that platform using some small platforms on the sides and the jetpack, but before you do so, you must throw the Yellow Pikmin at the dandelions on platforms above the small side platforms mentioned before. This will keep them busy while you take your time climbing. Once you do, whistle the Pikmin back down, and throw them at the pellet. Then, simply wait for them to return.
Secret Spot 15
Secret Spot 16
Secret Spot 17
Secret Spot 18
Secret Spot 19
- Sector: Sector 5
- Pellet: Winged
- Requirements: Complete Gale-Force Glen
You start on the bottom screen, where there are two Bouncy Mushrooms, and the top screen has two platforms with a tiny gap in the middle. The gap must be crossed to reach the pellet as Olimar, but you cannot use the jetpack, because an overhang blocks your way. As such, the built must be constructed using the two fragments right next to it. Simply throw your 2 Red Pikmin to the larger Bouncy Mushroom so they can start working on the bridge, and then jump on the smaller mushroom with the jetpack, to get yourself access to the larger one, where you can join the Pikmin. Once they're done, simply make your way to the pellet.
Secret Spot 20
Secret Spot 21
- Sector: Sector 6
- Pellet: Red
- Requirements: Complete Charred Plains
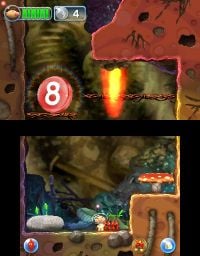
The action takes place on the top screen, where 7 of your Red Pikmin are trapped in a room with a Fiery Blowlet. You start on the bottom screen with one Red Pikmin and a vine to reach the top screen. Make your way up the vine, and open up the room by using your single Pikmin to destroy the sand block blocking the entrance. Now, you can use the 8 Red Pikmin with you to take down the enemy, or leave it alone altogether, and toss your Pikmin to the pellet hanging on the nearby platform.
Secret Spot 22
Secret Spot 23
- Sector: Sector 6
- Pellet: Red
- Requirements: Complete Sizzling Precipice
The pellet is on a platform on the top screen that can be accessed from below. A similar platform to its right leads to the pellet from above, but has a constant fire geyser on it. The player starts with 4 Red Pikmin, and can whistle 4 Yellow Pikmin from the nearby rock. The Yellow Pikmin are the only ones that can reach the pellet's platform, and the Red Pikmin are the only ones that can cross the fire geyser's platform, with the aid of a Bouncy Mushroom placed under it. Start by whistling the Yellow Pikmin out, and then throw the Pikmin to the correct platforms. Then, just wait for the pellet to drop to Olimar. Although the pellet gets close to the fire geyser as it's being carried, it will never touch it or harm the Pikmin.
