Area

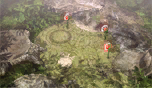
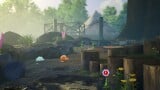
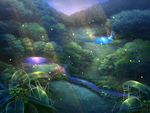
Areas (エリア?, lit.: "Area") are the main explorable locations in the Pikmin games. Each game in the series has a set of areas that can be visited, and these areas provide a range of environments to grow Pikmin, fight enemies, and collect items. Each game features an area selection menu for selecting which area to go to from the areas unlocked. In the main games, this menu is shown at the beginning of each day, and it is not possible to change the area one is exploring during a day.
In each game, the leaders will only be able to access a single area initially, but over the course of the game, more areas will be unlocked. For example, to access to the Perplexing Pool in Pikmin 2, a specific treasure, the Geographic Projection, must be collected. Gaining access to new areas is a major form of progression through the games.
Areas function differently in each game in the series. In the main games, areas are 3D environments with various rooms and corridors connected non-linearly, while in Hey! Pikmin, areas are linear standalone levels, and are organized into groups called sectors, of which there are 9. The items that are collected in areas vary by game as well. In Pikmin, ship parts are scattered around the 5 areas. In Pikmin 2, areas contain treasure and several caves, which contain more treasure. In Pikmin 3, 4 of the 5 areas contain fruit, while the last area is a standalone challenge. In Pikmin 4, areas have treasure, raw material, and caves which hold treasure, raw materials, and castaways, or occasionally are Dandori Challenges or Dandori Battles. In Hey! Pikmin, each area contains 1–4 treasures.
List[edit]
Pikmin[edit]

Pikmin 2[edit]

Pikmin 3[edit]
Pikmin 4[edit]

Hey! Pikmin[edit]
Areas in Hey! Pikmin are much smaller, and grouped into sectors. Each area has a level code that indicates its sector and its placement within the sector. Areas with an "E" in the code are boss areas; areas with an "X" in the level code are secret areas. The last sector only has 1 area, which is a boss area. Sectors also contain Secret Spots and Sparklium Springs.

Unlocking[edit]

The method used to unlock areas in each game differs. One area is unlocked from the start, but the others can only be accessed after certain conditions are met.
In Pikmin, areas are unlocked through collecting ship parts, the main collectible. The number of parts required to access each area is 1 for The Forest of Hope, 5 for The Forest Navel, 12 for The Distant Spring, and 29 for The Final Trial.
In Pikmin 2, the Awakening Wood and the Perplexing Pool are unlocked by collecting the Spherical Atlas and Geographic Projection respectively, while the Wistful Wild is unlocked by collecting ![]() × 10000 worth of treasure (after the previous areas have been unlocked).
× 10000 worth of treasure (after the previous areas have been unlocked).
In Pikmin 3, unlocking each area is tied to collecting a specific item. The Garden of Hope is unlocked by finding the S.S. Drake and completing day 1, the Distant Tundra is unlocked by collecting the Data Glutton, the Twilight River is unlocked by collecting the Folded Data Glutton, and the Formidable Oak is unlocked by collecting Louie for the second time. (To note is that although the Tropical Wilds is unlocked from the start, it cannot be landed in after day 1 before rescuing Brittany.)
In Pikmin 4, areas are unlocked by collecting a certain amount of Sparklium. The Sun-Speckled Terrace, Blossoming Arcadia, and Serene Shores are unlocked by collecting ![]() × 300,
× 300, ![]() × 1,500 and
× 1,500 and ![]() × 4,000 respectively. The three remaining areas of the game require an additional condition to be unlocked: the Hero's Hideaway requires
× 4,000 respectively. The three remaining areas of the game require an additional condition to be unlocked: the Hero's Hideaway requires ![]() × 7,000 and rescuing Bernard to be unlocked, the Giant's Hearth requires
× 7,000 and rescuing Bernard to be unlocked, the Giant's Hearth requires ![]() × 11,000 and rescuing Olimar to be unlocked, and the Primordial Thicket requires
× 11,000 and rescuing Olimar to be unlocked, and the Primordial Thicket requires ![]() × 13,000 and rescuing Yorke and Don Bergman to be unlocked. Unlocking areas in Olimar's Shipwreck Tale requires collecting a specific amount of ship parts: 2 for the Blossoming Arcadia, 8 for the Serene Shores, and 23 for the Hero's Hideaway.
× 13,000 and rescuing Yorke and Don Bergman to be unlocked. Unlocking areas in Olimar's Shipwreck Tale requires collecting a specific amount of ship parts: 2 for the Blossoming Arcadia, 8 for the Serene Shores, and 23 for the Hero's Hideaway.
In Hey! Pikmin, areas are unlocked by completing the previous area. Some areas have a secret exit which unlocks a different area to the standard exit, but both the standard next area and the secret next area will lead to the same area after that. Sectors are unlocked by completing the boss area in the previous sector, except for the final sector, which additionally requires collecting ![]() × 30,000.
× 30,000.
Features[edit]

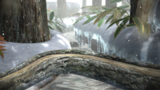
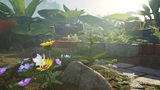
In the main games of the Pikmin series, areas have consistent features in their design. They have a landing site where the Onion(s) and ship land at the beginning of the day, and these are usually connected in several directions to spaces nearby. Most spaces center around a certain enemy or theme. There are often obstacles between spaces that may increase the time it takes to get there or to restrict access to it until a certain Pikmin type is unlocked. There are also some spaces that function more as corridors between other spaces. There are often large loops in areas that provide multiple ways to access a part of the area. In Pikmin 3, areas are divided into separated segments, with special connections that teleport leaders and Pikmin between them. In Pikmin 4, the aforementioned landing site takes on the form of multiple bases per area.
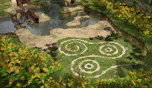
Base[edit]

In Pikmin 4, each area has multiple bases for the ship and the Onion to land in. A base is marked with several glowing pink rocks on the floor making up the shape of two rings, one where the S.S. Beagle or S.S. Dolphin sits, and one where the Onion goes. Each base is given a name and a number based on the landmarks around it, though these are fixed, meaning the number doesn't reflect the order in which players find bases. When landing on the area for the first time, the player will always arrive at base #1. As the player comes across new bases, they get added to the list of unlocked bases for that area. Some bases are blocked off by something, usually an enemy, which needs to be cleared before that base can be unlocked. Despite having multiple bases meaning the player has multiple spots to land in, the game will force the player to land at the most-recently used base for that area at the start of each day.
To select a different base as the one that the ship and Onion should currently use, the player needs to go up to an unused base and press ![]() /
/ ![]() . This will make the screen fade to and from black, and when the scene returns, the ship and Onion will be just about finished with landing in the new base. Any Pikmin or leader near the Onion or ship will be instantly transported inside the ship towards the new spot. Any Pikmin that were busy carrying things will readjust their trajectory towards the new base after a second.
. This will make the screen fade to and from black, and when the scene returns, the ship and Onion will be just about finished with landing in the new base. Any Pikmin or leader near the Onion or ship will be instantly transported inside the ship towards the new spot. Any Pikmin that were busy carrying things will readjust their trajectory towards the new base after a second.
Unlocking a base also allows it to be used in a night expedition, provided there is an available night expedition at that base. Some larger cave sublevels and the Hefty Haulway Dandori Challenge also have multiple bases, though these are only marked with a single ring for the ship, since the Onion does not go underground. The Rescue Command Post's bases are unique in that the player cannot change them, and they are not marked, despite being recognized independently in the radar. The rocks of bases that have not been unlocked are a dim red, and they turn bright pink when unlocked.
Segment[edit]
In Pikmin 3, areas are split into multiple segments. When a leader, Pikmin, or an object carried by Pikmin touch an invisible portal,[1] they are transported to the equivalent portal, in another segment of the area. For the most part, these segments separate the outdoors parts of an area from the tunnels and small caverns that can be explored, though some segments also exist for small enclosures, interesting plateaus, or corridors leading into boss arenas, among other things. The act of being transported in a portal saves the player some otherwise uninteresting travel time, but besides that, segmenting the area allows the game to only focus on the segment the player or Pikmin are on, and can save on processing and rendering segments that are irrelevant. Via the use of glitches, one can make the game show parts of a segment that aren't loaded entirely, or are missing geometry.
When the player's active leader goes through a portal, the screen goes through an iris out transition, and then an iris in transition in the new segment. The camera's behavior after this depends on a few circumstances, as explained here. This transition does not happen for other things that go through portals, and instead they simply appear at the destination instantly. The player can find where a portal leads by checking the radar – in the Wii U version of Pikmin 3, they can even tap on the portal's icon on the GamePad to pan the radar towards the equivalent portal. In reality, to make sure the player doesn't get transported back and forth endlessly, the destination of a portal is usually somewhere in front of the equivalent portal. In modes with a timer, transitioning through a portal also stops the timer momentarily, as explained here.
Terrain[edit]
Terrain varies between games, areas, and sections of areas. It has no real impact on gameplay, but it does change the atmosphere and the sounds of footsteps on the ground. Some enemies are associated with particular types of terrain.
Pikmin[edit]

Most areas in Pikmin have natural surfaces such as sand, soil and wood.
- Natural
- Grass: Found in most areas.
- Soil: This is what the leader and his Pikmin will be walking on for a majority of the time. Soil is found in every area in the game.
- Sand: Usually, when there is water, there is sand, especially in The Distant Spring. In it, about half the amount of land is submerged in water, and that amount of land is sand. It can also be found in the small pond area in The Impact Site and the large lake in The Forest Navel.
- Stone: The rimstone lake section of The Forest Navel is mostly made of stone. Some sections of The Impact Site include stone. Most of the general area surrounding The Distant Spring is made out of mossy cut stone.
- Wood: Various tree stumps can be found in the game – in The Impact Site, The Forest of Hope and The Distant Spring. Bridges are made out of wood and can be walked on.
- Man-made
- Cardboard: The cardboard boxes in The Impact Site, The Forest of Hope and The Final Trial can be walked on by using a nearby rock as a platform.
- Rusted metal: In The Final Trial, large slabs of rusted metal are used to cross the body of water separating the landing site from the area where the player battles against the Emperor Bulblax, which actually takes place in a large metal "bowl" like arena. This metal bowl arena is actually a sideways rusty tire rim.
Pikmin 2[edit]

In Pikmin 2, the player will find a vast array of different types of terrain.
- Natural
- Snow: In some caverns, one may find the area to be covered in a blanket of snow. This terrain can be found in the Valley of Repose and its respective caverns.
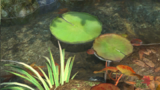
- Grass: A common terrain, mostly found in above ground areas, with the Awakening Wood being a common example. Grass-like terrain can be found in the Perplexing Pool; however, considering the area's aquatic nature, it's possible that it's actually moss.
- Wood: As in the first game, tree stumps can be found, most notably in the Perplexing Pool.
- Sand: The Perplexing Pool has sand surrounding its lakes, and the concrete cave theme also uses sand as terrain.
- Mud: Mud can be found near the pothole cover of the Valley of Repose, and the surface around the entrance to the Hole of Heroes appears to also be made of mud.
- Man-made
- Concrete: Can be found in a few areas; most of the Valley of Repose is formed from concrete. This is due to it being a crosswalk of sorts.
- Tile: This style consists of simple turquoise-colored tile filled floors and walls, which have sand filled in between each tile. Areas with this style usually have water, which is typically found in small descents of ground. The tiles may be interrupted by sand or a metallic floor.
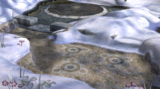
- Stone formations: Inside the Perplexing Pool, there are odd stones formations that are mysteriously shaped, some of which are walk-able. These odd formations range from simple pathways to maze-like structures.
- Seesaw blocks: In several areas, there are sets of seesaw blocks. They can be used to lift Pikmin and the leaders to higher areas, and several sets of these scales must be navigated to obtain treasure.
- Rusted metal: The landing area of the Wistful Wild is actually an old road sign, in addition to being on top of a sideways rusty tire rim. The fire path that was made of rusty metal from The Final Trial can also be considered a metallic surface. There is rusty metal that can be found by the White Flower Garden's entrance. There is also the metal theme for caves that is made almost entirely out of rusted metal.
- Dirty metal: There is a set of corridors made out of metal pipes commonly used with the tile theme for caves mentioned above. These pipes don't appear to be corroded, but are dirty instead.
Pikmin 3[edit]

- Natural
- Glass: Shards of glass and large crystal formations are present and can serve as obstacles or have valuable items encased inside of them. They can be shattered by being continuously hit with Rock Pikmin.
- Sand: Sand flooring exists in the Tropical Wilds. There is also plenty of sand in several areas of Mission Mode and Bingo Battle.
- Wood: There are multiple places where wood is incorporated into the terrain. In the Tropical Wilds, wood is accessible to walk on, but has no special features. In the Distant Tundra, frozen wood is incorporated as well as a walkway to the cave where Charlie is rescued. Some clipboards can also be walked on.
- Snow: In the Distant Tundra, snow can be found blanketing much of the area. It makes a crunching sound when leaders walk on it, similar to that in Pikmin 2.
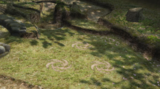
- Grass: The most common terrain, it covers most floors of areas and has no special qualities.
- Rock: Caves are structured from rock, and types range from simple brown rock, similar to that in Pikmin and Pikmin 2, to odd moss-covered rock, looking like granite.
- Mud: Terrain that exists primarily in the Garden of Hope, mainly in the arena of the Quaggled Mireclops. This terrain may change from water back to mud by the boss' stomps.
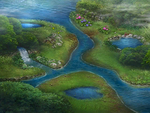
- Lily pads: Lily pads drift along rivers in the Twilight River, allowing leaders and Pikmin to travel across it and find more segments.
- Man-made
- Ceramics: All of the bridges in Pikmin 3 are constructed from ceramic objects.
- Tile: Simple tiling that has sand filled between the cracks. Similar to that in Pikmin 2, but it is only present in very few places.
- Buckets: A large bucket serves as a bridge to the Quaggled Mireclops' arena. In some Bingo Battle stages, plastic buckets can be found under the Onions.
- Scales: A set of scales can be found in areas in both Story and Mission Mode. These scales have a redesign from Pikmin 2, and can be used to get to fruits and to further segments.
- Rusted metal: Metal similar to that in Pikmin 2, but darker and with less or more rust.
- Pipes: They are unique ways of transport in the Bingo Battle area Rusted Labyrinth. They allow leaders to slide to lower areas, while geysers can transport them back up to the upper areas.
- Conveyor belts: Conveyor belts are unique ways of transport in the Mission Mode area Clockwork Chasm, with switches to change the direction of movement. These switches can be activated using Pikmin.
- Bricks: Self-explanatory. Some are found in the Twilight River and cannot be interacted with.
- Foam: All of the Jigsaw Colosseum and Jigsaw Fortress stages in Bingo Battle are both set on top of foam puzzle-piece mats.
- Cake frosting: The top of a cake is accessible by geyser on the Collect Treasure! variant of the Fortress of Festivity.
- Pizza: A pizza can be found on the Collect Treasure! variant of the Fortress of Festivity and can be walked on.
- Cardboard: Alongside the pizza in the Collect Treasure! variant of the Fortress of Festivity, is a circular cardboard pizza box that the pizza is located inside.
Hey! Pikmin[edit]
In Hey! Pikmin, the player can find a fairly large variety of environments. Each sector of the game features a unique environment, which serves to set the ambience. However, some areas vary from the atmosphere of the sector where they're located.
- Brilliant Garden: The first sector of the game has rather common terrain, made of grass and foliage.
- Verdant Waterfront: This sector mainly focuses on water environments, such as lakes, as well as all the plant-life terrain found around lakes.
- Sparkling Labyrinth: A rocky sector, with terrain made of rocks and crystals.
- Ravaged Rustworks: This sector features human-made materials, such as metal pipes and tubes.
- Leafswirl Lagoon: The environment of this sector is pretty focused on autumn, with the terrain being mostly dead leaves and dirt.
- Sweltering Parchlands: This sector is mostly themed around fire, so the terrain consists of dirt, coal, and burned vegetation.
- Snowfall Field: The exact opposite of the previous sector; this time, snow makes up most of the terrain, and this area symbolizes winter.
- Lushlife Murk and The Final Stretch: The last areas are focused on poisoned environments; the terrain usually consists of barren dirt and rock.
Relations[edit]
Though not directly confirmed, it is heavily implied that some areas in Pikmin 2 are actually areas from Pikmin, albeit changed. The Awakening Wood has the same layout as The Forest of Hope. It has been implied by Olimar that these are the same location, as read on his journal about the Geographic Projection.[2] Likewise, the Perplexing Pool shares the same layout as The Distant Spring, with some changes (such as the concrete section at the landing site). The Wistful Wild is a combination of The Impact Site and The Final Trial, with some new terrain connecting the areas. The Valley of Repose is not a remade version of The Forest Navel or any other area from the first Pikmin game and is completely new.
All areas in Pikmin 3 are original, while the forest shown in the title screen is almost the same as the western path of the Awakening Wood. This is best seen with a model viewer, because of the water and angles. This comparison is detailed here. The Mission Mode stage Forgotten Cove is a remade version of the The Forest Navel.
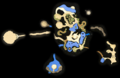
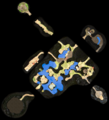
The Forest of Hope's radar pattern on top of a map of the Awakening Wood.
The Distant Spring's radar pattern on top of a map of the Perplexing Pool.
The Impact Site and The Final Trial's radar patterns on top of a map of the Wistful Wild.
Animation comparing the Pikmin 3 title screen with the Awakening Wood.


Gallery[edit]
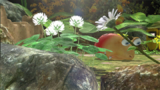
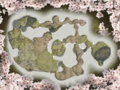
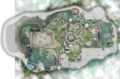
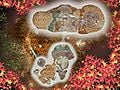
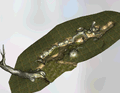
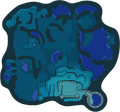
A map of The Impact Site.
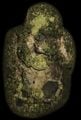
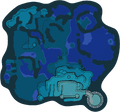
A map of The Forest of Hope.
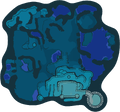
A map of The Forest Navel.
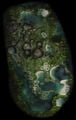
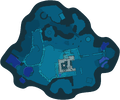
A map of The Distant Spring.
A map of The Final Trial.
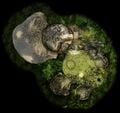
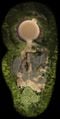
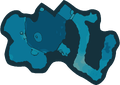
A map of the Valley of Repose.
A map of the Awakening Wood.
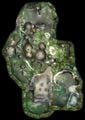
A map of the Perplexing Pool.
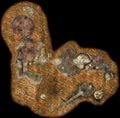
A map of the Wistful Wild.
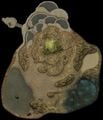
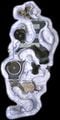
A map of the Tropical Wilds.
A map of the Garden of Hope.
A map of the Distant Tundra.
A map of the Twilight River.
A map of the Formidable Oak.
A map of the Rescue Command Post.
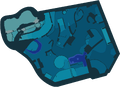
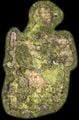
A map of the Sun-Speckled Terrace.

A map of the Sun-Speckled Terrace in Olimar's Shipwreck Tale.
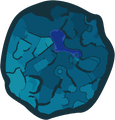
A map of the Blossoming Arcadia.
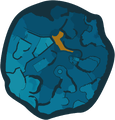
A map of the Blossoming Arcadia in Olimar's Shipwreck Tale.
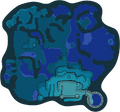
A map of the Serene Shores before noon.
A map of the Serene Shores after noon.
A map of the Serene Shores before noon in Olimar's Shipwreck Tale.
A map of the Serene Shores after noon in Olimar's Shipwreck Tale.

A map of the Hero's Hideaway.

A map of the Hero's Hideaway in Olimar's Shipwreck Tale.
A map of the Giant's Hearth.
A map of the Primordial Thicket.


Trivia[edit]
- The main areas in Pikmin 2 and Pikmin 3 each represent a season: the Valley of Repose and the Distant Tundra are winter, the Awakening Wood and the Garden of Hope are spring, the Perplexing Pool and Tropical Wilds are summer, and the Wistful Wild and Twilight River are autumn.
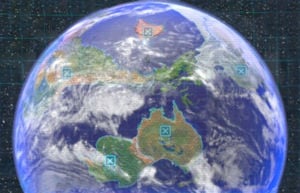
- The main areas in Pikmin 3 are also each located on a different continent of Earth: the Tropical Wilds is in Antarctica, the Garden of Hope is in Australia, the Distant Tundra is in Asia, and the Twilight River is in South America. The Formidable Oak is based on Greenland, though in the current-day location instead of Pangaea Proxima's.
- The names of the areas in Pikmin 3 all have the same number of characters (including spaces) – 14.
- In Pikmin and Pikmin 2, some meteors occasionally appear on the area selection menu's sky. A large cluster of them temporarily appears when the last area of each game is unlocked.
- Pikmin Bloom does not have areas, though since the game takes place on a map of the real world, it could be argued that the entirety of Earth is its single area, which would make it the largest area in the series.
Names in other languages[edit]
Area
| Language | Name | Meaning | Notes |
|---|---|---|---|
| エリア? Eria |
Area | ||
(traditional) |
地區 區域 Dìqū Qūyù |
Area | Used in Pikmin 3. Used in Pikmin 4. |
(simplified) |
区域 Qūyù |
Area | |
| Gebied | Area | ||
| Région Zone |
Region Zone |
Used in Pikmin, Pikmin 2 and Pikmin 4. Used in Pikmin 3. | |
| Region Gebiet |
Region | Used in Pikmin. Used in Pikmin 2, Pikmin 3 and Pikmin 4. | |
| Area | Area | ||
| 지역 jiyeog |
Area | ||
| Área | Area | ||
| Zona | Zone |
Surface
| Language | Name | Meaning |
|---|---|---|
| 地上? Chijō |
Above-ground | |
(traditional) |
地上 Dìshang |
Above-ground |
(simplified) |
地上 Dìshang |
Above-ground |
| Bovengronds | Above-ground | |
| Surface | Surface | |
| Oberfläche | Surface | |
| Superficie | Surface | |
| 지상 jisang |
Above-ground | |
| Superfície | Surface | |
| Superficie | Surface |
Base
| Language | Name | Meaning |
|---|---|---|
| 拠点? Kyoten |
Base | |
(traditional) |
據點 Jùdiǎn |
Base |
(simplified) |
据点 Jùdiǎn |
Base |
| Kamp | Camp | |
| Base | Base | |
| Basis | Base | |
| Base | Base | |
| 거점 geojeom |
Base | |
| Base | Base | |
| Base | Base |
Sector
|
Area (Hey! Pikmin)
|
See also[edit]
References[edit]
- ^ In the game files, the object's data is in
/content/CMCmn/object/portal.szs. - ^ “The interior of this hemisphere contains a chip coded with charts detailing a new region. I explored this forest the last time I was here, but it's clear that it has undergone some dramatic changes. The plants and animals have also evolved significantly. I've given this forest a new name... The Awakening Wood. I must begin to form a hypothesis to explain why the forest changed so rapidly.” – Captain Olimar in Olimar's journal for the Geographic Projection
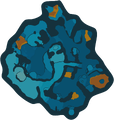
| Pikmin areas |
|---|
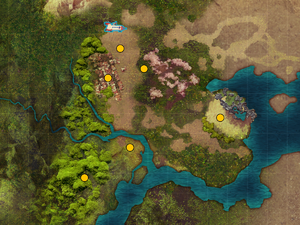
 Click an area on the image
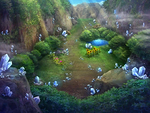
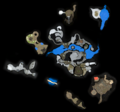
The Impact Site • The Forest of Hope • The Forest Navel • The Distant Spring • The Final Trial animtest • codetest • E3play_3 • map_06 • play_4 • route • shapetst • testmap • tuto1 • tuto2 |
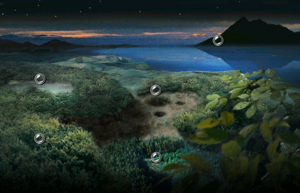
| Pikmin 2 areas |
|---|
 Click an area on the image
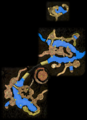
Valley of Repose • Awakening Wood • Perplexing Pool • Wistful Wild |
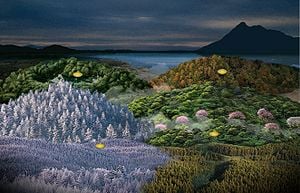
| Pikmin 3 areas |
|---|
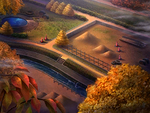
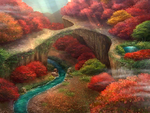
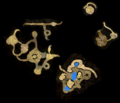
 Click an area on the image Tropical Wilds • Garden of Hope • Distant Tundra • Twilight River • Formidable Oak |
| Pikmin 4 areas |
|---|
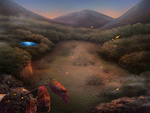
 Click an area on the image Rescue Command Post • Sun-Speckled Terrace • Blossoming Arcadia • Serene Shores • Hero's Hideaway • Giant's Hearth • Primordial Thicket |
| Hey! Pikmin sectors |
|---|
| Brilliant Garden • Verdant Waterfront • Sparkling Labyrinth • Ravaged Rustworks • Leafswirl Lagoon • Sweltering Parchlands • Snowfall Field • Lushlife Murk • The Final Stretch |