Stagnant Sea: Difference between revisions
(fix filename) |
m (Replaced P2 Marble icons with P3 equivalents.) |
||
| (23 intermediate revisions by 9 users not shown) | |||
| Line 1: | Line 1: | ||
{{game icons|p3=y}} | {{game icons|p3=y}} | ||
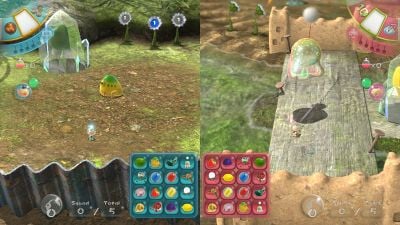
[[File:Stagnant Sea P3 gameplay.jpg|thumb|400px|Gameplay screenshot.]] | [[File:Stagnant Sea P3 gameplay.jpg|thumb|400px|Gameplay screenshot.]] | ||
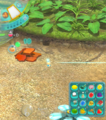
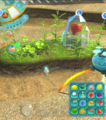
'''Stagnant Sea''' is | '''Stagnant Sea''' is the 2<sup>nd</sup> stage of ''[[Pikmin 3]]''<nowiki> '</nowiki>s [[Bingo Battle]]. It seems to take place in some sort of marsh. This is the first stage to have water, which covers ~50% of the area. The main path to the opponent's side is either blocked by enemies, [[dirt wall]]s or both, making it a little difficult for either player to reach their opponent. [[Grub-dog]]s litter the fields and some aquatic enemies make the water bodies dangerous to traverse too. It is possible to get [[Red Pikmin]], [[Blue Pikmin]], and [[Rock Pikmin]] in this stage. | ||
==Overview== | |||
The Stagnant Sea seems to take place in a marsh like area, with various man-made objects littered about both in and out of the playable area. There are three main land masses, with two of them housing each of the player's Onions. These are separated by water but are connected by two [[bridge]]s and a wooden plank that acts as a bridge. The map is very symmetrical with only aesthetics and decorations being the differences. In all 3 layouts, the main similarity is the presence of members of the [[grub-dog family]], either being [[Bulborb]]s, and their varieties, or [[Water Dumple]]s. [[Yellow Wollywog]]s also appear in each layout along with their larval form, the [[Wogpole]]. In the water at each side of the map is a discarded, muddied boot, either standing or laying on its side. The presence of these, along with tires, cones and metal poles, suggests that this stage takes place near or in civilization, which is a common theme within the Bingo Battle maps. | |||
==Layouts== | ==Layouts== | ||
The layout unlock order, as explained [[Bingo Battle#Maps|here]], is C, B, A. | |||
===Layout A=== | ===Layout A=== | ||
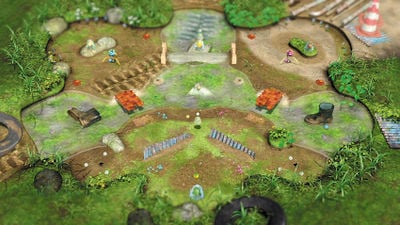
[[File:Stagnant sea.png|thumb|400px|Layout A.]] | [[File:Stagnant sea.png|thumb|400px|Layout A.]] | ||
This layout gives | |||
This layout gives players [[Red Pikmin]] to start with, and [[Blue Pikmin]] can be found. The main path in blocked by [[dirt wall]]s and an [[Orange Bulborb]]. | |||
'''Enemies''': | |||
{{columns|2| | {{columns|2| | ||
*{{icon|Dwarf | *{{icon|Bulborb|y|v=P3}} × 2 | ||
*{{icon|Dwarf Bulborb|y|v=P3}} × 4 | |||
*{{icon|Orange Bulborb|y|v=P3}} × 1 | *{{icon|Orange Bulborb|y|v=P3}} × 1 | ||
*{{icon|Skitter Leaf|y|v=P3}} × 3 | *{{icon|Skitter Leaf|y|v=P3}} × 3 | ||
*{{icon|Swooping Snitchbug|y|v=P3}} × 1 | *{{icon|Swooping Snitchbug|y|v=P3}} × 1 | ||
| Line 18: | Line 25: | ||
*{{icon|Yellow Wollywog|y|v=P3}} × 2 | *{{icon|Yellow Wollywog|y|v=P3}} × 2 | ||
}} | }} | ||
'''Fruits''': | |||
{{columns|2| | {{columns|2| | ||
*{{icon|Citrus Lump|y|v=FF}} × 1 | *{{icon|Citrus Lump|y|v=FF}} × 1 | ||
| Line 29: | Line 34: | ||
*{{icon|Insect Condo|y|v=FF}} × 1 | *{{icon|Insect Condo|y|v=FF}} × 1 | ||
}} | }} | ||
*{{icon| | '''Marbles''': | ||
*{{icon| | *{{icon|Blue Marble|v=P3}} [[Crystallized Clairvoyance|Blue Marble]] × 1 | ||
*{{icon| | *{{icon|Red Marble|v=P3}} [[Crystallized Telepathy|Red Marble]] × 1 | ||
= | *{{icon|Yellow Marble|v=P3}} [[Crystallized Telekinesis|Yellow Marble]] × 2 | ||
'''Tools''': | |||
*{{icon|Bridge|v=P3|y}} (red) × 2 | |||
*{{icon|Fragment|y}} (red) × 40 (4 groups of 10) | |||
'''Obstacles''': | |||
*{{icon|Dirt wall|y}} × 2 | *{{icon|Dirt wall|y}} × 2 | ||
*{{icon| | *{{icon|Water body|y}} × 2 | ||
*{{icon| | |||
'''Plants and fungi''': | |||
*{{icon|Egg|y}} × 8 | *{{icon|Pellet Posy|v=P3}} [[Pellet Posy|1-Pellet Posy]] × 16 | ||
*{{icon|Pellet Posy|v=P3}} [[Pellet Posy|5-Pellet Posy]] × 2 | |||
'''Other objects''': | |||
*{{icon|Egg|v=P3|y}} × 8 | |||
===Layout B=== | ===Layout B=== | ||
[[File:Map 05 stagnant sea b.jpg|thumb|400px|Layout B.]] | [[File:Map 05 stagnant sea b.jpg|thumb|400px|Layout B.]] | ||
This layout gives | |||
This layout gives players Blue Pikmin to start with, and [[Rock Pikmin]] can be found. The main path is blocked by [[dirt wall]]s and a [[Medusal Slurker]]. | |||
'''Enemies''': | |||
{{columns|2| | {{columns|2| | ||
*{{icon|Desiccated Skitter Leaf|y}} × 4 | *{{icon|Desiccated Skitter Leaf|y}} × 4 | ||
| Line 55: | Line 72: | ||
*{{icon|Yellow Wollywog|y|v=P3}} × 1 | *{{icon|Yellow Wollywog|y|v=P3}} × 1 | ||
}} | }} | ||
'''Fruits''': | |||
{{columns|2| | {{columns|2| | ||
*{{icon|Face Wrinkler|y}} × 1 | *{{icon|Face Wrinkler|y}} × 1 | ||
| Line 64: | Line 80: | ||
*{{icon|Zest Bomb|y}} × 1 | *{{icon|Zest Bomb|y}} × 1 | ||
}} | }} | ||
*{{icon| | '''Marbles''': | ||
*{{icon| | *{{icon|Red Marble|v=P3}} [[Crystallized Telepathy|Red Marble]] × 1 | ||
*{{icon| | *{{icon|Blue Marble|v=P3}} [[Crystallized Clairvoyance|Blue Marble]] × 1 | ||
= | *{{icon|Yellow Marble|v=P3}} [[Crystallized Telekinesis|Yellow Marble]] × 2 | ||
'''Tools''': | |||
*{{icon|Bridge|v=P3|y}} (red) × 2 | |||
*{{icon|Fragment|y}} (red) × 40 (4 groups of 10) | |||
'''Obstacles''': | |||
*{{icon|Dirt wall|y}} × 2 | |||
*{{icon|Crystal nodule|y}} × 6 | *{{icon|Crystal nodule|y}} × 6 | ||
*{{icon|Large crystal|y}} × 4 | *{{icon|Large crystal|y}} × 4 | ||
*{{icon| | *{{icon|Water body|y}} × 2 | ||
*{{icon| | |||
'''Plants and fungi''': | |||
*{{icon|Pellet Posy|v=P3}} [[Pellet Posy|1-Pellet Posy]] × 22 | |||
===Layout C=== | ===Layout C=== | ||
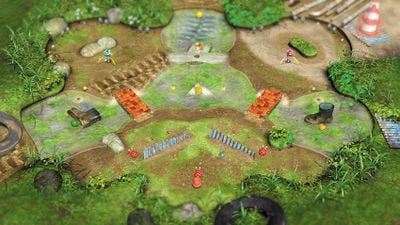
[[File:Map 06 stagnant sea c.jpg|thumb|400px|Layout C.]] | [[File:Map 06 stagnant sea c.jpg|thumb|400px|Layout C.]] | ||
This layout gives | |||
This layout gives players Blue Pikmin to start with, and no other Pikmin can be found. Unlike the other two layouts, there is no walls blocking the main path and the [[bridge]]s are already built. | |||
'''Enemies''': | |||
{{columns|2| | {{columns|2| | ||
*{{icon|Dwarf | *{{icon|Bulborb|y|v=P3}} × 3 | ||
*{{icon|Dwarf Bulborb|y|v=P3}} × 4 | |||
*{{icon|Hermit Crawmad|y|v=P3}} × 2 | *{{icon|Hermit Crawmad|y|v=P3}} × 2 | ||
*{{icon|Medusal Slurker|y}} × 1 | *{{icon|Medusal Slurker|y}} × 1 | ||
*{{icon|Skeeterskate|y}} × 2 | *{{icon|Skeeterskate|y}} × 2 | ||
*{{icon|Wogpole|y|v=P3}} × 9 | *{{icon|Wogpole|y|v=P3}} × 9 | ||
*{{icon|Yellow Wollywog|y|v=P3}} × 2 | *{{icon|Yellow Wollywog|y|v=P3}} × 2 | ||
}} | }} | ||
'''Fruits''': | |||
{{columns|2| | {{columns|2| | ||
*{{icon|Citrus Lump|y|v=FF}} × 1 | *{{icon|Citrus Lump|y|v=FF}} × 1 | ||
| Line 99: | Line 124: | ||
*{{icon|Zest Bomb|y}} × 1 | *{{icon|Zest Bomb|y}} × 1 | ||
}} | }} | ||
*{{icon| | '''Marbles''': | ||
*{{icon| | *{{icon|Red Marble|v=P3}} [[Crystallized Telepathy|Red Marble]] × 1 | ||
*{{icon| | *{{icon|Blue Marble|v=P3}} [[Crystallized Clairvoyance|Blue Marble]] × 1 | ||
= | *{{icon|Yellow Marble|v=P3}} [[Crystallized Telekinesis|Yellow Marble]] × 2 | ||
*{{icon| | |||
'''Tools''': | |||
*{{icon|Egg|y}} × 4 | *{{icon|Bridge|v=P3|y}} (red) × 2 | ||
'''Obstacles''': | |||
*{{icon|Water body|y}} × 2 | |||
'''Plants and fungi''': | |||
*{{icon|Pellet Posy|v=P3}} [[Pellet Posy|1-Pellet Posy]] × 16 | |||
'''Other objects''': | |||
*{{icon|Egg|v=P3|y}} × 4 | |||
==Gallery== | ==Gallery== | ||
<gallery> | <gallery> | ||
Stagnant Sea radar.png|Texture used on the [[radar]]. | Stagnant Sea radar.png|Texture used on the [[radar]]. | ||
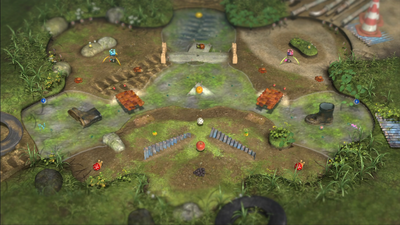
Stagnant Sea overview.png|Another view of Layout C, in the [[Promotional material|E3 2013 stage demo]]. | Stagnant Sea overview.png|Another view of Layout C, in the [[Promotional material|E3 2013 stage demo]]. | ||
P3d - Stagnant Sea Onions.jpg|The [[Onion]]s of both teams. | |||
Stagnant Sea P3 Medusal Slurker.png|A [[Medusal Slurker]] above the beam connecting the two team's sides. | |||
Stagnant Sea P3 Face Wrinkler in crystal.png|The same beam, with a [[Face Wrinkler]] encased in [[crystal]]. | |||
Stagnant Sea P3 Medusal Slurker landmass.png|A Medusal Slurker above the landmass separate from the two teams. Some of the pink team's [[Rock Pikmin]] are buried in the distance. | |||
Stagnant Sea P3 Pellet Posies.png|Several [[Pellet Posy|Pellet Posies]] in the back of the landmass with tire tracks. | |||
Stagnant Sea P3 dirt wall.png|A [[dirt wall]] in the landmass with tire tracks, which run the length of the landmass. | |||
Stagnant Sea P3 Boot and Water Dumples.png|[[Water Dumple]]s and a boot off the shore of the tire-tracked landmass. | |||
Stagnant Sea P3 Boot.png|A view of the boot from the landmass separate from the two teams' sides. | |||
Stagnant Sea P3 Red Marble.png|A Red Marble in the sole of the same boot. Items are normally hidden inside it. | |||
Stagnant Sea P3 foliage.png|Foliage in the separate landmass, along with [[Crystal|crystal nodules]]. | |||
Stagnant Sea P3 sandy landmass.png|One team's sandier landmass behind the boot, without tire tracks. An encased [[Sunseed Berry]] lies just behind the Onion. | |||
Stagnant Sea P3 sandy landmass back.png|The back of the sandy landmass, with Pellet Posies growing, and construction equipment and a boot print in the background. | |||
Stagnant Sea P3 brick fragments.png|[[Fragments]] on the sandy landmass. | |||
Stagnant Sea P3 Sunseed Berry.png|A Sunseed Berry trapped in a crystal. | |||
</gallery> | </gallery> | ||
==Names in other languages== | |||
{{foreignname | |||
|Ger=Quell des Ursprungs | |||
|GerM=Source of Origin | |||
|GerN=Here as a Source of Water | |||
|Spa=Alberca Prodigiosa | |||
|SpaM=Prodigious Pool | |||
|Fra=Soupe primordiale | |||
|FraM=Primordial Soup | |||
|Ita=Stagno sorgivo | |||
|ItaM=Spring Pond | |||
|notes=y | |||
}} | |||
==See also== | |||
* [[Parched Brook]] | |||
{{BB}} | {{BB}} | ||
Latest revision as of 20:08, March 12, 2024
Stagnant Sea is the 2nd stage of Pikmin 3 's Bingo Battle. It seems to take place in some sort of marsh. This is the first stage to have water, which covers ~50% of the area. The main path to the opponent's side is either blocked by enemies, dirt walls or both, making it a little difficult for either player to reach their opponent. Grub-dogs litter the fields and some aquatic enemies make the water bodies dangerous to traverse too. It is possible to get Red Pikmin, Blue Pikmin, and Rock Pikmin in this stage.
Overview[edit]
The Stagnant Sea seems to take place in a marsh like area, with various man-made objects littered about both in and out of the playable area. There are three main land masses, with two of them housing each of the player's Onions. These are separated by water but are connected by two bridges and a wooden plank that acts as a bridge. The map is very symmetrical with only aesthetics and decorations being the differences. In all 3 layouts, the main similarity is the presence of members of the grub-dog family, either being Bulborbs, and their varieties, or Water Dumples. Yellow Wollywogs also appear in each layout along with their larval form, the Wogpole. In the water at each side of the map is a discarded, muddied boot, either standing or laying on its side. The presence of these, along with tires, cones and metal poles, suggests that this stage takes place near or in civilization, which is a common theme within the Bingo Battle maps.
Layouts[edit]
The layout unlock order, as explained here, is C, B, A.
Layout A[edit]
This layout gives players Red Pikmin to start with, and Blue Pikmin can be found. The main path in blocked by dirt walls and an Orange Bulborb.
Enemies:
 Bulborb × 2
 Dwarf Bulborb × 4
 Orange Bulborb × 1
 Skitter Leaf × 3
 Swooping Snitchbug × 1
 Whiptongue Bulborb × 1
 Wogpole × 16
 Yellow Wollywog × 2
Fruits:
 Citrus Lump × 1
 Dusk Pustules × 1
 Face Wrinkler × 1
 Golden Sunseed × 1
 Insect Condo × 1
Marbles:
 Blue Marble × 1
 Red Marble × 1
 Yellow Marble × 2
Tools:
Obstacles:
 Dirt wall × 2
 Water body × 2
Plants and fungi:
 1-Pellet Posy × 16
 5-Pellet Posy × 2
Other objects:
 Egg × 8
Layout B[edit]
This layout gives players Blue Pikmin to start with, and Rock Pikmin can be found. The main path is blocked by dirt walls and a Medusal Slurker.
Enemies:
 Desiccated Skitter Leaf × 4
 Female Sheargrub × 10
 Hermit Crawmad × 2
 Medusal Slurker × 2
 Skeeterskate × 2
 Skutterchuck × 2
 Water Dumple × 4
 Wogpole × 4
 Yellow Wollywog × 1
Fruits:
 Face Wrinkler × 1
 Golden Sunseed × 1
 Sunseed Berry × 1
 Zest Bomb × 1
Marbles:
 Red Marble × 1
 Blue Marble × 1
 Yellow Marble × 2
Tools:
Obstacles:
 Dirt wall × 2
 Crystal nodule × 6
 Large crystal × 4
 Water body × 2
Plants and fungi:
 1-Pellet Posy × 22
Layout C[edit]
This layout gives players Blue Pikmin to start with, and no other Pikmin can be found. Unlike the other two layouts, there is no walls blocking the main path and the bridges are already built.
Enemies:
 Bulborb × 3
 Dwarf Bulborb × 4
 Hermit Crawmad × 2
 Medusal Slurker × 1
 Skeeterskate × 2
 Wogpole × 9
 Yellow Wollywog × 2
Fruits:
 Citrus Lump × 1
 Face Wrinkler × 1
 Insect Condo × 1
 Portable Sunset × 1
 Velvety Dreamdrop × 1
 Zest Bomb × 1
Marbles:
 Red Marble × 1
 Blue Marble × 1
 Yellow Marble × 2
Tools:
 Bridge (red) × 2
Obstacles:
 Water body × 2
Plants and fungi:
 1-Pellet Posy × 16
Other objects:
 Egg × 4
Gallery[edit]
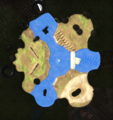
Texture used on the radar.
Another view of Layout C, in the E3 2013 stage demo.
The Onions of both teams.
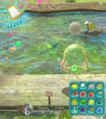
A Medusal Slurker above the beam connecting the two team's sides.
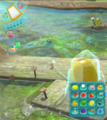
The same beam, with a Face Wrinkler encased in crystal.
A Medusal Slurker above the landmass separate from the two teams. Some of the pink team's Rock Pikmin are buried in the distance.
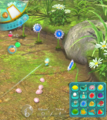
Several Pellet Posies in the back of the landmass with tire tracks.
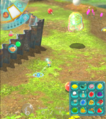
A dirt wall in the landmass with tire tracks, which run the length of the landmass.
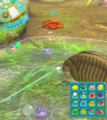
Water Dumples and a boot off the shore of the tire-tracked landmass.
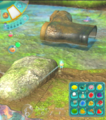
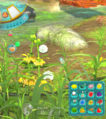
Foliage in the separate landmass, along with crystal nodules.
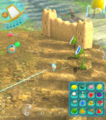
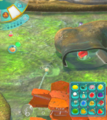
One team's sandier landmass behind the boot, without tire tracks. An encased Sunseed Berry lies just behind the Onion.
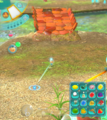
Fragments on the sandy landmass.
Names in other languages[edit]
| Language | Name | Meaning | Notes |
|---|---|---|---|
| Soupe primordiale | Primordial Soup | ||
| Quell des Ursprungs | Source of Origin | Here as a Source of Water | |
| Stagno sorgivo | Spring Pond | ||
| Alberca Prodigiosa | Prodigious Pool |
