
Bulblax Kingdom
| Bulblax Kingdom | |
|---|---|

| |
| Location | Awakening Wood |
| Sublevels | 7 |
| Treasures | 10 |
| Hazards |   (Note) (Note)  
|
|
The following article or section contains guides. |
The Bulblax Kingdom (デメマダラの王国?, lit.: "Kingdom of Dememadara") is a cave in the Awakening Wood in Pikmin 2, and is typically the third cave entered in the area. The name refers to the cave's boss, the Emperor Bulblax. Various other grub-dog enemies appear in the cave, as well as other enemy families. In this cave, there are  × 1240 worth of treasures.
How to reach[edit]
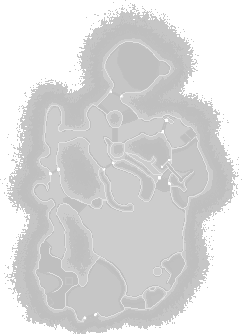

There are two methods of reaching the Bulblax Kingdom. Either can be used for equivalent success.
- Beyond the White Flower Garden is a poison gate. Destroying it reveals a pair of scales that may be used to reach the ledge where the Chance Totem is found. From here, a squad of Yellow Pikmin can be used to reach the electric gate guarding the cave.
- If Blue Pikmin have been discovered, they can be used to destroy the clog near the landing site, revealing a regular gate that can be destroyed to allow both leaders and all Pikmin to reach the ledge and get to the electric gate.
Although there is water to be found in this cave, Blue Pikmin are not required to collect any treasure, and water hazards are not indicated in the cave's preview window. Thus, it is optimal to exclude Blue Pikmin entirely; Purple Pikmin should be brought in great numbers to defeat the Emperor Bulblax and various Orange Bulborbs, and a considerable amount of Red and Yellow Pikmin should be present to deal with their respective hazards as well as to make use of the Candypop Buds. Keep in mind that enough Red Pikmin to carry the Gyroid Bust should be on hand, as it is surrounded in fire geysers.
Notes
Ship's dialogs
“So, you have at last reached the higher ground. Congratulations are in order.
...Wait. What is this? My seismic sensors are picking up tremors deep below.
What force is at work in the depths of the planet?”Sublevel 1[edit]

- Theme: Soil
- Music: Bulblax Kingdom
- Treasures:
 Crystal Clover (inside Orange Bulborb)
- Enemies:
 Dwarf Orange Bulborb × 4
 Orange Bulborb × 2
- Obstacles:
- None
- Vegetation:
 Crimson Candypop Bud × 1
 Ivory Candypop Bud × 1 (if max Pikmin requirement is met)
- Others:
- None
This first sublevel should be rather easy, as long as a sufficient amount of Purple Pikmin are present. Find the Orange Bulborb that possesses the Crystal Clover, making sure the Dwarf Orange Bulborbs are dealt with when needed. There is always one of the two Orange Bulborbs in an alcove near the ship's pod's site, but its back often faces the wall, so it is advisable take caution and defeat it quickly with Purple Pikmin if it has the treasure.
Deal with the remaining Bulborbs if the need arises. There is also a Crimson Candypop Bud available, but its use is not recommended, as it is wise to conserve your Yellow Pikmin for sublevel 4, Purple and White Pikmin should not be used for Candypop Buds of other types due to their scarcity, and Blue Pikmin should not be brought along in the first place.
| Technical sublevel information | |||||
|---|---|---|---|---|---|
| Internal cave name | forest_3 | ||||
| "Main" object maximum (?) | 6 | ||||
| "Treasure" object maximum (?) | 0 | ||||
| "Gate" object maximum (?) | 0 | ||||
| Dead end unit probability (?) | 100 | ||||
| Number of rooms (?) | 2 | ||||
| Corridor-to-room ratio (?) | 0 | ||||
| Escape geyser (?) | No | ||||
| Clogged hole (?) | No | ||||
| Cave units file (?) | 3_MAT_cnt2_nor3_uzu1_tsuchi.txt | ||||
| Lighting file (?) | normal_light_lv0.ini | ||||
| Background (?) | None | ||||
| Cave units (?) | |||||
 |
 |
 |
 |
 |
 |
| Dead end with item | Three-way crossing | Four-way crossing | Turning corridor | Corridor | Long corridor |
 |
 |
 |
|||
| Room with spiraling trunk | Circular room with 4 exits | Room with long bending dead end | |||
| Detailed object list | ||||
|---|---|---|---|---|
| The game spawns these "main" objects: | ||||
| ID | Object | Amount | Fall method | Spawn location |
| 1 | Orange Bulborb
|
1 | None | "Hard" enemy spots |
| - | Crystal Clover
|
Carried inside entry with ID 1 | ||
| 3 | Ivory Candypop Bud
|
1 | None | "Special" enemy spots |
| Alongside it spawns 4 "main" objects. Chances: | ||||
| ID | Object | Chance | Fall method | Spawn location |
| 2 | Dwarf Orange Bulborb
|
100% | None | "Easy" enemy spots |
| Then it spawns these "dead end" objects: | ||||
| ID | Object | Amount | Fall method | Spawn location |
| 4 | Crimson Candypop Bud
|
1 | None | Dead ends |
| 5 | Orange Bulborb
|
1 | None | Dead ends |
- For details on how objects are spawned, and how some may fail to spawn, see here.
Sublevel 2[edit]


- Theme: Soil
- Music: Soil 3
- Treasures:
- Enemies:
 Fiery Dweevil × 2
- Obstacles:
 Fire geyser × 6
- Vegetation:
 Common Glowcap × 2
- Others:
- None
The second sublevel isn't very hard at all. There are two Fiery Dweevils that can be easily taken out by a group of Purple Pikmin. Make sure to whistle any Pikmin that catch on fire. Then you should destroy the geysers with your Red Pikmin and throw the Pikmin up onto the ledge that holds the Tear Stone. After retrieving the treasure, find the hole to enter the next sublevel.
| Technical sublevel information | |||||
|---|---|---|---|---|---|
| Internal cave name | forest_3 | ||||
| "Main" object maximum (?) | 8 | ||||
| "Treasure" object maximum (?) | 1 | ||||
| "Gate" object maximum (?) | 0 | ||||
| Dead end unit probability (?) | 0 | ||||
| Number of rooms (?) | 2 | ||||
| Corridor-to-room ratio (?) | 0 | ||||
| Escape geyser (?) | No | ||||
| Clogged hole (?) | No | ||||
| Cave units file (?) | 2_MAT_sak2_nor1_tsuchi.txt | ||||
| Lighting file (?) | normal_light_lv1.ini | ||||
| Background (?) | None | ||||
| Cave units (?) | |||||
|
|
|
|
|
|
| Dead end with item | Three-way crossing | Four-way crossing | Turning corridor | Corridor | Long corridor |
 |
 |
||||
| Room with large trunk | Circular room with 1 exit | ||||
| Detailed object list | ||||
|---|---|---|---|---|
| The game spawns these "main" objects: | ||||
| ID | Object | Amount | Fall method | Spawn location |
| 1 | Fiery Dweevil
|
2 | None | "Hard" enemy spots |
| 2 | Fire geyser
|
2 | None | "Easy" enemy spots |
| 3 | Fire geyser
|
2 | None | "Easy" enemy spots |
| 4 | Fire geyser
|
2 | None | "Easy" enemy spots |
| Then it spawns these "decoration" objects: | ||||
| ID | Object | Amount | Fall method | Spawn location |
| 5 | Common Glowcap
|
2 | None | Plant spots |
| Then it spawns these "treasure" objects: | ||||
| ID | Object | Amount | Fall method | Spawn location |
| 6 |  Tear Stone Tear Stone
|
1 | None | Treasure spots |
- For details on how objects are spawned, and how some may fail to spawn, see here.
Sublevel 3[edit]

- Theme: Soil
- Music: Soil 3 (alternate)
- Treasures:
 Olimarnite Shell (fully buried)
- Enemies:
 Female Sheargrub × 8
 Mitite (group of 10) × 0 - 1 (from eggs)
 Withering Blowhog × 3
- Obstacles:
- None
- Vegetation:
- Common Glowcap × 6
- Ivory Candypop Bud × 1
- Others:
 Egg × 1
This next sublevel is a little more difficult, but still simple. There are three Withering Blowhogs that will try to deflower all of your Pikmin, but if you keep your distance and throw Purple Pikmin, you'll weigh them down immediately, and then you can swarm them with more Pikmin, or pound them with more purples.
There are a significant number of Female Sheargrubs that will get in your way, but there are no Male Sheargrubs, so these are a negligible threat. The Olimarnite Shell will be buried completely underground, and if you haven't brought any White Pikmin to this cave, or just want more, there is an Ivory Candypop Bud in one of the abnormally shaped alcoves. There is one egg to use if many of your Pikmin got deflowered, but you can get more nectar in later sublevels. After the sublevel has been scavenged, move on.
| Technical sublevel information | |||||
|---|---|---|---|---|---|
| Internal cave name | forest_3 | ||||
| "Main" object maximum (?) | 12 | ||||
| "Treasure" object maximum (?) | 1 | ||||
| "Gate" object maximum (?) | 0 | ||||
| Dead end unit probability (?) | 50 | ||||
| Number of rooms (?) | 2 | ||||
| Corridor-to-room ratio (?) | 0 | ||||
| Escape geyser (?) | No | ||||
| Clogged hole (?) | No | ||||
| Cave units file (?) | 2_MAT_mid1_nor2_tsuchi.txt | ||||
| Lighting file (?) | normal_light_lv0.ini | ||||
| Background (?) | None | ||||
| Cave units (?) | |||||
|
|
|
|
|
|
| Dead end with item | Three-way crossing | Four-way crossing | Turning corridor | Corridor | Long corridor |
 |
 |
||||
| Room with 6 exits | Room with long dead end | ||||
| Detailed object list | ||||
|---|---|---|---|---|
| The game spawns these "main" objects: | ||||
| ID | Object | Amount | Fall method | Spawn location |
| 1 | Withering Blowhog
|
2 | None | "Hard" enemy spots |
| 2 | Withering Blowhog
|
1 | None | "Hard" enemy spots |
| 3 | Female Sheargrub
|
3 | None | "Easy" enemy spots |
| 4 | Female Sheargrub
|
3 | None | "Easy" enemy spots |
| 5 | Female Sheargrub
|
2 | None | "Easy" enemy spots |
| 6 | Ivory Candypop Bud
|
1 | None | "Special" enemy spots |
| Then it spawns these "decoration" objects: | ||||
| ID | Object | Amount | Fall method | Spawn location |
| 7 | Common Glowcap
|
6 | None | Plant spots |
| Then it spawns these "treasure" objects: | ||||
| ID | Object | Amount | Fall method | Spawn location |
| 8 | Olimarnite Shell
|
1 | None | Treasure spots |
| Then it spawns these "dead end" objects: | ||||
| ID | Object | Amount | Fall method | Spawn location |
| 9 | Egg
|
1 | None | Dead ends |
- For details on how objects are spawned, and how some may fail to spawn, see here.
Sublevel 4[edit]
- Theme: Soil
- Music: Soil 1
- Treasures:
 Crystal King (inside Iridescent Glint Beetle)
 Unknown Merit (inside Wollyhop)
- Enemies:
 Anode Beetle × 5
 Honeywisp × 3
 Iridescent Glint Beetle × 1
- Mitite (group of 10) × 0 - 3 (from Honeywisps)
 Wollyhop × 1
- Obstacles:
 Electrical wire × 2
- Vegetation:
- Common Glowcap × 8
 Violet Candypop Bud × 2
- Others:
- None
This sublevel is a lot harder than the earlier ones because it is jam-packed with electrical wires and Anode Beetles, and requires you to engage in close-range combat. There is also a Wollyhop. The goal is to collect the two treasures, the Unknown Merit and Crystal King. The Unknown Merit is held by the Wollyhop that will fall from the sky, so be cautious when moving. The Crystal King is held by an Iridescent Glint Beetle.
First you will want to take your Yellow Pikmin and have them destroy the electrical wires, then have your Purple Pikmin flip over and defeat all of the Anode Beetles. If you haven't spotted either treasure-bearing enemy, use the Treasure Gauge to scout them out. When you see the Iridescent Glint Beetle, throw a Purple Pikmin on or near it to topple it over and make it drop the treasure. If you don't get its treasure and it burrows back into the ground, it will reappear somewhere else in the sublevel.
After you get that, look for the Wollyhop. Once it lands on the ground, get out of its view (so it won't jump) and throw purples onto its head. Once you are finished, you may transform 10 of your Pikmin into Purple Pikmin with the two Violet Candypop Buds located in the alcoves of the cave, though one or both might not appear through no fault of the player, as detailed here and here. If this happens, you may want to reset the console to restart the sublevel, and see if they will appear then. Remember, you're going to need many Purple Pikmin in the future, and more urgently, for the boss.
There are also two Common Glowcaps that each hide a Honeywisp. They are especially useful to you if many of your Pikmin were deflowered on the third sublevel. If you return here, the Iridescent Glint Beetle will still appear, but you won't have a radar to find it and it won't appear again if you miss the chance to get its nectar and sprays.
| Technical sublevel information | |||||
|---|---|---|---|---|---|
| Internal cave name | forest_3 | ||||
| "Main" object maximum (?) | 9 | ||||
| "Treasure" object maximum (?) | 0 | ||||
| "Gate" object maximum (?) | 0 | ||||
| Dead end unit probability (?) | 80 | ||||
| Number of rooms (?) | 3 | ||||
| Corridor-to-room ratio (?) | 0 | ||||
| Escape geyser (?) | No | ||||
| Clogged hole (?) | No | ||||
| Cave units file (?) | 3_MAT_hit2_blk1_nor3_tsuchi.txt | ||||
| Lighting file (?) | normal_light_lv3.ini | ||||
| Background (?) | None | ||||
| Cave units (?) | |||||
|
|
|
|
|
|
| Dead end with item | Three-way crossing | Four-way crossing | Turning corridor | Corridor | Long corridor |
 |
 |
|
|||
| Room with 5 exits | Room with hole in wall | Room with long bending dead end | |||
| Detailed object list | ||||
|---|---|---|---|---|
| The game spawns these "main" objects: | ||||
| ID | Object | Amount | Fall method | Spawn location |
| 1 | Iridescent Glint Beetle
|
1 | None | "Hard" enemy spots |
| - | Crystal King
|
Carried inside entry with ID 1 | ||
| 2 | Wollyhop
|
1 | Falls from the sky | "Hard" enemy spots |
| - | Unknown Merit
|
Carried inside entry with ID 2 | ||
| 3 | Anode Beetle
|
3 | None | "Easy" enemy spots |
| 4 | Anode Beetle
|
2 | None | "Easy" enemy spots |
| 5 | Electrical wire
|
2 | None | Cave unit seams |
| Then it spawns these "decoration" objects: | ||||
| ID | Object | Amount | Fall method | Spawn location |
| 6 | Common Glowcap
|
4 | None | Plant spots |
| Then it spa | ||||