Secret Spot: Difference between revisions
mNo edit summary |
(Added some more, plus cleanup.) |
||
| Line 1: | Line 1: | ||
{{game icons|hp=y}} | {{game icons|hp=y}} | ||
{{ | {{game help|hp|Finish the rest of the sections.}} | ||
{{guide}} | {{guide}} | ||
'''Secret Spots''' are special [[area]]s in {{hp}}. They are much smaller than a regular area, and only contain a single [[pellet]], which usually requires a puzzle or challenge to be completed in order to access. Once the pellet is collected, the area ends immediately, and 8 Pikmin of the same type as the pellet are added to the [[Pikmin Park]]. There are 4 Secret Spots per [[sector]], except the final sector, which has none. | '''Secret Spots''' are special [[area]]s in {{hp}}. They are much smaller than a regular area, and only contain a single [[pellet]], which usually requires a puzzle or challenge to be completed in order to access. Once the pellet is collected, the area ends immediately, and 8 Pikmin of the same type as the pellet are added to the [[Pikmin Park]]. There are 4 Secret Spots per [[sector]], except the final sector, which has none. To unlock a Secret Spot, the player needs to complete the level that comes before it. Unlike [[Sparklium Springs]], the player can re-enter a Secret Spot at any time, making them a good way of raising the number of Pikmin for the Pikmin Park. Most of the time, the player has [[Red Pikmin]] at their disposal, but certain challenges could make use of other Pikmin types's strengths and weaknesses. | ||
The [[radar]] does not work in Secret Spots. Pikmin found in Secret Spots are not returned to the Pikmin Park. | The [[radar]] does not work in Secret Spots. Pikmin found in Secret Spots are not returned to the Pikmin Park. If Captain Olimar is killed, or the pellet is lost, the challenge will be failed, and a screen asking the player if they wish to retry will appear. | ||
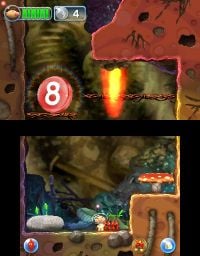
== Secret Spot 1 == | == Secret Spot 1 == | ||
[[File:Secret Spot 1.jpg|thumb|right|Secret Spot 1.]] | [[File:Secret Spot 1.jpg|thumb|right|Secret Spot 1.]] | ||
* '''Sector''': [[ | * '''Sector''': [[Brilliant Garden]] | ||
* '''Pellet''': Red | * '''Pellet''': Red | ||
* '''Requirements''': Complete [[First Expedition]] | * '''Requirements''': Complete [[First Expedition]] | ||
| Line 22: | Line 21: | ||
== Secret Spot 4 == | == Secret Spot 4 == | ||
[[File:Secret Spot 4.jpg|thumb|right|Secret Spot 4.]] | [[File:Secret Spot 4.jpg|thumb|right|Secret Spot 4.]] | ||
* '''Sector''': [[ | * '''Sector''': [[Brilliant Garden]] | ||
* '''Pellet''': Red | * '''Pellet''': Red | ||
* '''Requirements''': Complete [[Cherrystone Pass]] | * '''Requirements''': Complete [[Cherrystone Pass]] | ||
| Line 33: | Line 32: | ||
== Secret Spot 6 == | == Secret Spot 6 == | ||
[[File:Secret Spot 6.jpg|thumb|right|Secret Spot 6.]] | [[File:Secret Spot 6.jpg|thumb|right|Secret Spot 6.]] | ||
* '''Sector''': [[ | * '''Sector''': [[Verdant Waterfront]] | ||
* '''Pellet''': Blue | * '''Pellet''': Blue | ||
* '''Requirements''': Complete [[Serene Stream]] | * '''Requirements''': Complete [[Serene Stream]] | ||
| Line 43: | Line 42: | ||
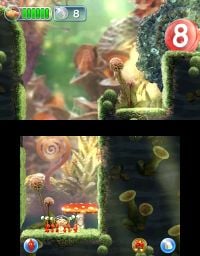
== Secret Spot 8 == | == Secret Spot 8 == | ||
[[File:Secret Spot 8.jpg|thumb|right|Secret Spot 8.]] | |||
* '''Sector''': [[Verdant Waterfront]] | |||
* '''Pellet''': Blue | |||
* '''Requirements''': Complete [[The Shallow End]] | |||
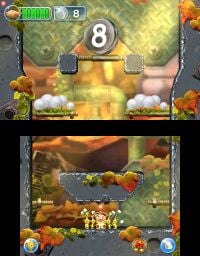
The pellet is on top of a platform on the top screen. On the bottom screen, there is a square rock that can be pushed left and right across the area, with two small ledges on each end. These ledges both stop the rock from being completely flush against a wall (and as such, allow Pikmin to get on top of the ledge to push in the opposite direction), but also allow Captain Olimar to climb on top of the rock using his [[jetpack]]. Climbing is necessary, since the only way to reach the top platform is by climbing onto a vine only accessible at the rock's height. Olimar, his eight [[Red Pikmin]], and the rock all start on the left side, while the vine is near the right side. As such, you must order the Pikmin to push the rock to the right and then quickly get on top of it to ride it along. Once you get near the vine, simply use the jetpack to reach it, climb up, and head for the pellet. If you can't get on the rock since it is too far away, you will have to whistle the Pikmin to you, and throw them over the rock so they can push in the opposite direction. | |||
Alternatively, you can start the level, climb on the rock right away, start the jetpack whilst on the right edge of the rock, and head for the vine. | |||
{{clear}} | |||
== Secret Spot 9 == | == Secret Spot 9 == | ||
== Secret Spot 10 == | == Secret Spot 10 == | ||
[[File:Secret Spot 10.jpg|thumb|right|Secret Spot 10.]] | [[File:Secret Spot 10.jpg|thumb|right|Secret Spot 10.]] | ||
* '''Sector''': [[ | * '''Sector''': [[Sparkling Labyrinth]] | ||
* '''Pellet''': Rock | * '''Pellet''': Rock | ||
* '''Requirements''': Complete [[Echo Cavern]] | * '''Requirements''': Complete [[Echo Cavern]] | ||
| Line 63: | Line 71: | ||
== Secret Spot 14 == | == Secret Spot 14 == | ||
[[File:Secret Spot 14.jpg|thumb|right|Secret Spot 14.]] | [[File:Secret Spot 14.jpg|thumb|right|Secret Spot 14.]] | ||
* '''Sector''': [[ | * '''Sector''': [[Ravaged Rustworks]] | ||
* '''Pellet''': Rock | * '''Pellet''': Rock | ||
* '''Requirements''': Complete [[Pollution Pool]] | * '''Requirements''': Complete [[Pollution Pool]] | ||
| Line 77: | Line 85: | ||
== Secret Spot 18 == | == Secret Spot 18 == | ||
[[File:Secret Spot 18.jpg|thumb|right|Secret Spot 18.]] | |||
* '''Sector''': [[Leafswirl Lagoon]] | |||
* '''Pellet''': Winged | |||
* '''Requirements''': Complete [[Downpour Thicket]] | |||
The bottom-left of the stage is solid ground, and it is also where Olimar and the 8 [[Blue Pikmin]] start, but the rest of the bottom of the stage is a stream of water going right. The pellet is on a platform high above, in the center of the area. Below it is a [[Bouncy Mushroom]], and to the bottom-right of the area, at the end of the water stream, is another Bouncy Mushroom. You must try to throw Pikmin at the central Bouncy Mushroom while fighting the current. Once they're all thrown, you must then fight the current to wait for the Pikmin to bring the pellet down, and finally, to touch it. If you hit the Bouncy Mushroom on the far right, it will send you back to dry land on the starting spot; the same happens to the Pikmin, even if they are carrying. | |||
{{clear}} | |||
== Secret Spot 19 == | == Secret Spot 19 == | ||
[[File:Secret Spot 19.jpg|thumb|right|Secret Spot 19.]] | [[File:Secret Spot 19.jpg|thumb|right|Secret Spot 19.]] | ||
* '''Sector''': [[ | * '''Sector''': [[Leafswirl Lagoon]] | ||
* '''Pellet''': Winged | * '''Pellet''': Winged | ||
* '''Requirements''': Complete [[Gale-Force Glen]] | * '''Requirements''': Complete [[Gale-Force Glen]] | ||
| Line 91: | Line 107: | ||
== Secret Spot 21 == | == Secret Spot 21 == | ||
[[File:Secret Spot 21.jpg|thumb|right|Secret Spot 21.]] | [[File:Secret Spot 21.jpg|thumb|right|Secret Spot 21.]] | ||
* '''Sector''': [[ | * '''Sector''': [[Sweltering Parchlands]] | ||
* '''Pellet''': Red | * '''Pellet''': Red | ||
* '''Requirements''': Complete [[Charred Plains]] | * '''Requirements''': Complete [[Charred Plains]] | ||
| Line 102: | Line 118: | ||
== Secret Spot 23 == | == Secret Spot 23 == | ||
[[File:Secret Spot 23.jpg|thumb|right|Secret Spot 23.]] | [[File:Secret Spot 23.jpg|thumb|right|Secret Spot 23.]] | ||
* '''Sector''': [[ | * '''Sector''': [[Sweltering Parchlands]] | ||
* '''Pellet''': Red | * '''Pellet''': Red | ||
* '''Requirements''': Complete [[Sizzling Precipice]] | * '''Requirements''': Complete [[Sizzling Precipice]] | ||
| Line 114: | Line 130: | ||
== Secret Spot 26 == | == Secret Spot 26 == | ||
[[File:Secret Spot 26.jpg|thumb|right|Secret Spot 26.]] | |||
* '''Sector''': [[Snowfall Field]] | |||
* '''Pellet''': Yellow | |||
* '''Requirements''': Complete [[Below the Ice]] | |||
This area has two shores and a lake in the middle. To cross from the left shore, the starting one, to the right shore, the one with the pellet, a [[trowel]] on the right side needs to be tipped down to the left. To reach the trowel, an underwater passage needs to be taken. The pellet cannot be accessed right away, since there is a [[crystal]] in the way, and the 4 [[Rock Pikmin]] that hide behind a stone at the start cannot reach the crystal unless the trowel is tipped. As such, grab your starting 4 [[Blue Pikmin]], and go underwater with them to the right shore. You can gain access to ground level by using a [[vine]] underwater. Tip the trowel to the left using the Blue Pikmin, and then go to the starting point to whistle out the Rock Pikmin. Finally, take them to the crystal, break it, and claim the pellet. | |||
{{clear}} | |||
== Secret Spot 27 == | == Secret Spot 27 == | ||
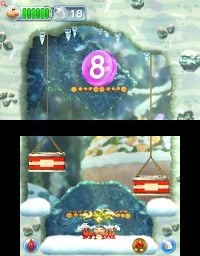
[[File:Secret Spot 27.jpg|thumb|right|Secret Spot 27.]] | |||
* '''Sector''': [[Snowfall Field]] | |||
* '''Pellet''': Winged | |||
* '''Requirements''': Complete [[Ordeal of Flame]] | |||
The main focus of this area is the two [[elevator platform]]s on the left and right sides. Between them, up above, is the pellet. At ground level, there is a dip in the center of the level, but there is also a platform connected to a [[vine]] that goes a bit higher. Since 8 Pikmin and Olimar need to be raised to reach the pellet to bring it down, and as such, at least 10 Pikmin must be on the opposite end, the stage has a total of 18 [[Red Pikmin]]. Simply throw all Pikmin at one of the platforms and then use the [[jetpack]] to get there yourself. Then, throw 10 Pikmin at the opposite platform to raise the one you're on. At the top, throw the eight Pikmin with you at the pellet. Then, wait at the platform you're on for the pellet to be brought to you. | |||
{{clear}} | |||
== Secret Spot 28 == | == Secret Spot 28 == | ||
| Line 122: | Line 152: | ||
== Secret Spot 30 == | == Secret Spot 30 == | ||
[[File:Secret Spot 30.jpg|thumb|right|Secret Spot 30.]] | |||
* '''Sector''': [[Lushlife Mark]] | |||
* '''Pellet''': Winged | |||
* '''Requirements''': Complete [[Septic Swamp]] | |||
The bottom-left of the area is the starting point, on safe ground. It also has a Bouncy Mushroom that leads to the top central platform, where the pellet is. This platform goes a long way to the right, and since Olimar cannot reach this platform, he has to take the bottom route. In this path, there are only a few small platforms of safe ground, since the rest is covered in [[poison]] liquid. There is also safe ground on the bottom-right corner of the area. Start by whistling the 8 [[Red Pikmin]] hiding behind the two sets of twigs, and throw them at the Bouncy Mushroom. They will begin carrying the pellet and head to the right, so hurry on using the bottom route to meet up with them on the bottom-right of the area. You will have to jump from platform to platform using the [[jetpack]] until you reach your goal. The more upgraded your jetpack is, the fewer breaks you need to take. If you take too long, the Pikmin will reach the bottom-right platform, and continue moving forward, until they eventually fall into the poison. This makes you lose the pellet, and more importantly, the challenge. | |||
{{clear}} | |||
== Secret Spot 31 == | == Secret Spot 31 == | ||
== Secret Spot 32 == | == Secret Spot 32 == | ||
[[File:Secret Spot 32.jpg|thumb|right|Secret Spot 32.]] | |||
* '''Sector''': [[Lushlife Mark]] | |||
* '''Pellet''': Red | |||
* '''Requirements''': Complete [[Burning Bog]] | |||
The level is shaped like a stairway with three steps. The bottom one, the starting point, has a [[Bouncy Mushroom]] that springs Olimar or the Pikmin directly up. The second step is empty, but has a protrusion to stop Pikmin from falling off. Finally, the top step has the pellet, and can be reached by Pikmin thrown from the second. Throwing the Pikmin at the Bouncy Mushroom in hopes that they will reach the second step will achieve nothing. So start by throwing all your 8 [[Red Pikmin]] at the Bouncy Mushroom so they stay there, and then join them. Move to the right so you can actually land on the second step, and once there, simply whistle once. The Pikmin will eventually start moving to the right as they bounce, even if it takes them more than one bounce to do so. When everyone is gathered, simply throw the Pikmin at the pellet and wait for it to be delivered to you. | |||
{{clear}} | |||
== See also == | == See also == | ||
* [[Sparklium Springs]] | * [[Sparklium Springs]] | ||
[[Category:Areas]] | [[Category:Areas]] | ||
Revision as of 15:21, August 12, 2017
|
The following article or section is in need of assistance from someone who plays Hey! Pikmin. |
|
The following article or section contains guides. |
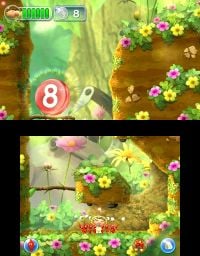
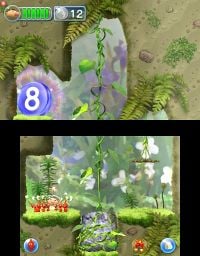
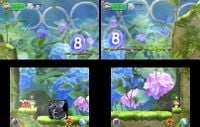
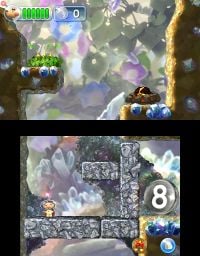
Secret Spots are special areas in Hey! Pikmin. They are much smaller than a regular area, and only contain a single pellet, which usually requires a puzzle or challenge to be completed in order to access. Once the pellet is collected, the area ends immediately, and 8 Pikmin of the same type as the pellet are added to the Pikmin Park. There are 4 Secret Spots per sector, except the final sector, which has none. To unlock a Secret Spot, the player needs to complete the level that comes before it. Unlike Sparklium Springs, the player can re-enter a Secret Spot at any time, making them a good way of raising the number of Pikmin for the Pikmin Park. Most of the time, the player has Red Pikmin at their disposal, but certain challenges could make use of other Pikmin types's strengths and weaknesses.
The radar does not work in Secret Spots. Pikmin found in Secret Spots are not returned to the Pikmin Park. If Captain Olimar is killed, or the pellet is lost, the challenge will be failed, and a screen asking the player if they wish to retry will appear.
Secret Spot 1
- Sector: Brilliant Garden
- Pellet: Red
- Requirements: Complete First Expedition
The first Secret Spot has a simple puzzle. The pellet lies on a high platform. You're given 4 Red Pikmin at the start. Olimar and the Pikmin can climb up a vine to reach a platform that's closer to the pellet. This platform is also on the same level as a ledge where a bush with 4 other Red Pikmin is. You should start by whistling the Pikmin from the bush, then climb the vine, throw the starting Pikmin at the pellet, use the jetpack to get to the ledge with the other 4 Pikmin, and throw those as well. Then, it's just a matter of waiting at the ledge.
Secret Spot 2
Secret Spot 3
Secret Spot 4
- Sector: Brilliant Garden
- Pellet: Red
- Requirements: Complete Cherrystone Pass
You start off with 8 Red Pikmin. The pellet is on a branch high up; a fair bit below this branch is another one. While you can throw the Pikmin at the first branch, you have to take a different path to reunite with them. By climbing some ledges to the right using the jetpack, it's possible to reach the platform with the first branch, step by step. Since Pikmin are dismissed when the jetpack is used, the Pikmin must first be thrown at the branch before you head off. After reuniting, it's simply a matter of throwing the Pikmin from the first branch to the second. You will need to climb to the platform connected to the branch in order to catch the pellet.
Secret Spot 5
Secret Spot 6
- Sector: Verdant Waterfront
- Pellet: Blue
- Requirements: Complete Serene Stream
You start with 12 Red Pikmin. The level is simple: the pellet is on a high ledge, and the only way for Olimar and the Pikmin to get within throwing distance is by being lifted by the pulley system. You must get everyone on top of the pulley system's rock (using the whistle will bundle everyone together), and then throw four Pikmin at the pulley. This will be enough to lift Olimar and the other Pikmin. From there, it's a simple matter of throwing the remaining Pikmin at the pellet, and catching it after it falls down.
Secret Spot 7
Secret Spot 8
- Sector: Verdant Waterfront
- Pellet: Blue
- Requirements: Complete The Shallow End
The pellet is on top of a platform on the top screen. On the bottom screen, there is a square rock that can be pushed left and right across the area, with two small ledges on each end. These ledges both stop the rock from being completely flush against a wall (and as such, allow Pikmin to get on top of the ledge to push in the opposite direction), but also allow Captain Olimar to climb on top of the rock using his jetpack. Climbing is necessary, since the only way to reach the top platform is by climbing onto a vine only accessible at the rock's height. Olimar, his eight Red Pikmin, and the rock all start on the left side, while the vine is near the right side. As such, you must order the Pikmin to push the rock to the right and then quickly get on top of it to ride it along. Once you get near the vine, simply use the jetpack to reach it, climb up, and head for the pellet. If you can't get on the rock since it is too far away, you will have to whistle the Pikmin to you, and throw them over the rock so they can push in the opposite direction.
Alternatively, you can start the level, climb on the rock right away, start the jetpack whilst on the right edge of the rock, and head for the vine.
Secret Spot 9
Secret Spot 10
- Sector: Sparkling Labyrinth
- Pellet: Rock
- Requirements: Complete Echo Cavern
The pellet is behind a wall made of stones. There is a bomb rock that can be used to take down the stones, but unfortunately, the floor Olimar and the Pikmin have to move around is also made of stones. So the demolition needs to be controlled as to only take out the wall, not the floor. There is a small lip made of stone connected to the wall – this is where the bomb rock must be thrown to in order to grant access to the pellet. Before that, however, you have to whistle the 4 Yellow Pikmin hiding in a bush on the top screen. The bomb rock is also on the top screen, and Olimar is on the bottom, so you must use the Yellow Pikmin's high throw arc to get the bomb rock. Blowing up the stone floor will make Olimar fall into the pit, and will result in a failure.
Secret Spot 11
Secret Spot 12
Secret Spot 13
Secret Spot 14
- Sector: Ravaged Rustworks
- Pellet: Rock
- Requirements: Complete Pollution Pool
The pellet is on a platform that can be passed through from below. This platform is too high to reach from the starting point, but there is a platform above the starting point that gives Olimar the ability to throw his starting 8 Yellow Pikmin up there. You must climb to that platform using some small platforms on the sides and the jetpack, but before you do so, you must throw the Yellow Pikmin at the dandelions on platforms above the small side platforms mentioned before. This will keep them busy while you take your time climbing. Once you do, whistle the Pikmin back down, and throw them at the pellet. Then, simply wait for them to return.
Secret Spot 15
Secret Spot 16
Secret Spot 17
Secret Spot 18
- Sector: Leafswirl Lagoon
- Pellet: Winged
- Requirements: Complete Downpour Thicket
The bottom-left of the stage is solid ground, and it is also where Olimar and the 8 Blue Pikmin start, but the rest of the bottom of the stage is a stream of water going right. The pellet is on a platform high above, in the center of the area. Below it is a Bouncy Mushroom, and to the bottom-right of the area, at the end of the water stream, is another Bouncy Mushroom. You must try to throw Pikmin at the central Bouncy Mushroom while fighting the current. Once they're all thrown, you must then fight the current to wait for the Pikmin to bring the pellet down, and finally, to touch it. If you hit the Bouncy Mushroom on the far right, it will send you back to dry land on the starting spot; the same happens to the Pikmin, even if they are carrying.
Secret Spot 19
- Sector: Leafswirl Lagoon
- Pellet: Winged
- Requirements: Complete Gale-Force Glen
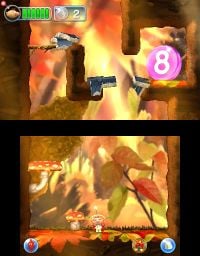
You start on the bottom screen, where there are two Bouncy Mushrooms, and the top screen has two platforms with a tiny gap in the middle. The gap must be crossed to reach the pellet as Olimar, but you cannot use the jetpack, because an overhang blocks your way. As such, the built must be constructed using the two fragments right next to it. Simply throw your 2 Red Pikmin to the larger Bouncy Mushroom so they can start working on the bridge, and then jump on the smaller mushroom with the jetpack, to get yourself access to the larger one, where you can join the Pikmin. Once they're done, simply make your way to the pellet.
Secret Spot 20
Secret Spot 21
- Sector: Sweltering Parchlands
- Pellet: Red
- Requirements: Complete Charred Plains
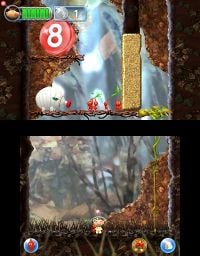
The action takes place on the top screen, where 7 of your Red Pikmin are trapped in a room with a Fiery Blowlet. You start on the bottom screen with one Red Pikmin and a vine to reach the top screen. Make your way up the vine, and open up the room by using your single Pikmin to destroy the sand block blocking the entrance. Now, you can use the 8 Red Pikmin with you to take down the enemy, or leave it alone altogether, and toss your Pikmin to the pellet hanging on the nearby platform.
Secret Spot 22
Secret Spot 23
- Sector: Sweltering Parchlands
- Pellet: Red
- Requirements: Complete Sizzling Precipice
The pellet is on a platform on the top screen that can be accessed from below. A similar platform to its right leads to the pellet from above, but has a constant fire geyser on it. The player starts with 4 Red Pikmin, and can whistle 4 Yellow Pikmin from the nearby rock. The Yellow Pikmin are the only ones that can reach the pellet's platform, and the Red Pikmin are the only ones that can cross the fire geyser's platform, with the aid of a Bouncy Mushroom placed under it. Start by whistling the Yellow Pikmin out, and then throw the Pikmin to the correct platforms. Then, just wait for the pellet to drop to Olimar. Although the pellet gets close to the fire geyser as it's being carried, it will never touch it or harm the Pikmin.
Secret Spot 24
Secret Spot 25
Secret Spot 26
- Sector: Snowfall Field
- Pellet: Yellow
- Requirements: Complete Below the Ice
This area has two shores and a lake in the middle. To cross from the left shore, the starting one, to the right shore, the one with the pellet, a trowel on the right side needs to be tipped down to the left. To reach the trowel, an underwater passage needs to be taken. The pellet cannot be accessed right away, since there is a crystal in the way, and the 4 Rock Pikmin that hide behind a stone at the start cannot reach the crystal unless the trowel is tipped. As such, grab your starting 4 Blue Pikmin, and go underwater with them to the right shore. You can gain access to ground level by using a vine underwater. Tip the trowel to the left using the Blue Pikmin, and then go to the starting point to whistle out the Rock Pikmin. Finally, take them to the crystal, break it, and claim the pellet.
Secret Spot 27
- Sector: Snowfall Field
- Pellet: Winged
- Requirements: Complete Ordeal of Flame
The main focus of this area is the two elevator platforms on the left and right sides. Between them, up above, is the pellet. At ground level, there is a dip in the center of the level, but there is also a platform connected to a vine that goes a bit higher. Since 8 Pikmin and Olimar need to be raised to reach the pellet to bring it down, and as such, at least 10 Pikmin must be on the opposite end, the stage has a total of 18 Red Pikmin. Simply throw all Pikmin at one of the platforms and then use the jetpack to get there yourself. Then, throw 10 Pikmin at the opposite platform to raise the one you're on. At the top, throw the eight Pikmin with you at the pellet. Then, wait at the platform you're on for the pellet to be brought to you.
Secret Spot 28
Secret Spot 29
Secret Spot 30
- Sector: Lushlife Mark
- Pellet: Winged
- Requirements: Complete Septic Swamp
The bottom-left of the area is the starting point, on safe ground. It also has a Bouncy Mushroom that leads to the top central platform, where the pellet is. This platform goes a long way to the right, and since Olimar cannot reach this platform, he has to take the bottom route. In this path, there are only a few small platforms of safe ground, since the rest is covered in poison liquid. There is also safe ground on the bottom-right corner of the area. Start by whistling the 8 Red Pikmin hiding behind the two sets of twigs, and throw them at the Bouncy Mushroom. They will begin carrying the pellet and head to the right, so hurry on using the bottom route to meet up with them on the bottom-right of the area. You will have to jump from platform to platform using the jetpack until you reach your goal. The more upgraded your jetpack is, the fewer breaks you need to take. If you take too long, the Pikmin will reach the bottom-right platform, and continue moving forward, until they eventually fall into the poison. This makes you lose the pellet, and more importantly, the challenge.
Secret Spot 31
Secret Spot 32
- Sector: Lushlife Mark
- Pellet: Red
- Requirements: Complete Burning Bog
The level is shaped like a stairway with three steps. The bottom one, the starting point, has a Bouncy Mushroom that springs Olimar or the Pikmin directly up. The second step is empty, but has a protrusion to stop Pikmin from falling off. Finally, the top step has the pellet, and can be reached by Pikmin thrown from the second. Throwing the Pikmin at the Bouncy Mushroom in hopes that they will reach the second step will achieve nothing. So start by throwing all your 8 Red Pikmin at the Bouncy Mushroom so they stay there, and then join them. Move to the right so you can actually land on the second step, and once there, simply whistle once. The Pikmin will eventually start moving to the right as they bounce, even if it takes them more than one bounce to do so. When everyone is gathered, simply throw the Pikmin at the pellet and wait for it to be delivered to you.
