Parched Brook: Difference between revisions
m (Text replacement - "{{icon|Red Bulborb" to "{{icon|Bulborb") |
m (Replaced P2 Marble icons with P3 equivalents.) |
||
| (6 intermediate revisions by 3 users not shown) | |||
| Line 1: | Line 1: | ||
{{game icons|p3=y}} | {{game icons|p3=y}} | ||
[[File:P3d - Parched Brook Gameplay.jpg|thumb|400px|Gameplay screenshot.]] | |||
'''Parched Brook''' is the eighth stage of ''[[Pikmin 3]]''<nowiki>'</nowiki>s [[Bingo Battle]]. | '''Parched Brook''' is the eighth stage of ''[[Pikmin 3]]''<nowiki> '</nowiki>s [[Bingo Battle]]. | ||
Red, Blue, and Winged Pikmin can be found here. | Red, Blue, Yellow, and Winged Pikmin can be found here. | ||
==Layouts== | ==Layouts== | ||
The | The layout unlock order, as explained [[Bingo Battle#Maps|here]], is A, C, B. | ||
===Layout A=== | ===Layout A=== | ||
[[File: | [[File:Map 22 parched brook a.jpg|thumb|400px|Layout A overview.]] | ||
*{{icon|Orange Bulborb|y|v=P3}} ×1 | This layout gives players [[Red Pikmin]] to start with, and [[Blue Pikmin]] can be found. Notable to this layout are various scattered piles of fragments, reinforced walls, and tons of scattered bomb rocks. | ||
'''Enemies''': | |||
{{columns|2| | |||
*{{icon|Orange Bulborb|y|v=P3}} × 1 | |||
*{{icon|Bulborb|y|v=P3}} × 1 | *{{icon|Bulborb|y|v=P3}} × 1 | ||
*{{icon|Yellow Wollywog|y|v=P3}} ×2 | *{{icon|Yellow Wollywog|y|v=P3}} × 2 | ||
*{{icon|Dwarf Bulborb|y| | *{{icon|Dwarf Bulborb|v=P3|y}} × 3 | ||
*{{icon|Dwarf Orange Bulborb|y}} × 3 | *{{icon|Male Sheargrub|y|v=P3}} × 6 | ||
*{{icon|Skitter Leaf|y|v=P3}} × 5 | |||
*{{icon|Fiery Blowhog|y|v=P3}} × 1 | |||
*{{icon|Watery Blowhog|y|v=P3}} × 1 | |||
*{{icon|Iridescent Flint Beetle|y|v=P3}} × 2 | |||
*{{icon|Dwarf Orange Bulborb|v=P3|y}} × 3 | |||
*{{icon|Skeeterskate|y}} × 2 | |||
*{{icon|Desiccated Skitter Leaf|y}} × 2 | |||
}} | |||
'''Fruits''': | |||
{{columns|2| | |||
*{{icon|Insect Condo|y|v=FF}} ×1 | *{{icon|Insect Condo|y|v=FF}} ×1 | ||
=== | *{{icon|Citrus Lump|y|v=FF}} × 1 | ||
*{{icon| | *{{icon|Golden Sunseed|y}} × 1 | ||
*{{icon|Bridge|v=P3|y}} ( | *{{icon|Sunseed Berry|y|v=FF}} × 1 | ||
{{ | }} | ||
'''Marbles''': | |||
*{{icon|Blue Marble|v=P3}} [[Crystallized Clairvoyance|Blue Marble]] × 1 | |||
*{{icon|Red Marble|v=P3}} [[Crystallized Telepathy|Red Marble]] × 1 | |||
'''Tools''': | |||
*{{icon|Bridge|v=P3|y}} (red) × 2 | |||
*{{icon|fragment|y}} (red) × 60 (6 groups of 10) | |||
*{{icon|Bomb rock|y}} × 18 | |||
'''Obstacles''': | |||
*{{icon|Reinforced wall|v=P3|y}} × 2 | |||
*{{icon|Water body|y}} × 4 | |||
'''Plants and fungi''': | |||
*{{icon|Pellet Posy|v=P3}} [[Pellet Posy|1-Pellet Posy]] × 16 | |||
*{{icon|Pellet Posy|v=P3}} [[Pellet Posy|5-Pellet Posy]] × 2 | |||
'''Other objects''': | |||
*{{icon|Egg|y|v=P3}} × 8 | |||
===Layout B=== | ===Layout B=== | ||
[[File: | [[File:Map 23 parched brook b.jpg|thumb|400px|Layout B overview.]] | ||
This layout gives players [[Yellow Pikmin]] to start with, and | |||
This layout gives players [[Yellow Pikmin]] to start with, and Blue Pikmin can be found. Notable to this layout are electric gates and Burrowing Snagrets. | |||
'''Enemies''': | |||
{{columns|2| | |||
*{{icon|Bearded Amprat|y}} × 2 | *{{icon|Bearded Amprat|y}} × 2 | ||
*{{icon|Bulborb|y|v=P3}} × 2 | *{{icon|Bulborb|y|v=P3}} × 2 | ||
*{{icon|Yellow Wollywog|y|v=P3}} × 2 | *{{icon|Yellow Wollywog|y|v=P3}} × 2 | ||
| Line 36: | Line 71: | ||
*{{icon|Burrowing Snagret|y|v=P3}} × 2 | *{{icon|Burrowing Snagret|y|v=P3}} × 2 | ||
*{{icon|Skeeterskate|y}} × 2 | *{{icon|Skeeterskate|y}} × 2 | ||
*{{icon|Female Sheargrub|y|v=P3}} × | *{{icon|Female Sheargrub|y|v=P3}} × 8 | ||
*{{icon|Hermit Crawmad|y|v=P3}} × 2 | *{{icon|Hermit Crawmad|y|v=P3}} × 2 | ||
*{{icon|Desiccated Skitter Leaf|y}} × 4 | |||
*{{icon| | }} | ||
'''Fruits''': | |||
{{columns|2| | |||
*{{icon|Insect Condo|y|v=FF}} × 1 | *{{icon|Insect Condo|y|v=FF}} × 1 | ||
*{{icon|Heroine's Tear|y}} × 1 | *{{icon|Heroine's Tear|y}} × 1 | ||
*{{icon|Sunseed Berry|y|v=FF}} × 1 | *{{icon|Sunseed Berry|y|v=FF}} × 1 | ||
*{{icon|Face Wrinkler|y}} × 1 | *{{icon|Face Wrinkler|y}} × 1 | ||
= | *{{icon|Golden Sunseed|y}} × 2 (in Burrowing Snagrets) | ||
*{{icon| | }} | ||
= | |||
'''Marbles''': | |||
*{{icon|Blue Marble|v=P3}} [[Crystallized Clairvoyance|Blue Marble]] × 2 | |||
*{{icon|Red Marble|v=P3}} [[Crystallized Telepathy|Red Marble]] × 2 | |||
'''Tools''': | |||
*{{icon|Bridge|v=P3|y}} (red) × 2 | |||
*{{icon|fragment|y}} (red) × 40 (2 groups of 20) | |||
*{{icon|Mine|y}} × 6 | |||
'''Obstacles''': | |||
*{{icon|Electric gate|v=P3|y}} × 2 | *{{icon|Electric gate|v=P3|y}} × 2 | ||
*{{icon| | *{{icon|Water body|y}} × 4 | ||
'''Plants and fungi''': | |||
*{{icon|Pellet Posy|v=P3}} [[Pellet Posy|1-Pellet Posy]] × 32 | |||
===Layout C=== | ===Layout C=== | ||
[[File: | [[File:Map 24 parched brook c.jpg|thumb|400px|Layout C overview.]] | ||
This layout | |||
This layout gives players Red Pikmin to start with, and [[Winged Pikmin]] can be found. Notable to this layout is a lack of bridges and the inclusion of geysers. | |||
*{{icon|Bulborb|v=P3|y}} × 1 | '''Enemies''': | ||
*{{icon| | {{columns|2| | ||
*{{icon|Bulborb|y|v=P3}} × 1 | |||
*{{icon|Dwarf Bulborb|y|v=P3}} × 3 | |||
*{{icon|Yellow Wollywog|y|v=P3}} × 2 | |||
*{{icon|Male Sheargrub|y|v=P3}} × 4 | |||
*{{icon|Skitter Leaf|y|v=P3}} × 6 | |||
*{{icon|Fiery Blowhog|y|v=P3}} × 1 | |||
*{{icon|Watery Blowhog|y|v=P3}} × 1 | |||
*{{icon|Orange Bulborb|y|v=P3}} × 1 | |||
*{{icon|Dwarf Orange Bulborb|y|v=P3}} × 3 | |||
*{{icon|Waddlepus|y}} × 2 | *{{icon|Waddlepus|y}} × 2 | ||
*{{icon| | *{{icon|Shearwig|y|v=P3}} × 5 | ||
*{{icon|Armored Cannon Larva|y|v=P3}} × 1 | |||
*{{icon| | }} | ||
= | '''Fruits''': | ||
{{columns|2| | |||
*{{icon|Face Wrinkler|y}} × 1 | |||
*{{icon|Insect Condo|v=FF|y}} × 1 | |||
*{{icon|Zest Bomb|y}} × 1 | |||
*{{icon|Heroine's Tear|y}} × 1 | |||
}} | |||
===Names in other languages | '''Tools''': | ||
*{{icon|Bomb rock|y}} × 6 | |||
*{{icon|Geyser|y}} × 2 | |||
'''Obstacles''': | |||
*{{icon|Dirt wall|y}} × 2 | |||
*{{icon|Water body|y}} × 4 | |||
'''Plants and fungi''': | |||
*{{icon|Pellet Posy|v=P3}} [[Pellet Posy|1-Pellet Posy]] × 32 | |||
==Gallery== | |||
<gallery> | |||
Parched Brook radar.png|Texture used on the [[radar]]. | |||
</gallery> | |||
==Names in other languages== | |||
{{foreignname | {{foreignname | ||
|Ger=Murmelnder Bach | |Ger=Murmelnder Bach | ||
| Line 81: | Line 158: | ||
}} | }} | ||
== | ==See also== | ||
* [[Bingo Battle]] | |||
* [[Stagnant Sea]] | |||
{{BB}} | {{BB}} | ||
Latest revision as of 21:00, March 12, 2024

Parched Brook is the eighth stage of Pikmin 3 's Bingo Battle.
Red, Blue, Yellow, and Winged Pikmin can be found here.
Layouts[edit]
The layout unlock order, as explained here, is A, C, B.
Layout A[edit]

This layout gives players Red Pikmin to start with, and Blue Pikmin can be found. Notable to this layout are various scattered piles of fragments, reinforced walls, and tons of scattered bomb rocks.
Enemies:
 Orange Bulborb × 1
 Bulborb × 1
 Yellow Wollywog × 2
 Dwarf Bulborb × 3
 Male Sheargrub × 6
 Skitter Leaf × 5
 Fiery Blowhog × 1
 Watery Blowhog × 1
 Iridescent Flint Beetle × 2
 Dwarf Orange Bulborb × 3
 Skeeterskate × 2
 Desiccated Skitter Leaf × 2
Fruits:
 Insect Condo ×1
 Citrus Lump × 1
 Golden Sunseed × 1
 Sunseed Berry × 1
Marbles:
 Blue Marble × 1
 Red Marble × 1
Tools:
Obstacles:
 Reinforced wall × 2
 Water body × 4
Plants and fungi:
 1-Pellet Posy × 16
- 5-Pellet Posy × 2
Other objects:
 Egg × 8
Layout B[edit]

This layout gives players Yellow Pikmin to start with, and Blue Pikmin can be found. Notable to this layout are electric gates and Burrowing Snagrets.
Enemies:
 Bearded Amprat × 2
- Bulborb × 2
- Yellow Wollywog × 2
- Watery Blowhog × 2
 Burrowing Snagret × 2
- Skeeterskate × 2
 Female Sheargrub × 8
 Hermit Crawmad × 2
- Desiccated Skitter Leaf × 4
Fruits:
- Insect Condo × 1
 Heroine's Tear × 1
- Sunseed Berry × 1
 Face Wrinkler × 1
- Golden Sunseed × 2 (in Burrowing Snagrets)
Marbles:
- Blue Marble × 2
- Red Marble × 2
Tools:
Obstacles:
 Electric gate × 2
- Water body × 4
Plants and fungi:
- 1-Pellet Posy × 32
Layout C[edit]

This layout gives players Red Pikmin to start with, and Winged Pikmin can be found. Notable to this layout is a lack of bridges and the inclusion of geysers.
Enemies:
- Bulborb × 1
- Dwarf Bulborb × 3
- Yellow Wollywog × 2
- Male Sheargrub × 4
- Skitter Leaf × 6
- Fiery Blowhog × 1
- Watery Blowhog × 1
- Orange Bulborb × 1
- Dwarf Orange Bulborb × 3
 Waddlepus × 2
 Shearwig × 5
 Armored Cannon Larva × 1
Fruits:
- Face Wrinkler × 1
- Insect Condo × 1
 Zest Bomb × 1
- Heroine's Tear × 1
Tools:
Obstacles:
 Dirt wall × 2
- Water body × 4
Plants and fungi:
- 1-Pellet Posy × 32
Gallery[edit]
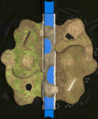
Texture used on the radar.

Names in other languages[edit]
| Language | Name | Meaning |
|---|---|---|
| Rigole chantante | Singing Channel | |
| Murmelnder Bach | Murmuring Brook | |
| Rivo asciutto | Dry Stream | |
| Arroyo Rumoroso | Rumorous Stream |