Drafty Gallery: Difference between revisions
Chazmatron (talk | contribs) (Info box image and improved layout of sublevel objects) Tag: Mobile edit |
|||
| Line 1: | Line 1: | ||
{{game icons|p4=y}} | {{game icons|p4=y}} | ||
{{infobox cave | {{infobox cave | ||
|image = | |image = Pikmin 4 Drafty Gallery.jpg | ||
|size = | |size = 300px | ||
|caption = | |caption = | ||
|location = Blossoming Arcadia | |location = Blossoming Arcadia | ||
| Line 9: | Line 9: | ||
|treasures = 10 | |treasures = 10 | ||
|onions = 0 | |onions = 0 | ||
|hazards = {{fire}} | |hazards = {{icon|fire}} | ||
|suggested = [[Red Pikmin]], [[Yellow Pikmin]]. | |suggested = [[Red Pikmin]], [[Yellow Pikmin]]. | ||
}} | }} | ||
| Line 33: | Line 33: | ||
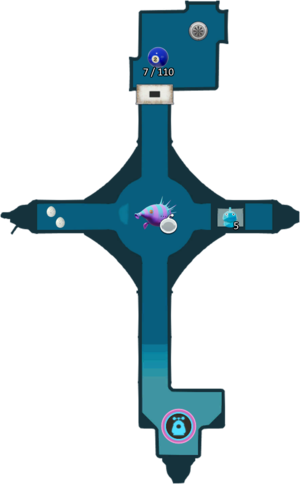
== Sublevel 1 == | == Sublevel 1 == | ||
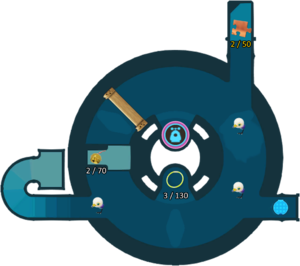
[[File:P4 Map Drafty Gallery 1.png|thumb|300px|Map of sublevel 1.]] | [[File:P4 Map Drafty Gallery 1.png|thumb|300px|Map of sublevel 1.]] | ||
{{game help|p4| | {{game help|p4|Write a guide on how to complete the sublevel.}} | ||
* '''Treasures''': | * '''Treasures''': | ||
** {{icon|Hoop of Fortune|v=P4|y}} | ** {{icon|Hoop of Fortune|v=P4|y}} × 1 | ||
** {{icon| | ** {{icon|Memory Fragment (Top...Probably?)|v=P4|y}} × 1 | ||
** {{icon| | ** {{icon|Spouse Alert|v=P4|y}} × 1 | ||
* '''Enemies''': | * '''Enemies''': | ||
** {{icon|Downy Snagret|v=P4|y}} × 3 | ** {{icon|Downy Snagret|v=P4|y}} × 3 | ||
* '''Obstacles''': | * '''Obstacles''': | ||
** | ** {{icon|Dirt wall|y}} × 1 | ||
* '''Tools''': | * '''Tools''': | ||
** | ** None | ||
* '''Wild Pikmin''': | * '''Wild Pikmin''': | ||
** | ** None | ||
* '''Others''': | * '''Others''': | ||
** | ** None | ||
{{clear}} | {{clear}} | ||
| Line 53: | Line 53: | ||
== Sublevel 2 == | == Sublevel 2 == | ||
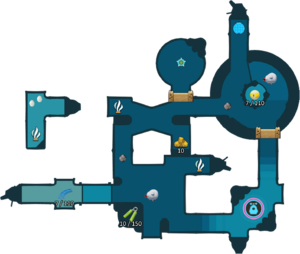
[[File:P4 Map Drafty Gallery 2.png|thumb|300px|Map of sublevel 2.]] | [[File:P4 Map Drafty Gallery 2.png|thumb|300px|Map of sublevel 2.]] | ||
{{game help|p4| | {{game help|p4|Write a guide on how to complete the sublevel.}} | ||
* '''Treasures''': | * '''Treasures''': | ||
** {{icon|Back-at-the-Beginning Track|v=P4|y}} | ** {{icon|Back-at-the-Beginning Track|v=P4|y}} × 1 | ||
** {{icon|Gold Nugget|v=P4|y}} × 10 | ** {{icon|Gold Nugget|v=P4|y}} × 10 | ||
** {{icon|Sphere of Support|v=P4|y}} × 1 | |||
** {{icon|Tandem Trainer|v=P4|y}} × 1 | |||
* '''Enemies''': | * '''Enemies''': | ||
** {{icon|Fiery Blowhog|y|v=P4}} × 2 | ** {{icon|Fiery Blowhog|y|v=P4}} × 2 | ||
* '''Obstacles''': | * '''Obstacles''': | ||
** | ** {{icon|Dirt wall|y}} × 2 | ||
** {{icon|Fire geyser|y}} × 2 | ** {{icon|Fire geyser|y}} × 2 | ||
* '''Tools''': | * '''Tools''': | ||
** | ** {{icon|Geyser|y}} × 3 | ||
* '''Wild Pikmin''': | * '''Wild Pikmin''': | ||
** | ** None | ||
* '''Others''': | * '''Others''': | ||
** {{icon|Candypop Bud|v=P4|y}} × 1 (Ice) | ** {{icon|Candypop Bud|v=P4|y}} × 1 (Ice) | ||
** {{icon|Egg|y|v=P3}} × 2 | |||
{{clear}} | {{clear}} | ||
| Line 75: | Line 77: | ||
== Sublevel 3 == | == Sublevel 3 == | ||
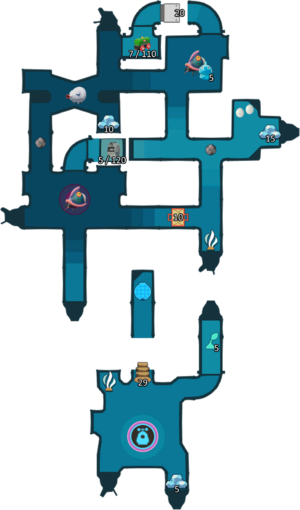
[[File:P4 Map Drafty Gallery 3.png|thumb|300px|Map of sublevel 3.]] | [[File:P4 Map Drafty Gallery 3.png|thumb|300px|Map of sublevel 3.]] | ||
{{game help|p4| | {{game help|p4|Write a guide on how to complete the sublevel.}} | ||
* '''Treasures''': | * '''Treasures''': | ||
** {{icon|Internal-Clock Measurer|v=P4|y}} | ** {{icon|Internal-Clock Measurer|v=P4|y}} | ||
** {{icon|Middle-Management Tank Car|v=P4|y}} | ** {{icon|Middle-Management Tank Car|v=P4|y}} | ||
* '''Enemies''': | * '''Enemies''': | ||
** {{icon|Fiery Blowhog|y|v=P4}} × 1 | |||
** {{icon|Joustmite|y|v=P4}} × 2 | ** {{icon|Joustmite|y|v=P4}} × 2 | ||
* '''Obstacles''': | * '''Obstacles''': | ||
** {{icon|Bag|y|v=P2}} × 1 | |||
** {{icon|Clipboard|y|v=P4}} × 1 (Weighing 20 Pikmin) | |||
** {{icon|Fire geyser|y}} × 2 | ** {{icon|Fire geyser|y}} × 2 | ||
* '''Tools''': | * '''Tools''': | ||
** | ** [[Clay bridge]] × 2 (requiring 29 pieces of raw material) | ||
** {{icon|Geyser|y}} × 2 | |||
* '''Wild Pikmin''': | * '''Wild Pikmin''': | ||
** {{icon|Ice Pikmin|v=P4|y}} × 5 (fighting Joustmite) | ** {{icon|Ice Pikmin|v=P4|y}} × 5 (fighting Joustmite) | ||
** {{icon|Ice Pikmin|v=P4|y}} × 5 (Sprouts) | ** {{icon|Ice Pikmin|v=P4|y}} × 5 (Sprouts) | ||
* '''Others''': | * '''Others''': | ||
** | ** {{icon|Egg|v=P3|y}} × 2 | ||
** | ** {{icon|Raw material|y}} × 3 (piles of 5, 10 and 15) | ||
{{clear}} | {{clear}} | ||
== Sublevel 4 == | == Sublevel 4 == | ||
[[File:P4 Map Drafty Gallery 4.png|thumb|300px|Map of sublevel 4.]] | [[File:P4 Map Drafty Gallery 4.png|thumb|300px|Map of sublevel 4.]] | ||
{{game help|p4| | {{game help|p4|Write a guide on how to complete the sublevel.}} | ||
* '''Treasures''': | * '''Treasures''': | ||
** {{icon|Sphere of Family|v=P4|y}} | ** {{icon|Sphere of Family|v=P4|y}} × 1 (requires 1 enemy defeated) | ||
* '''Enemies''': | * '''Enemies''': | ||
** {{icon|Puffy Blowhog|y|v=P4}} × 1 | ** {{icon|Puffy Blowhog|y|v=P4}} × 1 | ||
* '''Obstacles''': | * '''Obstacles''': | ||
** {{icon|Numbered | ** {{icon|Numbered gate|v=P4|y}} × 1 | ||
* '''Tools''': | * '''Tools''': | ||
** | ** None | ||
* '''Wild Pikmin''': | * '''Wild Pikmin''': | ||
** {{icon|Ice Pikmin|v=P4|y}} × 5 | ** {{icon|Ice Pikmin|v=P4|y}} × 5 | ||
* '''Others''': | * '''Others''': | ||
** | ** {{icon|Castaway|v=P4|y}} × 1 (inside Puffy Blowhog) | ||
** {{icon|Egg|y|v=P3}} × 2 | |||
{{clear}} | {{clear}} | ||
Revision as of 10:10, November 5, 2023
| Drafty Gallery | |
|---|---|
| |
| Location | Blossoming Arcadia |
| Sublevels | 4 |
| Rescues | 1 |
| Treasures | 10 |
| Onions | 0 |
| Hazards | |
| Suggested Pikmin | Red Pikmin, Yellow Pikmin. |
|
The following article or section contains guides. |
|
The following article or section is in need of assistance from someone who plays Pikmin 4. |
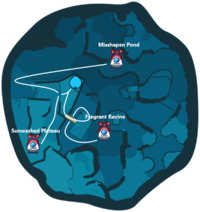
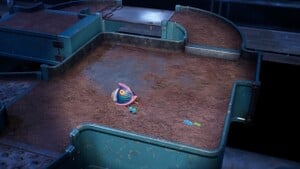
The Drafty Gallery is a cave in the Blossoming Arcadia in Pikmin 4. Its entrance is not surrounded by any major obstacles and the only hazards inside are fire, making it likely to be the player's first cave to explore. Members of the Blowhog family appear in this cave, who cause drafts with their attacks. With the pressence of pits as well, it's recommended the player take extra care to make sure no enemies shake off Pikmin into them. This cave has ![]() × 1,010 worth of treasure.
× 1,010 worth of treasure.
How to reach
There are two main ways to access this cave.
- From the Fragrant Ravine, head west and turn right till you reach the top of the hill with the area's Dandori Battle entrance. Build and cross the clay bridge and then turn right.
- From the Sunwashed Plateau, walk along the right path until you come across a climbing wall. Build and climb the wall, and you will find the cave's entrance straight ahead.
Notes
Olimar's Voyage Log
Sublevel 1
|
The following article or section is in need of assistance from someone who plays Pikmin 4. |
- Treasures:
- Enemies:
 Downy Snagret × 3
- Obstacles:
 Dirt wall × 1
- Tools:
- None
- Wild Pikmin:
- None
- Others:
- None
Sublevel 2
|
The following article or section is in need of assistance from someone who plays Pikmin 4. |
- Treasures:
 Back-at-the-Beginning Track × 1
 Gold Nugget × 10
 Sphere of Support × 1
 Tandem Trainer × 1
- Enemies:
 Fiery Blowhog × 2
- Obstacles:
 Dirt wall × 2
 Fire geyser × 2
- Tools:
 Geyser × 3
- Wild Pikmin:
- None
- Others:
 Candypop Bud × 1 (Ice)
 Egg × 2
Sublevel 3
|
The following article or section is in need of assistance from someone who plays Pikmin 4. |
- Treasures:
- Enemies:
 Fiery Blowhog × 1
 Joustmite × 2
- Obstacles:
 Bag × 1
 Clipboard × 1 (Weighing 20 Pikmin)
 Fire geyser × 2
- Tools:
- Clay bridge × 2 (requiring 29 pieces of raw material)
 Geyser × 2
- Wild Pikmin:
 Ice Pikmin × 5 (fighting Joustmite)
 Ice Pikmin × 5 (Sprouts)
- Others:
 Egg × 2
 Raw material × 3 (piles of 5, 10 and 15)
Sublevel 4
|
The following article or section is in need of assistance from someone who plays Pikmin 4. |
- Treasures:
 Sphere of Family × 1 (requires 1 enemy defeated)
- Enemies:
 Puffy Blowhog × 1
- Obstacles:
 Numbered gate × 1
- Tools:
- None
- Wild Pikmin:
 Ice Pikmin × 5
- Others:
Gallery
|
This article or section is in need of more images. |
Names in other languages
| Language | Name | Meaning |
|---|---|---|
| ふっとばされ回廊? Fut-tobasare Kairō |
Blow Away Gallery | |
(traditional) |
吹飛走廊 Chuīfēi Zǒuláng |
Blow Away Gallery |
(simplified) |
吹飞走廊 Chuīfēi Zǒuláng |
Blow Away Gallery |
| Blaaskaakgalerij | Blowhard gallery | |
| Galerie des bourrasques | Gusts gallery | |
| Zugige Gänge | Drafty Hallways | |
| Galleria ventosa | Windy gallery | |
| 낭떠러지 회랑 Nangtteoleoji Hirang |
Precipice Gallery | |
| Galeria ventilante | Ventilating gallery | |
| Galería ventosa | Windy gallery |
See also
|
The following article or section is in need of assistance from someone who plays Pikmin 4. |
|
The following article or section is in need of assistance from someone who plays Pikmin 4. |
