Secluded Courtyard
| Secluded Courtyard | |
|---|---|

| |
| Location | Blossoming Arcadia |
| Sublevels | 4 |
| Rescues | 2 |
| Treasures | 10 |
| Onions | 1 |
| Suggested Pikmin | |
| Wild Pikmin | |
|
The following article or section contains guides. |
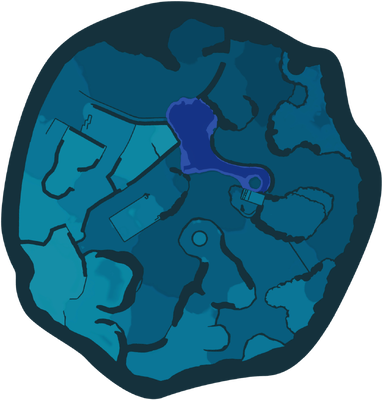
The Secluded Courtyard ひミツの坪庭?, lit.: "Secret-nectarous Spot Garden" is a cave in the Blossoming Arcadia in Pikmin 4. It has a zen garden theme. Many of its enemies are mimics, such as members of skitterling family and dweevil family. This extends to the cave's boss: the Foolix. Yellow Pikmin are useful here, with its high ledges and electric hazards, though Ice Pikmin are also recommended for dealing with the bodies of water and freezing the aforementioned boss. This cave has ![]() × 845 worth of treasure.
× 845 worth of treasure.
How to reach[edit]
The Secluded Courtyard is towards the southeast of the Blossoming Arcadia, on a plateau. Starting at the Fragrant Ravine base (the default base), head north toward the river and make a U-turn to the right before the clay bridge. A dirt wall must be destroyed to gain access to an elevated section, and then an electric gate must be destroyed to reach the caves entrance. Most enemies along the path can be avoided, but two Bearded Amprats can provide trouble.
Notes[edit]
Olimar's Voyage Log[edit]

Sublevel 1[edit]

- Treasures:
 Citrus Lump × 1
 Decorative Goo × 1
 Universal Rubber Cutie × 1
- Enemies:
 Skitter Leaf × 12 (10 fall from the sky)
 Sunsquish × 1 (inside nectar egg)
 Wolpole × 2
- Obstacles:
 Potted plant × 1
 Spotcap × 4 (the last one contains 1 raw material)
 Water body × 2
- Tools:
- None
- Wild Pikmin:
 Blue Pikmin × 5 (fighting Wolpoles)
- Blue Pikmin × 5 (sprouts)
- Others:
 Nectar egg × 3
From the left of the starting area, head up the hill to collect the Decorative Goo. Be aware that one of the nectar eggs contains a Sunsquish. Have a couple of Pikmin start pulling the adjacent potted plant and head right of the starting area. Defeat the harmless enemies and destroy the Spotcaps to access the Citrus Lump, which is hanging from a cobweb. To collect the Universal Rubber Cutie, head back to the potted plant and freeze the small body of water with Ice Pikmin – after plucking the underwater Blue Pikmin sprouts. Then walk towards the treasure, and defeat the Skitter Leaves after they fall from the sky. Finally, carry the treasure back to the S.S. Beagle.
Sublevel 2[edit]

- Treasures:
- Enemies:
 Anode Dweevil × 4
 Yellow Wollyhop × 2
- Obstacles:
 Dirt wall × 1
- Water body × 1
 Water spout × 3
- Tools:
 Climbing stick × 1
- Wild Pikmin:
 Yellow Pikmin × 5 (sprouts)
- Others:
 Castaway × 1
- Nectar egg × 2
 Raw material pile × 1 (15 pieces)
The castaway in this sublevel can be approached from either direction. Make sure to defeat all the Anode Dweevils to stop them from electrifying Pikmin carrying items back – one is hiding behind the dirt wall. To collect the Talisman of Life (Cherry Blossom), throw at least 2 Yellow Pikmin at the base of the climbing stick from the lower block. The path back to the base contains a Yellow Wollyhop, which can crush those two Pikmin carrying the treasure back, so you should ideally defeat it beforehand.
Sublevel 3[edit]

- Treasures:
 Astringent Clump × 1
 Blonde Impostor × 1
 Gold Nugget × 15
- Enemies:
 Desiccated Skitter Leaf × 5
- Sunsquish × 4 (1 inside large nectar egg)
- Obstacles:
 Electric gate × 1
 Iron fence × 2
- Water spout × 3
- Tools:
- None
- Wild Pikmin:
- Blue Pikmin × 5 (fighting Sunsquish)
 Candypop Bud (Yellow) × 1 (if 5 or less Yellow Pikmin)
- Others:
 Flarlic × 1
 Dirt-mound × 1 (containing 25 raw materials)
 Nectar (not inside a nectar egg) × 2
- Nectar egg × 1 (in place of Candypop Bud if more than 5 Yellow Pikmin)
 Nectar egg (large) × 2
- Raw material pile x 1 (15 pieces)
If your Yellow Pikmin numbers are low, you can get some with the Candypop Bud behind the starting area. Yellow Pikmin are quite useful on this sublevel, as they can reach the Blonde Impostor suspended in the air and the Flarlic on a high pot. Be careful when collecting the Astringent Clump – it is suspended above a water spout, so if the spout hasn't been destroyed first, the treasure will land on top of it, requiring careful timing to collect with non-Blue Pikmin. You should also be careful near the area the Flarlic is located, as multiple Desiccated Skitter Leaves will fall from the sky. Additionally, a Sunsquish will fall from the sky near the large nectar egg (the one closest to the electric gate).
Sublevel 4[edit]

- Treasures:
 Expression Hider × 1
- Enemies:
 Foolix × 1
- Obstacles:
 Numbered gate × 1 (opens when the Foolix is defeated)
- Potted plant × 1
- Tools:
- None
- Wild Pikmin:
- None
- Others:
- Castaway × 1 (inside Foolix)
- Nectar egg (large) × 1
- See also: Foolix strategy.
After digging up the potted plant, you'll come across what looks like a single blob of nectar in the middle of an arena. This is in fact the Foolix, the boss of the cave. After defeating it, carry back the castaway it drops and the nearby treasure. If any of your Pikmin have been wilted during the fight, you can use the large nectar egg to gain some nectar, though there is a chance multiple raw material drop instead.
Gallery[edit]
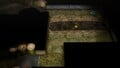
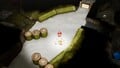
Sublevel 1[edit]
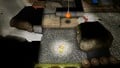
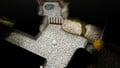
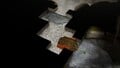
The southern section of sublevel 1, where the base is located.
The western section of sublevel 1.
The northern section of sublevel 1.
The northeastern section of sublevel 1.
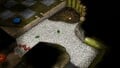
The eastern section of sublevel 1.


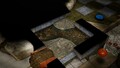
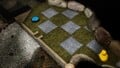
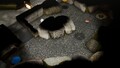
Sublevel 2[edit]
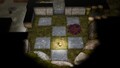
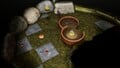
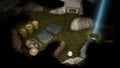
The southern section of sublevel 2, where the base is located.
The western section of sublevel 2.
The central section of sublevel 2.
The northern section of sublevel 2.
The eastern section of sublevel 2.


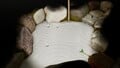
Sublevel 3[edit]
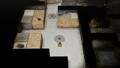
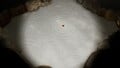
The central section of sublevel 3, where the base is located.
The eastern section of sublevel 3.
The northern section of sublevel 3.
The western section of sublevel 3.
The southern section of sublevel 3.


Sublevel 4[edit]
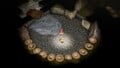
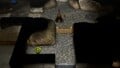
The southern section of sublevel 4, where the base is located.
The western section of sublevel 4.
The northern section of sublevel 4, where the boss arena is located.
The eastern section of sublevel 4.


Trivia[edit]
- Louie specifically mentions this cave ("blah-blah Courtyard") in his second Fit for a Feast quest when requesting two Yellow Wollyhops.
- Unlike most of his other requests, this is the only cavern where Yellow Wollyhops appear belowground, meaning the request cannot be fulfilled anywhere else.
Names in other languages[edit]
| Language | Name | Meaning |
|---|---|---|
| ひミツの坪庭? Hi-Mitsu no Tsuboniwa |
Secret-nectarous Spot Garden | |
(traditional) |
秘密小庭園 Mìmì Xiǎo Tíngyuán |
Secret Little Flower Garden |
(simplified) |
秘密小庭园 Mìmì Xiǎo Tíngyuán |
Secret Little Flower Garden |
| Verzonken hof | Recessed courtyard | |
| Courette isolée | Isolated courtyard | |
| Verborgener Innenhof | Hidden Courtyard | |
| Cortile segreto | Secret courtyard | |
| 비밀의 안뜰 Bimil-ui Antteul |
Secret Courtyard | |
| Pátio breado | Dark courtyard | |
| Jardín secreto | Secret garden |
See also[edit]
| Caves in Pikmin 4 | |
|---|---|
| Rescue Command Post | Burrow of Beginnings |
| Sun-Speckled Terrace | Last-Frost Cavern • Crackling Cauldron • Aquiferous Summit • Industrial Maze • Hectic Hollows |
| Blossoming Arcadia | Drafty Gallery • Secluded Courtyard • Sightless Passage • Kingdom of Beasts |
| Serene Shores | Seafloor Resort • Subzero Sauna • Below-Grade Discotheque • Engulfed Castle |
| Hero's Hideaway | Doppelgänger's Den • Frozen Inferno • Plunder Palace |
| Giant's Hearth | Ultimate Testing Range • Dream Home • Cradle of the Beast |
| Primordial Thicket | The Mud Pit • Subterranean Swarm • Cavern for a King |
| Dandori Challenges | Dandori Day Care • Hotshock Canyon • Rockaway Cellars • Test Tubs • Ice-Cross Course • Hefty Haulway • Aerial Incinerator • Strategic Freezeway • Planning Pools • Toggle Training • Cliff-Hanger's Hold • Oasis of Order • Trial of the Sage Leaf |
| Dandori Battles | Trial Run • Battle in a Box • Dandori Castle • Leafy Showdown • Hot Sandy Duel • Final Battle |