Ultimate Testing Range
| Ultimate Testing Range | |
|---|---|

| |
| Location | Giant's Hearth |
| Sublevels | 5 |
| Rescues | 2 |
| Treasures | 12 |
| Onions | 0 |
| Suggested Pikmin | |
| Wild Pikmin | |
|
The following article or section contains guides. |
The Ultimate Testing Range is a cave in the Giant's Hearth in Pikmin 4. The abundance of pits and flying enemies make Winged Pikmin the most recommend Pikmin to be taken down. The cavern's name doesn't come into play until its final sublevel, featuring a boss encounter with the gun-slinging Man-at-Legs. This cave has ![]() × 1,115 worth of treasure.
× 1,115 worth of treasure.
How to reach[edit]
Located near the Abandoned Throne base, a clay mound can be found, requiring 7 raw materials to be built. It leads up to the top of some elevated ground where this cave is found.
Notes[edit]
Louie's Voyage Log[edit]
Sublevel 1[edit]

- Treasures:
 Long-Shot Totem
 Relentless Spear (on floating platform)
 Sphere of Trust
- Enemies:
 Venom Dweevil × 4
- Obstacles:
- Tools:
 Clay bridge × 1 (27 pieces of raw material required)
 Floating platform × 3
 Geyser × 1
- Wild Pikmin:
 Winged Pikmin × 5 (buried sprouts)
- Others:
 Raw material pile × 1 (21 pieces)
 Egg × 3
Venom Dweevils are located next to the Sphere of Trust and the Long-Shot Totem, meaning they will likely steal them and prevent transporting them. A particular Venom Dweevil falls down when attempting to transport the latter treasure, but it will not fall down if Oatchi carries it using his Swallow ability. They can be easily defeated with White Pikmin, as they are immune to their poison attacks. Next to the Long-Shot Totem, there is a constantly moving floating platform that must be used to reach the other section of the sublevel and to collect the Sphere of Trust. The other path going left leads to the next sublevel's entrance and the Relentless Spear; there is also a geyser to get back to high ground, in case the clipboard and clay bridge were not lowered and built respectively. Lower the clipboard and build the clay bridge in order to transport the Sphere of Trust. The Relentless Spear is located atop of an elevated floating platform, next to another one that lifts the player up in order to reach it. The five Winged Pikmin sprouts behind the dirt wall can be used to increase your Winged Pikmin population.
Sublevel 2[edit]

- Treasures:
- Enemies:
 Watery Blowhog × 2
 Miniature Snootwhacker × 3
 Withering Blowhog × 1
- Obstacles:
 Iron fence × 1
 Iron fence × 4 (lowered by pressing the button)
- Tools:
- Geyser × 4 (1 is plugged)
 Dirt-mound × 1 (contains 1 bomb rock)
 Button × 1 (lowers Iron fences)
- Wild Pikmin:
- None
- Others:
 Candypop Bud (White) × 1 (if more than 10 Winged Pikmin, else becomes Winged)
 Candypop Bud (Winged) × 2
- Raw material pile × 2 (15 pieces each)
- Egg × 2
A button located on a high ledge must be pressed to lower four iron fences. To reach it, unplug and use the geyser that leads to the next sublevel's entrance, followed by the geyser next to it. Lowering the four iron fences enables easier routing around the sublevel for Oatchi, as well as access to the next sublevel. Assuming only the suggested Pikmin types are brought, the Watery Blowhogs' water attacks can harm your Pikmin, although if Blue Pikmin are brought, they could be used to easily defeat them, as they are immune to their attacks. The Miniature Snootwhackers can potentially knock back your Pikmin into the pit, but they could be defeated with Oatchi's Rush to expose their bellies in order to damage them. Although mostly harmless, the Withering Blowhog can also knock back your Pikmin into the pit if it is fought. It is recommended to have at least 10 Winged Pikmin to collect both treasures. The Straight-and-Narrow Track should be carried with at least 7 Winged Pikmin to lift it over the ledge. To collect the Telekinesis Detector, go through the iron fence as the rookie Rescue Officer and throw at least 10 Pikmin at it to carry it past the iron fence and the pit. If there are not enough Winged Pikmin to use, convert other Pikmin types into Winged Pikmin by using the Candypop Buds (Winged).
Sublevel 3[edit]

- Treasures:
- Enemies:
 Waddlepus × 2
 Arachnode × 3
 Puffy Blowhog × 2
- Obstacles:
 Box × 1
- Iron fence × 2
 Bubble blower × 2
- Tools:
- Geyser × 3
- Floating platform × 1
- Wild Pikmin:
- None
- Others:
 Castaway (Leafling) × 1 (on Arachnode web)
- Candypop Bud (Winged) × 2
- Raw material pile × 2 (15 pieces each)
- Egg × 2
The Puffy Blowhogs, Waddlepusses, and bubble blowers can cause your Pikmin to fall into the pit, so dispatch them if necessary. Two Arachnode webs block around the loop at the start. When first approaching them, they are behind their webs, meaning they cannot be damaged with Pikmin. Use the geyser or go around the rim of the loop to bypass the webs and to be able to defeat them, allowing for the two Heart Swords to be transported. Going down the left path leads to a large gap across a small section of the sublevel and two geysers; one goes back to the loop while the other goes near the next sublevel's entrance. On the other path, there is a constantly moving floating platform that also leads to the next sublevel's entrance. Pass through the iron fence as the rookie Rescue Officer and defeat the Arachnode by going underneath its web (without Winged Pikmin still in the squad) to defeat it on the other side and freeing the leafling. Defeat the Puffy Blowhog and push the box to create a path for the Sphere of Heart and leafling to be transported. 7 Pikmin should be used to collect the Sphere of Heart, as they can go through the iron fence blocking it to transport it.
Sublevel 4[edit]

- Treasures:
- Enemies:
- Obstacles:
- None
- Tools:
 Switch × 1 (changes direction of moving walkways)
 Moving walkway × 10
- Clay bridge × 1 (23 pieces of raw material required)
- Geyser × 3
- Wild Pikmin:
- Winged Pikmin × 10 (two lots of 5, both inside a Lesser Spotted Jellyfloat)
- Others:
- Candypop Bud (White) × 1
- Raw material pile × 1 (20 pieces)
- Egg × 2
A switch in the center of the sublevel must be used to control the moving walkways. However, Winged Pikmin can fly over the moving walkways while transporting objects, such as clay to build the clay bridge. Additionally, Oatchi can run through them with his Rush ability. If no Winged Pikmin are currently in the squad, both the Disk of Surprising Wisdom and Memory Fragment (Right Edge) will require controlling the moving walkways in order for them to be transported.
At the beginning of the sublevel, there are two paths to take: The right path cannot be taken due to the moving walkways moving in the wrong direction, unless Oatchi's Rush ability is used to outrun them. This leads to the bottom right section and the next sublevel's entrance. The left path's moving walkways lead to a Lesser Spotted Jellyfloat. Following after that, two Fiery Dweevils next to the Disk of Surprising Wisdom. One of the two Fiery Dweevils will likely occupy the Disk of Surprising Wisdom and agitating them will harm your Pikmin through their fire attacks, so defeat them if necessary. This section of the sublevel also has a geyser that goes to the center of the sublevel. which also has one going back to the left section. The clay bridge at the center serves as a shortcut back to the S.S. Beagle, allowing for objects to quickly be transported. The top section contains the 15 gold nuggets and the Memory Fragment (Right Edge), as well as a geyser to leave the section. Your Pikmin and Oatchi can also use this geyser to transport the gold nuggets if the moving walkways are currently moving in the wrong direction. There are two moving walkways next to each other that allow the player to easily move in and out of the center and right sections. Going further right leads to the bottom right section, containing the next sublevel's entrance.
The Jellyfloats can easily be defeated with Winged Pikmin, as their ability to fly excells against airborne enemies. Ice Pikmin can also be brought to freeze them, instantly killing them when they fall to ground in a frozen state. The Jellyfloats will likely impede your Pikmin’s progress of transporting, as they will attempt to inhale them and keep a couple of them inside their bodies, though in the case of the Greater version, the Pikmin will die after a couple of seconds have passed. The Greater Spotted Jellyfloat is located at the center of the sublevel, near the switch, which will likely interrupt the player from using the switch to change the moving walkways, if it inhales any Pikmin or the rookie Rescue Officer.
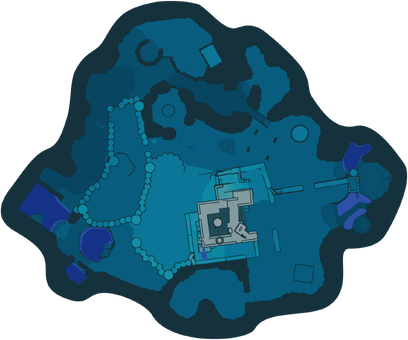
Sublevel 5[edit]

- Treasures:
- Enemies:
 Man-at-Legs × 1
- Obstacles:
 Dirt wall × 3
 Numbered gate × 2 (both open when 1 Man-at-Legs is defeated)
- Others:
- See also: Man-at-Legs strategy.
The Man-at-Legs resides in the middle of a circular arena that makes up most of the floor. Three dirt walls can be found around the arena which can be used to take cover from its bullet attacks. The dirt walls seem to have much higher health than usual, but they will eventually be destroyed by the Man-at-Legs if they are used too much.
Oatchi is helpful in the fight, as riding him will help keep your Pikmin together, and with Rush Boots, he can outrun the Man-at-Legs' bullet attacks.
Another good strategy for killing the Man-at-Legs is by rushing into its valve before it can emerge from the ground, which will make it lose around half of its health.
Once it is defeated, it will drop the castaway, and the two numbered gates will open up the Winged Freedom Sculpture and cave's exit.
Gallery[edit]
|
This article or section is in need of more images. |
Names in other languages[edit]
| Language | Name | Meaning |
|---|---|---|
| 最終兵器実験場? Saishū Heiki Jikkenjō |
Ultimate Weapon Testing Range | |
(traditional) |
終極兵器實驗場 Zhōngjí Bīngqì Shíyàn-cháng |
Ultimate Weapon Testing Range |
(simplified) |
终极兵器实验场 Zhōngjí Bīngqì Shíyàn-cháng |
Ultimate Weapon Testing Range |
| Ultieme testfaciliteit | Ultimate test facility | |
| Centre d'essais ultime | Ultimate testing center | |
| Ultimatives Testgelände | Ultimate Test Site | |
| Campo di prova finale | Final proving ground | |
| 최종 병기 실험장 Choejong Byeonggi Silheom-jang |
Ultimate Weapon Testing Range | |
| Campo de provas finais | Final proving ground | |
| Campo de pruebas final | Final proving ground |
Trivia[edit]
- This cave is similar in name to the Secret Testing Range, a Challenge Mode stage in Pikmin 2 that also features the Man-at-Legs.
- Sublevel 5 is the only sublevel in the game to have multiple numbered gates.
- Those numbered gates are also the longest in the game.
See also[edit]
| Caves in Pikmin 4 | |
|---|---|
| Rescue Command Post | Burrow of Beginnings |
| Sun-Speckled Terrace | Last-Frost Cavern • Crackling Cauldron • Aquiferous Summit • Industrial Maze • Hectic Hollows |
| Blossoming Arcadia | Drafty Gallery • Secluded Courtyard • Sightless Passage • Kingdom of Beasts |
| Serene Shores | Seafloor Resort • Subzero Sauna • Below-Grade Discotheque • Engulfed Castle |
| Hero's Hideaway | Doppelgänger's Den • Frozen Inferno • Plunder Palace |
| Giant's Hearth | Ultimate Testing Range • Dream Home • Cradle of the Beast |
| Primordial Thicket | The Mud Pit • Subterranean Swarm • Cavern for a King |
| Dandori Challenges | Dandori Day Care • Hotshock Canyon • Rockaway Cellars • Test Tubs • Ice-Cross Course • Hefty Haulway • Aerial Incinerator • Strategic Freezeway • Planning Pools • Toggle Training • Cliff-Hanger's Hold • Oasis of Order • Trial of the Sage Leaf |
| Dandori Battles | Trial Run • Battle in a Box • Dandori Castle • Leafy Showdown • Hot Sandy Duel • Final Battle |