Subterranean Swarm
| Subterranean Swarm | |
|---|---|

| |
| Location | Primordial Thicket |
| Sublevels | 5 |
| Rescues | 2 |
| Treasures | 13 |
| Onions | 0 |
| Suggested Pikmin | |
| Wild Pikmin | |
|
The following article or section contains guides. |
The Subterranean Swarm is a cave in the Primordial Thicket in Pikmin 4. It has a large variety of enemies of all types, particularly insect-esque ones weak to Rock Pikmin and Winged Pikmin, and all sublevels have a large quantity of sticky mold covering the ground. It features an encounter with a Horned Cannon Beetle and a Sovereign Bulblax. This cave has ![]() × 1,275 worth of treasure.
× 1,275 worth of treasure.
How to reach[edit]

From the area's first base, The Sylvan Gate, turn right and walk towards the lower ground. Then take a right turn again and keep on walking until you reach a Grubchucker surrounded by clusters of mushrooms and mold. One of these hides the cave's entrance, so it's recommended to take out the Grubchucker before entering to be safe.
Notes[edit]
Louie's Voyage Log[edit]

Sublevel 1[edit]

- Treasures:
 Hoop of Fortune × 1 (stuck inside of an Arachnode's web)
 Hoop of Healing × 1 (stuck inside of an Arachnode's web)
 Sphere of Calm × 1 (hanging from a cobweb)
- Enemies:
 Arachnode × 3
 Grubchucker × 2
- Obstacles:
 Dirt wall × 1 (has 8000 HP)
 Sticky mold × 8
 Spotcap × 23
- Tools:
- Wild Pikmin:
 Candypop Bud × 2 (Purple)
- Others:
 Large egg × 1
 Pile of raw material × 2 (15 pieces each)
Being a late game cave, it is rather complex and has multiple paths, but the most efficient start is to break the large nectar egg next to you. It will most likely drop spray or nectar that will help throughout the rest of the cave. Then you will want to head down the longer path to your right and kill the Arachnode. This is best done by throwing Rock Pikmin. You will then want to go to path to the right you just unlocked and fight the Grubchucker. This is best done by charging Winged Pikmin at it to knock it down, and then charging Rock Pikmin to deal damage. After killing it you can safely transform 5 Pikmin into Purple Pikmin. You can also then weigh down the Sphere of Calm. Next, you can the go around and the Arachnode to the north and kill it with Rock Pikmin to release the Hoop of Fortune and Hoop of Healing from its web. You can then head towards the second Grubchucker and use the same strategy to wipe it out. Then you can transform 5 more Pikmin into Purple Pikmin. After that you can head straight to the second sublevel, just after you destroy the Spotcaps surrounding it.
Sublevel 2[edit]

- Treasures:
 Belted Delicacy × 2
 Spouse Alert × 1
- Enemies:
 Shearflea × 12
 Armored Cannon Larva × 3
- Obstacles:
- Dirt wall × 2
- Sticky mold × 5
 Kingcap × 4
- Spotcap × 23
- Tools:
- Wild Pikmin:
 Candypop Bud (White) × 1
- Others:
 Large egg
- Pile of raw material} × 1 (30 pieces)
This level starts you in front of a dirt wall, but avoid breaking down until you have killed the Armored Cannon Larva on the other side to prevent its boulders from harming you. If you make your way around the other side you will come across 2 Shearfleas. Rock Pikmin will be able to safely deal with them as they are immune to their stabbing. They are also good for avoiding the Armored Cannon Larva's boulders. You will then see 3 more Shearfleas and another Armored Cannon Larva. On the big wooden stumps in front there will be 3 more Shearfleas which can be killed easily. This allows you to be able to throw 10 Pikmin to grab the treasure on the top stump: the Belted Delicacy. This also means you can then access the white Candypop Bud which will give you 5 White Pikmin. You can then also grab the Raw materials. It isn't recommended to break the mushrooms until the end because they help with hiding from the boulders.
The second area is behind another dirt wall. Inside, more Shearfleas surround the area. Once you are fully around, crack the large nectar egg. You should notice a third Armored Cannon Larva at the top of room's tree stump. In order for you to get up there, you will need to remove the sticky mold. When climbing the tree stump, timing is key. When there's time in-between the boulders coming down, ride Oatchi up to small platforms along the stump that allow you avoid the boulders. Once at the top, defeat the Armored Cannon Larva and collect the Spouse Alert.
Sublevel 3[edit]

- Treasures:
 Creativity Conduit (inside Horned Cannon Beetle)
 Back-at-the-Beginning Track (under some sticky mold)
- Enemies:
- Obstacles:
- Sticky mold × 8
- Spotcap × 39
- Others:
 Castaway × 1 (Leafling) (under some sticky mold).
- Large egg
- Candypop Bud (Purple) × 1
- See also: Horned Cannon Beetle strategy.
As you start the level, to the right there will be a purple Candypop Bud surrounded by sticky mold. Destroy them and use 5 of any Pikmin to create Purple Pikmin, which will help you later on. Next is a big egg, which will hopefully give you nectar for your new Pikmin.
Within the main area is a large Horned Cannon Beetle that acts like a midboss. Before you engage with it, try to break as many as the mushrooms as you can so you can get rid of the sticky mold, otherwise you won’t be able to move much around the area. After that, you can properly fight the Horned Cannon Beetle. Once you kill the beetle, it will give you the Creativity Conduit. In other sections, you can find a Back-at-the-Beginning Track and a leafling, both covered in more mold. Collect both and you'll be free to move on.
Sublevel 4[edit]

- Treasures:
- Enemies:
 Swooping Snitchbug × 2
 Joustmite × 1
 Doodlebug × 1
 Flighty Joustmite × 3
 Shearwig × 8
 Mitite × 20 (10 after some sticky mold has been removed, 10 could be inside the Doodlebug)
- Obstacles:
- Dirt wall × 1
- Sticky mold × 5
- Spotcap × 12
- Kingcap × 1
 Poison Spotcap × 3
 Breakable pot × 4
 Iron fence × 1
 Tunnel × 1
- Tools:
- Wild Pikmin:
- Others:
- Candypop Bud (White) × 2
- Pile of raw material × 1 (15 pieces)
Start by going to the right, to an area with 4 Shearwigs, who you will need to defeat. Then, smash the pots with Oatchi, which will smash the ones on top of the cans which drops the Chance Totem. But it means you can access Raw materials as well. On the opposite side of where the materials are there is a Flighty Joustmite. Whilst also being in that area another group of Shearwig you will need to combat there as well. This is when you can access the treasures. The first one is Memory Fragment (Center Left) and the second one is Chance Totem. After that you can break the mushrooms apart so that you can access the white Candypop Bud.
Move onto another area where there are 2 Flighty Joustmite. If you kill them you will be able to move the Mega Horn safely. There is also a white Candypop Bud there, which can help with the Doodlebug and poisonous mushrooms later on. In the same area there is also a tunnel, which can make transferring treasure a lot easier.
You will then move onto an area where there will be a Swooping Snitchbug with some sticky mould patches. Once you have defeated both, walk over a patch to reveal a Doodlebug. Hitting its back will give you bomb rocks. However, it will also trigger lots of Mitites. The Snitchbug may grab one of the bomb rocks dropped by the Doodlebug, and as bomb rocks flip the Doodlebug over, will cause a chain reaction. On the left hand side, you can send any Pikmin to these mushrooms, however the ones with the blue spores coming out need to be hit by only the White Pikmin. Once all obstacles in the area have been cleared, you can send Pikmin to retrieve the pile of Gold Nuggets and then a few Pikmin to hit down the sand barrier that has the tunnel exit behind.
The last area holds a Joustmite and a Swooping Snitchbug, though there are no more treasures, and this will simply just clear the way back to the S.S. Beagle.
Sublevel 5[edit]

- Treasures:
- Enemies:
- Obstacles:
 Boulder (group of 7) × indefinite amount (created by the Sovereign Bulblax, when it jumps so high and lands)
 Numbered gate × 1 (only opens when 1 Sovereign Bulblax is defeated)
- Sticky mold × 2
- Spotcap × 4
- Tools:
 Potted mushroom × 2
- Wild Pikmin:
- None
- Others:
- See also: Sovereign Bulblax strategy.
First break the egg next to where you begin. Then go into the arena area and try to clear the sticky moulds on both sides without waking the Sovereign Bulblax up. Make sure all the eggs are smashed so that if you need to make your Pikmin stronger during the fight those are already pre-broken. Once you get wake the Sovereign Bulblax up, make sure that you are always on Oatchi so the Pikmin are not all over the place and you can easily call them back when they are thrown off it. However, when the monster pushes you off Oatchi with his roar, you need to make sure you call all Pikmin back and get on him as soon as possible. A good idea is to quickly jump off of Oatchi right before they roar to prevent getting briefly stunned. If you need to hide, there are leafs the Sovereign Bulblax can’t find you in. Once you defeat the monster the Castaway will come out of it and if you break the big egg it will give you Raw materials. The area will open up where the way out is but there is also a treasure in there which is a Sweet Stumble-Not.
Gallery[edit]
|
This article or section is in need of more images. |
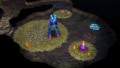
The Grubchucker on the right of the 1st Sub-Level.

Names in other languages[edit]
| Language | Name | Meaning |
|---|---|---|
| 蟲だまり? Mushi Damari |
Bug Swarm | |
(traditional) |
蟲子聚集點 Chóngzi Jùjí Diǎn |
Bug Gathering Spot |
(simplified) |
虫子聚集点 Chóngzi Jùjí Diǎn |
Bug Gathering Spot |
| Kriebel-en-kruipruimte | Itch-and-crawl space | |
| Essaim souterrain | Subterranean swarm | |
| Unterirdisches Nest | Underground Nest | |
| Nido sotterraneo | Subterranean nest | |
| 벌레 소굴 Beolle Sogul |
Bug Nest | |
| Enxame subterrâneo | Subterranean swarm | |
| Nido subterráneo | Subterranean nest |
See also[edit]
| Caves in Pikmin 4 | |
|---|---|
| Rescue Command Post | Burrow of Beginnings |
| Sun-Speckled Terrace | Last-Frost Cavern • Crackling Cauldron • Aquiferous Summit • Industrial Maze • Hectic Hollows |
| Blossoming Arcadia | Drafty Gallery • Secluded Courtyard • Sightless Passage • Kingdom of Beasts |
| Serene Shores | Seafloor Resort • Subzero Sauna • Below-Grade Discotheque • Engulfed Castle |
| Hero's Hideaway | Doppelgänger's Den • Frozen Inferno • Plunder Palace |
| Giant's Hearth | Ultimate Testing Range • Dream Home • Cradle of the Beast |
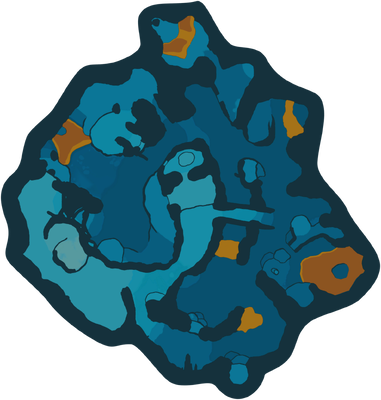
| Primordial Thicket | The Mud Pit • Subterranean Swarm • Cavern for a King |
| Dandori Challenges | Dandori Day Care • Hotshock Canyon • Rockaway Cellars • Test Tubs • Ice-Cross Course • Hefty Haulway • Aerial Incinerator • Strategic Freezeway • Planning Pools • Toggle Training • Cliff-Hanger's Hold • Oasis of Order • Trial of the Sage Leaf |
| Dandori Battles | Trial Run • Battle in a Box • Dandori Castle • Leafy Showdown • Hot Sandy Duel • Final Battle |