
2-Player Battle

- This article is about the competitive 2-player mode in Pikmin 2. For a mode in another Pikmin game that involves 2 players battling, see 2-player mode.
2-Player Battle (2Pバトル?, lit.: "2P Battle") is a game mode in Pikmin 2. It involves, as the name implies, a competition between two players, with a few different ways to win. Player 1 controls Captain Olimar and a team of Red Pikmin on the top half of the screen, and player 2 controls Louie with Blue Pikmin on the bottom half.
At the start of a battle, players can find a number of Pellet Posies next to their Onions, as well as a marble of that team's color, and in some stages, they can find a group of Female Sheargrubs near the base, allowing them to bolster their numbers. Onions work as they do in Story Mode, but there is a Pikmin limit of 50 per player. Seeing as leaders cannot access the Onion menu, the Onion is in charge of automatically spitting out Pikmin seeds whenever there is space for them in the field. Pikmin that die to opposing Pikmin attacks simply respawn at the Onion, after a short delay.
Cherries periodically spawn in certain spots, and recovering one will allow a spin of the roulette wheel. To make things even, Blue Pikmin are given the strength of Red Pikmin, and bodies of water are absent. However, both types are still immune to their respective elements. Each player's leaders and Pikmin can engage with each other in combat as elaborated below.
In the setup menu, each player can choose how many Pikmin they start with in multiples of 5, between 5 and 50. This menu also has the list of stages, a general overview of the scores (see below for more information) and a way to show a summary of the game rules. Unlike other loading screens in the game, 2-Player Battle stage loading screens will contain a random tip.
Arenas[edit]
The players can choose one of ten maps. Every battle uses the same music. Unlike the caves in story mode, these use fixed layouts and are not generated randomly, for the most part. For more details, see below.
Ways to win[edit]
There are four ways to score a victory over the opponent:
- Taking 4 yellow yellow marbles to the Onion. Note that there are only 7 in total, making it so that only one player can do so.
- Taking the opponent's marble to the Onion. Note that Pikmin cannot carry their own marble, but one of the items does allow for its retrieval.
- The opponent suffers a Pikmin extinction. Note that this can happen from Pikmin in-fighting, but because Pikmin that die this way respawn at the Onion after a delay, the extinction needs to happen during this delay in order for the player's count to reach 0.
- The opponent's leader is down.
Items[edit]
A player can get items by carrying cherries back to their Onion. Cherries in this mode spawn randomly, and have a maximum number of carrier Pikmin of one. Recovering a cherry will make the item roulette spin, and when it's done, it'll randomly land on an item. Players can then use that item at any moment by pressing  /
/  /
/  . If more cherries are collected before the player uses the current item, they'll be added to a queue, for a maximum of 5 items waiting to be used. Pressing the item button in these cases will use the current item and instantly make the roulette spin for the next one.
The roulette only becomes visible when it is spinning or there are items in queue. Above the roulette are four unfilled circles, each becoming filled by a red dot to represent an item in the queue; the current item does not have a dot. Each spin takes around five seconds, which stops the player from using an item right after another. Although it's identified as a roulette wheel, it looks and behaves more closely to a slot machine's reel.
Players have access to 12 different items that benefit them, disadvantage their opponent, or both. The following is a list of all items, sorted by the order in which they're placed on the roulette:
| Icon | Power | Description |
|---|---|---|
 |
+5 Sprouts | Grants the player five Pikmin sprouts. Any Pikmin that go over the 50 Pikmin limit will not be granted, and if the player is already at the limit, no Pikmin will spawn. This item can still be obtained even if the player already has 50 Pikmin. |
 |
+10 Sprouts | Just like +5 Sprouts, but grants ten sprouts instead. |
 |
Flower | Makes all of the player's Pikmin that are not planted in the ground bloom into flowers. |
 |
Ghost | Makes the player's leader and Pikmin become invisible to the opponent for exactly 2 minutes. The opponent can still see the dust from the player leader's footsteps, their whistle, and, if their Pikmin are affected by the ultra-spicy spray, the glowing circles on their heads. Additionally, the opponent's Pikmin can still see everything, and the leader and Pikmin are fully visible on the collecting player's portion of the screen. |
 |
Ultra-bitter spray | Grants one dose of ultra-bitter spray. |
 |
Ultra-spicy spray | Grants one dose of ultra-spicy spray. |
 |
Marble return | Makes the player's marble, if not buried by a Breadbug, bounce all the way back to the Onion, regardless of distance. Any opposing Pikmin carrying the marble will be knocked down. |
 |
Withering Blowhog | Makes a Withering Blowhog appear near the opponent's Onion. |
 |
Swooping Snitchbug | Makes a Swooping Snitchbug appear near the opponent's Onion. |
 |
Boulders | Makes several Boulders drop near the opponent. Leaders and Pikmin under Onions are likely to escape unharmed since boulders break upon touching the Onion. Boulders are capable of hurting leaders and Pikmin in either player's team, so care should be taken when using the item when both players are near one another. |
 |
Volatile Dweevil | Drops a Volatile Dweevil near the opponent. |
 |
Fiery Blowhog/Watery Blowhog | Makes a Blowhog appear near the opponent's Onion. If the opponent is Louie, a Fiery Blowhog will appear. If the opponent is Olimar, a Watery Blowhog appears instead. These Blowhogs cannot harm leaders. |
Enemies created upon a spin of the roulette wheel disappear completely on defeat, meaning their bodies cannot be returned to either Onion. They automatically die after 50 seconds have passed.
General Pikmin competitive strategies[edit]

|
The following article or section contains guides. |
These are some general strategies that can help a player land a win. The nature of the strategies listed here allows them to be combined and expanded upon freely, to maximize their efficiency. These tactics apply not just to 2-Player Battle, but also to other competitive modes in the franchise, like Bingo Battle and Dandori Battle.
Pick your battles[edit]
When determining how to most efficiently recover an object, or even which object to get, the following are important to consider:
- Is the object close to your base?
- Is the object light enough to be carried without too many Pikmin?
- Is the object free to take, or is it trapped behind a gate, in a crystal, buried, or even inside an enemy?
- Is the object possible to obtain with your current Pikmin types and amounts?
Time wasted extracting objects from difficult situations is time that your opponent can spend winning. While you may be left with no option but to pursue a difficult-to-obtain object, it is important to plan for it well and stay alert. Defeating a mid-boss or breaking down a wall to obtain an object does not guarantee you that object, as it may present an opportunity for a particularly clever opponent to take advantage without having to do any of the work.
Read the opponent's strategy[edit]
Additionally, it is worth considering how your opponent may strategize. Consider which objects and goals they may be pursuing, which obstacles they may have to tackle to obtain them, and what objects they may find easiest to defend against you. Additionally, be careful of any backup plans they may have. Taking some time to occasionally study their side's HUD or gameplay may reveal their plans; simply waiting for the game's warnings about a near victory to appear will usually mean waiting until too late to do anything.
Avoid Pikmin skirmishes[edit]
Your Pikmin may inevitably end up fighting your opponent's Pikmin. It is advisable to avoid such brawls at all costs unless your army is significantly larger than theirs and/or you have better sprays and items. While Pikmin defeated by other Pikmin will simply respawn at leaf maturity at their Onion, recouping after a loss is time-consuming. If your opponent intends to steal an object you need but they heavily outnumber you, consider the battle lost and spend the time better elsewhere. Equally, battling near your opponent's Onion, often regardless of their army size compared to yours, will generally result in a win for them due to their ability to quickly replenish forces. Even for the winning player, you must keep in mind that recovering from a battle is time-consuming.
Purposely idle Pikmin[edit]
Leave about 3-5 Pikmin near objects or choke-points that are important to you, to act as an alert system. When your numbers start to change, go investigate.
Depending on the game and stage, you may notice that the objects that allow you to use a roulette spin will oftentimes drop steadily in the same spots of the arena over time (usually in one of the alcoves). Take note of where they seem to drop more during the match, then keep Pikmin in that area to quickly transport them back to the Onion.
Handling idle Pikmin[edit]
Idle Pikmin on the opposing team can be dispatched in a number of ways. You can try luring the Pikmin towards a hazard or enemy, or spawn your own with the roulette wheel. On a stage with them, you can even throw bomb-rocks at Pikmin to easily wipe them out. As a last resort, you can use an ultra-bitter spray to get rid of Pikmin guarding a choke point. Do not use Pikmin of your own to clear these idlers out, as they'll just be reborn at the Onion.
Surprise collections[edit]
Progressing towards your goal in a highly linear and efficient fashion makes it obvious what strategy you are going for. As mentioned before, the games are also very loud about players they see coming close to winning. It is sometimes advisable to simply take objects to your base but stop them short of actually entering your Onion; this nearly guarantees their capture without making your strategy obvious to the other player. Carrying everything you need at once will also help you get a quick victory before the other player can realize they were even in danger of losing.
Screen-peeking[edit]

At any point you may look at your opponent's side of the screen and vice-versa. When your Pikmin are carrying something important that you don't want the opponent to realize, make sure to keep said object off-camera.
"Flag" capture[edit]
If the current battle has any team "flag" that can be captured (team marbles in 2-Player Battle or Victory Macaroons in Bingo Battle), defending and retrieving the object – as well as stealing your opponent's flag – can be tricky. The following are some helpful tips:
- Defense
- If you have an extra leader, leave them with some Pikmin near the base.
- Never stay away from your base for too long.
- Recovering
- Bring most of your army and swarm the object.
- Attack the opponent's leaders so they can't react.
- Consider getting cherries to hope for an item that can retrieve your flag.
- Stealing
- Use the fastest Pikmin you have available – flowered Pikmin, good carrier types like White Pikmin and Winged Pikmin, and spicy Pikmin.
- While your Pikmin are busy grabbing it, distract the enemy Pikmin with a single Pikmin.
- If the enemy is unaware of what you are doing, keep it low-profile. Keep the object and the opponent's empty base off-camera, round up any stragglers, and go focus on some other task that isn't suspicious.
A quick path to victory can be to focus on getting the opponent's "flag" object as quickly as possible. From the start of the match, focus on increasing your army above everything else. If you're faster than your opponent, you can gather quite a number advantage. Then, go for the enemy's base with almost all your Pikmin. You can then let one or two Pikmin carry the opponent's flag while they're busy with the battle. This is especially effective on small stages with a short trek between bases, like War Path.
2-Player Battle strategies[edit]
|
The following article or section contains guides. |
These strategies are more geared towards Pikmin 2's 2-Player Battle specifically.
Per-stage knowledge[edit]
For specific strategies to employ in the different arenas, check the "Strategies" section of each stage's article.
Wasting the opponent's sprays[edit]
Sprays are an essential part of battle mode, as they can turn the tides in a Pikmin vs. Pikmin situation easily. Using a small squad, attacking the enemy might get the other player to use sprays prematurely. This can be repeated with the rest of the Pikmin. Another strategy is to send small forces to attack your opponent repeatedly, this should drain their spray deposits. Afterwards, rush the opponent with all of your troops. Bitter spray their Pikmin, then spicy spray yours. Afterwards steal their marble with a few Pikmin. Escort the marble with about 1/4 of your troops, and have the rest engage with your opponent's troops, allowing you to distract your enemy.
Using items[edit]
Offensive strategies on the best times and scenarios in which to use items.
- Ghost: Use this when your plans involve doing many different small tasks. Because the opponent won't be able to see your Pikmin around the stage, they are less likely to interrupt them, making it possible to have many Pikmin carrying many different things. This also pairs well with the idle Pikmin strategies mentioned above. Since the effect lasts for two whole minutes, you have plenty of time to wait for an opening to storm the opponent's base and steal their marble – just pay attention to when they're out of the base, don't have plans to return soon, and are sufficiently far away. However when trying this, be wary that the other player may peek at your screen, or even notice in their periphery that your screen is not moving. So avoid standing still in wait, and avoid showing the opponent's base on-camera.
- Marble return: With this item in queue, you can adopt strategies that leave your base wide open. So long as you can pay attention to your opponent's side of the screen, you'll know when they are planning to capture your marble. Once they do so, let them carry the marble all the way to their base, but use the item before the object is actually retrieved. This maximizes the amount of time the opponent wastes. If you can tell your opponent is not going to go for an assault on your marble, and you have other spins of the roulette wheel in queue, consider throwing this item away so you can have access to more important items.
- Withering Blowhog, Swooping Snitchbug: Use these when the opponent has a lot of flower Pikmin, or when they have a lot of Pikmin at the base. You can also use this when you have multiple other spins in queue, since there is a chance you'll get more items that cause chaos at the opponent's base.
- Boulders: Use this when the opponent is out and about, and avoid using it when they are at their base or near enemies, since the boulders may break on the Onion or hit the enemies instead.
- Volatile Dweevil: Try to predict what your opponent is going to do next, and use this item when they're en route to doing so. This will cause them to have to detour or wait out the beast's explosion. If you want to use this when your opponent is fighting an enemy, make sure it's an enemy that is hard to reach and is very good at spreading the opponent's Pikmin around, like a Puffy Blowhog. This will maximize the chances of the Volatile Dweevil hitting scattered Pikmin while the opponent is struggling, while also helping to make sure the enemy they were fighting won't get hurt with the explosion.
- Blowhogs: This is best used when you can see that your opponent has many Pikmin carrying things. Unless they're constantly near their base, it's likely that the carrier Pikmin will reach the base unattended and be subjected to the Blowhog's attacks, scoring you some easy Pikmin kills.
Defending against items[edit]

These are defensive strategies if any items are used against you.
- Ghost: Keep an eye out for the dirt particles that walking leaders leave behind, and pay a lot of attention to the opponent's half of the screen. If your opponent is more of a generalist, let them work on whatever random tasks they want without interrupting them, since it will be a confusing fight for you if you want to stop them. If your opponent is more opportunistic, be very careful about attempts to steal your team's marble, and try to lull them into a false sense of security if you can, by bringing many Pikmin with you, leaving your base, and then turning around after a while to catch them in the act.
- Marble return: If you notice your opponent got this item, try to find the time to threaten their team's marble, preferably using a small handful of Pikmin. Balance out this offensive, since if you are far too weak to succeed at stealing the marble, the opponent will call your bluff and hit you with the item or attack you in some other way, and you'll have just wasted your time. On the flip-side, if you actually succeed and are too effective, you may be spreading yourself too thin, and it will be all for naught since the opponent only has to press the item button to undo your progress. Ideally, you want to distract and string the opponent along, making them never be too sure of when to use that item, and to instead hold onto it for as long as possible, since it stops them from using other items. That said, be wary not to spend too much time with these high jinks.
- Withering Blowhog, Swooping Snitchbug: Fighting one can cost a lot of time, especially if you don't have many Pikmin or they are leaf Pikmin. It may be best to leave the creature alone and focus your efforts on tasks outside of your base. Swooping Snitchbugs can even be ignored outright if you have sufficient Pikmin, considering they spend a lot of time getting into position, swooping, holding Pikmin, and throwing them, and all for two Pikmin at a time, at most.
- Boulders: If your camera is in a top-down view and you have the liberty of movement, check out the shadows the boulders cast and maneuver around them. Remember to swarm your group to help control their positioning. Otherwise, just keep moving, and the boulders might not hit you. If you realize the opponent has that item and is ready to use it, try to throw Pikmin out of your group in a sneaky and agile way, so that when the boulders drop you'll have fewer Pikmin to worry about. Also try to prioritize going near enemies or to tend to your base, since boulders dropped in either case will likely hit the enemies or your Onion.
- Volatile Dweevil: Whenever the Volatile Dweevil drops, stay calm, gather your Pikmin, and head the other way. If you know the Volatile Dweevil is coming, you can prepare an escape plan, depending on where you are and where you're heading.
- Blowhogs: If you have Pikmin at the base, these can be very lethal. Fighting them is tedious, but not necessarily difficult, so consider doing so if you feel threatened. Otherwise, take this opportunity to grab your Pikmin and explore far away from your base. By the time you're done and you have Pikmin carrying things back to the Onion, the enemy will have been gone.
Player interactions[edit]
Players have a few ways of directly interacting with each other's group. Players cannot whistle or pluck each other's Pikmin.
- For general combat information, see here.
- When a player's Pikmin are carrying or holding on to an object, if an opponent Pikmin shows up, what happens depend on how close the new Pikmin is to the closest carrier Pikmin:
- If they are close, the two Pikmin will start fighting each other. This also causes all carrier Pikmin to drop the object.
- If they are far away, the new Pikmin will also grab onto the object. Any Pikmin grabbing onto the object, regardless of team, contributes to the carrying strength, and if the strength requirement is met, all of those Pikmin contribute to transporting the object. The Onion that receives the object is controlled by the majority; in the case of a tie this is decided randomly. Once the object is delivered, the previously-cooperative Pikmin from the different teams will start fighting one another as normal.
- Using an ultra-bitter spray on opposing Pikmin will bury them and revert them to a leaf state. However, they'll pop out of the ground automatically after 10 seconds.
- A number of the available items directly interfere with the opposing player's group.
Victory details[edit]

The leaders' faces on the 2-player Battle setup screen change depending on the current score leader. If one player is one point ahead, that player's leader will smile, and the other leader will frown. If a player is three points ahead, their leader will grin, and the other will be quite angry. If the scores are the same for both players, both leaders will have a neutral expression.
Whenever a player has 3 marbles, their Pikmin will chant the corresponding leader's name – they'll chant "O-ri-ma!" or "Ru-i!", over their Japanese names, Orimā (オリマー) and Rūi (ルーイ). If both players have 3 marbles and only one remains, both Pikmin groups will still chant, over one another. Since this chanting is a part of the battle's music, amusingly, players can still hear chants if all Pikmin are burrowed underground.
Each leader has his own victory tune. Though they follow the same melody, the Pikmin will call out the name of whoever won once the tune finishes. If one of the players loses through excess damage to the suit or Pikmin extinction, the themes will have a slight variation in rhythm similar to the difference in the story-mode levels. In the unlikely case of a tie, a different tune plays and both the leader's names will be called out by the Pikmin. The tune changes with each type of tie.
Excluding the variations of the Pikmin chorus, there are eight different themes that can play: one player wins, Olimar loses due to extinction, Olimar loses due to damage, Louie loses due to extinction, Louie loses due to damage, draw by simultaneous marble-collection, draw by simultaneous extinction, and draw by simultaneous leader KO.
Stage generation and layouts[edit]

|
This article or section is in need of more images. Particularly: |
Unlike Story Mode and Challenge Mode caves, which generate sublevels solely by placing cave units randomly, the stages in 2-Player Battle are mostly made by placing specific units in specific spots to end up with layouts hand-made by the developers. That said, the random sublevel generation logic is still in effect during the loading of 2-Player Battle stages.
When the game loads a stage, it starts by deciding if it will generate it entirely randomly or by using fixed layouts; in the latter's case it also chooses which of the existing layouts. It then loads the list of necessary cave units for the stage from the game files, in the same format as the lists used in Story Mode and Challenge Mode. Then, it places whatever manually-specified units exist in their right places, if any. Finally, it starts filling the stage randomly just like in the other game modes, until the stage is completely generated without any issues (like unconnected doorways).
Different versions of the game and different stages have different generation modes and different layouts:
- In the Nintendo Switch version...
- All stages are chosen to be generated randomly by default.
- In other versions...
- Dim Labyrinth has no predefined layout and instead always generates the stage randomly.
- Carpet Plain has 2 predefined layouts, with a 50% chance of either being picked.
- Brawl Yard has a 20% chance of generating the stage randomly, and an 80% chance of using one of its 3 layouts with equal odds.
- All other stages have 3 predefined layouts, with equal odds of either being picked.
The generation method and layout chosen can be manually selected by the player with an undocumented feature. To activate it, player 1 should be holding a direction on  (GameCube),
  (New Play Control), or
  (Switch), while the loading screen with the tips is showing up. The time at which the player starts holding does not matter, as long as it's before the loading screen appears, and the player can let go at the loading screen. The direction held controls how the stage will be generated:
- Up: Layout #1.
- Right: Layout #2.
- Down: Layout #3.
- Left: Random generation.
To know which layout number corresponds to what, please read the corresponding level's article, and check the technical information section. For the Carpet Plain, both right and down result in layout #2. Because Dim Labyrinth is always randomly generated, holding a direction has no effect there.
All stages can be generated at random, but it is clear that this was not intended for some of them. The randomization system does not take into account balance, meaning that it is unlikely that a stage will be symmetrical, and more often than not, for unintended stages, the Onions are placed in bizarre and inappropriate locations. Because of the secrecy of the manual generation method selection feature, as well as the potential for gameplay balance problems that arise with the "left" variant, it is possible that this was actually a debugging tool in the game during development, but never removed for the final release. The reason as to why random generation is the default mode in the Nintendo Switch version is not known, and manually forcing a specific layout is recommended.
Hidden Shearwigs[edit]
On all stages, unearthing a yellow marble with occasionally spawn 1-5 Shearwigs where the marble is unearthed. This chance is based off how many yellow marbles have been collected and the proximity of any uncollected yellow marbles, where equal players will have a 20% chance to spawn 1-3 Shearwigs, a player at an advantage will have at most an 80% chance to spawn 3-5 Shearwigs, and a player at a disadvantage will have at least a 1% chance to spawn 1-3 Shearwigs. The player which is determined to be unearthing a marble is decided by whose Pikmin makes up a majority on the marble.
Gallery[edit]
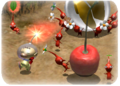
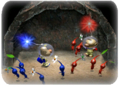
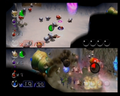 Players fighting on Colosseum.
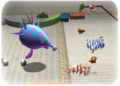
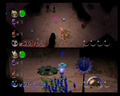 Dim Labyrinth, with a close-up of a Breadbug's nest.
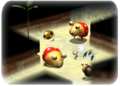
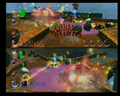 A battle in Hostile Territory, showcasing the numerous dangers in the cave.
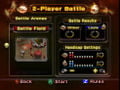 The 2-Player Battle menu screen.
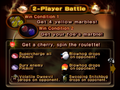 First page of the rules.
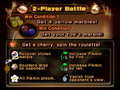 Second page of the rules.


Trivia[edit]
- The Angle Maze features a Raging Long Legs in one of its variations. It is the only battle map to include a boss enemy.
- Within the game's files, one can find textures for 3 unused roulette wheel slots: an Antenna Beetle, a Spotty Bulbear, and a combination of a Fiery and Hydro Dweevil, the latter having a duplicate file with the same name, but with
_oldappended. The backgrounds' colors and lines indicate that these slots were removed before the final icon textures were cleaned up. - In this mode, the leaders are immune to the Watery Blowhog's water-like liquid and the Fiery Blowhog's fire. In Story Mode, while it is still possible to gain immunity to fire by collecting the Scorch Guard, there is no upgrade allowing the leaders to be immune to the Watery Blowhog's liquid.
- In the GameCube games, the idle Pikmin at the start of a match will not have glowing stems. If they are taken in the group and then made idle again, their stems will glow like normal. This glitch was fixed in the New Play Control! versions.
- In the New Play Control! versions, at the start of a match, idle Pikmin that join a leader will first race to a point far away from the leader, and only after a second return to their rightful spot in the group. The reason for this is not known.
- Snow Bulborbs, Dwarf Orange Bulborbs, Breadbugs, Anode Beetles, and Careening Dirigibugs can only be delivered to Onions in this mode.
 Unused Antenna Beetle roulette icon.
 Unused Spotty Bulbear roulette icon.
 Unused Dweevil roulette icon.


Names in other languages[edit]
|
The following article or section is in need of assistance from someone who plays Pikmin 2. |
2-Player Battle
| Language | Name | Meaning | Notes |
|---|---|---|---|
 Japanese Japanese |
2Pバトル? Tsū Pi Batoru |
2P Battle | Because 2P comes from the English "Two Players," the English reading "Tsū" is used instead of the Japanese number 二?, lit.: "two". |
 French French |
Bataille 2 joueurs | 2-player battle | |
 German German |
2-Sp.-Modus | 2P Mode | |
 Italian Italian |
Scontro 2G | 2P Fight | |
 Korean Korean |
2P 배틀 I-Pi Baeteul |
2P Battle | Because 2P comes from English, the "2" is read as "I" (이, the Sino-Korean number for two). |
 Spanish Spanish |
Batalla 2J | 2P Battle |
Yellow marble
| Language | Name | Meaning |
|---|---|---|
| Japanese |
黄色いビー玉? Kīroi Bīdama |
Yellow marble |
| French |
Bille jaune | Yellow marble |
| German |
Gelbe Murmel | yellow marble |
| Italian |
Biglie gialle | |
| Korean |
노란색 구슬 Nolansaeg Guseul |
Yellow Marble |
| Spanish |
Canica amarilla | Yellow marble |
Foe's marble
| Language | Name | Meaning | Notes |
|---|---|---|---|
| Japanese |
あいてのビー玉? Aite no Bīdama |
Opponent's marble | |
| French |
Bille ennemie | Enemy marble | |
| German |
gegn. Murmel | opposing marble | "gegn." is a short form of "gegnerische" (opposing) |
| Italian |
Biglia del nemico | ||
| Korean |
상대방 구슬 Sangdaebang Guseul |
Opponent's Marble | |
| Spanish |
Canica a tu rival | Rival's marble | |
 Spanish (NoA) Spanish (NoA) |
Canica del oponente | Opponent's marble | Name taken from the New Play Control! Pikmin 2 manual. |
See also[edit]
