Clay: Difference between revisions
No edit summary |
Phineas81707 (talk | contribs) No edit summary |
||
| Line 11: | Line 11: | ||
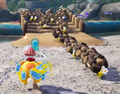
[[File:P4 completed Clay Bridge.jpg|thumb|200px|A completed clay bridge in ''Pikmin 4''.]] | [[File:P4 completed Clay Bridge.jpg|thumb|200px|A completed clay bridge in ''Pikmin 4''.]] | ||
A '''clay bridge''' is a [[bridge]] made of clay. These allow gaps to be crossed. Clay pieces in bridges are laid in a grid, each row being made of 6 pieces, 4 as the floor and 2 as walls. Some clay bridges sit at an angle while unbuilt, and cannot be walked off the unfinished end until the bridge is finished. | A '''clay bridge''' is a [[bridge]] made of clay. These allow gaps to be crossed. Clay pieces in bridges are laid in a grid, each row being made of 6 pieces, 4 as the floor and 2 as walls. Some clay bridges sit at an angle while unbuilt, and cannot be walked off the unfinished end until the bridge is finished. | ||
{{clear}} | {{clear}} | ||
| Line 21: | Line 22: | ||
== Clay valve == | == Clay valve == | ||
A '''clay valve''' is a hexagonal valve handle made from clay, starting out as a misshapen pile of clay pieces while unbuilt. Once completed, 12 Pikmin can work together to rotate it anti-clockwise to turn off a [[sprinkler]]. | A '''clay valve''' is a hexagonal valve handle made from clay, starting out as a misshapen pile of clay pieces while unbuilt. Once completed, 12 Pikmin can work together to rotate it anti-clockwise to turn off a [[sprinkler]]. | ||
== Locations == | |||
; Areas | |||
* [[Sun-Speckled Terrace]]: | |||
** A bridge next to the Rugged Scaffold connects the base directly to the area next to [[Hectic Hollows]]. Requires 22 clay. | |||
** A bridge north of the Rugged Scaffold connects the main area of the terrace to the far corner, where the Distant Summit base is located. Requires 39 clay. | |||
** A bridge on top of a plateau next to the Meandering Slope allows access to the Dandori Battle Arena. Requires 23 clay. | |||
** A climbing wall in the water next to the Rugged Scaffold allows access to the Blue Onion. Requires 15 clay. | |||
* [[Blossoming Arcadia]]: | |||
** A bridge north of the Fragrant Ravine connects the landing site to the Misshapen Pond. Requires 40 clay. | |||
** A bridge next to the Dandori Battle arena connects it to [[Drafty Gallery]]. Requires 29 clay. | |||
** A bridge next to the Sunwashed Plateau grants access to the west section of the area. Requires 33 clay. | |||
** A valve between the Sunwashed Plateau and the Burgeoning Spiderworts turns off the sprinklers next to the [[Wayward Moon]]. Requires 16 clay. | |||
** A climbing wall on the far-east side of the map, a short walk from Misshapen Pond, allows access to the [[Kingdom of Beasts]]. Requires 11 clay. | |||
* [[Serene Shores]]: | |||
** A bridge allows all Pikmin to cross the water and reach the Dandori Battle Arena. Requires 17 clay. | |||
** A bridge west of the Water's Edge base, over the entrance to the Engulfed Castle, grants easy access to the west side of the map for non-Blue Pikmin during high tide, although the lower route is open to Pikmin during low tide. Requires 27 clay. | |||
** A bridge east of the Water's Edge base, blocked by [[hydro jelly]] and partially submerged during high tide, allows parts to be easily fished out from the deep water. Requires 34 clay. | |||
** A climbing wall near the Sand Keep base allows access to the Blue Onion. Requires 13 clay. | |||
* [[Hero's Hideaway]]: | |||
** A climbing wall on the south wall, on the west side, allows access to the [[Doppleganger's Den]]. Requires 30 clay. | |||
** A mound can be built in order to climb up the bottom of the two stairs separating the north and south halves of the map. It must be built from the bottom side, despite the closest base being on the top side. Requires 21 clay. | |||
* [[Giant's Hearth]]: | |||
** A mound to the north of the Line of Logs allows access to the main area, particularly the [[Arachnode]] blocking access to the Abandoned Throne. Requires 25 clay. | |||
** A bridge next to the [[Dream Home]] connects it to the Abandoned Throne. Requires 40 clay. | |||
** A valve north of the [[Cavern of the Beast]] turns off the sprinklers near the [[Masterhop]]s, allowing quick passage between the Line of Logs and Abandoned Throne areas, and also exposing a bonfire altar that cannot otherwise be lit. Requires 16 clay. | |||
** A second valve to the west, turns off a sprinkler blocking access to a Dandori Challenge, and cannot be reached by non-Blue Pikmin. Since there are [[dried plant]]s here, it must be turned off to bring over a [[fire starter]]. Requires 16 clay. | |||
** A third valve is in the north, behind a [[clipboard]] north of the Abandoned Throne and near a Dandori Challenge. It turns off the sprinkler surrounding the [[Bug-Eyed Crawmad]] to its immediate south. Requires 16 clay. | |||
** A mound east of the Abandoned Throne must be built to reach the [[Ultimate Testing Range]]. Requires 38 clay. | |||
** A climbing wall on the north side of the central hearth allows access to the treasures on the top. Pikmin are unable to gather treasures until the wall is built. Requires 7 clay. | |||
* [[Primordial Thicket]]: | |||
** A climbing wall near the [[Puffstool]], best accessible via a narrow tunnel from the Autumnal Gully, allows access to the plateau on which the [[Golden Vaulting Table]] sits. Requires 21 clay. | |||
** The bridge for which the Maple Bridge landing site is named is on top of the plateau to its south, guarded by a [[Flighty Joustmite]] and some sticky mold. Requires 75 clay. | |||
** A clay mound in the north of the area, surrounded by sticky mold, grants access to the [[Flarlic]] and, when open, the [[Cavern for a King]]. Requires 15 clay. | |||
; Caves | |||
* [[Hectic Hollows]]: | |||
** Sublevel 1: A climbing wall must be built to access a large portion of the sublevel. Requires 14 clay. | |||
* [[Aquiferous Summit]]: | |||
** Sublevel 2: A mound must be built to reach the exit vent at the top of the sublevel. Requires 22 clay. | |||
* [[Sightless Passage]]: | |||
** A mound must be completed to reach the exit vent. Requires 20 clay. | |||
* [[Drafty Gallery]]: | |||
** Sublevel 3: A bridge must be completed to reach the next sublevel. Requires 29 clay. | |||
* [[Seafloor Resort]]: | |||
** Sublevel 1: A clay valve opposite the base can be built to turn off the sprinklers near the cave exit. Requires 12 clay. | |||
** Sublevel 3: A bridge next to the base can be built to allow access for the captain to reach the switch to turn off the sublevel's iron bars. Requires 27 clay. | |||
* [[Below-Grade Discotheque]]: | |||
** Sublevel 1: A mound must be built to reach the next sublevel and the [[Sphere of Truth]]. Requires 15 clay. | |||
** Sublevel 4: A valve can be built to turn on the sprinklers and soak a [[sizzling floor]], allowing Pikmin to retrieve the [[Sphere of Beginnings]]. Requires 16 clay. | |||
* [[Engulfed Castle]]: | |||
** A clay mound east of the Beagle allows easy access to the east side of the map, although the same area can be reached by circling around from the west. Requires 21 clay. | |||
* [[Doppleganger's Den]]: | |||
** Sublevel 3: A climbing wall north of the second site for the Beagle allows easy access to the conveyor belt buttons and the [[Pocked Airhead]]. Requires 15 clay. | |||
* [[Frozen Inferno]]: | |||
** Sublevel 2: A mound must be built to access the top room of the sublevel, which contains the entrance to the next level. [[Cold air]] requires either Ice Pikmin to build the mound, or the bonfire altars be lit to allow other Pikmin to complete it safely. Requires 20 clay. | |||
* [[Plunder Palace]]: | |||
** Sublevel 5: A mound must be built in order to connect the [[Giant Breadbug]] dragging around the [[Leafling]] to the rest of the stage, and thus the S.S. Beagle. Requires 22 clay. | |||
* [[Cavern of the Beast]]: | |||
** Sublevel 2: A mound must be built to reach the [[Porquillon]] with the [[King of Meats]], as well as the entrance to the next sublevel. Requires 25 clay. | |||
* [[Dream Home]]: | |||
** A climbing wall must be built in order to access the east side of the sublevel, from the north side. Requires 15 clay. | |||
* [[Ultimate Testing Range]]: | |||
** Sublevel 1: A bridge connects the north and south halves of the sublevel, allowing treasures to be retrieved to the S.S. Beagle. Although it is next to the Beagle, Pikmin must assemble it from the far side. Requires 27 clay. | |||
** Sublevel 3: A bridge connects the central part of the sublevel to the S.S. Beagle, allowing a route for the north treasures to take regardless of the direction of the [[conveyor belts]]. Must be built from the side opposite the Beagle. Requires 23 clay. | |||
* [[Mud Pit]]: | |||
** Sublevel 1: A climbing wall allows access to the two Winged Candypop Buds on the central plateau. Requires 13 clay. | |||
** Sublevel 2: A bridge next to the second landing site allows access to the hole to the next sublevel. Requires 34 clay. | |||
; Dandori Challenges | |||
* [[Strategic Freezeway]]: A bridge connects the S.S. Beagle to the segment directly opposite, containing the 50 nugget pile. Requires 25 clay. | |||
* [[Oasis of Order]]: A climbing wall allows easy access to collect the [[Love Nugget]], [[Anxious Sprout]] and 30 nuggets on the top plateau immediately next to the Beagle. Requires 15 clay. | |||
* [[Trial of the Sage Leaf]] Story 2: A clay mound next to the Beagle must be built to reach the Sage Leaf and complete the mission. Requires 45 clay. | |||
; Olimar's Shipwreck Tale areas: | |||
* [[Sun-Speckled Terrace]]: | |||
** A bridge connects the Ancient Arches to the Rugged Scaffold- in the same location as a bridge in the main game, but must be built from the opposite side. Requires 11 clay. | |||
** A clay mound next to the Rugged Scaffold can be built as one choice in route to reach the Flarlic on the highest point of the map. Requires 20 clay. | |||
** A bridge north of the Meandering Slope grants the most convenient access to the [[Puffy Blowhog]] that has ingested an Ionium Jet. Requires 34 clay. | |||
* [[Blossoming Arcadia]]: | |||
** A climbing wall behind some [[dried plant]]s allows access to [[Moss]]. Requires 7 clay. | |||
** A clay mound south of the Fragrant Ravine allows access to the Burgeoning Spiderwort, and the shortest route to the Omega Stabilizer. Requires 24 clay. | |||
** A bridge connects the area with the Blue Onion to the Meandering Slope. A bridge existed in the same place in the main game, although this one must be built from the opposite side. Requires 21 clay. | |||
* [[Serene Shores]]: | |||
** A bridge to the west of the Water's Edge connects it to the west area of the map. This bridge is in the same place as one in the main game, and both bridges are built from the same direction. Requires 21 clay. | |||
** A climbing wall on top of the Sand Keep gives access to an Automatic Gear. A wall existed in the same location in the main game. Requires 11 clay. | |||
* [[Hero's Hideaway]]: | |||
** A clay mount in the north-west corner of the map allows access to an Extraordinary Bolt and the button required to turn on the fan leading to the [[Man-at-Legs]], although in order to build it, the switch on top of the lit stove must be pressed by a Red Pikmin. Requires 20 clay. | |||
== Gallery == | == Gallery == | ||
Revision as of 22:19, March 28, 2024
|
This article is a stub. You can help Pikipedia by expanding it. |

Clay is a material in Pikmin 4 that can be used to build structures in areas and caves. To build with clay, Pikmin must be sent to the base of a structure, from which they will walk to the S.S. Beagle and take out a single piece of clay each, with each piece of clay converted from 1 raw material. Then they will carry the clay to the site of the structure, smack it with their stem to mold it, and throw the piece towards the structure.
If the player does not have enough raw materials, any Pikmin that goes to the S.S. Beagle to receive clay will stand under the ship, waiting for the clay to be available. Calling a Pikmin carrying a piece of clay will have it drop it, which makes it disappear, and be refunded as raw material instantly.
If Pikmin deliver part of the clay needed for a structure, and there are other Pikmin with the remaining clay on the way, they will wait on or by the structure; these Pikmin can be whistled back into the squad freely. If a structure doesn't end up being completed immediately by the group of Pikmin assigned to the task, the necessary amount of those Pikmin will return to the ship to get more clay until the required amount is met. Once all necessary pieces have been delivered, the structure will glow and then harden, becoming usable by the player.
Clay bridge

A clay bridge is a bridge made of clay. These allow gaps to be crossed. Clay pieces in bridges are laid in a grid, each row being made of 6 pieces, 4 as the floor and 2 as walls. Some clay bridges sit at an angle while unbuilt, and cannot be walked off the unfinished end until the bridge is finished.
Clay mound
A clay mound is a ramp made of clay. These allow high ledges to be ascended. Clay pieces are thrown on from the base, gradually forming a pile.
Climbing wall
A climbing wall is a vertical wall made of clay. These can be climbed by the leader and by Pikmin, but cannot be climbed by Oatchi. Clay pieces are thrown on from the base in a grid pattern, but the squares in the grid pattern do not correspond with individual pieces of raw material.
Clay valve
A clay valve is a hexagonal valve handle made from clay, starting out as a misshapen pile of clay pieces while unbuilt. Once completed, 12 Pikmin can work together to rotate it anti-clockwise to turn off a sprinkler.
Locations
- Areas
- Sun-Speckled Terrace:
- A bridge next to the Rugged Scaffold connects the base directly to the area next to Hectic Hollows. Requires 22 clay.
- A bridge north of the Rugged Scaffold connects the main area of the terrace to the far corner, where the Distant Summit base is located. Requires 39 clay.
- A bridge on top of a plateau next to the Meandering Slope allows access to the Dandori Battle Arena. Requires 23 clay.
- A climbing wall in the water next to the Rugged Scaffold allows access to the Blue Onion. Requires 15 clay.
- Blossoming Arcadia:
- A bridge north of the Fragrant Ravine connects the landing site to the Misshapen Pond. Requires 40 clay.
- A bridge next to the Dandori Battle arena connects it to Drafty Gallery. Requires 29 clay.
- A bridge next to the Sunwashed Plateau grants access to the west section of the area. Requires 33 clay.
- A valve between the Sunwashed Plateau and the Burgeoning Spiderworts turns off the sprinklers next to the Wayward Moon. Requires 16 clay.
- A climbing wall on the far-east side of the map, a short walk from Misshapen Pond, allows access to the Kingdom of Beasts. Requires 11 clay.
- Serene Shores:
- A bridge allows all Pikmin to cross the water and reach the Dandori Battle Arena. Requires 17 clay.
- A bridge west of the Water's Edge base, over the entrance to the Engulfed Castle, grants easy access to the west side of the map for non-Blue Pikmin during high tide, although the lower route is open to Pikmin during low tide. Requires 27 clay.
- A bridge east of the Water's Edge base, blocked by hydro jelly and partially submerged during high tide, allows parts to be easily fished out from the deep water. Requires 34 clay.
- A climbing wall near the Sand Keep base allows access to the Blue Onion. Requires 13 clay.
- Hero's Hideaway:
- A climbing wall on the south wall, on the west side, allows access to the Doppleganger's Den. Requires 30 clay.
- A mound can be built in order to climb up the bottom of the two stairs separating the north and south halves of the map. It must be built from the bottom side, despite the closest base being on the top side. Requires 21 clay.
- Giant's Hearth:
- A mound to the north of the Line of Logs allows access to the main area, particularly the Arachnode blocking access to the Abandoned Throne. Requires 25 clay.
- A bridge next to the Dream Home connects it to the Abandoned Throne. Requires 40 clay.
- A valve north of the Cavern of the Beast turns off the sprinklers near the Masterhops, allowing quick passage between the Line of Logs and Abandoned Throne areas, and also exposing a bonfire altar that cannot otherwise be lit. Requires 16 clay.
- A second valve to the west, turns off a sprinkler blocking access to a Dandori Challenge, and cannot be reached by non-Blue Pikmin. Since there are dried plants here, it must be turned off to bring over a fire starter. Requires 16 clay.
- A third valve is in the north, behind a clipboard north of the Abandoned Throne and near a Dandori Challenge. It turns off the sprinkler surrounding the Bug-Eyed Crawmad to its immediate south. Requires 16 clay.
- A mound east of the Abandoned Throne must be built to reach the Ultimate Testing Range. Requires 38 clay.
- A climbing wall on the north side of the central hearth allows access to the treasures on the top. Pikmin are unable to gather treasures until the wall is built. Requires 7 clay.
- Primordial Thicket:
- A climbing wall near the Puffstool, best accessible via a narrow tunnel from the Autumnal Gully, allows access to the plateau on which the Golden Vaulting Table sits. Requires 21 clay.
- The bridge for which the Maple Bridge landing site is named is on top of the plateau to its south, guarded by a Flighty Joustmite and some sticky mold. Requires 75 clay.
- A clay mound in the north of the area, surrounded by sticky mold, grants access to the Flarlic and, when open, the Cavern for a King. Requires 15 clay.
- Caves
- Hectic Hollows:
- Sublevel 1: A climbing wall must be built to access a large portion of the sublevel. Requires 14 clay.
- Aquiferous Summit:
- Sublevel 2: A mound must be built to reach the exit vent at the top of the sublevel. Requires 22 clay.
- Sightless Passage:
- A mound must be completed to reach the exit vent. Requires 20 clay.
- Drafty Gallery:
- Sublevel 3: A bridge must be completed to reach the next sublevel. Requires 29 clay.
- Seafloor Resort:
- Sublevel 1: A clay valve opposite the base can be built to turn off the sprinklers near the cave exit. Requires 12 clay.
- Sublevel 3: A bridge next to the base can be built to allow access for the captain to reach the switch to turn off the sublevel's iron bars. Requires 27 clay.
- Below-Grade Discotheque:
- Sublevel 1: A mound must be built to reach the next sublevel and the Sphere of Truth. Requires 15 clay.
- Sublevel 4: A valve can be built to turn on the sprinklers and soak a sizzling floor, allowing Pikmin to retrieve the Sphere of Beginnings. Requires 16 clay.
- Engulfed Castle:
- A clay mound east of the Beagle allows easy access to the east side of the map, although the same area can be reached by circling around from the west. Requires 21 clay.
- Doppleganger's Den:
- Sublevel 3: A climbing wall north of the second site for the Beagle allows easy access to the conveyor belt buttons and the Pocked Airhead. Requires 15 clay.
- Frozen Inferno:
- Sublevel 2: A mound must be built to access the top room of the sublevel, which contains the entrance to the next level. Cold air requires either Ice Pikmin to build the mound, or the bonfire altars be lit to allow other Pikmin to complete it safely. Requires 20 clay.
- Plunder Palace:
- Sublevel 5: A mound must be built in order to connect the Giant Breadbug dragging around the Leafling to the rest of the stage, and thus the S.S. Beagle. Requires 22 clay.
- Cavern of the Beast:
- Sublevel 2: A mound must be built to reach the Porquillon with the King of Meats, as well as the entrance to the next sublevel. Requires 25 clay.
- Dream Home:
- A climbing wall must be built in order to access the east side of the sublevel, from the north side. Requires 15 clay.
- Ultimate Testing Range:
- Sublevel 1: A bridge connects the north and south halves of the sublevel, allowing treasures to be retrieved to the S.S. Beagle. Although it is next to the Beagle, Pikmin must assemble it from the far side. Requires 27 clay.
- Sublevel 3: A bridge connects the central part of the sublevel to the S.S. Beagle, allowing a route for the north treasures to take regardless of the direction of the conveyor belts. Must be built from the side opposite the Beagle. Requires 23 clay.
- Mud Pit:
- Sublevel 1: A climbing wall allows access to the two Winged Candypop Buds on the central plateau. Requires 13 clay.
- Sublevel 2: A bridge next to the second landing site allows access to the hole to the next sublevel. Requires 34 clay.
- Dandori Challenges
- Strategic Freezeway: A bridge connects the S.S. Beagle to the segment directly opposite, containing the 50 nugget pile. Requires 25 clay.
- Oasis of Order: A climbing wall allows easy access to collect the Love Nugget, Anxious Sprout and 30 nuggets on the top plateau immediately next to the Beagle. Requires 15 clay.
- Trial of the Sage Leaf Story 2: A clay mound next to the Beagle must be built to reach the Sage Leaf and complete the mission. Requires 45 clay.
- Olimar's Shipwreck Tale areas
- Sun-Speckled Terrace:
- A bridge connects the Ancient Arches to the Rugged Scaffold- in the same location as a bridge in the main game, but must be built from the opposite side. Requires 11 clay.
- A clay mound next to the Rugged Scaffold can be built as one choice in route to reach the Flarlic on the highest point of the map. Requires 20 clay.
- A bridge north of the Meandering Slope grants the most convenient access to the Puffy Blowhog that has ingested an Ionium Jet. Requires 34 clay.
- Blossoming Arcadia:
- A climbing wall behind some dried plants allows access to Moss. Requires 7 clay.
- A clay mound south of the Fragrant Ravine allows access to the Burgeoning Spiderwort, and the shortest route to the Omega Stabilizer. Requires 24 clay.
- A bridge connects the area with the Blue Onion to the Meandering Slope. A bridge existed in the same place in the main game, although this one must be built from the opposite side. Requires 21 clay.
- Serene Shores:
- A bridge to the west of the Water's Edge connects it to the west area of the map. This bridge is in the same place as one in the main game, and both bridges are built from the same direction. Requires 21 clay.
- A climbing wall on top of the Sand Keep gives access to an Automatic Gear. A wall existed in the same location in the main game. Requires 11 clay.
- Hero's Hideaway:
- A clay mount in the north-west corner of the map allows access to an Extraordinary Bolt and the button required to turn on the fan leading to the Man-at-Legs, although in order to build it, the switch on top of the lit stove must be pressed by a Red Pikmin. Requires 20 clay.
Gallery
|
This article or section is in need of more images. |
A group of Pikmin building a clay bridge.

Names in other languages
|
The following article or section is in need of assistance from someone who plays Pikmin 4. |
- Clay
| Language | Name | Meaning |
|---|---|---|
| ネンド? Nendo |
Clay | |
| Argila | Clay |
- Clay bridge
| Language | Name | Meaning |
|---|
- Clay mound
| Language | Name | Meaning |
|---|
- Climbing wall
| Language | Name | Meaning |
|---|
- Clay valve
| Language | Name | Meaning |
|---|
See also
| Tools |
|---|
|
|
| Minor tools |