The Forest of Hope: Difference between revisions
(Merged.) |
|||
| Line 34: | Line 34: | ||
{{clear}} | {{clear}} | ||
==Challenge Mode | ==Challenge Mode Breakdown== | ||
{|class="wikitable sortable" | |||
!Pikmin Source!!{{tt|Seeds|Max produced with correct harvesting}}!!Amount!!Total | |||
|- | |||
|Starting Reds||||3||3 | |||
|- | |||
|Starting Yellows||||3||3 | |||
|- | |||
|Starting Blues||||3||3 | |||
|- | |||
|Red 1 Pellets||2||6||12 | |||
|- | |||
|Red 5 Pellets||5||2||10 | |||
|- | |||
|Red 10 Pellets||10||1||10 | |||
|- | |||
|Red 20 Pellets||20||1||20 | |||
|- | |||
|Yellow 1 Pellets||2||6||12 | |||
|- | |||
|Yellow 5 Pellets||5||2||10 | |||
|- | |||
|Yellow 10 Pellets||10||1||10 | |||
|- | |||
|Yellow 20 Pellets||20||1||20 | |||
|- | |||
|Blue 1 Pellets||2||5||10 | |||
|- | |||
|Blue 5 Pellets||5||2||10 | |||
|- | |||
|Blue 10 Pellets||10||2||20 | |||
|- | |||
|Blue 20 Pellets||20||1||20 | |||
|- | |||
|Pellet Posy||2||7||14 | |||
|- | |||
|Dwarf Bulbear||5||10||50 | |||
|- | |||
|Dwarf Red Bulborb||4||19||76 | |||
|- | |||
|Pearly Clamclamp||50||2||100 | |||
|- | |||
|Red Bulborb||12||8||96 | |||
|- | |||
|Spotty Bulbear||15||4||60 | |||
|- | |||
|'''Total'''||||||569 | |||
|} | |||
==Ship parts== | ==Ship parts== | ||
Revision as of 01:18, February 9, 2015
| The Forest of Hope | |
|---|---|
| |
| Ship parts | 8 |
| Pikmin available | Yellow |
| Requirements | Recover the Main Engine |
| Music | {{{music}}} |


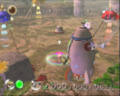
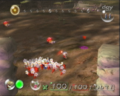
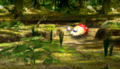
The Forest of Hope is the second playable area in Pikmin. On the area select map, it is the center of the vast forest in the game, and has eight ship parts scattered all over the area. Yellow Pikmin are first found in this area. This level would later become the Awakening Wood in Pikmin 2. There are 27 pellet posies in this area apon arrival, and only 19 after on day 4.
General layout
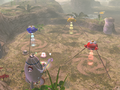
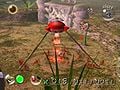
Most of this area consists of vast plains with some gates and high walls that block the way. There is a small lake near the main plain. The most common enemies here are Red Bulborbs and Dwarf Red Bulborbs. This area contains an assortment of red and yellow pellets, as well as two bridges that can be built to gain access to a small piece of land containing the Sagittarius. Behind the stone wall at the landing area is a yellow 20 pellet on a high tree stump that requires yellow Pikmin to reach. To the north is the arena where the Armored Cannon Beetle is fought and to the southwest is the ledge where the Burrowing Snagrets are.
The bomb-rocks in this area are located inside tin cans. The first one is near the great plain with Red Bulborbs, another one is near the place where the Yellow Onion is originally found. The last can is in the place where the Nova Blaster is found. On the first day the area is visited, some are found out of the cans, three resting in front of one of the stone walls that can be destroyed after obtaining Yellow Pikmin.
Although water defends access to the Geiger Counter, the Radiation Canopy, and the Sagittarius, it is possible to collect these parts with Yellow Pikmin; thus, the area can be completed uniquely with them.
In Challenge Mode, there are a lot more Bulborbs, and Spotty Bulbears can also be found where the Armored Cannon Beetle and Burrowing Snagrets are found in story mode (the former location also has a Pearly Clamclamp).
Enemies
- Dwarf Red Bulborb x 11
- Red Bulborb x 7 (x 9 after day 5)
- Iridescent Flint Beetle x 1 (x 3 after day 5)
- Honeywisp x 3
- Female Sheargrub x 6 (x 9 after day 5)
- Male Sheargrub x 4 (x 6 after day 5)
- Wogpole x 4
- Armored Cannon Beetle x 1
- Burrowing Snagrets x 3
- Swooping Snitchbug x 2 (after day 14)
Challenge Mode Breakdown
| Pikmin Source | Seeds | Amount | Total |
|---|---|---|---|
| Starting Reds | 3 | 3 | |
| Starting Yellows | 3 | 3 | |
| Starting Blues | 3 | 3 | |
| Red 1 Pellets | 2 | 6 | 12 |
| Red 5 Pellets | 5 | 2 | 10 |
| Red 10 Pellets | 10 | 1 | 10 |
| Red 20 Pellets | 20 | 1 | 20 |
| Yellow 1 Pellets | 2 | 6 | 12 |
| Yellow 5 Pellets | 5 | 2 | 10 |
| Yellow 10 Pellets | 10 | 1 | 10 |
| Yellow 20 Pellets | 20 | 1 | 20 |
| Blue 1 Pellets | 2 | 5 | 10 |
| Blue 5 Pellets | 5 | 2 | 10 |
| Blue 10 Pellets | 10 | 2 | 20 |
| Blue 20 Pellets | 20 | 1 | 20 |
| Pellet Posy | 2 | 7 | 14 |
| Dwarf Bulbear | 5 | 10 | 50 |
| Dwarf Red Bulborb | 4 | 19 | 76 |
| Pearly Clamclamp | 50 | 2 | 100 |
| Red Bulborb | 12 | 8 | 96 |
| Spotty Bulbear | 15 | 4 | 60 |
| Total | 569 |
Ship parts
- Eternal Fuel Dynamo
- Whimsical Radar
- Extraordinary Bolt
- Nova Blaster
- Shock Absorber
- Radiation Canopy
- Geiger Counter
- Sagittarius
Gallery
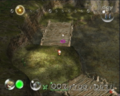
Overview of the starting area.
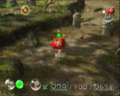
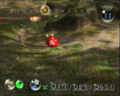
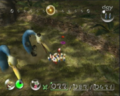
Red Pikmin at the landing site.
- DSC00460.JPG
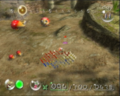
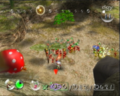
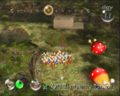
A group of Pikmin near a Yellow Onion and some pellets in Challenge Mode.
The starting area.
The open dirt section, right after the landing zone.
Further into the dirt section, on the way to the Yellow Pikmin Onion.
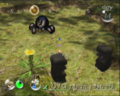
Section where the Yellow Pikmin are first found.
Section where the Extraordinary Bolt can be found.
To the east of the Extraordinary Bolt, there is a path covered in leaves.
The area before the Armored Cannon Beetle arena.
The Armored Cannon Beetle arena, at the northernmost section of the area.

A small hole creates an alternate path to the northeasternmost section.
The end of the northeasternmost section.
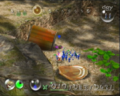
The location of the Shock Absorber.
The main pond in the area, taking up most of the southeastern section.
The bridges leading up to the Sagittarius.
The area before the Burrowing Snagret arena.
The Burrowing Snagret arena, next to the pond.
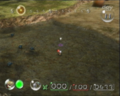
Preview image on the area selection menu.
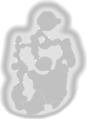
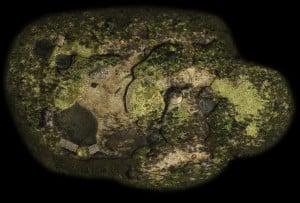
Overview map.


Other images
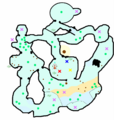
Fan-made map (go to The Impact Site for map key).
The radar pattern for The Forest of Hope.


Trivia
- It is possible to complete this area in one day. It requires going back to The Impact Site on day 2 and growing 80+ Red Pikmin there.
- In the late prototype stages of the game, a Puffstool was on the small plateau overlooking the lake in the place of the Burrowing Snagrets.
- The music in this area reappears in Super Smash Bros. Brawl and Super Smash Bros. for Wii U, on the stages Distant Planet and Garden of Hope, respectively.
| The Forest of Hope | |||||||||
|---|---|---|---|---|---|---|---|---|---|
|
Click an object |
| ||||||||
| Pikmin areas |
|---|
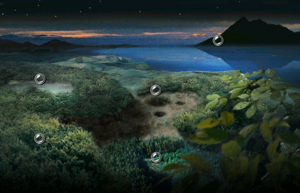 Click an area on the image
The Impact Site • The Forest of Hope • The Forest Navel • The Distant Spring • The Final Trial animtest • codetest • E3play_3 • map_06 • play_4 • route • shapetst • testmap • tuto1 • tuto2 |