Secret Testing Range: Difference between revisions
Jump to navigation
Jump to search
(American Wii set to Spanish.) |
TheSneakySpy (talk | contribs) No edit summary |
||
| Line 1: | Line 1: | ||
{{infobox challenge | {{infobox challenge | ||
|image={{PAGENAME}}.jpg | |image={{PAGENAME}}.jpg | ||
| | |reds=10 | ||
|yellows=10 | |||
| | |blues=10 | ||
|whites=10 | |||
| | |purples=10 | ||
| | |||
| | |||
|bitter=1 | |bitter=1 | ||
|spicy=1 | |spicy=1 | ||
|sublevels=2 | |sublevels=2 | ||
| | |time=sublevel 1 - 100 | ||
sublevel 2 - 150 | |||
}} | }} | ||
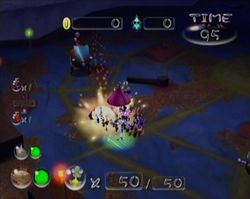
The '''Secret Testing Range''' is one of the thirty levels in the [[Challenge Mode (Pikmin 2)|Challenge Mode]] for ''[[Pikmin 2]]''. There are two sublevels and each level involves creatures that have weapons as appendages. | |||
==Sublevel 1== | |||
This level is a little hard, but the secret to the easy killing of a [[Gatling Groink]] is to bring all of your [[Pikmin family|Pikmin]] and make the [[Purple Pikmin]] be up front and hit it's backside. Alternatively you can leave the Pikmin with [[Captain Olimar|Olimar]] or [[Captain Louie|Louie]], control the opposite one and make the two [[Gatling Groink]]s come close to each other; then go underneath them, running back and forth when the Gatling Groinks' life circles are yellow or red. | |||
*'''Time''': 100 seconds | |||
*'''Time''': 100 | |||
*'''Enemies''': | *'''Enemies''': | ||
** | **[[Gatling Groink]] x2 | ||
** | **[[Iridescent Glint Beetle]] | ||
*''' | *'''Treasure''' | ||
**[[Cosmic Archive]] | |||
**[[ | |||
**[[Dream Architect]] | **[[Dream Architect]] | ||
**[[Glee Spinner]] | |||
**[[The Key]] | |||
**[[Lustrous Element]] | |||
**[[Prototype Detector]] | **[[Prototype Detector]] | ||
**[[ | **[[Stone of Glory]] | ||
==Sublevel 2== | |||
This floor is very hard. Note you can lure the Man-at-legs out of the water to make use of all of your Pikmin. | |||
*'''Time''': 150 seconds | |||
*'''Enemy''': | |||
**[[Man-at-Legs]] | |||
*'''Treasure''': | |||
*'''Time''': | **[[Favorite Gyro Block]] | ||
*''' | |||
** | |||
*''' | |||
**[[ | |||
**[[Fond Gyro Block]] | **[[Fond Gyro Block]] | ||
**[[The Key]] | |||
**[[Lost Gyro Block]] | **[[Lost Gyro Block]] | ||
**[[Memorable Gyro Block]] | **[[Memorable Gyro Block]] | ||
* | **[[Remembered Old Buddy]] | ||
* | |||
[[File:Pikmin_range.jpg|thumb|The 2nd floor of the range.]] | |||
== | ==Walkthrough Video== | ||
[[File:Pikmin 2 Strategies 2|425px]] | |||
| | |||
{{CM}} | {{CM}} | ||
[[Category:Pikmin 2]] | |||
[[Category:Pikmin 2 Challenge Mode]] | |||
Revision as of 18:33, June 25, 2014
| Secret Testing Range | |||
|---|---|---|---|

| |||
| Sublevels | 2 | Ultra-bitter sprays | 1 |
| Red Pikmin | 0 | Ultra-spicy sprays | 1 |
| Yellow Pikmin | 0 | ||
| Blue Pikmin | 0 | ||
| White Pikmin | 0 | ||
| Purple Pikmin | 0 | ||
| Bulbmin | 0 | ||
The Secret Testing Range is one of the thirty levels in the Challenge Mode for Pikmin 2. There are two sublevels and each level involves creatures that have weapons as appendages.
Sublevel 1
This level is a little hard, but the secret to the easy killing of a Gatling Groink is to bring all of your Pikmin and make the Purple Pikmin be up front and hit it's backside. Alternatively you can leave the Pikmin with Olimar or Louie, control the opposite one and make the two Gatling Groinks come close to each other; then go underneath them, running back and forth when the Gatling Groinks' life circles are yellow or red.
- Time: 100 seconds
- Enemies:
- Treasure
Sublevel 2
This floor is very hard. Note you can lure the Man-at-legs out of the water to make use of all of your Pikmin.
- Time: 150 seconds
- Enemy:
- Treasure:
