Green Hole
| Green Hole | |||
|---|---|---|---|

| |||
| Sublevels | 2 | Ultra-bitter sprays | 1 |
| Red Pikmin | 10 | Ultra-spicy sprays | 1 |
| Yellow Pikmin | 10 | ||
| Blue Pikmin | 10 | ||
| White Pikmin | 0 | ||
| Purple Pikmin | 0 | ||
| Bulbmin | 0 | ||
|
The following article or section contains guides. |
The Green Hole (グリーンホール?, lit.: "Green Hole") is the fifth level in Pikmin 2's Challenge Mode, and is automatically unlocked with the mode. A noticeable step up in difficulty compared to the levels preceding it, it contains various types of Bulborbs, including two Bulbmin on the first sublevel.
Sublevel 1[edit]
- Theme: Concrete
- Music: Concrete 3
- Time: 85 (170 seconds)
- Starting Pikmin:
 Red Pikmin × 10 (leaf)
 Yellow Pikmin × 10 (leaf)
 Blue Pikmin × 10 (leaf)
- Treasures:
 Crystal King × 1
 Spouse Alert × 1
 Tear Stone × 2 (inside Bulbmin)
 The Key × 1
- Enemies:
- Obstacles:
- None
- Vegetation:
- None
- Others:
 Egg × 8
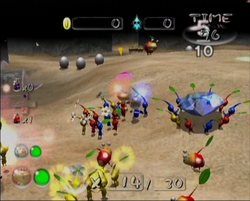
Be on guard as the level begins; in all likelihood, you'll immediately be assailed by two Bulbmin. Don't waste your ultra-bitter spray on them – it's much better used on the Fiery Bulblax in the next sublevel. Attacking the Bulbmin from behind should be effective provided you catch them off-guard. If you're going for a pink flower, consider punching them to death to keep the Pikmin out of harm's way.
The Key is out in the open, but you'll likely have to defeat both adult Bulbmin before it can safely be carried back. The 20 Bulbmin you'll gain from this are extremely useful on the next sublevel – make sure you defeat both adult Bulbmin before you leave.
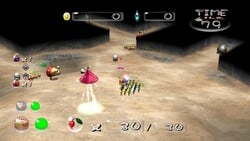
There are numerous eggs here. Break all of them before you leave as well – you'll be able to flower your army from the nectar, and if you're lucky, you might even get an extra spray or two to take into the next sublevel, making the next battle much easier.
| Technical sublevel information | |||||
|---|---|---|---|---|---|
| Internal cave name | ch_ABEM_LeafChappy | ||||
| "Main" object maximum (?) | 10 | ||||
| "Treasure" object maximum (?) | 3 | ||||
| "Gate" object maximum (?) | 0 | ||||
| Dead end unit probability (?) | 0 | ||||
| Number of rooms (?) | 1 | ||||
| Corridor-to-room ratio (?) | 0 | ||||
| Escape geyser (?) | No | ||||
| Clogged hole (?) | No | ||||
| Cave units file (?) | 1_MAT_manp_2_conc.txt | ||||
| Lighting file (?) | normal_light_cha.ini | ||||
| Background (?) | f010 (none)
| ||||
| Cave units (?) | |||||
| Dead end with item | Three-way crossing | Four-way crossing | Turning corridor | Corridor | Long corridor |
| Circular room with 9 exits | |||||
| Detailed object list | ||||
|---|---|---|---|---|
| The game spawns these "main" objects: | ||||
| ID | Object | Amount | Fall method | Spawn location |
| 1 | 2 | None | "Hard" enemy spots | |
| - | Carried inside entry with ID 1 | |||
| 2 | 8 | None | "Easy" enemy spots | |
| Then it spawns these "treasure" objects: | ||||
| ID | Object | Amount | Fall method | Spawn location |
| 3 | 1 | None | Treasure spots | |
| 4 | 1 | None | Treasure spots | |
| 5 | 1 | None | Treasure spots | |
- For details on how objects are spawned, and how some may fail to spawn, see here.
Sublevel 2[edit]
- Theme: Tiles
- Music: Tile
- Time: +100 (+200 seconds)
- Treasures:
 Disguised Delicacy × 1
 Insect Condo × 1
 Love Sphere × 1 (inside Snow Bulborb)
 Mirth Sphere × 1 (inside Dwarf Orange Bulborb)
 Omniscient Sphere × 1 (inside Dwarf Red Bulborb)
 The Key × 1 (inside Fiery Bulblax)
- Enemies:
 Dwarf Orange Bulborb × 1
 Dwarf Red Bulborb × 1
 Fiery Bulblax × 1
 Mitite (group of 10) × 0 - 1 (from eggs)
 Snow Bulborb × 1
- Obstacles:
- None
- Vegetation:
- None
- Others:
 Egg × 1
- See also: Fiery Bulblax strategy.
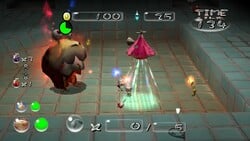
This floor has a handful of various types of Dwarf Bulborbs, as well as a Fiery Bulblax – the sublevel's biggest threat, which also has The Key. Kill the various Dwarf Bulborbs first to ensure they don't interfere with the battle. If you still have your ultra-bitter spray, hit the Fiery Bulblax with it, spray ultra-spicy spray on your Red Pikmin and Bulbmin, and attack.
If you want to go for a high score, you'll need to kill every Dwarf Bulborb variant, as each one drops a treasure. The other two treasures on the sublevel are simply out in the open.
| Technical sublevel information | |||||
|---|---|---|---|---|---|
| Internal cave name | ch_ABEM_LeafChappy | ||||
| "Main" object maximum (?) | 2 | ||||
| "Treasure" object maximum (?) | 2 | ||||
| "Gate" object maximum (?) | 0 | ||||
| Dead end unit probability (?) | 0 | ||||
| Number of rooms (?) | 1 | ||||
| Corridor-to-room ratio (?) | 0 | ||||
| Escape geyser (?) | Yes | ||||
| Clogged hole (?) | No | ||||
| Cave units file (?) | 1_MAT_vs_drypool_tile.txt | ||||
| Lighting file (?) | normal_light_lv0.ini | ||||
| Background (?) | f010 (none)
| ||||
| Cave units (?) | |||||
| Dead end with item | Three-way crossing | Four-way crossing | Turning corridor | Corridor | Long corridor |
| Room with waterless pool | |||||
| Detailed object list | ||||
|---|---|---|---|---|
| The game spawns these "main" objects: | ||||
| ID | Object | Amount | Fall method | Spawn location |
| 1 | 1 | None | "Special" enemy spots | |
| - | Carried inside entry with ID 1 | |||
| 2 | 1 | None | "Hard" enemy spots | |
| - | Carried inside entry with ID 2 | |||
| Then it spawns these "treasure" objects: | ||||
| ID | Object | Amount | Fall method | Spawn location |
| 3 | 1 | None | Treasure spots | |
| 4 | 1 | None | Treasure spots | |
| Then it spawns these "dead end" objects: | ||||
| ID | Object | Amount | Fall method | Spawn location |
| 5 | 1 | None | Dead ends | |
| - | Carried inside entry with ID 5 | |||
| 6 | 1 | None | Dead ends | |
| - | Carried inside entry with ID 6 | |||
| 7 | 1 | None | Dead ends | |
- For details on how objects are spawned, and how some may fail to spawn, see here.
Nintendo's official records[edit]
These are Nintendo's official records for the challenge, as obtained from a Japanese official webpage for Pikmin 2[1] and New Play Control! Pikmin 2.[2] Due to regional differences, the following scores may not apply to the North American and European versions of the games.
- Pikmin 2
- New Play Control! Pikmin 2
Trivia[edit]
- The Dwarf Bulborb variants on the second sublevel drop marbles correlating with their color. While the Dwarf Red Bulborb carries a red marble, the Dwarf Orange Bulborb and Snow Bulborb will drop a blue and yellow marble respectively; these two enemies were originally intended to be blue and yellow Bulborbs, according to their internal names, making this oddity a potential holdover from early in Pikmin 2's development.
Names in other languages[edit]
|
The following article or section needs help from someone who can translate Chinese/Dutch text. |
| Language | Name | Meaning |
|---|---|---|
| グリーンホール? Gurīn Hōru |
Green Hole | |
(traditional) |
綠色大廳 | |
(simplified) |
绿色大屁 | |
| Groene grot | ||
| Trou vert | Green hole | |
| Trou Vert | Green Hole | |
| Das grüne Loch | The green Hole | |
| Foro verde | Green hole | |
| 그린 홀 Geulin Hol |
Green Hole | |
| Gruta Verde | Green Grotto |
See also[edit]
References[edit]
- ^ Pikmin Nintendo official records on Nintendo Official Site
- ^ Pikmin Nintendo in-house official records on Nintendo Official Site


