Explorer's Cave
| Explorer's Cave | |||
|---|---|---|---|

| |||
| Sublevels | 2 | Ultra-bitter sprays | 2 |
| Red Pikmin | 50 | Ultra-spicy sprays | 2 |
| Yellow Pikmin | 0 | ||
| Blue Pikmin | 0 | ||
| White Pikmin | 0 | ||
| Purple Pikmin | 0 | ||
| Bulbmin | 0 | ||
|
The following article or section contains guides. |
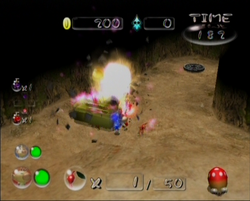
The Explorer's Cave (こてしらべの洞窟?, lit.: "Preliminary Test Cave") is the first level in Pikmin 2's Challenge Mode and is automatically unlocked with the mode. It is an easy area and introduces Challenge Mode to beginners. Only Red Pikmin are available for its two sublevels, the second one being the only with any enemies for the player to fight.
Sublevel 1[edit]
- Theme: Soil
- Music: Concrete 1
- Time: 100 (200 seconds)
- Starting Pikmin:
 Red Pikmin × 50 (leaf)
- Treasures:
 Lustrous Element × 1
 Mirrored Element × 1
 The Key × 1
 Unknown Merit × 1
- Enemies:
- None
- Obstacles:
- None
- Vegetation:
- Others:
- None
An extremely small sublevel, devoid of anything besides treasures and plant life. The Key is in the open, unguarded – if completing the level is your only concern, grab it and move on. Otherwise, spend a few moments gathering all the treasure to improve your score before continuing. Given the size of the sublevel, it shouldn't take long.
| Technical sublevel information | |||||
|---|---|---|---|---|---|
| Internal cave name | ch_ABEM_tutorial | ||||
| "Main" object maximum (?) | 0 | ||||
| "Treasure" object maximum (?) | 4 | ||||
| "Gate" object maximum (?) | 0 | ||||
| Dead end unit probability (?) | 0 | ||||
| Number of rooms (?) | 1 | ||||
| Corridor-to-room ratio (?) | 0 | ||||
| Escape geyser (?) | No | ||||
| Clogged hole (?) | No | ||||
| Cave units file (?) | 1_units_cent3_tsuchi.txt | ||||
| Lighting file (?) | normal_light_cha.ini | ||||
| Background (?) | None | ||||
| Cave units (?) | |||||
| Dead end with item | Three-way crossing | Four-way crossing | Turning corridor | Corridor | Long corridor |
| Circular room with 4 exits | |||||
| Detailed object list | ||||
|---|---|---|---|---|
| The game spawns these "decoration" objects: | ||||
| ID | Object | Amount | Fall method | Spawn location |
| 1 | 4 | None | Plant spots | |
| 2 | 1 | None | Plant spots | |
| 3 | 2 | None | Plant spots | |
| 4 | 3 | None | Plant spots | |
| Then it spawns these "treasure" objects: | ||||
| ID | Object | Amount | Fall method | Spawn location |
| 5 | 1 | None | Treasure spots | |
| 6 | 1 | None | Treasure spots | |
| 7 | 1 | None | Treasure spots | |
| 8 | 1 | None | Treasure spots | |
- For details on how objects are spawned, and how some may fail to spawn, see here.
Sublevel 2[edit]
- Theme: Soil
- Music: Soil 1
- Time: +100 (+200 seconds)
- Treasures:
 Lustrous Element × 1
 Mirrored Element × 1
 Omniscient Sphere × 5 (inside Dwarf Red Bulborbs)
 The Key × 1 (inside Red Bulborb)
 Unknown Merit × 1
- Enemies:
 Dwarf Red Bulborb × 5
 Mitite (group of 10) × 0 - 3 (from eggs)
 Red Bulborb × 1
- Obstacles:
- None
- Vegetation:
- Others:
 Egg × 3
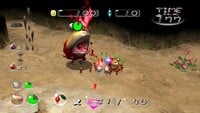
This sublevel features a few rather weak enemies. The Key is inside the Red Bulborb. If you're aiming for a pink flower, use your sprays. Hitting the Red Bulborb with a dose of ultra-bitter spray, then spraying ultra-spicy spray on your squad will allow them to kill it extremely quickly with no risk of losses, at which point the Dwarf Red Bulborbs are easy pickings. Once the enemies are dead, you can safely carry anything you need.
If aiming for a high score, you'll need to kill every Dwarf Red Bulborb – all five of them drop Omniscient Spheres. Breaking the eggs to flower your squad is recommended if you're going to be carrying treasure back, but be careful if Mitites spawn; with no Purple Pikmin, you have no effective way to kill them.
| Technical sublevel information | |||||
|---|---|---|---|---|---|
| Internal cave name | ch_ABEM_tutorial | ||||
| "Main" object maximum (?) | 7 | ||||
| "Treasure" object maximum (?) | 3 | ||||
| "Gate" object maximum (?) | 0 | ||||
| Dead end unit probability (?) | 100 | ||||
| Number of rooms (?) | 1 | ||||
| Corridor-to-room ratio (?) | 0 | ||||
| Escape geyser (?) | Yes | ||||
| Clogged hole (?) | No | ||||
| Cave units file (?) | 2_MAT_mid1_nor2_tsuchi.txt | ||||
| Lighting file (?) | normal_light_cha.ini | ||||
| Background (?) | None | ||||
| Cave units (?) | |||||
| Dead end with item | Three-way crossing | Four-way crossing | Turning corridor | Corridor | Long corridor |
| Room with 6 exits | Room with long dead end | ||||
| Detailed object list | ||||
|---|---|---|---|---|
| The game spawns these "main" objects: | ||||
| ID | Object | Amount | Fall method | Spawn location |
| 1 | 1 | None | "Hard" enemy spots | |
| - | Carried inside entry with ID 1 | |||
| 2 | 5 | None | "Hard" enemy spots | |
| - | Carried inside entry with ID 2 | |||
| 3 | 1 | None | "Easy" enemy spots | |
| Then it spawns these "decoration" objects: | ||||
| ID | Object | Amount | Fall method | Spawn location |
| 4 | 2 | None | Plant spots | |
| 5 | 2 | None | Plant spots | |
| 6 | 2 | None | Plant spots | |
| 7 | 2 | None | Plant spots | |
| 8 | 2 | None | Plant spots | |
| 9 | 2 | None | Plant spots | |
| Then it spawns these "treasure" objects: | ||||
| ID | Object | Amount | Fall method | Spawn location |
| 10 | 1 | None | Treasure spots | |
| 11 | 1 | None | Treasure spots | |
| 12 | 1 | None | Treasure spots | |
| Then it spawns these "dead end" objects: | ||||
| ID | Object | Amount | Fall method | Spawn location |
| 13 | 2 | None | Dead ends | |
- For details on how objects are spawned, and how some may fail to spawn, see here.
Nintendo's official records[edit]
These are Nintendo's official records for the challenge, as obtained from a Japanese official webpage for Pikmin 2[1] and New Play Control! Pikmin 2.[2] Due to regional differences, the following scores may not apply to the North American and European versions of the games.
- Pikmin 2
- New Play Control! Pikmin 2
Names in other languages[edit]
| Language | Name | Meaning |
|---|---|---|
| こてしらべの洞窟? Koteshirabe no Dōkutsu |
Preliminary Test Cave | |
| Grotte de l'explorateur | Explorer's cave | |
| Grotte de l'explorateur | Explorer's cave | |
| Höhle der Entdeckung | Cave of Discovery | |
| Grotta dell' Esploratore | Explorer's Cave | |
| 맛보기 동굴 Masbogi Dong-gul |
Trial Cave | |
| Cueva del Explorador | Explorer's Cave |
References[edit]
- ^ Pikmin Nintendo official records on Nintendo Official Site
- ^ Pikmin Nintendo in-house official records on Nintendo Official Site


