Shower Room: Difference between revisions
m (New template behavior.) |
(Updated as per policy.) |
||
| Line 1: | Line 1: | ||
{{Infobox cave | {{Infobox cave | ||
|image = Shower Room sublevel 3.jpg | |||
|location = Perplexing Pool | |||
|sublevels = 7 | |||
|treasures = 14 | |||
|hazards = {{f}} {{w}} {{e}} {{p}} {{r}} {{b}} | |||
|obstacles = {{waterbody}} {{wgate}} {{bgate}} | |||
}} | }} | ||
{{guide}} | |||
The '''Shower Room''' is a dungeon found in the [[Perplexing Pool]] [[areas|area]] of ''[[Pikmin 2]]'', the [[sublevel]]s of which have mostly the same style as the [[2-Player Battle]] location [[Tile Lands]]. To access the [[cave]], a [[bridge]] must be built across the lake behind the landing area so that [[Yellow Pikmin]] can cross it and destroy the electric [[gate]] there. [[Blue Pikmin|Blues]] are needed next in order to destroy the [[clog|rock formation]] covering the cave entrance, allowing Pikmin of other colours to approach it. | The '''Shower Room''' is a dungeon found in the [[Perplexing Pool]] [[areas|area]] of ''[[Pikmin 2]]'', the [[sublevel]]s of which have mostly the same style as the [[2-Player Battle]] location [[Tile Lands]]. To access the [[cave]], a [[bridge]] must be built across the lake behind the landing area so that [[Yellow Pikmin]] can cross it and destroy the electric [[gate]] there. [[Blue Pikmin|Blues]] are needed next in order to destroy the [[clog|rock formation]] covering the cave entrance, allowing Pikmin of other colours to approach it. | ||
| Line 16: | Line 17: | ||
{{Notes|ship=y}} | {{Notes|ship=y}} | ||
==Sublevel 1== | ==Sublevel 1== | ||
*'''Theme''': Tiles | *'''Theme''': Tiles | ||
*'''Enemies''': | *'''Enemies''': | ||
**2 | **{{icon|Wollywog|y}} × 2 (1 drops from the sky in a dead end) | ||
** | **{{icon|Watery Blowhog|y}} × 2 | ||
**7 | **{{icon|Wogpole|y}} × 7 (drop from the sky, 2 in dead ends) | ||
*'''Hazards''': | *'''Hazards''': | ||
**3 | **{{icon|Boulder|y}} × 3 | ||
**3 | **{{icon|Electrical wire|y}} × 3 | ||
*'''Treasures''': | *'''Treasures''': | ||
** | **{{icon|Merciless Extractor|y}} (US) / {{icon|Broken Food Master US - Divine Cooking Tool EU|y|n=Divine Cooking Tool|l=Divine Cooking Tool}} (Europe) | ||
*'''Plants''': | *'''Plants''': | ||
**None | **None | ||
*'''Others''': | *'''Others''': | ||
** | **{{icon|Ivory Candypop Bud|y}} × 1 (in a dead end) | ||
**2 | **{{icon|Egg|y}} × 2 (in dead ends) | ||
{{sublevel technical | {{sublevel technical | ||
| Line 74: | Line 73: | ||
*'''Theme''': Tiles | *'''Theme''': Tiles | ||
*'''Enemies''': | *'''Enemies''': | ||
** | **{{icon|Lesser Spotted Jellyfloat|y}} × 1 | ||
** | **{{icon|Orange Bulborb|y}} × 1 | ||
** | **{{icon|Dwarf Orange Bulborb|y}} × 6 (2 drop from the sky in dead ends) | ||
*'''Hazards''': | *'''Hazards''': | ||
**3 | **{{icon|Boulder|y}} × 3 | ||
**3 | **{{icon|Gas pipe|y}} × 3 | ||
*'''Treasures''': | *'''Treasures''': | ||
** | **{{icon|Sud Generator|y}} | ||
** | **{{icon|Durable Energy Cell|y}} | ||
*'''Plants''': | *'''Plants''': | ||
**None | **None | ||
*'''Others''': | *'''Others''': | ||
**1 | **{{icon|Gate|y}} × 1, with 4000 [[Health|HP]] | ||
** | **{{icon|Violet Candypop Bud|y}} × 1 (in a dead end) | ||
**2 | **{{icon|Egg|y}} × 2 (in dead ends) | ||
{{sublevel technical | {{sublevel technical | ||
| Line 125: | Line 124: | ||
*'''Theme''': Tiles | *'''Theme''': Tiles | ||
*'''Enemies''': | *'''Enemies''': | ||
** | **{{icon|Greater Spotted Jellyfloat|y}} × 1 | ||
** | **{{icon|Lesser Spotted Jellyfloat|y}} × 4 | ||
** | **{{icon|Hermit Crawmad|y}} × 1 | ||
** | **{{icon|Water Dumple|y}} × 4 (1 drops from the sky) | ||
**1 | **{{icon|Wollywog|y}} × 1 (drops from the sky in a dead end) | ||
*'''Hazards''': | *'''Hazards''': | ||
**None | **None | ||
*'''Treasures''': | *'''Treasures''': | ||
** | **{{icon|Mirrored Stage|y}} (inside the Greater Spotted Jellyfloat) | ||
** | **{{icon|Vorpal Platter|y}} | ||
** | **{{icon|Scrumptious Shell|y}} | ||
*'''Plants''': | *'''Plants''': | ||
**None | **None | ||
*'''Others''': | *'''Others''': | ||
**1 | **{{icon|Gate|y}} × 1, with 4000 [[Health|HP]] | ||
**2 | **{{icon|Egg|y}} × 2 (in dead ends) | ||
{{sublevel technical | {{sublevel technical | ||
| Line 183: | Line 182: | ||
*'''Theme''': Concrete | *'''Theme''': Concrete | ||
*'''Enemies''': | *'''Enemies''': | ||
**1 | **{{icon|Unmarked Spectralids|y}} × 1 (number of groups) | ||
*'''Hazards''': | *'''Hazards''': | ||
**None | **None | ||
*'''Treasures''': | *'''Treasures''': | ||
** | **{{icon|Arboreal Frippery|y|v=US}} | ||
*'''Plants''': | *'''Plants''': | ||
**7 | **{{icon|Clover|y}} × 7 | ||
**4 | **{{icon|Fiddlehead|y}} × 4 | ||
** | **{{icon|Figwort|y}} (small, dying) × 6 | ||
**3 | **{{icon|Figwort|y}} (small) × 3 | ||
*'''Others''': | *'''Others''': | ||
** | **{{icon|Queen Candypop Bud|y}} × 2 | ||
{{sublevel technical | {{sublevel technical | ||
| Line 220: | Line 219: | ||
*'''Theme''': Tiles | *'''Theme''': Tiles | ||
*'''Enemies''': | *'''Enemies''': | ||
** | **{{icon|Withering Blowhog|y}} × 2 | ||
**1 | **{{icon|Wollywog|y}} × 1 | ||
** | **{{icon|Fiery Blowhog|y}} × 2 | ||
** | **{{icon|Dwarf Orange Bulborb|y}} × 5 | ||
** | **{{icon|Lesser Spotted Jellyfloat|y}} × 1 (drops from the sky in a dead end) | ||
** | **{{icon|Munge Dweevil|y}} × 2 (drop from the sky in dead ends) | ||
*'''Hazards''': | *'''Hazards''': | ||
** | **{{icon|Fire geyser|y}} × 5 | ||
*'''Treasures''': | *'''Treasures''': | ||
** | **{{icon|Broken Food Master US - Divine Cooking Tool EU|y|l=Broken Food Master|n=Broken Food Master}} (US) / {{icon|Merciless Extractor|y}} (Europe) | ||
** | **{{icon|Endless Repository US - Perfect Container EU|y|l=Endless Repository|n=Endless Repository}} (US) / {{icon|Permanent Container|y}} (Europe) | ||
** | **{{icon|Pondering Emblem|y|v=US}} (US) / {{icon|Happiness Emblem|y|v=EU}} (Europe) | ||
*'''Plants''': | *'''Plants''': | ||
**None | **None | ||
*'''Others''': | *'''Others''': | ||
**1 | **{{icon|Gate|y}} × 1, with 4000 [[Health|HP]] | ||
** | **{{icon|Violet Candypop Bud|y}} × 1 (in a dead end) | ||
**2 | **{{icon|Egg|y}} × 2 | ||
{{sublevel technical | {{sublevel technical | ||
| Line 270: | Line 269: | ||
}} | }} | ||
In rare occasions, a Fiery | In rare occasions, a Fiery and a Withering Blowhog are behind a gate that must be destroyed to collect treasure. Not only does this mean that one should only use [[Red Pikmin]], but that these will also be deflowered. Restarting this layout is '''highly''' recommended. Also, some fire geysers could pose a threat to non-Reds. | ||
==Sublevel 6== | ==Sublevel 6== | ||
*'''Theme''': Tiles | *'''Theme''': Tiles | ||
*'''Enemies''': | *'''Enemies''': | ||
** | **{{icon|Anode Dweevil|y}} × 5 (4 drop from the sky in dead ends) | ||
** | **{{icon|Munge Dweevil|y}} × 5 (4 drop from the sky in dead ends) | ||
** | **{{icon|Volatile Dweevil|y}} × 1 | ||
**1 | **{{icon|Wollywog|y}} × 1 | ||
** | **{{icon|Bumbling Snitchbug|y}} × 1 | ||
** | **{{icon|Orange Bulborb|y}} × 1 | ||
** | **{{icon|Dwarf Orange Bulborb|y}} × 7 | ||
**1 | **{{icon|Doodlebug|y}} × 1 (in a dead end) | ||
*'''Hazards''': | *'''Hazards''': | ||
**None | **None | ||
*'''Treasures''': | *'''Treasures''': | ||
** | **{{icon|Rubber Ugly|y}} | ||
** | **{{icon|Behemoth Jaw|y}} | ||
** | **{{icon|Abstract Masterpiece|y|v=US}} (US) / {{icon|Plentiful Tank|y}} (Europe) | ||
*'''Plants''': | *'''Plants''': | ||
**None | **None | ||
*'''Others''': | *'''Others''': | ||
**1 | **{{icon|Gate|y}} × 1, with 4000 [[Health|HP]] | ||
** | **{{icon|Ivory Candypop Bud|y}} × 1 (in a dead end) | ||
{{sublevel technical | {{sublevel technical | ||
| Line 327: | Line 326: | ||
The first thing one should do is set off the Volatile Dweevil that is hiding in one of the pipes. The Orange Bulborb may be sitting in front of the Rubber Ugly; also, just like the Volatile Dweevil, all Dweevils are hiding in the pipes, so they could take treasures that are being carried by Pikmin. One good way to deal with Dweevils is to throw a Purple Pikmin at or near it to stun it, but '''do not''' throw Purples at Volatile Dweevils, since the Pikmin will very likely be killed in the following explosion. | The first thing one should do is set off the Volatile Dweevil that is hiding in one of the pipes. The Orange Bulborb may be sitting in front of the Rubber Ugly; also, just like the Volatile Dweevil, all Dweevils are hiding in the pipes, so they could take treasures that are being carried by Pikmin. One good way to deal with Dweevils is to throw a Purple Pikmin at or near it to stun it, but '''do not''' throw Purples at Volatile Dweevils, since the Pikmin will very likely be killed in the following explosion. | ||
==Sublevel 7 | ==Sublevel 7== | ||
*'''Theme''': Tiles | *'''Theme''': Tiles | ||
*'''Enemies''': | *'''Enemies''': | ||
** | **{{icon|Ranging Bloyster|y}} × 1 | ||
*'''Hazards''': | *'''Hazards''': | ||
**None | **None | ||
*'''Treasures''': | *'''Treasures''': | ||
** | **{{icon|Amplified Amplifier|y}} | ||
*'''Plants''': | *'''Plants''': | ||
**None | **None | ||
*'''Others''': | *'''Others''': | ||
**1 | **{{icon|Gate|y}} × 1, with 100 [[Health|HP]] | ||
**1 | **{{icon|Egg|y}} × 1 (drops from the sky in a dead end) | ||
{{sublevel technical | {{sublevel technical | ||
| Line 370: | Line 369: | ||
}} | }} | ||
Some gates have to be torn down to get to the Bloyster. Be careful, as sometimes its tentacles can reach through the gate. See the link | {{see also|Ranging Bloyster strategy|l1=Ranging Bloyster#Strategy}} | ||
Some gates have to be torn down to get to the Bloyster. Be careful, as sometimes its tentacles can reach through the gate. See the link above for a very effective strategy. | |||
==Names in other languages== | ==Names in other languages== | ||
Revision as of 12:24, December 21, 2014
| Shower Room | |
|---|---|

| |
| Location | Perplexing Pool |
| Sublevels | 7 |
| Treasures | 14 |
| Hazards | Template:F [[wikipedia:{{{1}}}|{{{1}}}]] Template:E Pikmin Template:R Template:B |
|
The following article or section contains guides. |
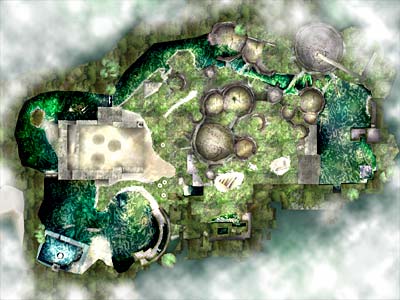
The Shower Room is a dungeon found in the Perplexing Pool area of Pikmin 2, the sublevels of which have mostly the same style as the 2-Player Battle location Tile Lands. To access the cave, a bridge must be built across the lake behind the landing area so that Yellow Pikmin can cross it and destroy the electric gate there. Blues are needed next in order to destroy the rock formation covering the cave entrance, allowing Pikmin of other colours to approach it.
It is possible to avoid building the bridge by long throwing Blues to land near the cave's clog and unblock it. This allows yellows to approach the gate without the use of the bridge. It is also possible to enter the cave without destroying that gate via the scales glitch; other types of Pikmin can be brought in by having the other captain bring them to the cave area and whistling him with the one behind the gate.
Once Blue Pikmin destroy the rock covering the entrance, the surrounding water is drained. There are also the remains of a tiled object around as well as washing machine tubes, supporting that that part of the area is based on a bathroom theme.
In the US version of this cave, there are 1220 Pokos worth of treasure. In the European version of this cave, there are 1240 Pokos worth of treasure.
Notes
Ship's dialogs
“A large rock sits in a reservoir of water. May I interject here?
I have been observing the two of you working together. You have been cooperating well.
Yet, to face the dangers ahead, you must be free of the shackles of a boss-worker relationship!
Learn to use X to separate and Y to change leaders.
If you can master teamwork, you can overcome any impediment!”Sublevel 1
- Theme: Tiles
- Enemies:
 Wollywog × 2 (1 drops from the sky in a dead end)
 Watery Blowhog × 2
 Wogpole × 7 (drop from the sky, 2 in dead ends)
- Hazards:
 Boulder × 3
 Electrical wire × 3
- Treasures:
 Merciless Extractor (US) / [icon] Divine Cooking Tool (Europe)
- Plants:
- None
- Others:
 Ivory Candypop Bud × 1 (in a dead end)
 Egg × 2 (in dead ends)
| Technical sublevel information | |||||
|---|---|---|---|---|---|
| Internal cave name | yakushima_3 | ||||
| "Main" object maximum (?) | 14 | ||||
| "Treasure" object maximum (?) | 1 | ||||
| "Gate" object maximum (?) | 0 | ||||
| Dead end unit probability (?) | 60 | ||||
| Number of rooms (?) | 3 | ||||
| Corridor-to-room ratio (?) | {{{ctrratio}}} | ||||
| Escape geyser (?) | No | ||||
| Clogged hole (?) | No | ||||
| Cave units file (?) | 3_units_a_d_north_tile.txt | ||||
| Lighting file (?) | suityu_light_lv0.ini | ||||
| Background (?) | None | ||||
| Cave units (?) | |||||
 |
 |
 |
 |
 |
 |
| Dead end | Dead end with item | Dead end with item | Three-way crossing | Four-way crossing | Turning corridor |
 |
 |
 |
 |
||
| Corridor | Long corridor | Room with 4 exits | Room with 4 exits | Square room with 1 exit | |
Electric generators should block the paths, sometimes with Watery Blowhogs nearby. In this instace, Yellow Pikmin should still be used to shut off the generators because they can still be easily saved from any water. Apart from the enemies, some boulders may fall from the ceiling. However, the level has a simple layout, so the treasure should be easy to find.
Oddly, Wogpoles will occasionally drop from the sky, but since they are not in water, they pose no problem to Pikmin.
Sublevel 2
- Theme: Tiles
- Enemies:
 Lesser Spotted Jellyfloat × 1
 Orange Bulborb × 1
 Dwarf Orange Bulborb × 6 (2 drop from the sky in dead ends)
- Hazards:
- Treasures:
- Plants:
- None
- Others:
- [icon] Gate × 1, with 4000 HP
 Violet Candypop Bud × 1 (in a dead end)
- Egg × 2 (in dead ends)
| Technical sublevel information | |||||
|---|---|---|---|---|---|
| Internal cave name | yakushima_3 | ||||
| "Main" object maximum (?) | 10 | ||||
| "Treasure" object maximum (?) | 2 | ||||
| "Gate" object maximum (?) | 1 | ||||
| Dead end unit probability (?) | 50 | ||||
| Number of rooms (?) | 2 | ||||
| Corridor-to-room ratio (?) | {{{ctrratio}}} | ||||
| Escape geyser (?) | No | ||||
| Clogged hole (?) | No | ||||
| Cave units file (?) | 2_units_ud_dry_tile.txt | ||||
| Lighting file (?) | suityu_light_lv1.ini | ||||
| Background (?) | None | ||||
| Cave units (?) | |||||
|
|
 |
|
| |
| Dead end with item | Three-way crossing | Four-way crossing | Long corridor | Dead end | Dead end with item |
|
|
 |
 |
||
| Turning corridor | Corridor | Room with 2 ramps | Room with waterless pool | ||
Apart from the boulders, Dwarf Orange Bulborbs fall from the ceiling as well. They could become a nusiance when attacking the Jellyfloat or the larger Orange Bulborb.
Sublevel 3
- Theme: Tiles
- Enemies:
 Greater Spotted Jellyfloat × 1
- Lesser Spotted Jellyfloat × 4
 Hermit Crawmad × 1
 Water Dumple × 4 (1 drops from the sky)
- Wollywog × 1 (drops from the sky in a dead end)
- Hazards:
- None
- Treasures:
 Mirrored Stage (inside the Greater Spotted Jellyfloat)
 Vorpal Platter
 Scrumptious Shell
- Plants:
- None
- Others:
| Technical sublevel information | |||||
|---|---|---|---|---|---|
| Internal cave name | yakushima_3 | ||||
| "Main" object maximum (?) | 10 | ||||
| "Treasure" object maximum (?) | 2 | ||||
| "Gate" object maximum (?) | 2 | ||||
| Dead end unit probability (?) | 50 | ||||
| Number of rooms (?) | 4 | ||||
| Corridor-to-room ratio (?) | {{{ctrratio}}} | ||||
| Escape geyser (?) | No | ||||
| Clogged hole (?) | No | ||||
| Cave units file (?) | 4_units_a_d_f_l_tile.txt | ||||
| Lighting file (?) | suityu_light_lv2.ini | ||||
| Background (?) | None | ||||
| Cave units (?) | |||||
|
|
|
|
|
|
| Dead end | Dead end with item | Dead end with item | Three-way crossing | Four-way crossing | Turning corridor |
|
|
|
 |
 | |
| Corridor | Long corridor | Room with 4 exits | Room with 4 exits | Room with 4 exits and a raised edge | Room with dead end after U-turn |
Sometimes this level has 6-7 enemies all gathered in one spot; should this happen, a Bitter Spray would be recommended, or regenerating the level with reset. Be prepared for any Water Dumples that drop from above.
Sublevel 4

- Theme: Concrete
- Enemies:
 Unmarked Spectralids × 1 (number of groups)
- Hazards:
- None
- Treasures:
- Plants:
 Clover × 7
 Fiddlehead × 4
 Figwort (small, dying) × 6
- Figwort (small) × 3
- Others:
| Technical sublevel information | |||||
|---|---|---|---|---|---|
| Internal cave name | yakushima_3 | ||||
| "Main" object maximum (?) | 15 | ||||
| "Treasure" object maximum (?) | 1 | ||||
| "Gate" object maximum (?) | 0 | ||||
| Dead end unit probability (?) | 0 | ||||
| Number of rooms (?) | 1 | ||||
| Corridor-to-room ratio (?) | {{{ctrratio}}} | ||||
| Escape geyser (?) | Yes | ||||
| Clogged hole (?) | No | ||||
| Cave units file (?) | 1_unit_16x17r_conc.txt | ||||
| Lighting file (?) | yakushima_3_16x17r_light.ini | ||||
| Background (?) | None | ||||
| Cave units (?) | |||||
 |
|||||
| Huge rest room | |||||
A very large rest level. This is a unique level layout, only seen once in the main game mode. It appears to take the place in some pipes and under a street drainage vent. There are some Queen Candypop Buds here. Also, if you need to leave, there is a geyser available. Although water flows through the pipes, it is shallow enough so that any Pikmin type can pass through without any trouble. This rest level is also similar to the Hidden Garden, Challenge mode's twenty-third level, with a few minor changes.
Sublevel 5
- Theme: Tiles
- Enemies:
 Withering Blowhog × 2
- Wollywog × 1
 Fiery Blowhog × 2
- Dwarf Orange Bulborb × 5
- Lesser Spotted Jellyfloat × 1 (drops from the sky in a dead end)
 Munge Dweevil × 2 (drop from the sky in dead ends)
- Hazards:
 Fire geyser × 5
- Treasures:
- [icon] Broken Food Master (US) / Merciless Extractor (Europe)
- [icon] Endless Repository (US) /
 Permanent Container (Europe)
  Pondering Emblem (US) /
  Happiness Emblem (Europe)
- [icon] Broken Food Master (US) /
- Plants:
- None
- Others:
- [icon] Gate × 1, with 4000 HP
- Violet Candypop Bud × 1 (in a dead end)
- Egg × 2
| Technical sublevel information | |||||
|---|---|---|---|---|---|
| Internal cave name | yakushima_3 | ||||
| "Main" object maximum (?) | 15 | ||||
| "Treasure" object maximum (?) | 3 | ||||
| "Gate" object maximum (?) | 3 | ||||
| Dead end unit probability (?) | 0 | ||||
| Number of rooms (?) | 3 | ||||
| Corridor-to-room ratio (?) | {{{ctrratio}}} | ||||
| Escape geyser (?) | No | ||||
| Clogged hole (?) | No | ||||
| Cave units file (?) | 3_units_d_f_ujikou_tile.txt | ||||
| Lighting file (?) | suityu_light_lv2.ini | ||||
| Background (?) | None | ||||
| Cave units (?) | |||||
|
|
|
|
|
|
| Dead end | Dead end with item | Dead end with item | Three-way crossing | Four-way crossing | Turning corridor |
|
|
|
 |
||
| Corridor | Long corridor | Room with 4 exits | Room with 4 exits and a raised edge | Room with waterway and grill | |
In rare occasions, a Fiery and a Withering Blowhog are behind a gate that must be destroyed to collect treasure. Not only does this mean that one should only use Red Pikmin, but that these will also be deflowered. Restarting this layout is highly recommended. Also, some fire geysers could pose a threat to non-Reds.
Sublevel 6
- Theme: Tiles
- Enemies:
 Anode Dweevil × 5 (4 drop from the sky in dead ends)
- Munge Dweevil × 5 (4 drop from the sky in dead ends)
 Volatile Dweevil × 1
- Wollywog × 1
 Bumbling Snitchbug × 1
- Orange Bulborb × 1
- Dwarf Orange Bulborb × 7
 Doodlebug × 1 (in a dead end)
- Hazards:
- None
- Treasures:
 Rubber Ugly
 Behemoth Jaw
 Abstract Masterpiece (US) /
  Plentiful Tank (Europe)
- Plants:
- None
- Others:
- [icon] Gate × 1, with 4000 HP
- Ivory Candypop Bud × 1 (in a dead end)
| Technical sublevel information | |||||
|---|---|---|---|---|---|
| Internal cave name | yakushima_3 | ||||
| "Main" object maximum (?) | 10 | ||||
| "Treasure" object maximum (?) | 3 | ||||
| "Gate" object maximum (?) | 3 | ||||
| Dead end unit probability (?) | 50 | ||||
| Number of rooms (?) | 3 | ||||
| Corridor-to-room ratio (?) | {{{ctrratio}}} | ||||
| Escape geyser (?) | No | ||||
| Clogged hole (?) | No | ||||
| Cave units file (?) | 3_units_a_l_yuko_tile.txt | ||||
| Lighting file (?) | suityu_light_lv3.ini | ||||
| Background (?) | None | ||||
| Cave units (?) | |||||
|
|
 |
|
| |
| Dead end with item | Long corridor | Dead end with item | Three-way crossing | Four-way crossing | Turning corridor |
|
|
|
 |
||
| Corridor | Room with 4 exits | Room with dead end after U-turn | Corridor with 6 pipes | ||
The first thing one should do is set off the Volatile Dweevil that is hiding in one of the pipes. The Orange Bulborb may be sitting in front of the Rubber Ugly; also, just like the Volatile Dweevil, all Dweevils are hiding in the pipes, so they could take treasures that are being carried by Pikmin. One good way to deal with Dweevils is to throw a Purple Pikmin at or near it to stun it, but do not throw Purples at Volatile Dweevils, since the Pikmin will very likely be killed in the following explosion.
Sublevel 7
- Theme: Tiles
- Enemies:
 Ranging Bloyster × 1
- Hazards:
- None
- Treasures:
- Plants:
- None
- Others:
| Technical sublevel information | |||||
|---|---|---|---|---|---|
| Internal cave name | yakushima_3 | ||||
| "Main" object maximum (?) | 1 | ||||
| "Treasure" object maximum (?) | 0 | ||||
| "Gate" object maximum (?) | 6 | ||||
| Dead end unit probability (?) | 30 | ||||
| Number of rooms (?) | 2 | ||||
| Corridor-to-room ratio (?) | {{{ctrratio}}} | ||||
| Escape geyser (?) | Yes | ||||
| Clogged hole (?) | No | ||||
| Cave units file (?) | 1_units_a_tile.txt | ||||
| Lighting file (?) | suityu_light_lv4.ini | ||||
| Background (?) | None | ||||
| Cave units (?) | |||||
|
|
|
|
|
|
| Dead end with item | Dead end with item | Three-way crossing | Four-way crossing | Turning corridor | Corridor |
|
|||||
| Long corridor | Long corridor | Room with 4 exits | |||
- See also: Ranging Bloyster strategy.
Some gates have to be torn down to get to the Bloyster. Be careful, as sometimes its tentacles can reach through the gate. See the link above for a very effective strategy.
Names in other languages
| Language | Name | Meaning |
|---|---|---|
| シャワールーム? | Shower Room |
Trivia
- The Shower Room is the only cave whose entrance is initially inaccessible.
![[icon]](/index.php?title=Special:Upload&wpDestFile=Broken_Food_Master_US_-_Divine_Cooking_Tool_EU_icon.png)
![[icon]](/index.php?title=Special:Upload&wpDestFile=Gas_pipe_icon.png)
![[icon]](/index.php?title=Special:Upload&wpDestFile=Gate_icon.png)
![[icon]](/index.php?title=Special:Upload&wpDestFile=Endless_Repository_US_-_Perfect_Container_EU_icon.png)
|
This page is currently pending deletion. Reason: |
#REDIRECT Template:P2 caves