
Glutton's Kitchen
| Glutton's Kitchen | |
|---|---|

| |
| Location | Perplexing Pool |
| Sublevels | 6 |
| Treasures | 14 |
| Hazards | 
|
|
The following article or section contains guides. |
The Glutton's Kitchen (食神の台所?, lit.: "Cooking God's Kitchen") is a cave in the Perplexing Pool in Pikmin 2. The boss of the cave is the Giant Breadbug. In the US and Nintendo Switch versions of this cave, there are  × 1190 worth of treasures, × 1270 worth of treasures in the European version, and × 1170 in the Japanese version. This cave is the only cave in the main game to have entirely toybox-themed sublevels, and the cave's name reflects the large amount of food treasures located there.
The only hazard in this cave is electricity. As such, the only Pikmin that are strictly necessary are Yellow Pikmin. Purple Pikmin are also recommended to deal with the Spotty Bulbear and Armored Cannon Larva, and also to fight the Breadbugs with. As such, your squad might contain 30-50 Purple Pikmin, and the remainder Yellow Pikmin. White Pikmin may be useful for their carrying speed, but aren't necessary for any obstacles in the cave. There is also a Queen Candypop Bud, and because of the large amounts of individual types that can be brought in, it is not a problem to leave room for those eight.
How to reach[edit]
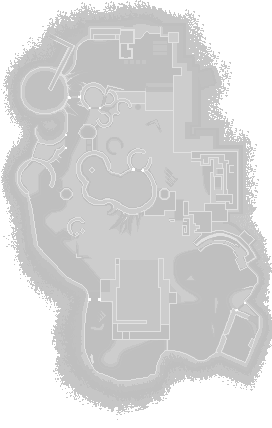


To reach this cave, one must take some Yellow Pikmin to destroy the electric gate, and is recommended that the Yellow Wollyhop near it must be killed. It is recommended to bring in 40 Yellows, 30 Purple Pikmin, 10 Red Pikmin and 20 White Pikmin, for different battles. It is located on a tree stump near where the Yellow Onion was found.
Notes
Ship's dialogs
“Interesting! My odor detectors are reacting... A strong scent wafts from that hole!
I am a machine, so rating scents is beyond me, but your faces tell me all I need to know.
You are both drooling... I wish, just once, I could feel what it is like to drool.”Sublevel 1[edit]
- Theme: Toybox
- Music: Toy
- Treasures:
- Enemies:
 Dwarf Bulbear × 10
- Obstacles:
- None
- Vegetation:
- None
- Others:
- None
There are numerous Dwarf Bulbears here. They should be killed with Purple Pikmin. Inside the large wooden box should be another Bulbear. It too should be defeated by throwing Pikmin over the edge, allowing the player to grab the Master's Instrument. Wooden walls of a house can also be seen when  /
/  is held down.
| Technical sublevel information | |||||
|---|---|---|---|---|---|
| Internal cave name | yakushima_2 | ||||
| "Main" object maximum (?) | 10 | ||||
| "Treasure" object maximum (?) | 1 | ||||
| "Gate" object maximum (?) | 0 | ||||
| Dead end unit probability (?) | 0 | ||||
| Number of rooms (?) | 1 | ||||
| Corridor-to-room ratio (?) | 0 | ||||
| Escape geyser (?) | No | ||||
| Clogged hole (?) | No | ||||
| Cave units file (?) | 1_units_hit6x6_yakushima_toy.txt | ||||
| Lighting file (?) | yakushima_2_light.ini | ||||
| Background (?) | flooring ( wooden floor) wooden floor)
| ||||
| Cave units (?) | |||||
 |
 |
 |
 |
 |
 |
| Dead end | Three-way crossing | Four-way crossing | Turning corridor | Corridor | Long corridor |
 |
|||||
| Room with wooden box | |||||
| Detailed object list | ||||
|---|---|---|---|---|
| The game spawns these "main" objects: | ||||
| ID | Object | Amount | Fall method | Spawn location |
| 1 | Dwarf Bulbear
|
4 | None | "Hard" enemy spots |
| 2 | Dwarf Bulbear
|
3 | None | "Easy" enemy spots |
| 3 | Dwarf Bulbear
|
3 | None | "Easy" enemy spots |
| Then it spawns these "treasure" objects: | ||||
| ID | Object | Amount | Fall method | Spawn location |
| 4 |  Master's Instrument Master's Instrument
|
1 | None | Treasure spots |
- For details on how objects are spawned, and how some may fail to spawn, see here.
Sublevel 2[edit]
- Theme: Toybox
- Music: Toy Railroad
- Treasures:
 Massive Lid (GameCube US) /
  Happiness Emblem (Wii US/Nintendo Switch) /
  Survival Container (Europe) /
  Milk Lid (Japan)
 Imperative Cookie
- Enemies:
 Breadbug × 3
 Cloaking Burrow-nit × 1
 Female Sheargrub × 4
 Male Sheargrub × 4
- Obstacles:
- None
- Vegetation:
 Violet Candypop Bud × 1 (if max Pikmin requirement is met)
- Others:
- Chiyogami paper × 2
A toy train track surrounds the Research Pod. It is possible to walk around on it, although this serves no purpose for the game's objective. There are Breadbugs on this level that will carry away treasure and defeated enemies into their dens. The Cloaking Burrow-nit and Sheargrubs may also hinder the Pikmin from collecting the Massive Lid and Imperative Cookie. A Violet Candypop Bud can also appear here, but only if Purple Pikmin total is less than 20.
Pieces of chiyogami paper are also encountered on the floor. They are interactive, but like the train track, they serve no function other than to add to the scenery.
| Technical sublevel information | |||||
|---|---|---|---|---|---|
| Internal cave name | yakushima_2 | ||||
| "Main" object maximum (?) | 10 | ||||
| "Treasure" object maximum (?) | 2 | ||||
| "Gate" object maximum (?) | 0 | ||||
| Dead end unit probability (?) | 0 | ||||
| Number of rooms (?) | 1 | ||||
| Corridor-to-room ratio (?) | 0 | ||||
| Escape geyser (?) | No | ||||
| Clogged hole (?) | No | ||||
| Cave units file (?) | 1_units_large_toy.txt | ||||
| Lighting file (?) | yakushima_2_light.ini | ||||
| Background (?) | tatami ( carpet) carpet)
| ||||
| Cave units (?) | |||||
|
|
|
|
|
|
| Dead end | Three-way crossing | Four-way crossing | Turning corridor | Corridor | Long corridor |
 |
|||||
| Toy train track room | |||||
| Detailed object list | ||||
|---|---|---|---|---|
| The game spawns these "main" objects: | ||||
| ID | Object | Amount | Fall method | Spawn location |
| 1 | Violet Candypop Bud
|
1 | None | "Special" enemy spots |
| 2 | Female Sheargrub
|
2 | None | "Easy" enemy spots |
| 3 | Female Sheargrub
|
2 | None | "Easy" enemy spots |
| 4 | Male Sheargrub
|
4 | None | "Hard" enemy spots |
| 5 | Breadbug
|
1 | None | "Hard" enemy spots |
| Then it spawns these "decoration" objects: | ||||
| ID | Object | Amount | Fall method | Spawn location |
| 6 | Breadbug
|
2 | None | Plant spots |
| 7 | Cloaking Burrow-nit
|
1 | None | Plant spots |
| 8 | Chiyogami paper | 2 | None | Plant spots |
| Then it spawns these "treasure" objects: | ||||
| ID | Object | Amount | Fall method | Spawn location |
| 9 | Massive Lid (GC US) Happiness Emblem (Wii US/Nintendo Switch) Survival Container (EU) Milk Lid (JP)
|
1 | None | Treasure spots |
| 10 | Imperative Cookie
|
1 | None | Treasure spots |
- For details on how objects are spawned, and how some may fail to spawn, see here.
Sublevel 3[edit]
- Theme: Toybox
- Music: Toy
- Treasures:
- Enemies:
 Anode Beetle × 10
- Breadbug × 2
 Mitite (group of 10) × indefinite amount (from eggs)
 Puffy Blowhog × 1
- Obstacles:
 Electrical wire × 5
- Vegetation:
- Others:
 Egg × 1 or more
A xylophone and a small tambourine are the main decorations on this level and also serve as large obstacles. Lots of electrical wires and Anode Beetles will be in the way, so those should taken care of with Yellow Pikmin; if the player lacks these, they may use this sublevel's Golden Candypop Bud. This is the only Golden Candypop Bud in the entire game; it's advised to convert a single Pikmin with it to add the entry to the Piklopedia, even if you do not need more Yellow Pikmin.
A Puffy Blowhog also flies around here, and it can be encountered and fought out of bounds. Breadbugs will be stealing treasures and corpses, such as the Harmonic Synthesizer and Director of Destiny, since both lie in the open.
Note that due to the way sublevel generation works, it is possible for the Harmonic Synthesizer to not appear, as detailed here and here.
| Technical sublevel information | |||||
|---|---|---|---|---|---|
| Internal cave name | yakushima_2 | ||||
| "Main" object maximum (?) | 16 | ||||
| "Treasure" object maximum (?) | 2 | ||||
| "Gate" object maximum (?) | 0 | ||||
| Dead end unit probability (?) | 50 | ||||
| Number of rooms (?) | 3 | ||||
| Corridor-to-room ratio (?) | 0 | ||||
| Escape geyser (?) | No | ||||
| Clogged hole (?) | No | ||||
| Cave units file (?) | 3_units_small2_small_mid_toy.txt | ||||
| Lighting file (?) | yakushima_2_light.ini | ||||
| Background (?) | flooring ( wooden floor)
| ||||
| Cave units (?) | |||||
 |
|
|
|
|
|
| Dead end with item | Three-way crossing | Four-way crossing | Turning corridor | Corridor | Long corridor |
 |
 |
 |
|||
| Large rectangular empty room | Tambourine room | Xylophone room | |||
| Detailed object list | ||||
|---|---|---|---|---|
| The game spawns these "main" objects: | ||||
| ID | Object | Amount | Fall method | Spawn location |
| 1 | Puffy Blowhog
|
1 | None | "Hard" enemy spots |
| 2 | Breadbug
|
2 | None | "Hard" enemy spots |
| 3 | Anode Beetle
|
4 | None | "Hard" enemy spots |
| 4 | Anode Beetle
|
2 | None | "Easy" enemy spots |
| 5 | Anode Beetle
|
2 | None | "Easy" enemy spots |
| 6 | Electrical wire
|
5 | None | Cave unit seams |
| Then it spawns these "treasure" objects: | ||||
| ID | Object | Amount | Fall method | Spawn location |
| 7 |  Director of Destiny Director of Destiny
|
1 | None | Treasure spots |
| 8 |  Harmonic Synthesizer Harmonic Synthesizer
|
1 | None | Treasure spots |
| Then it spawns these "dead end" objects: | ||||
| ID | Object | Amount | Fall method | Spawn location |
| 9 |  Golden Candypop Bud Golden Candypop Bud
|
1 | None | Dead ends |
| 10 | Egg
|
1 | None | Dead ends |
| 11 | Anode Beetle
|
2 | Falls from the sky | Dead ends |
| Then it spawns "dead end" objects in as many dead ends as it can. Chances: | ||||
| ID | Object | Chance | Fall method | Spawn location |
| 10 | Egg
|
100% | None | Dead ends |
- For details on how objects are spawned, and how some may fail to spawn, see here.
Sublevel 4[edit]
- Theme: Toybox
- Music: Toy Railroad (alternate)
- Treasures:
 Invigorator
- Happiness Emblem (GameCube US) / Massive Lid (Wii US) /
 Drone Supplies (Europe) /
  Good Old Memories (Japan) (inside Spotty Bulbear in all versions)
  White Goodness
- Enemies:
- Breadbug × 2
- Dwarf Bulbear × 5
 Spotty Bulbear × 1
- Obstacles:
- None
- Vegetation:
- None
- Others:
- None
A few Breadbugs and a Spotty Bulbear with its young are present here. It is possible to petrify both the parent and the young Bulbears with one single bitter spray. Another good strategy is to bring just a few Purple Pikmin and find it before it picks up any Dwarf Bulbears, than petrify it and toss away. Treasures available here are the Happiness Emblem, Invigorator and White Goodness.
| Technical sublevel information | |||||
|---|---|---|---|---|---|
| Internal cave name | yakushima_2 | ||||
| "Main" object maximum (?) | 8 | ||||
| "Treasure" object maximum (?) | 2 | ||||
| "Gate" object maximum (?) | 0 | ||||
| Dead end unit probability (?) | 0 | ||||
| Number of rooms (?) | 2 | ||||
| Corridor-to-room ratio (?) | 0 | ||||
| Escape geyser (?) | No | ||||
| Clogged hole (?) | No | ||||
| Cave units file (?) | 2_units_hit47_hit67_toy.txt | ||||
| Lighting file (?) | yakushima_2_light.ini | ||||
| Background (?) | flooring ( wooden floor)
| ||||
| Cave units (?) | |||||
|
|
|
|
|
|
| Dead end | Three-way crossing | Four-way crossing | Turning corridor | Corridor | Long corridor |
 |
 |
||||
| Room with 3 exits | Room with 4 exits | ||||
| Detailed object list | ||||
|---|---|---|---|---|
| The game spawns these "main" objects: | ||||
| ID | Object | Amount | Fall method | Spawn location |
| 1 | Spotty Bulbear
|
1 | None | "Special" enemy spots |
| - | Happiness Emblem (GC US) Massive Lid (Wii US) Drone Supplies (EU) Good Old Memories (JP)
|
Carried inside entry with ID 1 | ||
| 2 | Dwarf Bulbear
|
3 | None | "Hard" enemy spots |
| 3 | Dwarf Bulbear
|
2 | None | "Easy" enemy spots |
| 4 | Breadbug
|
2 | None | "Hard" enemy spots |
| Then it spawns these "treasure" objects: | ||||
| ID | Object | Amount | Fall method | Spawn location |
| 5 | White Goodness
|
1 | None | Treasure spots |
| 6 | Invigorator
|
1 | None | Treasure spots |
- For details on how objects are spawned, and how some may fail to spawn, see here.
Sublevel 5[edit]
- Theme: Toybox
- Music: Toy
- Treasures: