Pikmin 2 icon.png

Rumbling Grotto: Difference between revisions

From Pikipedia, the Pikmin wiki
Jump to navigation Jump to search
(American Wii set to Spanish.)
No edit summary
Line 1: Line 1:
{{infobox challenge
{{infobox challenge
|image={{PAGENAME}}.jpg
|image={{PAGENAME}}.jpg
|size=250px
|sublevels=2
|sublevels=2
|red=30
|time=sublevel 1 - 170
|redm=f
 
|blue=30
sublevel 2- 120
|bluem=f
|reds=30
|blues=30
|spicy=4
|spicy=4
|bitter=3
|bitter=3
|gridcol=1
|gridrow=5
}}
}}


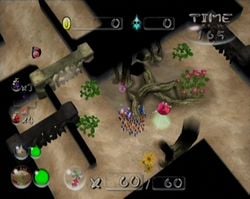
The '''Rumbling Grotto''' is a [[Challenge Mode (Pikmin 2)|Challenge Mode]] level in ''[[Pikmin 2]]'' where you have to find [[the Key]] on one sublevel and defeat a [[Pileated Snagret]] for it on the next. Proceed with caution.
The '''Rumbling Grotto''' is a [[Challenge Mode (Pikmin 2)|Challenge Mode]] arena where you have to find [[The Key|The Key]] on one sublevel and defeat a [[Pileated Snagret]] for it on the next, making it one of the harder levels to preform a no-death run on. Proceed with caution.


== Sublevel 1 ==
== Sublevel 1 ==
*'''Theme''': Concrete
The cave starts rumbling while [[Creeping Chrysanthemum]]s, [[Cloaking Burrow-nit]]s, [[Sheargrub]]s and [[Shearwig]]s come out of the ground. If you don't want to risk [[Pikmin]] deaths, you can reset the cave until the key lies right beside you, which happens quite often.
*'''Time''': 170
*'''Enemies''':
**2 [[Creeping Chrysanthemum]]s
**3 [[Cloaking Burrow-nit]]s
**1 [[Iridescent Glint Beetle]]
**3 to 6* [[Female Sheargrub]]s
**3 to 6* [[Male Sheargrub]]s
**3 to 6* [[Shearwig]]s
*'''Hazards''':
**None
*'''Treasures''':
**2 [[Mirrored Element]]s (inside the Creeping Chrysanthemums)
**3 [[Unknown Merit]]s (inside the Cloaking Burrow-nits)
**[[Lustrous Element]] (inside the Iridescent Glint Beetle)
**3 to 6* [[Omniscient Sphere]]s (inside the Female Sheargrubs)
**3 to 6* [[Mirth Sphere]]s (inside the Male Sheargrubs)
**3 to 6* [[Armored Nut]]s (inside the Shearwigs)
**[[The Key]]
**[[Gyroid Bust]]
**[[Crystal King]]
*'''Plants''':
**3 [[Margaret]]s
**1 large [[Shoot]]
**1 small [[Shoot]]
**2 small [[Figwort]]s
**2 large [[Figwort]]s
**6 [[Clover]]s
*'''Others''':
**1 type of [[gate]], with 4000 [[Health|HP]]
 
<nowiki>*</nowiki> There must be a grand total of 12 enemies, between the types marked with the asterisk. At least 3 enemies of each type must exist. The treasures match the carriers.
 
{{sublevel technical
|cave        = ch_MAT_crawler
|enemymax    = 21
|itemmax    = 3
|gatemax    = 3
|capmax      = 0
|rooms      = 4
|geyser      = No
|unitfile    = 4_units_c_e_j_l_conc.txt
|lightfile  = normal_light_cha.ini
|bg          = None
|clog        = No
|hiddenfloor = 0
|units      =
{{sublevel units
|cap_conc|Dead end
|item_cap_conc|Dead end with item
|way3_conc|Three-way crossing
|way4_conc|Four-way crossing
|wayl_conc|Turning corridor
|way2_conc|Corridor
}}
{{sublevel units
|way2x2_conc|Long corridor
|room_4x4c_4_conc|'''Room with 4 exits'''
|room_4x4e_4_conc|'''Room with 4 exits and C-shaped wall'''
|room_north4x4j_1_conc|'''Room with 1 exit and a pipe'''
|room_north4x4l_1_conc|'''Room with dead end after U-turn'''
}}
}}
 
The cave starts rumbling while [[Creeping Chrysanthemum]]s, [[Cloaking Burrow-nit]]s, [[Sheargrub]]s and [[Shearwig]]s come out of the ground. To avoid [[Pikmin family|Pikmin]] [[Spirit|deaths]], it is possible to reset the cave until the key lies right beside the player, which happens quite often.


== Sublevel 2 ==
== Sublevel 2 ==
*'''Theme''': Concrete
More rumbling with the Pileated Snagret. Use all [[spray]]s here so the Pikmin don't get harmed, grab the key, and jump out. Using red pikmin first helps, since their attack power is greater than that of your blues.
*'''Time''': +120
*'''Enemies''':
**[[Pileated Snagret]]
*'''Hazards''':
**None
*'''Treasures''':
**[[The Key]] (inside the Pileated Snagret)
*'''Plants''':
**4 large dying [[Figwort]]s
**2 small dying [[Figwort]]s
*'''Others''':
**None
 
{{sublevel technical
|cave        = ch_MAT_crawler
|enemymax    = 7
|itemmax    = 0
|gatemax    = 0
|capmax      = 0
|rooms      = 1
|geyser      = Yes
|unitfile    = 1_units_manh_conc.txt
|lightfile  = normal_light_cha.ini
|bg          = None
|clog        = No
|hiddenfloor = 0
|units      =
{{sublevel units
|item_cap_conc|Dead end with item
|way3_conc|Three-way crossing
|way4_conc|Four-way crossing
|wayl_conc|Turning corridor
|way2_conc|Corridor
|way2x2_conc|Long corridor
}}
{{sublevel units
|room_manh_2_conc|'''Large circular room with 1 exit'''
}}
}}
 
More rumbling with the Pileated Snagret. Use all [[spray]]s here so the Pikmin don't get harmed, grab the key, and jump out.


If you are doing a 2-player Challenge, the battle can be very quick and easy. Stand on opposite side of the Snagret and have both players toss Pikmin rapidly at its head. If you do it right, it should always go back into the ground instead of eating any Pikmin, and you save time and deaths.


==Names in other languages==
{{Foreignname
|Jap=土とんの洞窟<!-- Found in the Wii version of Pikmin 2's BGM Files, specifically pikmin2 > user > Totaka > ChallengeBgmList.txt -->
|SpaA=Gruta Estruendosa
|SpaAM=Rumbling Grotto
}}


{{CM}}
{{CM}}
[[Category:Pikmin 2]]
[[Category:Pikmin 2 Challenge Mode]]

Revision as of 18:26, June 25, 2014

Rumbling Grotto
Rumbling Grotto.jpg
Sublevels 2 Ultra-bitter sprays 3
Red Pikmin 0 Ultra-spicy sprays 4
Yellow Pikmin 0
P2 challenge mode flower.png
P2 challenge mode dot.png
Blue Pikmin 0
White Pikmin 0
Purple Pikmin 0
Bulbmin 0

The Rumbling Grotto is a Challenge Mode arena where you have to find The Key on one sublevel and defeat a Pileated Snagret for it on the next, making it one of the harder levels to preform a no-death run on. Proceed with caution.

Sublevel 1

The cave starts rumbling while Creeping Chrysanthemums, Cloaking Burrow-nits, Sheargrubs and Shearwigs come out of the ground. If you don't want to risk Pikmin deaths, you can reset the cave until the key lies right beside you, which happens quite often.

Sublevel 2

More rumbling with the Pileated Snagret. Use all sprays here so the Pikmin don't get harmed, grab the key, and jump out. Using red pikmin first helps, since their attack power is greater than that of your blues.

If you are doing a 2-player Challenge, the battle can be very quick and easy. Stand on opposite side of the Snagret and have both players toss Pikmin rapidly at its head. If you do it right, it should always go back into the ground instead of eating any Pikmin, and you save time and deaths.