The Giant's Bath: Difference between revisions
(American Wii set to Spanish.) |
TheSneakySpy (talk | contribs) No edit summary |
||
| Line 1: | Line 1: | ||
{{infobox challenge | {{infobox challenge | ||
|image=The Giant's Bath.jpg | |image=The Giant's Bath.jpg | ||
|spicy=5 | |spicy=5 | ||
|sublevels=2 | |sublevels=2 | ||
| | |time = sublevel 1 - 200 | ||
'''The Giant's Bath''' is the twentieth level | sublevel 2 - 150 | ||
|blues = 50}} | |||
'''The Giant's Bath''' is the twentieth level in [[Challenge Mode (Pikmin 2)|''Pikmin 2's'' Challenge Mode]]. It has many enemies and features the rare [[Toady Bloyster]]. You should watch your [[Pikmin (species)|Pikmin]] as you collect treasures. | |||
==Sublevel 1== | ==Sublevel 1== | ||
*'''Time''': 200 seconds | |||
*'''Time''': 200 | |||
*'''Enemies''': | *'''Enemies''': | ||
** | **[[Bumbling Snitchbug]] | ||
** | **[[Greater Spotted Jellyfloat]] | ||
** | **[[Hermit Crawmad]] x2 | ||
** | **[[Toady Bloyster]] | ||
*''' | *'''Treasure''': | ||
**[[Sud Generator]] | |||
**[[Frosty Bauble]] | |||
**[[ | |||
**[[Frosty Bauble]] | |||
**[[Rubber Ugly]] | **[[Rubber Ugly]] | ||
**[[Maternal Sculpture]] | **[[Maternal Sculpture]] | ||
**[[ | **[[Joyless Jewel]] | ||
**[[Crystal Clover]] | **[[Crystal Clover]] | ||
* | **[[The Key]] | ||
** | **[[Petrified Heart]] | ||
* | **[[Tear Stone]] | ||
===Strategy=== | |||
As you start, go for the Toady Bloyster. Don't go in the water, as you'll waste more time. Before leaving, avoid the Bumbling Snitchbugs, since they are able to grab you. Go deeper into the cave. Remember; you don't have to collect any treasure other than The Key dropped by the Toady Bloyster. | |||
==Sublevel 2== | ==Sublevel 2== | ||
*'''Time''': 150 seconds | |||
*'''Time''': | *'''Enemy''': | ||
*''' | **[[Ranging Bloyster]] | ||
** | *'''Treasure''': | ||
*''' | **[[The Key]] | ||
**[[The Key]] | |||
**[[Paradoxical Enigma]] | **[[Paradoxical Enigma]] | ||
**[[Pink Menace]] | |||
**[[Regal Diamond]] | **[[Regal Diamond]] | ||
*'''Candypop Buds''' | |||
*''' | **[[Candypop Bud#Ivory Candypop Bud|Ivory Candypop Bud]] x2 | ||
** | |||
===Strategy=== | |||
In the arena, there lives the Ranging Bloyster. To battle it effectively, switch your pilots. When moving, be fast and continue switching or it'll start to eat your Pikmin squad. Run until you are under its bulb-like gills and use the same strategy as you did for the Toady Bloyster. Get the key and leave the challenge level. | |||
{{CM}} | {{CM}} | ||
[[Category:Pikmin 2]] | |||
[[Category:Pikmin 2 Challenge Mode]] | |||
Revision as of 18:24, June 25, 2014
| The Giant's Bath | |||
|---|---|---|---|

| |||
| Sublevels | 2 | Ultra-bitter sprays | 0 |
| Red Pikmin | 0 | Ultra-spicy sprays | 5 |
| Yellow Pikmin | 0 | ||
| Blue Pikmin | 0 | ||
| White Pikmin | 0 | ||
| Purple Pikmin | 0 | ||
| Bulbmin | 0 | ||
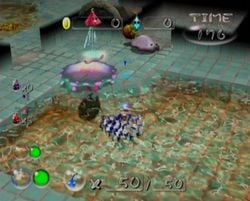
The Giant's Bath is the twentieth level in Pikmin 2's Challenge Mode. It has many enemies and features the rare Toady Bloyster. You should watch your Pikmin as you collect treasures.
Sublevel 1
- Time: 200 seconds
- Enemies:
- Treasure:
Strategy
As you start, go for the Toady Bloyster. Don't go in the water, as you'll waste more time. Before leaving, avoid the Bumbling Snitchbugs, since they are able to grab you. Go deeper into the cave. Remember; you don't have to collect any treasure other than The Key dropped by the Toady Bloyster.
Sublevel 2
- Time: 150 seconds
- Enemy:
- Treasure:
- Candypop Buds
Strategy
In the arena, there lives the Ranging Bloyster. To battle it effectively, switch your pilots. When moving, be fast and continue switching or it'll start to eat your Pikmin squad. Run until you are under its bulb-like gills and use the same strategy as you did for the Toady Bloyster. Get the key and leave the challenge level.