Pikmin 2 icon.png

Emperor's Realm: Difference between revisions

From Pikipedia, the Pikmin wiki
Jump to navigation Jump to search
No edit summary
No edit summary
Line 9: Line 9:
|bitter=2
|bitter=2
}}
}}
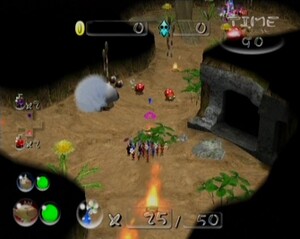
The '''Emperor's Realm''' is the final cavern in [[Challenge Mode (Pikmin 2)|Challenge Mode]] in ''[[Pikmin 2]]''. The common enemies the player will fight are [[Grub-dog]]s and [[Breadbug family|Breadbug mimics]]. The level can be hard if one doesn't watch the Pikmin and the time.
The '''Emperor's Realm''' is the final cavern in [[Challenge Mode]] in [[Pikmin 2]]. The common enemies you'll fight are [[Grub-dog]]s and [[Breadbug family|Breadbug mimics]]. The level is relatively difficult compared to most other challenge mode levels, as it has 5 sublevels full of dangerous Grub-dogs, such as the [[Spotty Bulbear]].
 
==Sublevel 1==
==Sublevels==
 
===Sublevel 1===
*'''Time''': 100 seconds
*'''Enemies''':
*'''Enemies''':
Line 26: Line 23:
**[[Petrified Heart]]


===Sublevel 2===
==Sublevel 2==
*'''Time''': 100 seconds
*'''Enemies''':
*'''Enemies''':
Line 39: Line 36:
**[[Tear Stone]]
**[[Tear Stone]]


===Sublevel 3===
==Sublevel 3==
*'''Time''': 100 seconds
*'''Enemies''':
*'''Enemies''':
Line 48: Line 45:
**[[Queen Candypop Bud]] x3


===Sublevel 4===
==Sublevel 4==
*'''Time''': 100 seconds
*'''Enemies''':
*'''Enemies''':
Line 56: Line 53:
**[[The Key]]
**[[The Key]]


===Sublevel 5===
==Sublevel 5==
*'''Time''': 100 seconds
*'''Enemies''':
*'''Enemies''':
Line 66: Line 63:
**[[Mirrored Element]]


==Walkthrough==
===Sublevel 1===
A [[Red Bulborb]] will probably be next to the starting point. If it's tucked in the wooden structure, ignore it, as it won't wake up when your Pikmin pass with treasure. The [[Hairy Bulborb]] has the key. Make your way to it, and toss your purple Pikmin onto its back. After retrieving the key, you may explore the rest of the cave for treasure. Beware of the fire geysers.
===Sublevel 2===
If you're unlucky, the [[Spotty Bulbear]] will notice you from the start. Try to lure it into the starting point, and use an [[ultra-bitter spray]]. If the [[Dwarf Bulbear]]s follow the Spotty Bulbear, you may need to throw some Pikmin onto their back before taking on the petrified Bulbear. If you're lucky, no Pikmin will die. Retrieve The Key and you can now head over to the exit.
===Sublevel 3===
Throw blue Pikmin onto the [[Queen Candypop Bud]]s when their color is red. The goal is to have several red Pikmin with you. Once you're ready and cleared most of the fire geysers near the starting area, dismiss everyone and wake up the [[Fiery Bulblax]] with a punch from your Captain. Be careful not to get too close when punching, as you could get burned. Attract the Bulblax to the starting area. It'll cross the water and be extinguished, but that's not the point. It'll cross land again and reignite, and when it comes to a certain point near the starting area, it'll give up and turn back. When it does, call your red Pikmin and [[ultra-bitter spray|petrify]] it. Have your red Pikmin attack it and retrieve The Key. If you want, you can use the [[egg]]s in the level or the nectars dropped by the Bulblax (if any) to flower your Pikmin.
===Sublevel 4===
Just as the level starts, quickly gather your Pikmin and head for the [[Empress Bulblax]]. Quickly throw some Pikmin onto her head, but don't use the C-stick, or else some Pikmin will swarm her central body and most likely will get killed. After some time, the Empress will shake your Pikmin off. Be sure to call them before she does. Any [[Bulborb Larva]] she had spawned will likely be squashed. While the Empress is rolling, you may want to take down the fire geyser to your left. When she stops, repeat the same strategy. You have time, so don't rush it. Once that's done, one or two larvae might survive, so take them out with a punch from a Captain.
===Sublevel 5===
From the start, if you head forward, you'll find 3 [[bomb-rock]]s. Try to wake up the [[Emperor Bulblax]] in front of these bomb-rocks. Attract him towards them, and once he tucks in his tongue, preparing to stick it out, go gather your Pikmin. While he's dazed, throw Pikmin onto his face. Be careful when using the C-stick, as you might make some Pikmin attack the remaining bomb-rocks. When he wakes up, have him eat either one or both of the other bomb-rocks, and attack him again. This Bulblax will likely contain the key, but if not, repeat the strategy with the other Emperors.


{{CM}}
{{CM}}
[[Category:Pikmin 2]]
[[Category:Pikmin 2 Challenge Mode]]

Revision as of 11:04, March 25, 2013

Emperor's Realm
Emperor's Realm.jpg
Sublevels 5 Ultra-bitter sprays 2
Red Pikmin 20 Ultra-spicy sprays 2
Yellow Pikmin 0
P2 challenge mode flower.png
P2 challenge mode dot.png
Blue Pikmin 20
White Pikmin 0
Purple Pikmin 10
Bulbmin 0

The Emperor's Realm is the final cavern in Challenge Mode in Pikmin 2. The common enemies you'll fight are Grub-dogs and Breadbug mimics. The level is relatively difficult compared to most other challenge mode levels, as it has 5 sublevels full of dangerous Grub-dogs, such as the Spotty Bulbear.

Sublevel 1

Sublevel 2

Sublevel 3

Sublevel 4

Sublevel 5