Fiery Bulblax
| |||
|---|---|---|---|
| Appears in | Pikmin 2, Pikmin 4 | ||
| Scientific name | Oculus vulcanus | ||
| Family | Grub-dog | ||
| Areas | Valley of Repose, Perplexing Pool, Giant's Hearth | ||
| Caves | Submerged Castle, Cavern of Chaos, Hole of Heroes, Dream Den, Engulfed Castle, Frozen Inferno, Cradle of the Beast | ||
| Night expeditions | Line of Logs | ||
| Challenge Mode stages | Green Hole, Cryptic Cavern, Hazard Training, Cave of Pain, Emperor's Realm, | ||
| Dandori Challenge stages | Trial of the Sage Leaf | ||
| Dandori Battle stages | Hot Sandy Duel | ||
| 2-Player Battle stages | None | ||
| Attacks | Eat and burn Pikmin | ||
The Fiery Bulblax (ヤキチャッピー?, lit.: "Sizzling Chappy") is an uncommon enemy that appears in Pikmin 2 and Pikmin 4. Similar to other grub-dog family members, it is a large, two-legged creature with a pair of eyes on stalks, a pair of fangs on either side of its mouth, and two toes each equipped with a small claw. However, unlike most other grub-dogs, the Fiery Bulblax appears to be melting, giving it a deformed-looking appearance. Also unlike most other grub-dogs, this Bulblax lacks any form of spots. It instead has a dark, ash-colored back with small orange patches, though it does have the same face color as a regular Bulborb. Its eyes are asymmetrical, with its right eye being a lot larger than its left one (its eyestalks have the same length however).
The Fiery Bulblax is constantly ablaze, and appears to be melting from the extreme heat it puts off, most noticeably on its face. Red Pikmin are often the only type that can safely attack it due to their fire-resistance. However, if lured into a body of water, its flames will be temporarily extinguished, allowing all Pikmin types to safely attack.
Stats[edit]
| Game | Weight | Max. carriers |
Seeds | Value | Health | Regen. |
|---|---|---|---|---|---|---|
| 10 | 20 | 12 | 1400 | 4.2 HP/s | ||
| 12 | 24 | 15 (15 glow pellets) | 2000 | No |
Behavior[edit]
Much like other members of the grub-dog family, the Fiery Bulblax is nocturnal, sleeping in open locations during the day. During the night, it can be found wandering around. When it sleeps, it lies on its belly facing forwards and its back will be covered in flames, constantly burning while it rests. These flames can be extinguished however, and they will disappear once the Bulblax is defeated.
Once awoken, the Fiery Bulblax will become aggressive and will charge at any nearby Pikmin or leaders. Much like other grub-dogs, it will lunge in an attempt to eat Pikmin, and if it succeeds, it will stand up to eat them. If it is being attacked by multiple Pikmin at once, the Bulblax will stop attacking and will then shake its body in order to knock off its attackers.
It should be noted that, although the Fiery Bulblax does not wake up until touched, it is more sensitive compared to other Bulborbs when returning to its home, and can stop in its tracks if Pikmin or leaders enter its territory.
If a Fiery Bulblax's fiery backside is extinguished, it will soon attempt to reignite itself. In Pikmin 2, it does this immediately after exiting the water that put the fire out. In Pikmin 4, it takes a few moments before it reignites itself – often done when it is returning to its territory.
Locations[edit]
Pikmin 2[edit]
Areas[edit]
- Valley of Repose - Respawns every time the area is re-entered, either from the area selection menu or from exiting a cave.
- There is one Fiery Bulblax in this area. It is located in the northern part of the area, blocked off by a white bramble gate. In this northern segment, the Bulblax can be found towards the west and across the small body of water. It holds the Temporal Mechanism.
- Perplexing Pool - Despawns after day 30 and never respawns after being defeated
- There is one Fiery Bulblax in this area. It can be found directly north of the landing site, in front of the poison white bramble gate blocking access to the Yellow Onion.
Caves[edit]
- Submerged Castle
- One can be seen on sublevel 1, holding the Bug Bait.
- Cavern of Chaos
- Three can be seen on sublevel 2, with one holding the Essence of Despair, the other holding the Frosty Bauble, and the last one holding the Gemstar Wife.
- Hole of Heroes
- One can be seen on sublevel 9, holding either the Dimensional Slicer (US), the Patience Tester (Europe), or the Flying Saucer (Japan).
- Dream Den
- One can be seen on sublevel 5, holding the Insect Condo.
Challenge Mode[edit]
- Green Hole
- One can be seen on sublevel 2, holding The Key.
- Cryptic Cavern
- One can be seen on sublevel 4, holding The Key.
- Hazard Training
- One can be seen on sublevel 1, holding The Key.
- Cave of Pain
- One can be seen on sublevel 4, holding the Seed of Greed.
- Emperor's Realm
- One can be seen on sublevel 3, holding The Key.
Pikmin 4[edit]
Areas[edit]
- Giant's Hearth
- There are two Fiery Bulblaxes in this area. The first Bulblax can be found towards the southeast of the Line of Logs base, on the raised section just south of the sprinkler. It is near the clay valve that is used to turn off said sprinkler. The second Bulblax is located towards the center of the map, with it guarding the Abandoned Throne base.
Caves[edit]
- Engulfed Castle
- There is one Fiery Bulblax on sublevel 1. It can be found directly north of the base, in the straight path between the two bodies of water. It holds the Vanishing Cookie.
- Frozen Inferno
- There is one Fiery Bulblax on sublevel 1. It is located in the northeastern section, containing the already-lit bonfire altar. The Bulblax will be on the sizzling floor.
- Cradle of the Beast
- There is one Fiery Bulblax on sublevel 1. It can be found in the room directly north of the base, alongside some water spouts. It holds the Delectable Bouquet.
Dandori Challenges[edit]
Trial of the Sage Leaf[edit]
- 1st Story: Bulblaxes
- There is one Fiery Bulblax found in this story. It is located in a room towards the east. The Bulblax is north of the room full of sticky mold, and east of the iron fence that is in the room towards the north.
Dandori Battles[edit]
Night expeditions[edit]
- Giant's Hearth
- Line of Logs
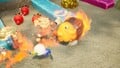
- There are three Fiery Bulblaxes in the Line of Logs expedition. The first Fiery Bulblax is located towards the northeast, adjacent to a clay valve and a Dandori Challenge cave entrance. The second Fiery Bulblax can be found slightly southwest of the previous Bulblax, with it being in the section with the sprinkler and the bonfire altar. During the day, a Bug-Eyed Crawmad would be located here. The third and final Fiery Bulblax is located south of the Abandoned Throne base, with it being between two piles of glow pellets. This Fiery Bulblax is near a buried Emperor Bulblax.
- Line of Logs
Strategy[edit]
|
The following article or section contains guides. |
With Pikmin[edit]
As Fiery Bulblaxes are typically on fire, Pikmin immune to fire, such as Red Pikmin, Bulbmin, and Glow Pikmin are the most obvious — and often only — choice to battle one with. Typical grub-dog fighting strategies will work, although note that Fiery Bulblaxes are among the most durable grub-dogs. With this in mind, you should bring the largest squad of flame-retardant Pikmin you can muster to defeat the creature as quickly as possible. Rapidly throwing Pikmin onto its back, or swarming its back with a large group of Pikmin will likely be your most effective method. Using sprays will dramatically simplify the battle, especially ultra-bitter spray.
While a somewhat risky and unreliable strategy, Purple Pikmin are deceptively effective against them in Pikmin 2. While they will be ignited, their slam attack will actually inflict damage and can even stun them just as often as most other enemies. While the Fiery Bulblax is up on its feet, it is high up enough to require specifically angling the Purple Pikmin to hit the sides of the Bulblax, so they don't come in contact with the creature's back during their throwing arc, as this will set them on fire and prevent them from slamming down. You'll have to be quick with the whistle to prevent any from burning to death, but this strategy allows even a small group of Purple Pikmin to effectively stunlock the Bulblax to death. The Mega Tweeter upgrade is recommended before attempting this.
During night expeditions, Glow Pikmin are the only Pikmin type available. They are immune to fire as well, noticeably simplifying the battles against them; a glowmob with any modestly sized group will more than likely allow them to defeat it before it can meaningfully react.
There are a few Fiery Bulblaxes throughout the Pikmin series that can only be reached with Blue Pikmin, such as in the Submerged Castle. In these cases, the only way to injure it is to extinguish its flames, either by waking it up and luring it into a body of water or by using an ice blast. The Bulblax will reignite itself the moment it leaves the water in Pikmin 2, so it's highly recommended to use an ultra-bitter spray on it to lock it in place and ensure the Blue Pikmin can safely attack it, as otherwise, it will likely devour quite a few Pikmin in the skirmish. In Pikmin 4, the Bulblax will only reignite after enough time has passed or after falling back asleep, making this method much safer in that game, as one can stand idle until it falls back asleep and attack it then with good timing.
Alternative methods[edit]
Punching a Fiery Bulblax to death is possible, but it will be a lengthy process due to the enemy's high HP, and in Pikmin 2, high health regeneration. Attempting it without the Scorch Guard is ill-advised due to the punch's short range. This will typically be most useful in situations where one needs to defeat a Fiery Bulblax but doesn't have many Red Pikmin, or to prevent possible Pikmin causalities.
If Oatchi is upgraded with his ![]() Pup Scorch Guard, he can hold his own against a Fiery Bulblax if sent to attack one, which can prove useful in night expeditions. Despite this, he is liable to being knocked out if he hasn't been sufficiently upgraded in other areas. Fully upgrading his Chomp to Big Chomp and acquiring
Pup Scorch Guard, he can hold his own against a Fiery Bulblax if sent to attack one, which can prove useful in night expeditions. Despite this, he is liable to being knocked out if he hasn't been sufficiently upgraded in other areas. Fully upgrading his Chomp to Big Chomp and acquiring ![]() Pup Air Armor++ and
Pup Air Armor++ and ![]() Pup Tuff Stuff++ is recommended.
Pup Tuff Stuff++ is recommended.
Items in Pikmin 4 are quite effective on it. Ice blasts will quench its flames, allowing for any type of Pikmin to safely attack or for Oatchi to inflict devastating damage with a rush. If speed is of the essence, like in the Engulfed Castle, bomb rocks can kill it extremely quickly: It'll take two to kill it normally, and only one if it ends up consuming a bomb-rock.
Otherwise, if applicable, waiting for the Waterwraith to fall is a valid tactic, as it will instantly kill the Bulblax if it rolls over it, although note that you'll have to contend with the Waterwraith instead.
Notes
Olimar's notes
Louie's notes
Dalmo's notes[edit]
Olimar's notes (Pikmin 4)[edit]
“Bodily excretions of a highly flammable waxy substance interact with the cell structure of this Grub-Dog's skin, causing a chemical reaction that produces extremely high temperatures.
The skin benefits from a spongy cell structure that diffuses the surface heat, protecting the creature's inner organs.
Due to the astonishing amount of heat produced by this beast, it should be observed with great caution.”Louie's notes (Pikmin 4)[edit]
Pikmin 2 Nintendo Player's Guide[edit]
Technical information[edit]
| Pikmin 2 technical information (?) | |||
|---|---|---|---|
| Internal name | firechappy
| ||
| Global properties (List) | |||
| ID | Japanese comment | Property | Value |
| s000 | friction(not used) | Friction | 0.5 |
| s001 | wallReflection | Unknown (wall bounce speed multiplier?) | 0.5 |
| s002 | faceDirAdjust | Unknown | 0.25 |
| s003 | accel | Acceleration | 0.1 |
| s004 | bounceFactor | Unknown (bounce when it hits the ground?) | 0.3 |
| fp00 | ライフ | HP | 1400 |
| fp01 | マップとの当り | Unknown (related to slopes) | 40 |
| fp02 | ダメージスケールXZ | Horizontal damage scale | 0.25 |
| fp03 | ダメージスケールY | Vertical damage scale | 0.25 |
| fp04 | ダメージフレーム | Damage scale duration | 0.35 |
| fp05 | 質量 | Unknown (weight?) | 0.1 |
| fp06 | 速度 | Move speed | 110 |
| fp08 | 回転速度率 | Rotation acceleration | 0.4 |
| fp09 | テリトリー | Territory radius | 400 |
| fp10 | ホーム範囲 | "Home" radius | 15 |
| fp11 | プライベート距離 | "Private" radius | 70 |
| fp12 | 視界距離 | Sight radius | 500 |
| fp13 | 視界角度 | FOV | 90 |
| fp14 | 探索距離 | Unknown (exploration radius?) | 500 |
| fp15 | 探索角度 | Unknown (exploration angle?) | 120 |
| fp16 | 振り払い率 | Successful shake rate | 1 |
| fp17 | 振り払い力 | Shake knockback | 120 |
| fp18 | 振り払いダメージ | Shake damage | 1 |
| fp19 | 振り払い範囲 | Shake range | 40 |
| fp20 | 攻撃可能範囲 | Unknown (shock attack max range?) | 75 |
| fp21 | 攻撃可能角度 | Unknown (shock attack max angle?) | 25 |
| fp22 | 攻撃ヒット範囲 | Unknown (attack hit range?) | 80 |
| fp23 | 攻撃ヒット角度 | Unknown (attack hit angle?) | 35 |
| fp24 | 攻撃力 | Attack damage | 10 |
| fp25 | 視界高 | Unknown (height visibility?) | 50 |
| fp26 | 探索高 | Unknown (exploration height?) | 50 |
| fp27 | ライフの高さ | HP wheel height | 110 |
| fp28 | 回転最大速度 | Rotation speed | 4 |
| fp29 | 警戒時間 | Unknown (warning time?) | 15 |
| fp30 | 警戒ライフ | Unknown | 30 |
| fp31 | ライフ回復率 | Regeneration rate | 0.0001 |
| fp32 | LOD半径 | Off-camera radius | 75 |
| fp33 | マップとのあたりポリゴンの選定 | Collision processing radius | 60 |
| fp34 | ピクミンとのあたり | Pikmin damage radius | 30 |
| fp35 | 石化時間 | Petrification duration | 1 |
| fp36 | ヒップドロップダメージ | Purple Pikmin drop damage | 50 |
| fp37 | 地震気絶確立 | Purple Pikmin stun chance | 0.3 (30%) |
| fp38 | 地震気絶時間 | Purple Pikmin stun time | 5 |
| ip01 | 振り払い打撃A | Shake mode 1 – hit count | 6 |
| ip02 | 振り払い張付1 | Shake mode 1 – Pikmin requirement | 5 |
| ip03 | 振り払い打撃B | Shake mode 2 – hit count | 12 |
| ip04 | 振り払い張付2 | Shake mode 2 – Pikmin requirement | 10 |
| ip05 | 振り払い打撃C | Shake mode 3 – hit count | 17 |
| ip06 | 振り払い張付3 | Shake mode 3 – Pikmin requirement | 20 |
| ip07 | 振り払い打撃D | Shake mode 4 – hit count | 22 |
| Specific properties | |||
| ID | Japanese comment | Property | Value |
| fp01 | 足元範囲 | Determines rotation speed while standing (lower values give faster rotations) | 30 |
| fp02 | 白ピクミン毒 | White Pikmin poison damage | 300 |
Other information[edit]
- Size: Body length: 105mm, as per the e-card
- Pikmin 2 Piklopedia number: #10
- Pikmin 4 Piklopedia number: #11
- This enemy triggers the Auto Target Lock note in the Rescue Journal
Naming[edit]
- See more: Grub-dog family#Naming.
- Common name: Fiery Bulblax. The word "fiery" in its name is clearly due to the fact that it is always ablaze, and "Bulblax" is a different name used for the most powerful Bulborbs, perhaps in relation to a possible planned boss status. The Fiery Bulblax also shares the melted features and protected hide of the Emperor Bulblax (which are more prevalent in Pikmin 4), as well as deeper vocalizations shared with the Empress Bulblax in Pikmin 2. The meaning of the word Bulblax is unknown.
- Japanese nickname: ヤキチャッピー?. The name could be translated to "Sizzling Chappy", with "Chappy" being the Japanese name for Bulborb.
- Japanese name: ヒノデメマダラ?, lit.: "Fiery Spotted Bug-eye".
- Scientific name: Oculus vulcanus. Vulcanus is Latin for "volcano". According to an unused early English script in the game's files, the species name was initially going to simply be volcano.[1] In the German translation of Pikmin 4, its scientific name is instead listed as Oculus terribilis, which is the Spotty Bulbear's species name.
- Internal names: Internally, it is simply called
firechappy. - Prerelease: None.
Names in other languages[edit]
| Language | Name | Meaning | Notes |
|---|---|---|---|
| ヤキチャッピー / 焼きチャッピー[2]? Yaki Chappī |
Sizzling Chappy | "Chappy" is the Japanese name for Bulborb | |
(traditional) |
燃燒恰比 Ránshāo Qiàbǐ |
Flaming Chappy | "Qiàbǐ" is the Chinese (traditional) name for Bulborb |
(simplified) |
燃烧恰比 Ránshāo Qiàbǐ |
Flaming Chappy | "Qiàbǐ" is the Chinese (simplified) name for Bulborb |
| Vlammende bulblax | Burning bulblax | ||
| Bulblax Embrasé Bulblax embrasé (Pikmin 4) |
Burning Bulblax Burning bulblax (Pikmin 4) |
"Bulborbe" is the French name for Bulborb | |
| Feuriger Punktkäfer | Fiery Dot Beetle | "Punktkäfer" is the German name for Bulborb | |
| Coleto Igneo Coleto igneo (Pikmin 4) |
Fiery Bulborb Fiery bulborb (Pikmin 4) |
"Coleto" may come from "boletus" (Latin for mushroom), as a bulborb's spots resemble those found on certain mushrooms "Coleto" is the Italian name for both Bulborb and Bulbear | |
| 불꽃차피 Bulkkot-Chapi |
Flame Chappy | "Chapi" is the Korean name for Bulborb | |
| Bulbolhão-de-fogo | Fiery big bulbeye | "Bulbolhão" is the masculine augmentative form of "Bulbolho" (bulborb) "Bulbolho" is a portmanteau of "bulbo" (bulb) and "olho" (eye), it is the Brazilian Portuguese name for Bulborb "Bulbolhão" also sounds close to "bobalhão" (a childish slang that means "silly" or "stupid", it's the masculine form of "bobalhona") | |
| Bulbo fogoso (Pikmin 2) Bulbo dragón (Pikmin 2 (Nintendo Switch), Pikmin 4) |
Fiery bulborb | Even though "dragón" means 'dragon', the "Bulbo dragón" (Fiery Bulblax), uses the word as an equivalent to 'fiery' in the English name. |
Gallery[edit]
Pikmin 2[edit]
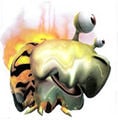
Artwork of the Fiery Bulblax from Pikmin 2.

The Piklopedia icon of the Fiery Bulblax in the Nintendo Switch version of Pikmin 2.
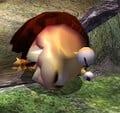
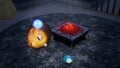
A Fiery Bulblax sleeping in Pikmin 2's Piklopedia.
A Fiery Bulblax awake in Pikmin 2's Piklopedia.
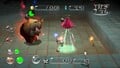
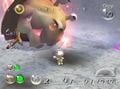
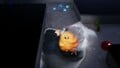
The Fiery Bulblax in the Green Hole eating some Pikmin.
The Fiery Bulblax that holds the Temporal Mechanism in the Valley of Repose.
The same Firey Bulblax after being woken up.

The extinguished backside of a Fiery Bulblax.
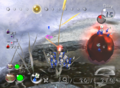
Blue Pikmin safely attacking a re-ignited Fiery Bulblax, due to an oversight.
The corpse of a Fiery Bulblax.


Pikmin 4[edit]
|
This article or section is in need of more images. Particularly: |
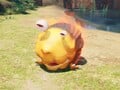
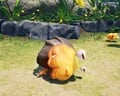
A Fiery Bulblax asleep in Pikmin 4's Piklopedia.
A Fiery Bulblax going to sleep in Pikmin 4.
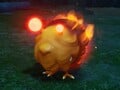
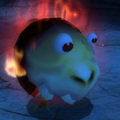
A Fiery Bulblax with glowing red eyes.
A Fiery Bulblax in the Engulfed Castle next to the Ice Sword.

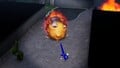
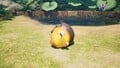
A Fiery Bulblax's back after having it extinguished by water.
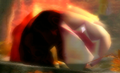
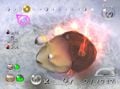
A Fiery Bulblax's fire in the process of being put out.
The corpse of a Fiery Bulblax in the Piklopedia.
The corpse of a Fiery Bulblax from a different angle.
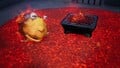
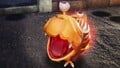
A Fiery Bulblax powering a sizzling floor in the Frozen Inferno.
A deceased Fiery Bulblax on an extinguished sizzling floor.

A Fiery Bulblax sleeping on the Abandoned Throne landing site.
A Fiery Bulblax burning dried plants.


Other[edit]
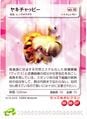
The Fiery Bulblax's e-card, #10 (19th red card).

A Fiery Bulblax as seen in the "Picky Eater" comic.


Trivia[edit]
- The Fiery Bulblax's Piklopedia icon in the GameCube and New Play Control! versions is an 80x80 image. This size is mostly only used for bosses, with regular enemies having icons that are 40x40 images. This could mean that at some point during development, the Fiery Bulblax could have been a boss. This was fixed in the Nintendo Switch version, as in this version of the game the Fiery Bulblax's icon is a 160x160 image, the same size as other regular enemy icons, while boss icons in this version of the game are 320x320 images.
- In Pikmin 2, if a Fiery Bulblax is fought while in water with Blue Pikmin, as soon as it gets out of the water, the fire starts again. However, the Blue Pikmin that are still latched on to its body will not get burned until whistled or shaken off.
See also[edit]
References[edit]
- ^ Pikmin 2/Early English Script on The Cutting Room Floor
- ^ さまざまな生物[けっこう危険な生物] on the official Japanese Pikmin 2 website, retrieved on December 10th, 2022
- Pikmin 2
- Pikmin 4
- Grub-dog family
- Pikmin 2 enemies
- Pikmin 4 enemies
- Fire enemies
- Pikmin-eating enemies
- Valley of Repose
- Perplexing Pool
- Submerged Castle
- Cavern of Chaos
- Hole of Heroes
- Dream Den
- Giant's Hearth
- Engulfed Castle
- Frozen Inferno
- Cradle of the Beast
- Pikmin 2 Challenge Mode
- Dandori Battle
- Trial of the Sage Leaf