The Forest of Hope: Difference between revisions
mNo edit summary |
ZanyDragon (talk | contribs) No edit summary |
||
| (58 intermediate revisions by 17 users not shown) | |||
| Line 1: | Line 1: | ||
{{game icons|p=y}} | {{game icons|p=y}} | ||
{{infobox area | {{infobox area | ||
|screenshot = | |screenshot = 02 Site Forest of Hope.png | ||
|map = The Forest of Hope HD.jpg | |map = The Forest of Hope HD.jpg | ||
|parts = 8 | |parts = 8 | ||
|pikmin_discovered = [[Yellow Pikmin]] | |pikmin_discovered = [[Yellow Pikmin]] | ||
|requirements = Recover | |requirements = Recover 1 ship part{{cite youtube|p6zzb5za6R4|showing that The Forest of Hope will only unlock when the player has at least one ship part|m=4|s=42|}} | ||
|music = ''[[Music in Pikmin#The Forest of Hope|The Forest of Hope]]'' | |music = ''[[Music in Pikmin#The Forest of Hope|The Forest of Hope]]'' | ||
}} | }} | ||
'''The Forest of Hope''' ({{j|希望の森|Kibō no mori|Forest of Hope}}) is the second | '''The Forest of Hope''' ({{j|希望の森|Kibō no mori|Forest of Hope}}) is the second [[area]] in {{p1}}. It is set in a temperate forest with a mix of wide-open spaces and narrow corridors. It contains 8 [[ship part]]s and is unlocked after collecting the first ship part, the [[Main Engine]], in [[The Impact Site]]. [[Yellow Pikmin]] are discovered in this area. The [[Enemy|enemies]] in this area are fairly easy compared to the other areas, with several [[Bulborb|Spotty Bulborb]]s, [[Dwarf Bulborb]]s, and [[Mandiblard family|Sheargrubs]]. This area was reused in {{p2}} as the [[Awakening Wood]]. | ||
==General layout== | ==General layout== | ||
Most of this area consists of vast plains with some gates and high walls that block the way. There is a small lake near the main plain. The most common enemies here are [[ | {{game help|p|Add a "Key sections" section like [[The Impact Site#Key sections|The Impact Site]].}} | ||
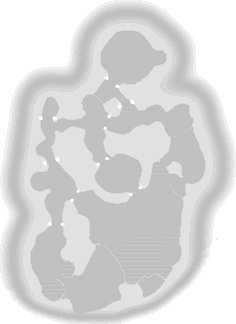
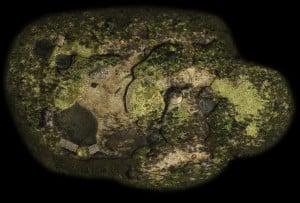
{{location map | width = 350 | height = 480 | image = FoH texture.png | bg = #111 | caption = Map of all ship parts and the location of the ship in The Forest of Hope. | icons = | |||
{{map icon | S.S. Dolphin | 155 | 248 | bg = none}} | |||
{{map icon | Eternal Fuel Dynamo | 169 | 363}} | |||
{{map icon | Whimsical Radar | 58 | 207}} | |||
{{map icon | Extraordinary Bolt | 75 | 159}} | |||
{{map icon | Nova Blaster | 269 | 170}} | |||
{{map icon | Shock Absorber | 282 | 241}} | |||
{{map icon | Radiation Canopy | 236 | 85}} | |||
{{map icon | Geiger Counter | 153 | 382}} | |||
{{map icon | Sagittarius | 224 | 425}} | |||
}} | |||
Most of this area consists of vast plains with some gates and high walls that block the way. There is a small lake near the main plain. The most common enemies here are [[Bulborb|Spotty Bulborb]]s and [[Dwarf Bulborb]]s. This area contains an assortment of red and yellow [[pellet]]s, as well as two [[bridge]]s that can be built to gain access to a small piece of land containing the [[Sagittarius]]. Behind the stone wall at the landing area is a yellow 20 pellet on a high tree stump that requires Yellow Pikmin to reach. To the north is the arena where the [[Armored Cannon Beetle]] is fought and to the southwest is the ledge where the [[Burrowing Snagret]]s are. | |||
The [[bomb-rock]]s in this area are located inside tin cans. The first one is near the great plain with [[ | The [[bomb-rock]]s in this area are located inside tin cans. The first one is near the great plain with [[Bulborb|Spotty Bulborb]]s, another one is near the place where the [[Yellow Onion]] is originally found. The last can is in the place where the [[Nova Blaster]] is found. On the first day the area is visited, some are found out of the cans, three resting in front of one of the stone walls that can be destroyed after obtaining Yellow Pikmin. | ||
Although water defends access to the [[Geiger Counter]], the [[Radiation Canopy]], and the [[Sagittarius]], it is possible to collect these parts with Yellow Pikmin; thus, the area can be completed uniquely with them. | Although water defends access to the [[Geiger Counter]], the [[Radiation Canopy]], and the [[Sagittarius]], it is possible to collect these parts with Yellow Pikmin; thus, the area can be completed uniquely with them. | ||
In [[Challenge Mode (Pikmin)|Challenge Mode]], there are a lot more Bulborbs, and Spotty Bulbears can also be found where the Armored Cannon Beetle and Burrowing Snagrets are found in story mode (the former location also has a [[Pearly Clamclamp]]). | In [[Challenge Mode (Pikmin)|Challenge Mode]], there are a lot more Bulborbs, and Spotty Bulbears can also be found where the Armored Cannon Beetle and Burrowing Snagrets are found in story mode (the former location also has a [[Pearly Clamclamp]]). | ||
<br clear=all> | |||
== | ==Objects== | ||
*{{icon|Dwarf | ===Ship parts=== | ||
*{{icon| | *{{icon|Eternal Fuel Dynamo|y}}: After destroying the [[gate]] near the landing site, the part is in plain sight. | ||
*{{icon|Whimsical Radar|y}}: This part is beyond the reinforced gate beside the place where the Yellow Onion is first discovered, atop a ledge. (Yellow Pikmin required for wall) | |||
*{{icon|Extraordinary Bolt|y}}: Slightly past the Whimsical Radar is a reinforced gate that guards this part. (Yellow Pikmin required for wall) | |||
*{{icon|Nova Blaster|y}}: Going past the reinforced gate near the landing site, or past the resting spot of the Extraordinary Bolt, is a gate. Beyond this gate is the part, past a few Bulborbs. | |||
*{{icon|Shock Absorber|y}}: Going past the regular gate of the landing site is a small ledge containing a five pellet on day 2. This part is on the ledge, which Olimar can reach by going through a small body of water. (Blue Pikmin required) | |||
*{{icon|Radiation Canopy|y}}: Beside the Nova Blaster are two gates, the first of which is submerged. This part is beyond both, guarded by an [[Armored Cannon Beetle]] (though not ingested by said enemy). (Blue Pikmin required) | |||
*{{icon|Geiger Counter|y}}: By going to the place where the Yellow Pikmin were discovered and turning left, it is possible to reach a reinforced wall. Going past this, a group of Bulborbs and a cardboard box leads to a ledge with three [[Burrowing Snagret]]s. The one closest to the far ledge has the part. (Yellow Pikmin required for wall) | |||
*{{icon|Sagittarius|y}}: Directly beyond the landing site, through the regular gate exit, is a large pool of water. This part is on an island at the far end that can be accessed by building two bridges. | |||
===Enemies=== | |||
{{columns|2| | |||
*{{icon|Dwarf Bulborb|y|n=Dwarf Bulborb}} × 11 | |||
*{{icon|Bulborb|y|n=Spotty Bulborb}} × 7 (+2 starting day 5) | |||
*{{icon|Iridescent Flint Beetle|y}} × 2, starting day 3 (+1 starting day 6) | *{{icon|Iridescent Flint Beetle|y}} × 2, starting day 3 (+1 starting day 6) | ||
*{{icon|Honeywisp|y}} × 3 | *{{icon|Honeywisp|y}} × 3 | ||
*{{icon|Female Sheargrub|y}} × 6 (+3 starting day 5) | *{{icon|Female Sheargrub|y}} × 6 (+3 starting day 5) | ||
*{{icon|Male Sheargrub|y}} × 4 (+2 starting day 5) | *{{icon|Male Sheargrub|y}} × 4 (+2 starting day 5) | ||
*{{icon| | *{{icon|Wolpole|y}} × 4 | ||
*{{icon|Armored Cannon Beetle|y}} × 1 | *{{icon|Armored Cannon Beetle|y}} × 1 | ||
*{{icon|Burrowing Snagret|y}} × 3 (after the one with [[Geiger Counter]] is defeated, it never returns) | *{{icon|Burrowing Snagret|y}} × 3 (after the one with [[Geiger Counter]] is defeated, it never returns) | ||
*{{icon|Swooping Snitchbug|y}} × 1, starting day 15 | *{{icon|Swooping Snitchbug|y}} × 1, starting day 15 | ||
}} | |||
{{clear}} | {{clear}} | ||
==Obstacles== | ===Obstacles=== | ||
{{columns|2| | |||
*{{icon|White bramble gate|y}} × 3 | *{{icon|White bramble gate|y}} × 3 | ||
*{{icon|Black bramble gate|y}} × 2 | *{{icon|Black bramble gate|y}} × 2 | ||
*{{icon|Gray reinforced wall|v=P1|y}} × 3 | *{{icon|Gray reinforced wall|v=P1|y}} × 3 | ||
*{{icon|Black reinforced wall|v=P1|y}} × 1 | *{{icon|Black reinforced wall|v=P1|y}} × 1 | ||
*{{icon|Cardboard box|y}} × 1 | |||
}} | |||
===Tools=== | |||
*{{icon|Bridge |y|v=P1}} × 2 | *{{icon|Bridge |y|v=P1}} × 2 | ||
==Challenge Mode breakdown== | ===Vegetation=== | ||
{{columns|2| | |||
*{{icon|Pellet Posy|y}} × 25 (20 after day 4) | |||
*{{icon|Clover|y}} × 15 | |||
*{{icon|Dandelion|y}} × 4 | |||
*{{icon|Nectar weed|y}} × 6 | |||
}} | |||
===Other=== | |||
*[[Nectar weed#Rubble|Rubble]] × 1 | |||
==Guide== | |||
{{guide}} | |||
There are ways to complete this area without the use of [[Blue Pikmin]]. This guide will explain how to get the parts the way they were intended. | |||
After landing, use some Pikmin to break down the [[gate#Bramble gate|white bramble gate]]. On the other side, and to the right, is the [[Eternal Fuel Dynamo]] which needed at least 40 Pikmin to carry. Use the [[Dwarf Bulborb]]s and [[Pellet Posy|pellet posies]] to grow your count to this and collect the part. Continuing to the right, there is another white bramble gate which needs to be destroyed. On the other side, there is a handful of Dwarf Bulborbs and a single [[Bulborb]], defeat these. Move further into the area and discover the [[Onion#Yellow Onion|Yellow Onion]], and using the pellets and corpses, grow your Yellow Pikmin count to 20-25. Pick up all the [[bomb rock]]s, near the wall and in the can, and use them to blow up the [[gate#Reinforced wall|white reinforced wall]]. In this next area, there are some male and female [[Sheargrub]]s along with the [[Whimsical Radar]]. Collect the radar and continue through the area. Using 9 bomb rocks, blow up the black reinforced wall and collect the [[Extraordinary Bolt]] behind it. Continuing down the path, you'll reach an open area with a black bramble gate, white reinforced wall, and some bulborbs. Kill the bulborbs and use the remaining bombs to blow up the wall. If you do not have enough bombs, that is okay. Break the black gate, head through and kill the bulborbs in your way. At the end of this area you'll find the [[Nova Blaster]], the only non-mandatory part in this area, along with more bomb rocks. Collect the part and more bombs, if needed, to blow up the wall from before. Head back to the landing site, and go back through the first gate you broke. This time we'll be heading left. Throw a minimum of 30 Pikmin onto the ledge and climb up the root to the left of said ledge to join your Pikmin. On this raised platform, There is the [[Shock Absorber]] and a bulborb. Kill the bulborb and collect the part. For the remaining 3 parts, Blue Pikmin are required. | |||
After discovering Blue Pikmin, take a handful and head through the wall to the north of the landing site. Head through the black gate and to the left you'll see a gate in some water. Use your Blue Pikmin to destroy this gate and then the other gate up the slope behind it. The [[Radiation Canopy]] is found in this area protected by an [[Armored Cannon Beetle]]. Defeat said beetle and collect the part. From the landing site, head through the southern exit towards the water. There are 2 bridges that need to be built in order to collect the [[Sagittarius]], one of which require Blue Pikmin. Build both bridges and collect the part. The final part is located in an area that can be accessed from where the Yellow Onion was found, so head there. Once you are there, you should notice another reinforced wall near the tin can, blow this up with bombs. Through the wall is a couple of bulborbs, whom you should dispose off, and a cardboard box. Head into the water with Blue Pikmin, and use them to push the box out the way. Head across the newly opened bridge, where you'll be attack by up to 3 [[Burrowing Snagret]]s. One of these snagrets holds the final part, the [[Geiger Counter]]. Dispose of them and collect the final part. | |||
==In Challenge Mode== | |||
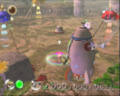
[[File:P1 Challenge Mode Forest of Hope Dwarf Bulbears.jpg|thumb|250px|Fighting some [[Dwarf Bulbear]]s in Challenge Mode.]] | |||
The Forest of Hope in [[Challenge Mode (Pikmin)|Challenge Mode]] is a diverse stage, featuring some peaceful sections and some sections with enemies. There are a lot of things to collect and a lot of time to collect them, with the maximum score being 569 and the time limit being 18 minutes and 54 seconds. | |||
===Object breakdown=== | |||
{|class="wikitable sortable" | {|class="wikitable sortable" | ||
!Pikmin source!!{{tt|Seeds|Max produced with correct harvesting}}!!Amount!!Total | !Pikmin source!!{{tt|Seeds|Max produced with correct harvesting}}!!Amount!!Total | ||
| Line 82: | Line 132: | ||
|Dwarf Bulbear||5||10||50 | |Dwarf Bulbear||5||10||50 | ||
|- | |- | ||
|Dwarf | |Dwarf Bulborb||4||19||76 | ||
|- | |- | ||
|Pearly Clamclamp||50||2||100 | |Pearly Clamclamp||50||2||100 | ||
|- | |- | ||
| | |Spotty Bulborb||12||8||96 | ||
|- | |- | ||
|Spotty Bulbear||15||4||60 | |Spotty Bulbear||15||4||60 | ||
| Line 93: | Line 143: | ||
|colspan="3" style="text-align: center;" | 569 | |colspan="3" style="text-align: center;" | 569 | ||
|} | |} | ||
==Gallery== | ==Gallery== | ||
<gallery> | <gallery> | ||
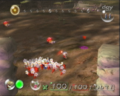
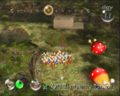
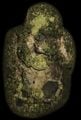
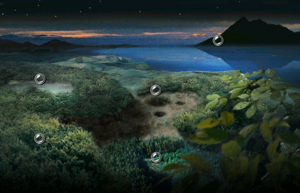
02 Site Forest of Hope.png|Overview of the starting area. | 02 Site Forest of Hope.png|Overview of the starting area. | ||
Pikmin1 1.jpg|Red Pikmin at the landing site. | |||
TFH start.png|The starting area. | |||
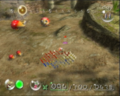
TFH open 1.png|The open dirt section, right after the landing zone. | |||
TFH open 2.png|Further into the dirt section, on the way to the area where [[Yellow Pikmin]] are found. | |||
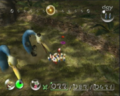
TFH yellows.png|Section where the Yellow Pikmin are first found. | |||
Reinforced wall P1.png|A nearby [[reinforced wall]], still open. | |||
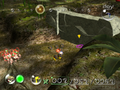
TFH bolt.png|Section where the [[Extraordinary Bolt]] can be found. | |||
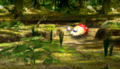
TFH bolt path.png|To the east of the Extraordinary Bolt, there is a path obscured by foilage. | |||
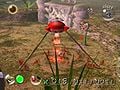
TFH before ACB.png|The area before the [[Armored Cannon Beetle]]'s arena. | |||
TFH ACB arena.png|The Armored Cannon Beetle's arena, at the northernmost section of the area. | |||
TFH hole.png|A small hole creates an alternate path to the northeasternmost section. | |||
TFH can.png|The end of the northeasternmost section. | |||
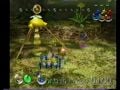
TFH shock absorber.png|The location of the [[Shock Absorber]]. | |||
TFH pond.png|The main pond in the area, taking up most of the southeastern section. | |||
TFH sagittarius.png|The bridges leading up to the [[Sagittarius]]. | |||
TFH before snagrets.png|The area before the [[Burrowing Snagret]] arena. | |||
TFH snagrets.png|The Burrowing Snagret arena, next to the pond. | |||
The Forest of Hope preview.png|Preview image on the [[area selection menu]]. | |||
Forest of Hope Challenge Mode.jpeg|thumb|The Forest of Hope in [[Challenge Mode (Pikmin)|Challenge Mode]]. | |||
</gallery> | </gallery> | ||
=== | ===Maps=== | ||
<gallery> | <gallery> | ||
The Forest of Hope HD.jpg|Aerial view. | |||
The Forest of Hope Player's Guide Map.png|Official map from [[the Official Nintendo Player's Guide]]. | |||
FoH texture.png|The area's [[radar]] map. | |||
</gallery> | </gallery> | ||
==Trivia== | ==Trivia== | ||
*It is possible to complete this area in one day, as can be seen on [[Challenge run#Low day|low day runs]]. | *It is possible to complete this area in one day, as can be seen on [[Challenge run#Low day|low day runs]].{{cite youtube|YeVYWsxF58U|Jhawk4's ''Pikmin'' world record speedrun|published={{date|15|June|2020}}}} | ||
*[[Blue Pikmin]] are not needed to complete the area. The bridge to the [[Sagittarius]] can be reached by non-Blue Pikmin, provided they're whistled to the island quickly enough, the gate leading to the [[Armored Cannon Beetle]] can be destroyed with [[bomb-rock]] Yellow Pikmin placed on top of the gate's structure, and the [[cardboard box]] before the [[Burrowing Snagret]]s can be pushed by throwing Pikmin on top of it, and [[Group move|moving]] them to the back of the box, or by simply using a [[long throw]]. | *[[Blue Pikmin]] are not needed to complete the area. The bridge to the [[Sagittarius]] can be reached by non-Blue Pikmin, provided they're whistled to the island quickly enough, the gate leading to the [[Armored Cannon Beetle]] can be destroyed with [[bomb-rock]] Yellow Pikmin placed on top of the gate's structure, and the [[cardboard box]] before the [[Burrowing Snagret]]s can be pushed by throwing Pikmin on top of it, and [[Group move|moving]] them to the back of the box, or by simply using a [[long throw]]. | ||
*In the late prototype stages of the game, a [[Puffstool]] was on the small plateau overlooking the lake in the place of the Burrowing Snagrets. | *In the late prototype stages of the game, a [[Puffstool]] was on the small plateau overlooking the lake in the place of the Burrowing Snagrets. | ||
*The music in this area reappears in ''[[Super Smash Bros. Brawl]]'' and ''[[Super Smash Bros. for Nintendo 3DS and Wii U|Super Smash Bros. for Wii U]]'', on the stages [[PNF-404|Distant Planet]] and [[Garden of Hope]], respectively. | *The music in this area reappears in ''[[Super Smash Bros. Brawl]]'' and ''[[Super Smash Bros. for Nintendo 3DS and Wii U|Super Smash Bros. for Wii U]]'', on the stages [[PNF-404|Distant Planet]] and [[Garden of Hope]], respectively. Parts of its melody are also used for the [[Music in Pikmin 4#Blossoming Arcadia (Olimar)|theme]] of the [[Blossoming Arcadia]] in [[Olimar's Shipwreck Tale]]. | ||
*All ship parts whose name begins with the letter "E" are in the Forest of Hope. | |||
==Names in other languages== | ==Names in other languages== | ||
{{Foreignname | {{Foreignname | ||
|Jap=希望の森 | |||
|JapR=Kibō no mori | |||
|JapM=Forest of Hope | |||
|FraE=La Forêt de l'Espoir | |FraE=La Forêt de l'Espoir | ||
|FraEM=The Forest of Hope | |FraEM=The Forest of Hope | ||
|Kor=희망의 숲 | |Kor=희망의 숲 | ||
|KorM= | |KorR=huimang-ui sup | ||
|KorM=Forest of Hope | |||
|Ger=Wald der Hoffnung | |Ger=Wald der Hoffnung | ||
|GerM=Forest of Hope | |GerM=Forest of Hope | ||
| | |Spa=El Bosque de la Esperanza | ||
| | |SpaM=The Forest of Hope | ||
|Ita=Foresta Speranza | |Ita=Foresta Speranza | ||
|ItaM=Hope Forest | |ItaM=Hope Forest | ||
|FraA=La Forêt de l'espoir | |FraA=La Forêt de l'espoir<br>La Forêt de l'Espoir (loading screen) | ||
|FraAM=The Forest of hope | |FraAM=The Forest of hope<br>The Forest of Hope | ||
}} | }} | ||
==See also== | ==See also== | ||
*[[Yellow Pikmin]] | *[[Yellow Pikmin]] | ||
*[[ | *[[Bulborb|Spotty Bulborb]] | ||
*[[Bomb rock]] | *[[Bomb rock]] | ||
*[[Awakening Wood]] | *[[Awakening Wood]] | ||
| Line 170: | Line 212: | ||
{{refs}} | {{refs}} | ||
{{featured|{{date|1|August|2020}}|{{date|1|October|2020}}}} | |||
{{The Forest of Hope}} | {{The Forest of Hope}} | ||
{{P1 areas|e0ffe0|005500|005500|000|fff}} | {{P1 areas|e0ffe0|005500|005500|000|fff}} | ||
{{DEFAULTSORT:Forest of Hope, The}} | |||
[[Category:The Forest of Hope| ]] | [[Category:The Forest of Hope| ]] | ||
Latest revision as of 13:56, December 9, 2023
| The Forest of Hope | |
|---|---|
| |
| Ship parts | 8 |
| Pikmin discovered | Yellow Pikmin |
| Requirements | Recover 1 ship part[1] |
| Music | The Forest of Hope |


The Forest of Hope (希望の森?, lit.: "Forest of Hope") is the second area in Pikmin. It is set in a temperate forest with a mix of wide-open spaces and narrow corridors. It contains 8 ship parts and is unlocked after collecting the first ship part, the Main Engine, in The Impact Site. Yellow Pikmin are discovered in this area. The enemies in this area are fairly easy compared to the other areas, with several Spotty Bulborbs, Dwarf Bulborbs, and Sheargrubs. This area was reused in Pikmin 2 as the Awakening Wood.
General layout[edit]
|
The following article or section is in need of assistance from someone who plays Pikmin. |
Most of this area consists of vast plains with some gates and high walls that block the way. There is a small lake near the main plain. The most common enemies here are Spotty Bulborbs and Dwarf Bulborbs. This area contains an assortment of red and yellow pellets, as well as two bridges that can be built to gain access to a small piece of land containing the Sagittarius. Behind the stone wall at the landing area is a yellow 20 pellet on a high tree stump that requires Yellow Pikmin to reach. To the north is the arena where the Armored Cannon Beetle is fought and to the southwest is the ledge where the Burrowing Snagrets are.
The bomb-rocks in this area are located inside tin cans. The first one is near the great plain with Spotty Bulborbs, another one is near the place where the Yellow Onion is originally found. The last can is in the place where the Nova Blaster is found. On the first day the area is visited, some are found out of the cans, three resting in front of one of the stone walls that can be destroyed after obtaining Yellow Pikmin.
Although water defends access to the Geiger Counter, the Radiation Canopy, and the Sagittarius, it is possible to collect these parts with Yellow Pikmin; thus, the area can be completed uniquely with them.
In Challenge Mode, there are a lot more Bulborbs, and Spotty Bulbears can also be found where the Armored Cannon Beetle and Burrowing Snagrets are found in story mode (the former location also has a Pearly Clamclamp).
Objects[edit]
Ship parts[edit]
 Eternal Fuel Dynamo: After destroying the gate near the landing site, the part is in plain sight.
 Whimsical Radar: This part is beyond the reinforced gate beside the place where the Yellow Onion is first discovered, atop a ledge. (Yellow Pikmin required for wall)
 Extraordinary Bolt: Slightly past the Whimsical Radar is a reinforced gate that guards this part. (Yellow Pikmin required for wall)
 Nova Blaster: Going past the reinforced gate near the landing site, or past the resting spot of the Extraordinary Bolt, is a gate. Beyond this gate is the part, past a few Bulborbs.
 Shock Absorber: Going past the regular gate of the landing site is a small ledge containing a five pellet on day 2. This part is on the ledge, which Olimar can reach by going through a small body of water. (Blue Pikmin required)
 Radiation Canopy: Beside the Nova Blaster are two gates, the first of which is submerged. This part is beyond both, guarded by an Armored Cannon Beetle (though not ingested by said enemy). (Blue Pikmin required)
 Geiger Counter: By going to the place where the Yellow Pikmin were discovered and turning left, it is possible to reach a reinforced wall. Going past this, a group of Bulborbs and a cardboard box leads to a ledge with three Burrowing Snagrets. The one closest to the far ledge has the part. (Yellow Pikmin required for wall)
 Sagittarius: Directly beyond the landing site, through the regular gate exit, is a large pool of water. This part is on an island at the far end that can be accessed by building two bridges.
Enemies[edit]
 Dwarf Bulborb × 11
 Spotty Bulborb × 7 (+2 starting day 5)
 Iridescent Flint Beetle × 2, starting day 3 (+1 starting day 6)
 Honeywisp × 3
 Female Sheargrub × 6 (+3 starting day 5)
 Male Sheargrub × 4 (+2 starting day 5)
 Wolpole × 4
 Armored Cannon Beetle × 1
 Burrowing Snagret × 3 (after the one with Geiger Counter is defeated, it never returns)
 Swooping Snitchbug × 1, starting day 15
Obstacles[edit]
 White bramble gate × 3
 Black bramble gate × 2
 Gray reinforced wall × 3
 Black reinforced wall × 1
 Cardboard box × 1
Tools[edit]
 Bridge × 2
Vegetation[edit]
 Pellet Posy × 25 (20 after day 4)
 Clover × 15
 Dandelion × 4
 Nectar weed × 6
Other[edit]
- Rubble × 1
Guide[edit]
|
The following article or section contains guides. |
There are ways to complete this area without the use of Blue Pikmin. This guide will explain how to get the parts the way they were intended.
After landing, use some Pikmin to break down the white bramble gate. On the other side, and to the right, is the Eternal Fuel Dynamo which needed at least 40 Pikmin to carry. Use the Dwarf Bulborbs and pellet posies to grow your count to this and collect the part. Continuing to the right, there is another white bramble gate which needs to be destroyed. On the other side, there is a handful of Dwarf Bulborbs and a single Bulborb, defeat these. Move further into the area and discover the Yellow Onion, and using the pellets and corpses, grow your Yellow Pikmin count to 20-25. Pick up all the bomb rocks, near the wall and in the can, and use them to blow up the white reinforced wall. In this next area, there are some male and female Sheargrubs along with the Whimsical Radar. Collect the radar and continue through the area. Using 9 bomb rocks, blow up the black reinforced wall and collect the Extraordinary Bolt behind it. Continuing down the path, you'll reach an open area with a black bramble gate, white reinforced wall, and some bulborbs. Kill the bulborbs and use the remaining bombs to blow up the wall. If you do not have enough bombs, that is okay. Break the black gate, head through and kill the bulborbs in your way. At the end of this area you'll find the Nova Blaster, the only non-mandatory part in this area, along with more bomb rocks. Collect the part and more bombs, if needed, to blow up the wall from before. Head back to the landing site, and go back through the first gate you broke. This time we'll be heading left. Throw a minimum of 30 Pikmin onto the ledge and climb up the root to the left of said ledge to join your Pikmin. On this raised platform, There is the Shock Absorber and a bulborb. Kill the bulborb and collect the part. For the remaining 3 parts, Blue Pikmin are required.
After discovering Blue Pikmin, take a handful and head through the wall to the north of the landing site. Head through the black gate and to the left you'll see a gate in some water. Use your Blue Pikmin to destroy this gate and then the other gate up the slope behind it. The Radiation Canopy is found in this area protected by an Armored Cannon Beetle. Defeat said beetle and collect the part. From the landing site, head through the southern exit towards the water. There are 2 bridges that need to be built in order to collect the Sagittarius, one of which require Blue Pikmin. Build both bridges and collect the part. The final part is located in an area that can be accessed from where the Yellow Onion was found, so head there. Once you are there, you should notice another reinforced wall near the tin can, blow this up with bombs. Through the wall is a couple of bulborbs, whom you should dispose off, and a cardboard box. Head into the water with Blue Pikmin, and use them to push the box out the way. Head across the newly opened bridge, where you'll be attack by up to 3 Burrowing Snagrets. One of these snagrets holds the final part, the Geiger Counter. Dispose of them and collect the final part.
In Challenge Mode[edit]

The Forest of Hope in Challenge Mode is a diverse stage, featuring some peaceful sections and some sections with enemies. There are a lot of things to collect and a lot of time to collect them, with the maximum score being 569 and the time limit being 18 minutes and 54 seconds.
Object breakdown[edit]
| Pikmin source | Seeds | Amount | Total |
|---|---|---|---|
| Starting Reds | 3 | 3 | |
| Starting Yellows | 3 | 3 | |
| Starting Blues | 3 | 3 | |
| Red 1 pellets | 2 | 6 | 12 |
| Red 5 pellets | 5 | 2 | 10 |
| Red 10 pellets | 10 | 1 | 10 |
| Red 20 pellets | 20 | 1 | 20 |
| Yellow 1 pellets | 2 | 6 | 12 |
| Yellow 5 pellets | 5 | 2 | 10 |
| Yellow 10 pellets | 10 | 1 | 10 |
| Yellow 20 pellets | 20 | 1 | 20 |
| Blue 1 pellets | 2 | 5 | 10 |
| Blue 5 pellets | 5 | 2 | 10 |
| Blue 10 pellets | 10 | 2 | 20 |
| Blue 20 pellets | 20 | 1 | 20 |
| Pellet Posy | 2 | 7 | 14 |
| Dwarf Bulbear | 5 | 10 | 50 |
| Dwarf Bulborb | 4 | 19 | 76 |
| Pearly Clamclamp | 50 | 2 | 100 |
| Spotty Bulborb | 12 | 8 | 96 |
| Spotty Bulbear | 15 | 4 | 60 |
| Total | 569 | ||
Gallery[edit]
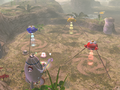
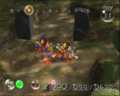
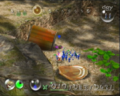
Overview of the starting area.
Red Pikmin at the landing site.
The starting area.
The open dirt section, right after the landing zone.
Further into the dirt section, on the way to the area where Yellow Pikmin are found.
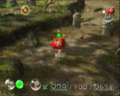
Section where the Yellow Pikmin are first found.
A nearby reinforced wall, still open.
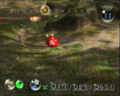
Section where the Extraordinary Bolt can be found.
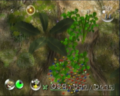
To the east of the Extraordinary Bolt, there is a path obscured by foilage.
The area before the Armored Cannon Beetle's arena.
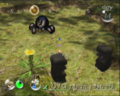
The Armored Cannon Beetle's arena, at the northernmost section of the area.

A small hole creates an alternate path to the northeasternmost section.
The end of the northeasternmost section.
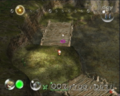
The location of the Shock Absorber.
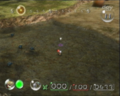
The main pond in the area, taking up most of the southeastern section.
The bridges leading up to the Sagittarius.
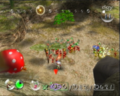
The area before the Burrowing Snagret arena.
The Burrowing Snagret arena, next to the pond.
Preview image on the area selection menu.
The Forest of Hope in Challenge Mode.


Maps[edit]
Aerial view.
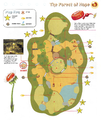
Official map from the Official Nintendo Player's Guide.
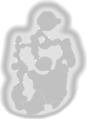
The area's radar map.


Trivia[edit]
- It is possible to complete this area in one day, as can be seen on low day runs.[2]
- Blue Pikmin are not needed to complete the area. The bridge to the Sagittarius can be reached by non-Blue Pikmin, provided they're whistled to the island quickly enough, the gate leading to the Armored Cannon Beetle can be destroyed with bomb-rock Yellow Pikmin placed on top of the gate's structure, and the cardboard box before the Burrowing Snagrets can be pushed by throwing Pikmin on top of it, and moving them to the back of the box, or by simply using a long throw.
- In the late prototype stages of the game, a Puffstool was on the small plateau overlooking the lake in the place of the Burrowing Snagrets.
- The music in this area reappears in Super Smash Bros. Brawl and Super Smash Bros. for Wii U, on the stages Distant Planet and Garden of Hope, respectively. Parts of its melody are also used for the theme of the Blossoming Arcadia in Olimar's Shipwreck Tale.
- All ship parts whose name begins with the letter "E" are in the Forest of Hope.
Names in other languages[edit]
| Language | Name | Meaning |
|---|---|---|
| 希望の森? Kibō no mori |
Forest of Hope | |
| La Forêt de l'espoir La Forêt de l'Espoir (loading screen) |
The Forest of hope The Forest of Hope | |
| La Forêt de l'Espoir | The Forest of Hope | |
| Wald der Hoffnung | Forest of Hope | |
| Foresta Speranza | Hope Forest | |
| 희망의 숲 huimang-ui sup |
Forest of Hope | |
| El Bosque de la Esperanza | The Forest of Hope |
See also[edit]
References[edit]
- ^ YouTube video showing that The Forest of Hope will only unlock when the player has at least one ship part (at 04:42)
- ^ YouTube video Jhawk4's Pikmin world record speedrun, published on June 15th, 2020
| The Forest of Hope | |||||||||
|---|---|---|---|---|---|---|---|---|---|
|
Click an object |
| ||||||||
| Pikmin areas |
|---|
 Click an area on the image
The Impact Site • The Forest of Hope • The Forest Navel • The Distant Spring • The Final Trial animtest • codetest • E3play_3 • map_06 • play_4 • route • shapetst • testmap • tuto1 • tuto2 |