The interface of the Voyage Log, viewing Olimar's log #76.
The Voyage Log in Pikmin 4 is a collection of notes from Olimar and Louie on various aspects of the Pikmin and PNF-404. They are unlocked automatically on the tablet as they become relevant, similar to the Rescue Journal.
Olimar's logs are generally unlocked within the first four areas (Sun-Speckled Terrace, Blossoming Arcadia, Serene Shores, and Hero's Hideaway), while Louie's logs are generally unlocked in the final two areas (Giant's Hearth and Primordial Thicket). Once all castaways are rescued, all logs become unlocked automatically.
Olimar's entries[edit]
|
This article or section needs to be cleaned up, either its format or general style.
Notes: Confirm the punctuation with the game files, particularly with apostrophes and ellipses.
|
#1 Onions[edit]
“I had barely begun my search when a strange thing reared up as if it were waiting for me. It then dropped a single seed. It resembles a vegetable on my home planet called an onion. I shall call this an Onion too. Its sprout glows and sways as if inviting me to come closer.”
How to unlock: Discover the Onion on day 1.
#2 Pikmin[edit]
“A fascinating creature emerged when I plucked the sprout! I tried to put some distance between us, but it followed me close behind. It seems quite friendly and looks similar to a Pikpik Carrot, my favorite vegetable. I'll call it a "Pikmin."”
How to unlock: Pluck a Pikmin for the first time.
#3 Pellet Posies[edit]
“The seedlike thing I harvested from that flower must be some kind of food that propagates more Pikmin. I will call these condensed nutrients "pellets" and the plant a "Pellet Posy."”
How to unlock: Bring a pellet from a Pellet Posy back to the Onion.
#4 The Pikmin Nest[edit]
“As evening fell, the Pikmin climbed back up into the Onion and took to the skies alongside the S.S. Dolphin. Astonishing! The Onion must be both a nest and a form of transportation!”
How to unlock: Land in the Sun-Speckled Terrace for the first time.
#5 Preservation Instincts[edit]
“The Onion stopped releasing seeds! I went to check on it and saw that the Pikmin will only propagate inside the Onion once a certain number are out on the surface. Could Limiting the number of active Pikmin be a strategy to avoid extinction?”
How to unlock: Cultivate more Pikmin than the number that can be outside at once.
#6 Wild Pikmin[edit]
“Wild Pikmin found underground can be brought to the surface and added to an Onion. However, when tasked with transporting a pellet, the resulting seed ends up the same color as the Onion. I must be careful, as these Pikmin cannot be propagated right now.”
How to unlock: Collect Pikmin that hasn't been discovered yet outside of your squad inside a cave or night expedition.
#7 Pikmin Cap[edit]
“When I brought some wild Pikmin found in a cave up to the surface, not all the Pikmin exited the research pod. There must be a limit on how many Pikmin can be out on the surface at a time, and it seems there can be 3 types at most. The rest I'll return to the Onion.”
How to unlock: Exit a cave with either more than the current Pikmin limit or more than 3 different types.
#8 Pikmin Maturation[edit]
“I've noticed that when they consume nectar, a flower immediately blooms on a Pikmin's head. Yet, when they mature in the ground from a sprout, their leaf becomes a bud before a flower. Either way, the more they grow, the faster Pikmin become. That could be useful...”
How to unlock: Have a Pikmin drink nectar.
#9 Lessons in Cooperation[edit]
“By working together, Pikmin can carry objects much heavier than themselves. And if you increase the number of Pikmin doing the transporting, they will transport objects even faster! Just think how much our kind could learn from this cooperative species.”
How to unlock: Carry a non-red Onion.
#10 Majority Rule[edit]
“After closely observing the Pikmin carrying their prey to the Onion, I saw that the next seeds the Onion dropped were the same type as the majority of the Pikmin that did the transporting. How fascinating that Pikmin ecology employs a concept like majority rule!”
How to unlock: Have multiple types of Pikmin carry the same treasure or creature.
#11 Leadership Quality[edit]
“Whenever their underlings are in a bad spot, it's a leader's duty to remain calm, quickly assess the situation, and form a plan of action. For example, when the Pikmin are in trouble and start to panic, I calm them and reengage their focus using my whistle.”
How to unlock: Have a Pikmin or Oatchi be affected by a hazard that can be whistled away.
#12 Caught Cold[edit]
“It was eerily quiet earlier, and I turned around to see the Pikmin were all just standing there, trembling! Perhaps the cold temperature put them in that state, because even the sound of my whistle only briefly alleviated the issue. I must get to the root of this...”
How to unlock: Have a Pikmin be affected by cold air in a cave.
#13 A Change of Heart[edit]
“How alarming! For some undiscernible reason, the Pikmin won't look at me! Even when I call them with my whistle! They always gladly followed me until now... Have they lost their senses? I must do something to get them back on my side.”
How to unlock: Have a Pikmin be confused by the Groovy Long Legs, Puffstool, or Moss.
#14 Pikmin... All Lost[edit]
“I got careless...and all the Pikmin perished as a result. Horrified, I made my way back to the base, only to find that the Onion had released 1 Pikmin seed! This behavior likely developed to prevent extinction. I've sworn to take better care next time. Cross my heart.”
How to unlock: Experience a Pikmin extinction. Can be unlocked if all Pikmin of a type perish during a cave investigation.
#15 The Red Pikmin[edit]
“Fire should be a natural enemy of the Pikmin, but Red Pikmin continue through the flames where other Pikmin would burn... Their attacks are also a little bit stronger than those of the other Pikmin. Could these qualities be somehow related?”
How to unlock: Take any type of Pikmin out of the Onion.
#16 The Yellow Pikmin[edit]
“I've decided to call the yellow-colored Pikmin with large earlike appendages "Yellow Pikmin." I liked that name a lot more than Ear Pikmin. They're resistant to electricity, and they fly high when thrown. Plus, they're good at digging!”
How to unlock: Discover Yellow Pikmin.
#17 The Blue Pikmin[edit]
“At a glance, the Blue Pikmin appear to have mouthlike gills and are notably able to function even underwater. Thanks to their water resistance and swimming talents, I can now transport things found in the water.”
How to unlock: Discover Blue Pikmin.
#18 The Ice Pikmin[edit]
“I always thought of Pikmin as plantlike creatures, so I never dreamed I'd come across an ice variant! Ice Pikmin can use their icy bodies to freeze water and creatures, but they also float like ice in the water. Don't spray them with water though. They really don't like it.”
How to unlock: Discover Ice Pikmin.
#19 The Rock Pikmin[edit]
“Ah, the hard, rocky Rock Pikmin. They break crystal walls with their stout bodies and tough headbutts, survive being stepped on, and can't be pierced by needles. Despite their sturdiness, they can still be crushed on hard surfaces or by some creatures' teeth.”
How to unlock: Discover Rock Pikmin.
#20 The Winged Pikmin[edit]
“As their name suggests, Winged Pikmin have sprouted wings and can fly. Of course, this means they can transport things by air and can save time that way. Their ground attacks are lackluster, but when it comes to aerial combat, they're unmatched.”
How to unlock: Discover Winged Pikmin.
#21 The Purple Pikmin[edit]
“One Purple Pikmin has the strength and weight of 10 regular Pikmin. What they lack in speed, they make up for in force! When thrown, their impact is powerful enough to emit gravitational waves. They're only found underground, so I must handle with care.”
How to unlock: Discover Purple Pikmin.
#22 The White Pikmin[edit]
“Rare White Pikmin come from white Candypop Buds that bloom in caves. They're small and notably fast on their feet, but their attacks are lacking. Imbued with enough poison to be lethal to a Bulborb, these wily Pikmin are resistant to poisonous gas themselves.”
How to unlock: Discover White Pikmin.
#23 Pikmin Songs[edit]
“Sometimes, when they're in a pleasant mood, the Pikmin will start to sing a little tune. Feeling inspired, I tried to join in...until they went noticeably silent. I suppose my singing doesn't appeal to their musical tastes.”
How to unlock: Have at least 80 Pikmin in your squad.
#24 Flarlic[edit]
“When an Onion absorbs this whitish bulb, it seems to perk up and increases the Pikmin you can lead by 10. The scent reminds me of the garlic on my planet. I'm tempted to have a nibble, but for now I'll just call it "flarlic" and leave the taste test for another day.”
How to unlock: Bring a Flarlic to the S.S. Beagle.
#25 Onion Fusion[edit]
“After being transported, the new Onion I found was absorbed by the first Onion! Could this be cannibalism?! I investigated the matter, and it looks like a new type of Pikmin can now be withdrawn from the Onion. This must mean that Onions can fuse together.”
How to unlock: Find and combine two Onions together.
#26 Same-Colored Onions[edit]
“I found another Onion the same color as a previously fused Onion but it transported anyway. When fed to the other Onion, 20 Pikmin seeds of its color were propagated! Absorbing one of your own species for nutrients is a horrifying yet impressive power move.”
How to unlock: Find and transport a duplicate Onion.
#27 Candypop Bud[edit]
“As we approached the giant flower, the Pikmin looked at me as though begging to be thrown inside. So I tried it, and with a POP the flower released a Pikmin seed the same color as itself. The sound reminded me of my favorite candy, so I'll call it a "Candypop Bud."”
How to unlock: Discover a Candypop Bud.
#28 Ultra-Spicy Berries[edit]
“Upon closer inspection, I was shocked to discover that an Ultra-Spicy Berry contains a large quantity of ultra-spicy essence! I've collected 1 bottle's worth of nectar from 10 berries, but what do I do with it? This stuff is way too hot for us sweet-toothed Hocotatians.”
How to unlock: Bring 10 Burgeoning Spiderwort berries to the S.S. Beagle.
#29 Ultra-Spicy Nectar[edit]
“On rare occasions, a red nectar will emerge from nectar eggs, and it contains quite a lot of ultra-spicy essence! Considering that it holds 10 Ultra-Spicy Berries' worth of it, I'm not surprised I'm already sweating. I'll have to bottle this up with extreme caution.”
How to unlock: Pick up ultra-spicy nectar.
#30 Ultra-Spicy Spray[edit]
“The Pikmin and Moss were sprayed with Ultra-Spicy Spray today. I quickly ran to clear it off, but when I saw that their movement had become animated and that the Pikmin's flowers had bloomed, I realized the spray must be a source of energy for these species!”
How to unlock: Watch the ultra-spicy spray cutscene.
#31 I Found Treasure![edit]
“After thorough investigation into the shiny objects found on this planet, I have deduced that they must contain sparklium. I feel giddy to have found real-life treasure, but my focus must remain on my main objective—finding the missing parts of the S.S. Dolphin.”
How to unlock: Pulled up by Collin during the first day.
#32 Raw Materials[edit]
“One could mistake this raw material for a simple stone, but it has more in common with amber and other fossilized biological matter. When heated, it melts down into a brown clay and becomes malleable. I should be able to find many applications for it.”
How to unlock: Find and pick up a piece of raw material.
#33 A Freezing Plan[edit]
“Battling creatures on this planet is hard work, but it would be a lot easier if they didn't move so much. That's why I plan to freeze them with Ice Pikmin or an Ice Blast! Then I'll charge them all at once. If I can freeze the flying kind in midair, I'll strike once they fall!”
How to unlock: Bring out 20 or more Ice Pikmin from the Onion all at once.
#34 Fire-Starter Basics[edit]
“Harnessing fire is the cornerstone of civilization. With a fire starter, you can burn things or create warmth. I could also use it to build fires in other areas, as long as I light them before the fire starter itself goes out.”
How to unlock: Have a Pikmin pick up a fire starter.
#35 Tug-of-War[edit]
“I’ve often heard the saying “Don't push it, pull it!” But I might like “Don't hit it, tug it!” even better. I have a theory that I could use the suction mechanism used for collecting ship parts to knock a breadbug’s head into the ship's hull. That'd do some damage.”
How to unlock: Defeat a normal Breadbug.
#36 Subterranean Time Warp[edit]
“Upon returning to the surface after exploring underground, I noticed the hands of my clock had barely moved at all, and I had been down there for hours! I can only assume that on this planet, time flows differently on the surface than it does underground.”
How to unlock: Exit a cave for the first time.
#37 Sunset Approaches[edit]
“Many creatures become more active at night, so Pikmin left on the surface are doomed to be eaten. If you're close to the Onion, you can return them safely inside. Stray Pikmin, on the other hand... I must remember to call them back to the squad before sunset.”
How to unlock: Be in an area long enough for the sunset warning to appear.
#38 The Creatures Are Back[edit]
“I was sure I had scoured 100% of a cave before returning to the surface, only to casually reenter it and find it teeming with the creatures I thought I had defeated! Or perhaps others of their kind have claimed this territory. The underground bursts with life!”
How to unlock: Re-enter a cave after 100%-completing it.
#39 The Nonexistent Entity[edit]
“Bomb Rocks show no signs of working against this creature, never mind Pikmin attacks! Does its body not actually exist in this dimension? Maybe if I hit it with a gravitational wave, the dimensions will converge and it will show itself. But is that possible?”
How to unlock: Encounter the Waterwraith.
#40 Last-Frost Cavern[edit]
“I entered a cave to look for S.S Dolphin parts and found a creature that defies the logic of space! It further surprised me by expelling frigid-cold air. Imagine if there were Pikmin that had been acclimatized to that cold air... This planet's ecosystem is full of mysteries.”
How to unlock: Discover the Last-Frost Cavern.
#41 Crackling Cauldron[edit]
“I was feeling hotter than usual in my space suit, and when I looked down, the ground was on fire! I panicked, but a Red Pikmin just gave me a sidelong glance, totally unfazed even as the fire licked at them. They're clearly capable of more than just skillful attacks.”
How to unlock: Discover the Crackling Cauldron.
#42 Aquiferous Summit[edit]
“I found a hole that should lead out to the top of the mountain, but the inside was more convoluted than expected, and only now do I see light at the end of the tunnel. If I ever make it out of this place, I'll deserve a good rest.”
How to unlock: Discover the Aquiferous Summit.
#43 Industrial Maze[edit]
“The ground...it started moving! I groped for a way forward, but I couldn't make any progress on my own. I wonder if Moss may be able to help me out of this mess…”
How to unlock: Discover the Industrial Maze.
#44 Hectic Hollows[edit]
“Someone or something built a rough wall inside the cave. The Pikmin and I were able to scramble up, but Moss was unable to climb up the wall. I'll have to leave her behind for now and hope we can find a way or a place to meet up.”
How to unlock: Discover the Hectic Hollows.
#45 Drafty Gallery[edit]
“Beneath the passage, all I can see is an interminable darkness. I tossed a pebble into the abyss but never heard it hit the ground. I must proceed with caution here. I don't want any Pikmin accidentally thrown to their demise, let alone shaken off by some creature.”
How to unlock: Discover the Drafty Gallery.
#46 Secluded Courtyard[edit]
“In the natural world, there are many example of strategic mimicry, where one lulls their prey into perceived safety…but I never thought I would witness it firsthand! I now know danger can lurk in even the jiggliest places.”
How to unlock: Discover the Secluded Courtyard.
#47 Sightless Passage[edit]
“A cave of utter darkness into which almost no light filters. I explored for a bit, relying on the glowing mushrooms to guide the way, but I turned back to avoid unnecessary risk. I wish I had a better Headlamp at my disposal. I’m starting to regret this bargain buy.”
How to unlock: Discover the Sightless Passage.
#48 Kingdom of Beasts[edit]
“Many types of Bulblax have settled in this cave. Perhaps they're building their empire... To them, I'm just a foreign invader that must be eradicated. If the danger becomes unavoidable, I'll need to rely on some of the items I brought with me.”
How to unlock: Discover the Kingdom of Beasts.
#49 Seafloor Resort[edit]
“What beautiful scenery! When I'm surrounded by water, I can't help but feel at one with the sea. Sadly, there aren't many places to land in here, so nonswimming Pikmin aren't able to do much. At least I got to pretend I was on vacation for a little while, right?”
How to unlock: Discover the Seafloor Resort.
#50 Subzero Sauna[edit]
“The temperature keeps dropping the further I dive underground. It's as if I'm in a sauna, but the air is stiflingly cold instead of hot. My space suit protects me, but the Pikmin keep shivering. I wonder if there's a way I could warm them up down here...”
How to unlock: Discover the Subzero Sauna.
#51 Below-Grade Discotheque[edit]
“While traversing the darkness, I came upon a delightful yet nostalgic object of mystery! Powerful streams of light, nonstop beats that assault the senses, a haze of smoke and music, and dancing Pikmin! It's like being back in the discotheques of my youth!”
How to unlock: Discover the Below-Grade Discotheque.
#52 Engulfed Castle[edit]
“Shortly into my explorations, a loud BANG echoed throughout the cave. My memory's been clouded by fear, but I do recall that there was nothing I could do with the Blue Pikmin I'd brought with me, and I ran away in desperation. The rest is a mystery...”
How to unlock: Discover the Engulfed Castle.
#53 Doppelgänger's Den[edit]
“I keep commanding Moss to follow a scent, and she keeps leading me completely off track! There must be some creature down here emitting an unusual smell that can trick not just Moss and the Pikmin but my sensors too! What a deceptive ecosystem...”
How to unlock: Discover the Doppelgänger's Den.
#54 Frozen Inferno[edit]
“The flaming entrance was so hot, I never could have made my way in without a Scorch Guard. The true surprise was that once I got further into the cave, it was like walking into a cold refrigerator. Hopefully the Red Pikmin, Moss, and I get through this...”
How to unlock: Discover the Frozen Inferno.
#55 Plunder Palace[edit]
“Everywhere I look in this cave reminds me of home. Playing together with the children. Sitting around the table, sharing a meal as a family...as the dog pilfers my side dish. Just that humdrum, routine, irreplaceable everyday life.”
How to unlock: Discover the Plunder Palace.
#56 Moss and the Pikmin[edit]
“I don't believe I've ever seen a space dog like Moss before. First of all, she's huge, but she also has an adorable leaf at the top of her tail. She seems to get on quite well with the Pikmin. I can't help but wonder if there's some kind of connection between them.”
How to unlock: Unlock the Hero's Hideaway.
“After training Moss to track a variety of scents, she can now not only sniff out the missing parts of the S.S. Dolphin but also Pikmin of whatever type I specify and even stray Pikmin. She's already proving to be a trusty partner.”
How to unlock: Have three types of Pikmin in the squad.
#58 Swim Lessons[edit]
“Moss has shown herself to be a very talented swimmer. She can transport nonswimming Pikmin across the water by carrying them on her back. To be honest, she could probably teach me a thing or two. I can't even swim in space if I don't have my favorite space float.”
How to unlock: Unlocked at the start of the third day in the Serene Shores.
#59 A Snack for Moss[edit]
“Since the first time I shared a Scrummy Bone with Moss when she was acting hungry, she wags her tail furiously and starts begging as soon as I start opening our bag of space food. It's delightful to watch, as long as our food supplies last...”
How to unlock: Unlocked at the start of the second day in the Serene Shores.
#60 Lost Civilization[edit]
“Some of the objects I call treasure seem to be more complex than they initially appear. It makes me wonder... Who made these? And where are they? I don't sense their presence here at all, but I suppose they could be hiding in the shadows, secretly watching me.”
How to unlock: Encounter a treasure from the Gifts from the Sages Series.
#61 A Base Mystery[edit]
“I keep coming across ruins of some sort...rings made of stones. I've been using them as a base to land on, and the more I think about it, they seem to be designed exactly for that purpose! Could it be a coincidence? I'd like to know who made them in the first place.”
How to unlock: Unlock the Feasting Center base in the Hero's Hideaway.
#62 Poisonous Oxygen[edit]
“The atmosphere on this planet contains large amounts of poisonous oxygen. I doubt that my space suit's life-support system can hold out for more than a few days now. Maybe if I had a leaf, like Moss or the Pikmin... What a silly thought.”
How to unlock: Discover a Leafling.
#63 Mistaken Sighting[edit]
“I was so hungry earlier that I mistook a Pikmin for a Pikpik Carrot and almost bit right into it! The Pikmin are friendly to me right now, but who knows how long our relationship will last? I quickly apologized to the terrified Pikmin and gave it a hug.”
How to unlock: Buy a Pikpik Carrot from Russ.
#64 Blossoming Memories[edit]
“This area is blooming with radiant blossoms. I recall how, in the spring, I would go for a stroll just to enjoy the flowers in my neighborhood on Planet Hocotate. Imagining my dog frolicking underneath the falling petals seemed to put my troubled mind at ease.”
How to unlock: Unlocked at the start of the third day in the Blossoming Arcadia.
#65 Sunsets[edit]
“Under a setting sun, I've played catch with my son and comforted my daughter as she fretted over the growing darkness. It's where I first fell in love with my wife's smile, long ago. The twilight of this planet brings back distant memories of Hocotate.”
How to unlock: Unlock the Sand Keep base in the Serene Shores.
#66 Bad Dreams[edit]
“Last night, I dreamt that one of my subordinates made a terrible mistake that put the company in a huge amount of debt. Too big for Hocotate Freight to pay back quickly... This is why I never take on debt. Anyway, when I woke up, I burst into a fit of laughter!”
How to unlock: Wait for Shepherd to mention a bad dream at the start of day 10.
#67 Happy Holidays[edit]
“My wife loves my cooking. Whenever I whip something up in an effort to do something special, she asks me, "Why can't you do this every day? Not just for the holidays!" I always take it as a compliment. I really miss those days. Simpler times...”
How to unlock: Reach the central island in the kitchen in the Hero's Hideaway.
#68 She's Growing Up[edit]
“Though I find myself stranded here, I know my daughter must be getting lovelier by the day. It's a terrible shame that I can't be there to see her grow up... Of course, if I was there now, I'm sure she'd just brush me off and yell, "Go away, Dad!"”
How to unlock: Unlocked at the start of the second day in the Hero's Hideaway.
#69 For My Son Someday[edit]
“My son constantly picks up bugs and animals, and my wife always scolds him for it. But I'd like him to pursue his interests and treasure his curiosity for living things. If I showed him the notes I've made about the creatures here, I'm sure his eyes would light up!”
How to unlock: Unlocked at the start of the third day in the Hero's Hideaway.
#70 Thank You, Pikmin[edit]
“It is very strange... The scenery of this planet, which I once found hostile, now sometimes strikes me as surprisingly serene. Perhaps I owe this feeling of peace to the Pikmin and our friendship.”
How to unlock: Obtained the morning after rescuing the leafified Olimar.
#71 The Pikmin's Purpose[edit]
“I wonder if these Pikmin were waiting for me to arrive. On this planet, they are a weak species, but if they're trying to use the power of an alien brain to climb to the top of the natural order... I have to wonder if it isn't me who is being used by them.”
How to unlock: Cure a Leafling.
#72 Another Nightmare[edit]
“I had a horrific dream last night. After I met my doom facing off against a creature, the Pikmin carried me back to their Onion. I've often thought that we might share a powerful bond, but perhaps that was only wishful thinking.”
How to unlock: Cure two leaflings.
#73 Untitled[edit]
“I am so very tired...”
How to unlock: Win the Leafy Showdown Dandori Battle.
#74 The Last Push[edit]
“At long last, my goal to collect all lost S.S. Dolphin parts is nearly complete. According to the ship's radar, the remaining pieces are inside a giant structure... My life support system is reaching its limit. One last push now.”
How to unlock: Rescue Bernard.
#75 Unknown Area[edit]
“I'm so close to fully repairing the S.S. Dolphin. The remaining parts should be somewhere inside this giant structure that I've never seen before. It's as if the rules of logic I've come to understand may not apply here. I'll have to explore carefully now...”
How to unlock: Enter the Hero's Hideaway.
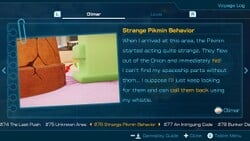
#76 Strange Pikmin Behavior[edit]
“When I arrived at this area, the Pikmin started acting quite strange. They flew out of the Onion and immediately hid! I can't find my spaceship parts without them... I suppose I'll just keep looking for them and can call them back using my whistle.”
How to unlock: Enter the Hero's Hideaway.
#77 An Intriguing Code[edit]
“I've noticed that there are several items labeled with a strange code strewn about this area. I'm not quite sure what they are to be used for, but I should take thorough notes in case it becomes obvious later.”
How to unlock: Collect either the Courage Emblem, Power Emblem, or Wisdom Emblem.
#78 Bunker Discovered[edit]
“I found a bunker inside the building! Thankfully, the entrance has a lock, so unwanted creatures won't be able to get in. I can rest easy now, knowing that I have a safe place to go if I get stranded here on this planet.”
How to unlock: Discover the bunker in the Hero's Hideaway.
#79 Moss the Guard Dog[edit]
“Moss has been guarding the outside of the bunker for me while I rest. She's also been gathering up Pikmin, though it's unclear where she's finding them. Either way, I feel so lucky to have Moss by my side in all this.”
How to unlock: Encounter Moss in the Hero's Hideaway.
#80 SOS![edit]
“This is Captain Olimar! I'm currently stranded on an unknown planet in the far reaches of space. I'm in dire need of assistance! Please send help as fast as you can!”
How to unlock: Get to the S.S. Shepherd.
Louie's entries[edit]
#1 Looking for Olimar[edit]
“I'm supposed to find Olimar. Boss's orders. Hmm. I don't really remember what he looks like.”
How to unlock: Enter the Giant's Hearth for the first time.
#2 Walking Pikpik Carrots[edit]
“These thingies remind me a lot of Pikpik Carrots. I'd eat them, but then who'd carry my snacks? Wish I had a golden Pikpik Carrot to eat right now.”
How to unlock: Unlocked at the start of the third day in the Giant's Hearth.
#3 Snacks[edit]
“Got sick of Nana's cookies, so I tried eating some of the creatures around here. They're pretty yummy.”
How to unlock: Bring an enemy corpse to the Onion or the S.S. Beagle (only in the area's caves) in the Giant's Hearth.
#4 Snacks that Grow[edit]
“If you don't hurry up and eat these, they turn hard in the ground. As soon as I spot one, I dig it up and grill it.”
How to unlock: Unearth the Anxious Sprout in the Giant's Hearth.
#5 Olimar Memories[edit]
“The stories Olimar told were always boring, but he never got too angry when I messed up... Still drawing a blank on his face.”
How to unlock: Unlock the Central Flame base in the Giant's Hearth.
#6 Olimar Sighting?[edit]
“Saw something sort of Olimar shaped. It was pretty shaggy and seemed happy enough. I'll leave it alone for now. I'd like to ride that green dog thing it had with it.”
How to unlock: Unlocked at the start of the second day in the Giant's Hearth.
#7 Full Report[edit]
“Mostly been focusing on snacks lately. Guess I'll just make something up when I report to the boss.”
How to unlock: Unlock the Abandoned Throne base in the Giant's Hearth.
#8 New Partner[edit]
“A green dog thing came up to me. It could be the one I saw with that Olimar-ish creature. Must've been abandoned. Guess I'll keep it.”
How to unlock: Enter the Primordial Thicket for the first time.
#9 Strange Juice[edit]
“Tried some of that green juice the things by the hearth were drinking. Tastes really yummy. It makes my head and tummy feel all warm and cozy.”
How to unlock: Unlock the Maple Bridge base in the Primordial Thicket.
“• Marinated lip steak
• Claw croquettes with cream sauce
• Roasted leg and miso shells
• Soy-pickled eyeballs
”
How to unlock: Kill a Grubchucker in the Primordial Thicket.
#11 Thinking of Nana[edit]
“I can pick all the fresh mushrooms I want here. I'll save some for Nana to try once I go home.”
How to unlock: Defeat a Puffstool in the Primordial Thicket.
#12 Ultimate Testing Range[edit]
“I filled my belly with all kinds of snacks. The strongest creatures are the tastiest. Except that ultimate weapon-like one. It was barely edible.”
How to unlock: Discover the Ultimate Testing Range.
#13 Dream Home[edit]
“I see a lot of places to mess around down here. Wouldn't be a bad place to live. I hid all my snacks in a box, but I forgot the code I need to open it.”
How to unlock: Discover the Dream Home.
#14 Cradle of the Beast[edit]
“So many creatures came toward me at once, it was like an all-you-can-eat buffet. My belly's so full. I couldn't eat another bite.”
How to unlock: Discover the Cradle of the Beast.
#15 The Mud Pit[edit]
“Got stuck in the bottomless swamp. Some parts of it were pitch-black. And now I'm covered in mud. Reminded me of the mountain behind Nana's house.”
How to unlock: Discover The Mud Pit.
#16 Subterranean Swarm[edit]
“I love how sticky it is down here. Plus, I had snacks walking over to me nonstop. Two of them were really big.”
How to unlock: Discover the Subterranean Swarm.
#17 Huge Dog Thing[edit]
“Spotted a huge dog thing in the mushroom forest. I like the one I have now, but that one looks more fun. Guess I'll follow it.”
How to unlock: Win the Final Battle Dandori Battle.
#18 The Dog Thing's Den[edit]
“Found the huge dog thing near the large rock at the back of the swamp. It had something in its mouth. It was that pink person who had the yummy juice. She's getting in the way. I'll just drop her somewhere.”
How to unlock: Obtained the morning after rescuing Nelle.
#19 Cavern for a King[edit]
“Finally tamed that huge dog thing. I’m gonna lie down now for a while in its den. It’s really deep, and there are plenty of snacks. The others will give up and go home.”
How to unlock: Discover the Cavern for a King.
#20 Golden Pikpik Carrots[edit]
“My favorite thing in all of space to eat but hard to come by. If I did find some, I'd devour them all to my heart’s content. I’m just waiting for the right delivery job...”
How to unlock: Rescue Louie.
Names in other languages[edit]
|
The following article or section needs help from someone who can translate Chinese/Italian/Portuguese text.
|
| Language
|
Name
|
Meaning
|
 Japanese Japanese |
航海日誌?
Kōkai Nisshi |
Logbook
|
 Chinese Chinese
(traditional) |
航行日誌 |
|
 Chinese Chinese
(simplified) |
航行日记 |
|
 Dutch Dutch |
Logboek |
Logbook
|
 French French |
Journal de bord |
Logbook
|
 German German |
Logbuch |
Logbook
|
 Italian Italian |
Diario di bordo |
|
 Korean Korean |
항해 일지
Hanghae Ilji |
Voyage Log
|
 Portuguese Portuguese |
Diário de bordo |
|
 Spanish Spanish |
Diario de viaje |
Journey log
|
See also[edit]


